Cisco 2811 Hardware Guide
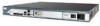
Cisco 2811 - Voice Security Bundle Router Manual
 |
UPC - 882658101816
View all Cisco 2811 manuals
Add to My Manuals
Save this manual to your list of manuals |
Cisco 2811 manual content summary:
- Cisco 2811 | Hardware Guide - Page 1
about Cisco 2800 series integrated services routers, including platform descriptions, safety information, site preparation, chassis installation and interconnection, power up, initial configuration, troubleshooting, interface card and module installation, and procedures for maintenance and upgrades - Cisco 2811 | Hardware Guide - Page 2
your Cisco 2800 series router Procedures for Cisco 2800 Series Routers and perform an initial configuration to provide network access. Troubleshooting Cisco 2800 Series Routers Describes how to isolate problems, read LEDs, and interpret error and recovery messages. Installing Network Modules in - Cisco 2811 | Hardware Guide - Page 3
and Upgrading Internal Modules in Cisco 2800 Series Routers Removing and Installing CompactFlash Memory Cards in Cisco 2800 Series Routers Description Describes how to install or upgrade modules that are located internally within the router, such as memory modules, AIMs, PVDMs, and power supplies - Cisco 2811 | Hardware Guide - Page 4
of the warnings that appear in these publications, refer to the Cisco 2800 Series Routers Regulatory Compliance and Safety Information document that accompanied your router. Warning Definition Warning IMPORTANT SAFETY INSTRUCTIONS This warning symbol means danger. You are in a situation that could - Cisco 2811 | Hardware Guide - Page 5
procedimientos estándar de prevención de accidentes. Vea las traducciones de las advertencias que acompañan a este dispositivo. Nota GUARDE ESTAS INSTRUCCIONES OL-5808-01 Cisco 2800 Series Hardware Documents: Introduction and Warnings 5 - Cisco 2811 | Hardware Guide - Page 6
olyckor. Se översättningarna av de varningsmeddelanden som finns i denna publikation, och se de översatta säkerhetsvarningarna som medföljer denna anordning. OBS! SPARA DESSA ANVISNINGAR Cisco 2800 Series Hardware Documents: Introduction and Warnings 6 OL-5808-01 - Cisco 2811 | Hardware Guide - Page 7
. Brug erklæringsnummeret efter hver advarsel for at finde oversættelsen i de oversatte advarsler, der fulgte med denne enhed. GEM DISSE ANVISNINGER OL-5808-01 Cisco 2800 Series Hardware Documents: Introduction and Warnings 7 - Cisco 2811 | Hardware Guide - Page 8
Safety Warnings Cisco 2800 Series Hardware Documents: Introduction and Warnings 8 OL-5808-01 - Cisco 2811 | Hardware Guide - Page 9
Related Documentation Related Documentation The Cisco IOS software running your Cisco 2800 series router includes extensive features and functionality. For information that is beyond the scope of these documents, or for additional information, use the following resources: Timesaver Make - Cisco 2811 | Hardware Guide - Page 10
Routers Quick Start Guide Software configuration documentation for Cisco 2800 series routers Cisco 2800 Series and Cisco 3800 Series Routers Regulatory Compliance and Safety Information Cisco 2800 Series Cards and Modules Cisco Modular Access Router Cable Specifications Cisco RPS-675 Redundant Power - Cisco 2811 | Hardware Guide - Page 11
the PDF icon to download and print the document in Adobe Portable Document Format (PDF). You can also contact the Cisco service and support website for assistance: http://www.cisco.com/public/Support_root.shtml. Duration of Hardware Warranty Ninety (90) days. Replacement, Repair, or Refund Policy - Cisco 2811 | Hardware Guide - Page 12
Ordering Documentation You can find instructions for ordering documentation at this URL: http://www.cisco.com/univercd/cc/td/doc/es_inpck/pdi.htm You can order Cisco documentation in these ways: • Registered Cisco.com users (Cisco direct customers) can order Cisco product documentation from the - Cisco 2811 | Hardware Guide - Page 13
24 hours a day, 365 days a year at this URL: http://www.cisco.com/techsupport Access to all tools on the Cisco Technical Support Website requires a Cisco.com user ID and password. If you have a valid service contract but do not have a user ID or password, you can register at this URL: http://tools - Cisco 2811 | Hardware Guide - Page 14
well as ordering and customer support services. Access the Cisco Product Catalog at this URL: http://cisco.com/univercd/cc/td/doc/pcat/ • Cisco Press publishes a wide range of general networking, training and certification titles. Both new and experienced users will benefit from these publications - Cisco 2811 | Hardware Guide - Page 15
Obtaining Additional Publications and Information OL-5808-01 Cisco 2800 Series Hardware Documents: Introduction and Warnings 15 - Cisco 2811 | Hardware Guide - Page 16
, CCDP, CCIE, CCIP, CCNA, CCNP, CCSP, Cisco, the Cisco Certified Internetwork Expert logo, Cisco IOS, Cisco Press, Cisco Systems, Cisco Systems Capital, the Cisco Systems logo, Cisco Unity, Enterprise/Solver, EtherChannel, EtherFast, EtherSwitch, Fast Step, Follow Me Browsing, FormShare, GigaDrive - Cisco 2811 | Hardware Guide - Page 17
, allowing you to configure your router to meet evolving needs. The Cisco 2800 series routers incorporate data, security, and voice services in a single system for fast, scalable delivery of crucial business applications. The routers offer features such as hardware-based VPN encryption acceleration - Cisco 2811 | Hardware Guide - Page 18
10 • Interface Numbering, page 16 • Specifications, page 18 • Regulatory Compliance, page 25 Hardware Features This section describes the basic features of Cisco 2800 series routers, including product identification, built-in interfaces, modules, memory, LED indicators, chassis ventilation, and the - Cisco 2811 | Hardware Guide - Page 19
Hardware Features 117342 781-00286-01 SN: AAANNNNXXXX SN: AAANNNNXXXX Note The serial number for Cisco 2801 routers is 11 characters long. The serial number label for Cisco 2811 routers is located on the rear of the chassis, near the top right corner, to the left of the CLEI label. (See Figure - Cisco 2811 | Hardware Guide - Page 20
of Cisco 2800 Series Built-In Interfaces Model Cisco 2801 Cisco 2811 Cisco 2821 Cisco 2851 100BASE-T Fast Ethernet (FE) 1000BASE-T Gigabit Ports (RJ-45) Ethernet (GE) Ports (RJ-45) 2 - 2 - - 2 - 2 Universal Serial Bus (USB) Ports 1 2 2 2 Console Port (RJ-45) 1 1 1 1 Auxiliary Port (RJ - Cisco 2811 | Hardware Guide - Page 21
cards fit into slots, located on the front of the chassis on the Cisco 2801 router, and on the rear of the chassis on the Cisco 2811, Cisco 2821, and Cisco 2851 routers; they can be removed and installed without opening the chassis. Advanced integration modules (AIMs), expansion DRAM memory modules - Cisco 2811 | Hardware Guide - Page 22
, and the startup configuration. • Flash memory-External flash memory. Stores the operating system software image. Table 3 summarizes the memory options for Cisco 2800 series routers. The default memory numbers for RAM represent the minimum usable memory. You can install additional RAM in multiples - Cisco 2811 | Hardware Guide - Page 23
for Cisco 2800 series routers. Cisco 2801 routers are equipped for operation using AC power only. Cisco 2811, Cisco 2821, and Cisco 2851 routers can be equipped for operation using either AC or DC input power by installation of the appropriate chassis power supply. IP phone power is supported if - Cisco 2811 | Hardware Guide - Page 24
for those products: the Cisco Network Modules Hardware Installation Guide or the Cisco Interface Cards Installation Guide. For LED troubleshooting information, including possible trouble causes and corrective actions, see Table 1 in the "Troubleshooting Cisco 2800 Series Routers" document. Table - Cisco 2811 | Hardware Guide - Page 25
) fault (if installed) Off IP phone power and Cisco RPS are not installed SYS ACT Blinking green Packet transfers are occurring or solid green Off No packet transfers are occurring CF Green Flash memory is being accessed; do not eject the CompactFlash memory card Off Flash memory is not - Cisco 2811 | Hardware Guide - Page 26
power supply, for a total of four fans. The Cisco 2801 internal fans operate at three different speeds, running at the slower speeds to conserve power and reduce fan noise at ambient temperatures below 40oC. They operate at the highest speed in ambient temperatures above 40oC. The Cisco 2811 router - Cisco 2811 | Hardware Guide - Page 27
Console port 6 Fast Ethernet ports and LEDs 7 System LEDs 8 Auxiliary Power (AUX/PWR) LED 9 Universal serial bus (USB) port 10 AIM/PVDM LEDs 11 Auxiliary port 12 Compact flash (CF) LED 13 External CompactFlash memory card slot 14 Removable center card guides to allow double-wide HWIC-D installation - Cisco 2811 | Hardware Guide - Page 28
connection 2 On/Off switch 3 Cisco redundant power supply connector (covered if not used) 4 Console and auxiliary ports 5 Universal serial bus (USB) ports 6 External CompactFlash memory card slot 7 LED indicators Figure 10 Front Panel of Cisco 2811 Router with AC Input Power and with IP Phone - Cisco 2811 | Hardware Guide - Page 29
Rear Panel of Cisco 2811 Router 8 7 H W I C 3 H W I C 1 1 5 6 1 H W I C 2A F HS W IL C 0 PVDM1 A= ACT S= SPEED FE 0/1 PVDM0 A= FDX A= LINK FE 0/0 A F S L AIM1 AIM0 4 3 2 1 Screw holes for ground lug 5 High-speed WAN interface card slot 1 2 Fast Ethernet port 0/0 6 High-speed - Cisco 2811 | Hardware Guide - Page 30
4 Universal serial bus (USB) ports 5 External CompactFlash memory card slot 6 LED indicators 7 Cisco redundant power supply connector (covered if not used) Figure 14 Front Panel of Cisco 2821 and Cisco 2851 Routers with AC Input Power and IP Phone Power Output 7 6 5 43 2 1 OPTIONAL RPS - Cisco 2811 | Hardware Guide - Page 31
Rear Panel of the Cisco 2821 Router 21 64 53 7 A= ACT A= FDX S= SPEED A= LINK A GE 0/1 GE 0/0 A F F S S L L PVDM2 PVDM1 PVDM0 AIM1 AIM0 EVM 2 ONLY 1 8 9 1 Gigabit Ethernet port 0/0 6 High-speed WAN interface card slot 3 2 Gigabit Ethernet port 0/1 3 High-speed WAN interface - Cisco 2811 | Hardware Guide - Page 32
95557 1 8 9 1 Gigabit Ethernet port 0/0 2 Gigabit Ethernet port 0/1 3 High-speed WAN interface card slot 0 4 High-speed WAN interface card slot 1 5 High-speed WAN interface card slot 2 6 High-speed WAN interface card slot 3 7 Extension voice module (EVM) slot 8 Network module enhanced (NME - Cisco 2811 | Hardware Guide - Page 33
Interface Numbering on Cisco 2811, Cisco 2821, and Cisco 2851 Integrated Services Routers Port Location Interface Numbering Scheme Built into the chassis front panel Interface-type port Built into the chassis rear panel Interface-type 0 / port In an interface card (HWIC, HWIC-D, WIC, VWIC, VIC - Cisco 2811 | Hardware Guide - Page 34
Specifications Table 8 Interface Numbering on Cisco 2811, Cisco 2821, and Cisco 2851 Integrated Services Routers (continued) Port Location Interface Numbering Scheme Examples1, 2 Voice port in a BRI expansion module (internal slot) in an extension voice module (EVM) Interface-type 26 / 07 / - Cisco 2811 | Hardware Guide - Page 35
Specifications Table 9 Cisco 2801 Router Specifications (continued) Description Specification Operating humidity 5 to 95%, noncondensing Operating temperature 32 to 104° F (0 to 40° C) Nonoperating temperature -4 to 149° F (-20 to 65° C) Noise level, standard power supply 39 dBA for local - Cisco 2811 | Hardware Guide - Page 36
Table 10 Cisco 2811 Router Specifications Description Dimensions (H x W x D) Weight AC input power • Input voltage • Frequency • Input current • Inrush surge current DC input power • Input voltage • Input current • Inrush surge current Power dissipation (maximum) • AC without IP phone support • AC - Cisco 2811 | Hardware Guide - Page 37
EMC compliance Specification FCC Part 15; ICES-003 Class A; EN55022 Class A; CISPR22 Class A; AS/NZS 3548 Class A; VCCI Class A; EN 300386; EN61000-3-3; EN61000-3-2 For detailed compliance information, refer to the Cisco 2800 and Cisco 3800 Series Integrated Services Routers Regulatory Compliance - Cisco 2811 | Hardware Guide - Page 38
Table 11 Cisco 2821 Router Specifications Description Dimensions (H x W x D) Weight AC input power • Input voltage • Frequency • Input current • Inrush surge current DC input power • Input voltage • Input current • Inrush surge current Power dissipation (maximum) • AC without IP phone support • AC - Cisco 2811 | Hardware Guide - Page 39
EMC compliance Specification FCC Part 15; ICES-003 Class A; EN55022 Class A; CISPR22 Class A; AS/NZS 3548 Class A; VCCI Class A; EN 300386; EN61000-3-3; EN61000-3-2 For detailed compliance information, refer to the Cisco 2800 and Cisco 3800 Series Integrated Services Routers Regulatory Compliance - Cisco 2811 | Hardware Guide - Page 40
Table 12 Cisco 2851 Router Specifications Description Dimensions (H x W x D) Weight AC input power • Input voltage • Frequency • Input current • Inrush surge current DC input power • Input voltage • Input current • Inrush surge current Power dissipation (maximum) • AC without IP phone support • AC - Cisco 2811 | Hardware Guide - Page 41
EMC compliance Specification FCC Part 15; ICES-003 Class A; EN55022 Class A; CISPR22 Class A; AS/NZS 3548 Class A; VCCI Class A; EN 300386; EN61000-3-3; EN61000-3-2 For detailed compliance information, refer to the Cisco 2800 and Cisco 3800 Series Integrated Services Routers Regulatory Compliance - Cisco 2811 | Hardware Guide - Page 42
, CCDP, CCIE, CCIP, CCNA, CCNP, CCSP, Cisco, the Cisco Certified Internetwork Expert logo, Cisco IOS, Cisco Press, Cisco Systems, Cisco Systems Capital, the Cisco Systems logo, Cisco Unity, Enterprise/Solver, EtherChannel, EtherFast, EtherSwitch, Fast Step, Follow Me Browsing, FormShare, GigaDrive - Cisco 2811 | Hardware Guide - Page 43
publication, refer to the Cisco 2800 and Cisco 3800 Series Integrated Services Routers Regulatory Compliance and Safety Information document that accompanies your router. Warning Only trained and qualified personnel should be allowed to install, replace, or service this equipment. Statement 1030 - Cisco 2811 | Hardware Guide - Page 44
have more than one power supply connection. All connections must be removed to de-energize the unit. Statement 1028 Warning Do not work on the system or connect or disconnect cables during periods of lightning activity. Statement 1001 Warning Read the installation instructions before connecting the - Cisco 2811 | Hardware Guide - Page 45
of your router. Ensure that the site is properly prepared before beginning installation. If you are experiencing shutdowns or unusually high errors with your existing equipment, this section can also help you isolate the cause of failures and prevent future problems. Power Supply Considerations - Cisco 2811 | Hardware Guide - Page 46
72 VDC 90 - 264 VAC 100 VAC, 10 A, or 240 VAC, 6 A Site Environment Cisco 2800 series routers can be placed on a desktop or installed in a rack. This Cisco 2811 router can also be wall mounted. The location of your router and the layout of your equipment rack or wiring room are extremely important - Cisco 2811 | Hardware Guide - Page 47
module rear panels are secure. All empty network module slots, interface card slots, and power supply bays must have filler panels installed inch rack are not available for Cisco 2801 routers. The following information will help you plan your equipment rack configuration: • Allow clearance around the - Cisco 2811 | Hardware Guide - Page 48
placed in Site Log Site power voltages verified Installation site power check completed Required tools available Additional equipment available Router received Router quick start guide received Cisco 2800 and Cisco 3800 Series Integrated Services Routers Regulatory Compliance and Safety - Cisco 2811 | Hardware Guide - Page 49
2800 Series Integrated Services Routers Quick Start Guide, • Cisco 2800 and Cisco 3800 Series Integrated Services Routers Regulatory Compliance and Safety Information document • Cisco Router and Security Device Manager (SDM) Quick Start Guide • Product Registration card and Cisco.com card OL-5784 - Cisco 2811 | Hardware Guide - Page 50
be damaged, or if you encounter problems installing or configuring your router, contact customer service. Warranty, service, and support information is in the quick start guide that shipped with your router. Required Tools and Equipment for Installation and Maintenance You need the following tools - Cisco 2811 | Hardware Guide - Page 51
Required Tools and Equipment for Installation and Maintenance OL-5784-01 Preinstallation Requirements and Planning for Cisco 2800 Series Routers 9 - Cisco 2811 | Hardware Guide - Page 52
Required Tools and Equipment for Installation and Maintenance CCVP, the Cisco Logo, and the Cisco Square Bridge logo are trademarks of Cisco Systems, Inc.; Changing the Way We Work, Live, Play, and Learn is a service mark of Cisco Systems, Inc.; and Access Registrar, Aironet, BPX, Catalyst, CCDA, - Cisco 2811 | Hardware Guide - Page 53
Cisco 2800 Series Routers This document provides information about cables needed to install your Cisco 2800 series integrated services router. It includes the following sections: • Console and Auxiliary Port the data in the buffers has been processed. Because the auxiliary port supports flow control - Cisco 2811 | Hardware Guide - Page 54
Network Modules Hardware Installation Guide • Cisco Interface Cards Installation Guide • Cisco Modular Access Router Cable Specifications Warning To avoid electric shock, do not connect safety extra-low voltage (SELV) circuits to telephone-network voltage (TNV) circuits. LAN ports contain SELV - Cisco 2811 | Hardware Guide - Page 55
. Supports the Ethernet maximum length of 328 feet (100 meters). Refer to the Cisco Modular Access Router Cable Specifications online document for information about Ethernet cables, connectors, and pinouts. Serial Connections Serial connections are provided by WAN interface cards and network modules - Cisco 2811 | Hardware Guide - Page 56
DB-60 connector, which connects to the DB-60 port on a serial WAN interface card. The other end of the serial transition cable is available with a connector appropriate for the standard you specify. The synchronous serial port can be configured as DTE or DCE, depending on the attached cable (except - Cisco 2811 | Hardware Guide - Page 57
ports. When detaching cables, detach the end away from the unit first. Statement 1026 Use a BRI cable (not included) to connect the BRI WAN interface card directly to an ISDN. Table 3 lists the specifications for ISDN BRI cables. Also, refer to the Cisco Modular Access Router Cable Specifications - Cisco 2811 | Hardware Guide - Page 58
on CSU/DSU WICs, refer to the Cisco Interface Cards Installation Guide online document on Cisco.com. CCVP, the Cisco Logo, and the Cisco Square Bridge logo are trademarks of Cisco Systems, Inc.; Changing the Way We Work, Live, Play, and Learn is a service mark of Cisco Systems, Inc.; and - Cisco 2811 | Hardware Guide - Page 59
Installation Procedures for Cisco 2800 Series Routers This document describes how to install your Cisco 2800 series integrated services router on a desktop or in a rack. It includes the following sections: • Installing Modules and Interface Cards, page 1 • Installing Internal Field-Replaceable - Cisco 2811 | Hardware Guide - Page 60
(WIC, VIC, VWIC, or HWIC) 11 Auxiliary port 5 Console port 12 CompactFlash (CF) LED 6 Fast Ethernet ports and LEDs 13 External CompactFlash memory card slot System LEDs 7 Removable center card guides to allow 14 double-wide HWIC-D installation 95816 Chassis Installation Procedures for Cisco - Cisco 2811 | Hardware Guide - Page 61
Installing Modules and Interface Cards Figure 2 1 Chassis Slot Locations in Cisco 2811 Routers 8 7 H W I C 3 H W I C 1 5 6 1 H W I C 2A F HS W IL C 0 PVDM1 A= ACT S= SPEED FE 0/1 PVDM0 A= FDX A= LINK FE 0/0 A F S L AIM1 AIM0 4 3 2 1 Screw holes for ground lug 2 Fast Ethernet - Cisco 2811 | Hardware Guide - Page 62
-wide). Installing Internal Field-Replaceable Units (FRUs) Cisco routers are shipped with default memory and power supplies already installed, and usually configured and shipped with interface cards, network module cards, packet voice data modules (PVDMs) and advanced integration modules (AIMs - Cisco 2811 | Hardware Guide - Page 63
information, see the data sheet for each module and interface card. Warning Before working on a system that has an on/off switch, turn OFF the power and unplug the power cord. Statement 1 You can set any Cisco 2800 series router on a desktop or install it in a rack. A Cisco 2811 router can also be - Cisco 2811 | Hardware Guide - Page 64
Brackets for Cisco 2811 Routers Bracket pair for 19-inch rack Bracket pair for 23-inch rack 95785 Figure 7 Rack-Mounting Brackets for Cisco 2821 and Cisco 2851 Routers Bracket pair for 19-inch rack Bracket pair for 23-inch rack 95744 Chassis Installation Procedures for Cisco 2800 Series - Cisco 2811 | Hardware Guide - Page 65
the brackets to the sides of the router with the front panel forward. Figure 8 Attaching Rack-Mounting Brackets to a Cisco 2801 Router R 95770 Attaching Rack-Mount Brackets to Cisco 2811, Cisco 2821, and Cisco 2851 Routers Attach the mounting brackets to the router chassis as shown in Figure - Cisco 2811 | Hardware Guide - Page 66
Bracket for 19-inch rack Bracket for 23-inch rack Figure 11 Bracket Installation for Center Mounting with Front Panel Forward 95747 Bracket for 23-inch rack Bracket for 19-inch rack OPTIONAL to the next rack hole. Chassis Installation Procedures for Cisco 2800 Series Routers 8 OL-5786-03 - Cisco 2811 | Hardware Guide - Page 67
the chassis using the handles on modules (such as power supplies, fans, or cards); these types of handles are not designed to support the weight of the unit. Statement organizing and routing cables. On brackets for the Cisco 2801 and Cisco 2811 routers, attach the cable management bracket to the left - Cisco 2811 | Hardware Guide - Page 68
the Optional Cable Management Bracket to a Cisco 2811, 2821, or 2851 Router ENM0 S L O T 3 S modules (such as power supplies, fans, or cards); these types of handles are not designed to support the weight of the unit. Statement 1032 Chassis Installation Procedures for Cisco 2800 Series Routers - Cisco 2811 | Hardware Guide - Page 69
surface. Mounting Cisco 2801, Cisco 2821, and Cisco 2851 routers on a wall is not recommended. The following warning applies to Cisco 2811 routers: Warning This unit is intended to be mounted on a wall. Please read the wall mounting instructions carefully before beginning installation. Failure to - Cisco 2811 | Hardware Guide - Page 70
long enough to penetrate at least 3/4 inch (20 mm) into supporting wood or metal wall stud. • For hollow-wall mounting, each router must be mounted with the power connections oriented downward. Failure to do so could present a fire hazard. • Figure 16 shows a typical wall-mounted installation - Cisco 2811 | Hardware Guide - Page 71
the equipment in the absence of a suitably installed ground conductor. Contact the appropriate electrical inspection authority is not supported on the Cisco 2801 router. • For NEC-compliant grounding, use size 14 AWG (2 mm2) or larger copper wire and an appropriate user-supplied ring terminal - Cisco 2811 | Hardware Guide - Page 72
Connection To install the ground connection for a Cisco 2800 series router, perform the following steps: Step 1 Step 2 Step 3 Step 4 Strip one end of the ground wire to the length required for the ground lug or terminal. • For the NEBS ground lug-approximately 0.75 in. (20 mm) • For user-provided - Cisco 2811 | Hardware Guide - Page 73
installation. For information about connecting the cables, see the "Cable Connection Procedures for Cisco 2800 Series Routers" online document. This document is to be used in conjunction with the Cisco 2800 Series Integrated Services Routers Quick Start Guide. CCVP, the Cisco Logo, and the Cisco - Cisco 2811 | Hardware Guide - Page 74
Installing the Chassis Ground Connection Chassis Installation Procedures for Cisco 2800 Series Routers 16 OL-5786-03 - Cisco 2811 | Hardware Guide - Page 75
publication, refer to the Cisco 2800 Series and Cisco 3800 Series Integrated Services Routers Regulatory Compliance and Safety Information document that accompanied this device. Warning Only trained and qualified personnel should be allowed to install, replace, or service this equipment. Statement - Cisco 2811 | Hardware Guide - Page 76
how to connect AC or DC power to Cisco 2800 series routers. It covers the following topics: • Connecting Routers to AC Power, page 2 • Connecting Routers to DC Power, page 2 • Connecting Routers to Backup Power, page 9 Warning Read the installation instructions before connecting the system to - Cisco 2811 | Hardware Guide - Page 77
wiring. A router with a DC-input power supply has a terminal block for the DC power connections. If backup power is required, see the "Connecting Routers to Backup Power" section on page 9. DC Wiring Requirements A Cisco 2811, Cisco 2821, or Cisco 2851 router with a DC-input power supply requires - Cisco 2811 | Hardware Guide - Page 78
in the OFF position. Warning Before performing any of the following procedures, ensure that power is removed from the DC circuit. Statement 1003 Tip Secure all power cabling when installing this unit to avoid disturbing field-wiring connections. Warning When stranded wiring is required, use - Cisco 2811 | Hardware Guide - Page 79
project above or below the front panel of the router. Turn on power to the DC circuit. Be sure to remove tape used to secure the circuit-breaker switch in the OFF position. Figure 2 Wire Routing and Attachment for Cisco 2811 Routers 24-60V --- 8A - A+ +B - Plastic covers 111814 Cable tie From - Cisco 2811 | Hardware Guide - Page 80
111815 Plastic covers Approved Scenarios and Scenarios Not Approved for Dual DC Power Supply Configuration in Cisco 2800 Routers You can connect a single DC power source to either the A input or the B input. If there are dual power sources, connect one source to the A input and one source to - Cisco 2811 | Hardware Guide - Page 81
terminals. Excessive discharging currents through these terminals can cause one or both of the dual input DC power supply's internal A- or B- fuses to open, resulting in lack of redundancy or system failure. voltages be equal. OL-5787-02 Cable Connection Procedures for Cisco 2800 Series Routers 7 - Cisco 2811 | Hardware Guide - Page 82
Power Connections Figure 6 Connecting Source A and Source B configuration. Caution Do not use the DC input configuration shown in Figure 7. Figure 7 Source A and Source B Wired with Opposite-Polarity Grounds AVa + A+ + B+ Vb B- 127041 Cable Connection Procedures for Cisco 2800 Series Routers - Cisco 2811 | Hardware Guide - Page 83
, and Voice Cables Connecting Routers to Backup Power If your router uses the Cisco Redundant Power System (RPS), refer to the Cisco Redundant Power System Hardware Installation Guide for instructions about the power connections. You can access this document at: http://www.cisco.com/univercd/cc/td - Cisco 2811 | Hardware Guide - Page 84
summarized here are also described in detail in the following documents: • Cisco Modular Access Router Cable Specifications • Cisco Network Modules Hardware Installation Guide • Cisco Interface Cards Installation Guide Cable Connection Procedures for Cisco 2800 Series Routers 10 OL-5787-02 - Cisco 2811 | Hardware Guide - Page 85
-CWDM Optical fiber as specified on applicable data sheet Gigabit Ethernet SFP, RJ-45 copper 1000BASE-T Category 5, 5e, 6 UTP 1. Cable color codes are specific to Cisco cables. 2. See the Cisco Modular Access Router Cable Specifications document for information about choosing these cables - Cisco 2811 | Hardware Guide - Page 86
pinouts, refer to the Cisco Modular Access Router Cable Specifications document. Connecting to a Console Terminal or Modem Your router has asynchronous serial console and auxiliary ports for system management. These ports provide administrative access to your router either locally (with a console - Cisco 2811 | Hardware Guide - Page 87
1 Use the blue RJ-45-to-DB-9 console cable to connect the router to a terminal. Note On the Cisco routers, the console port is color-coded blue. Step 2 Configure your terminal or terminal emulation software for 9600 baud (default), 8 data bits, 1 stop bit, no parity, and flow control set to "none - Cisco 2811 | Hardware Guide - Page 88
, CCDP, CCIE, CCIP, CCNA, CCNP, CCSP, Cisco, the Cisco Certified Internetwork Expert logo, Cisco IOS, Cisco Press, Cisco Systems, Cisco Systems Capital, the Cisco Systems logo, Cisco Unity, Enterprise/Solver, EtherChannel, EtherFast, EtherSwitch, Fast Step, Follow Me Browsing, FormShare, GigaDrive - Cisco 2811 | Hardware Guide - Page 89
how to power up your Cisco 2800 series integrated services router and perform an initial configuration to provide network access. It includes the following sections: • Powering Up Cisco 2800 Series Routers, page 1 • Configuring the Router, page 4 Powering Up Cisco 2800 Series Routers Warning Blank - Cisco 2811 | Hardware Guide - Page 90
blinks green. • The fans operate. Depending on your installation, some LEDs on the rear of the chassis and on installed modules might also come on. If you encounter problems when you power up the router, refer to the "Troubleshooting Cisco 2800 Series Routers" online document. Startup messages - Cisco 2811 | Hardware Guide - Page 91
SDM and install it on your router, see the "Initial Configuration Using Cisco Router and Security Device Manager" section on page 5. • If you see the following messages, the router has booted and is ready for initial configuration using the setup command facility or the command-line interface (CLI - Cisco 2811 | Hardware Guide - Page 92
advanced integration modules (AIMs). Configuring the Router This section covers the following topics: • Initial Configuration Using Cisco Router and Security Device Manager, page 5 • Initial Configuration Using the Setup Command Facility, page 5 • Initial Configuration Using the Cisco CLI-Manual - Cisco 2811 | Hardware Guide - Page 93
, you can use the CLI or Cisco Router and Security Device Manager to perform additional configuration. The prompts in the setup command facility vary, depending on your router model, the installed interface modules, and the software image. The following example and the user entries (in bold) are - Cisco 2811 | Hardware Guide - Page 94
Note The interface numbering that appears is dependent on the type of Cisco modular router platform and on the installed interface modules and cards. Current interface summary Controller Timeslots D-Channel Configurable modes Status T1 0/0/0 24 23 pri/channelized Administratively up Interface - Cisco 2811 | Hardware Guide - Page 95
the setup without saving this config. [2] Save this configuration to nvram and exit. Enter your selection [2]: 2 Building configuration... Use the enabled mode 'configure' command to modify this configuration. Press RETURN to get started! The user prompt appears. Router> Step 11 Verify the initial - Cisco 2811 | Hardware Guide - Page 96
messages do not appear, SDM and a default configuration file were installed on the router at the factory. To use SDM to configure your router, see the "Initial Configuration Using Cisco Router and Security Device Manager" section on page 5. For help with interface and port numbering, refer to the - Cisco 2811 | Hardware Guide - Page 97
, your Cisco router is ready to configure for specific functions. For advanced configuration procedures, use either SDM or the CLI. For configuration procedures using SDM, refer to the Cisco Router and Security Device Manager (SDM) Quick Start Guide that shipped with your router. For configuration - Cisco 2811 | Hardware Guide - Page 98
Configuring the Router CCVP, the Cisco Logo, and the Cisco Square Bridge logo are trademarks of Cisco Systems, Inc.; Changing the Way We Work, Live, Play, and Learn is a service mark of Cisco Systems, Inc.; and Access Registrar, Aironet, BPX, Catalyst, CCDA, CCDP, CCIE, CCIP, CCNA, CCNP, CCSP, - Cisco 2811 | Hardware Guide - Page 99
online Cisco Network Modules Hardware Installation Guide; to troubleshoot interface cards, refer to the online Cisco Interface Cards Installation Guide. If you cannot locate the source of the problem, contact a customer service representative for information on how to proceed. For technical support - Cisco 2811 | Hardware Guide - Page 100
. • With the power switch on and the PWR SYS LED off, do the fans operate? - If yes, the router is receiving power. The fans are connected directly to the DC outputs of the power supply. - If no, check the power source and power cable. Troubleshooting Cisco 2800 Series Routers 2 OL-5789-01 - Cisco 2811 | Hardware Guide - Page 101
by the router. - Make sure that the module is firmly seated in its slot. - Check the LEDs on the module. Each module has its own set of LEDs. For information on these LEDs, refer to the online Cisco Network Modules Hardware Installation Guide. OL-5789-01 Troubleshooting Cisco 2800 Series - Cisco 2811 | Hardware Guide - Page 102
service contact information. - Confirm that the Cisco IOS release installed in the router supports the card. The Cisco Interface Cards Installation Guide lists the software requirements for each card. • Router powers on and boots only when a particular cable is disconnected. - There may be a problem - Cisco 2811 | Hardware Guide - Page 103
the internal power supply, refer to the "Replacing the Power Supply" section of the "Installing and Upgrading Internal Modules in Cisco 2800 Series Routers" online document. If the fan is running- • Router fault Failure in one or more system board components. Contact Cisco technical support. Refer - Cisco 2811 | Hardware Guide - Page 104
. Refer to the Cisco RPS-675 Document. Check AC power supply, and replace if faulty. Refer to the "Replacing the Power Supply" section of the "Installing and Upgrading Internal Modules in Cisco 2800 Series Routers" online document. No packet transfers are occurring. Ethernet not active or not - Cisco 2811 | Hardware Guide - Page 105
(0, 1, 2) failed to initialize. If PVDM fails to initialize, replace the PVDM. To replace the PVDM, refer to the "Installing and Removing PVDMs" section of the "Installing and Upgrading Internal Modules in Cisco 2800 Series Routers" online document. OL-5789-01 Troubleshooting Cisco 2800 Series - Cisco 2811 | Hardware Guide - Page 106
Removing AIMs" section of the "Installing and Upgrading Internal Modules in Cisco 2800 Series Routers" online document. 1. The 3 blinks+pause state is applicable to the Cisco 2821 and Cisco 2851 routers only. The Cisco 2801 and Cisco 2811 do not have 1000 Mbps ethernet ports. 2. The PVDM2 LED is - Cisco 2811 | Hardware Guide - Page 107
-48V supply failed Explanation: The -48 V power supply has failed. Recommended action: Replace the power supply. Refer to the "Replacing the Power Supply" section of the "Installing and Upgrading Internal Modules in Cisco 2800 Series Routers" online document. OL-5789-01 Troubleshooting Cisco 2800 - Cisco 2811 | Hardware Guide - Page 108
action: Check the redundant power supply. If faulty, disconnect it from the router and contact your Cisco technical support representative. Note The Cisco 2801 does not support RPS. This message is not applicable to the Cisco 2801. Troubleshooting Cisco 2800 Series Routers 10 OL-5789-01 - Cisco 2811 | Hardware Guide - Page 109
: RPS ready/available Explanation: Redundant power supply is connected to the router and is powered up, but the router is not receiving power from the redundant power supply. Recommended action: Message is informational only. Note The Cisco 2801 does not support RPS. This message is not applicable - Cisco 2811 | Hardware Guide - Page 110
secret password that is configured on your router, you can replace it with a new enable secret password. For password recovery and replacement procedures for the Cisco 2800 series routers, refer to the Password Recovery Procedures document on Cisco.com. More Troubleshooting Help-Cisco Technical - Cisco 2811 | Hardware Guide - Page 111
, CCDP, CCIE, CCIP, CCNA, CCNP, CCSP, Cisco, the Cisco Certified Internetwork Expert logo, Cisco IOS, Cisco Press, Cisco Systems, Cisco Systems Capital, the Cisco Systems logo, Cisco Unity, Enterprise/Solver, EtherChannel, EtherFast, EtherSwitch, Fast Step, Follow Me Browsing, FormShare, GigaDrive - Cisco 2811 | Hardware Guide - Page 112
More Troubleshooting Help-Cisco Technical Assistance Center Troubleshooting Cisco 2800 Series Routers 14 OL-5789-01 - Cisco 2811 | Hardware Guide - Page 113
panels in Cisco 2800 series integrated services routers. Note Cisco 2801 routers do not have network module slots. Network modules cannot be installed in Cisco 2801 routers. This chapter contains the following sections: • Viewing the Cisco Network Module Installation Guide, page 1 • Installing Slot - Cisco 2811 | Hardware Guide - Page 114
slot divider with captive screw for the network module slot in Cisco 2851 routers. Figure 1 Slot Divider for Network Module Slots 121062 Install slot dividers into network module slots as follows: Step 1 Insert the top rails of the slot divider between the two guide rails in the top of the network - Cisco 2811 | Hardware Guide - Page 115
you remove the slot divider. Remove slot dividers from network module slots as follows: Step 1 Loosen the retention screw on the front of the slot divider. Step 2 Pull the slot divider straight out of the network module slot. OL-5790-01 Installing Network Modules in Cisco 2800 Series Routers 3 - Cisco 2811 | Hardware Guide - Page 116
Module Slots Installing and Removing Filler Panels in Network Module Slots You can install filler panels in extended-wide network module network module slots. Figure 5 Filler Panel for Network Module Slots 121063 You can use filler panels in the following configurations: • In a Cisco 2821 router, - Cisco 2811 | Hardware Guide - Page 117
NME-X T D M 0 11 121067 S L O SAG==ESACP0ET/1ED AAG==EFLIDN0X/K0 T 3 A F S S L A L O T F 1 S L PVDM2 PVDM1 PVDM0 AIM1 AIM0 1 Slot divider 2 Blank panel S L O T 2 S L O T 0 2 1 T D M 0 3 3 Filler panel OL-5790-01 Installing Network Modules in Cisco 2800 Series Routers 5 - Cisco 2811 | Hardware Guide - Page 118
of the slot. Guide the inner end of the filler panel into the square hole at the rear of the network module slot, and align the retention screw with the threaded screw hole in the chassis, slot divider, or adjacent filler panel. Note You may be securing the filler panel to the router chassis, to - Cisco 2811 | Hardware Guide - Page 119
documentation is related to your product. This documentation was not shipped with your product, but you can access it online at Cisco.com. • Cisco Network Modules and Interface Cards Regulatory Compliance and Safety Information OL-5790-01 Installing Network Modules in Cisco 2800 Series Routers 7 - Cisco 2811 | Hardware Guide - Page 120
or Website are the property of their respective owners. The use of the word partner does not imply a partnership relationship between Cisco and any other company. (0612R) Copyright © 2004 Cisco Systems, Inc. All rights reserved. Installing Network Modules in Cisco 2800 Series Routers 8 OL-5790-01 - Cisco 2811 | Hardware Guide - Page 121
Cards in Cisco 2800 Series Routers This chapter contains information on installing interface cards, interface card slot dividers, and blank panels in Cisco 2800 series integrated services routers. This chapter contains the following sections: • Viewing the Cisco Interface Card Installation Guide - Cisco 2811 | Hardware Guide - Page 122
1 Guide the slot divider between the two rails in the bottom of the HWIC slot. Push the slot divider in until it is fully seated. When the slot divider is fully seated, its outer end is flush with the front panel of the router. See Figure 2. Installing Interface Cards in Cisco 2800 Series Routers - Cisco 2811 | Hardware Guide - Page 123
2 Tighten the retention screw on the slot divider. Installing Slot Dividers in HWIC Slots on Cisco 2811, Cisco 2821, and Cisco 2851 Routers Figure 3 shows a slot divider for HWIC slots on Cisco 2811, Cisco 2821, and Cisco 2851 routers. OL-5791-01 Installing Interface Cards in Cisco 2800 Series - Cisco 2811 | Hardware Guide - Page 124
and Removing Slot Dividers Figure 3 Slot Divider for HWIC Slots on Cisco 2811, Cisco 2821, and Cisco 2851 Routers Install slot dividers into HWIC slots on Cisco 2811, Cisco 2821, and Cisco 2851 routers as follows: Step 1 Guide the two halves of the slot divider between the two rails in the - Cisco 2811 | Hardware Guide - Page 125
Cisco 2811, Cisco 2821, and Cisco 2851 routers as follows: Step 1 Step 2 Reach into the HWIC slots on both sides of the slot divider, and squeeze the two halves of the slot divider together. See Figure 6. Pull the slot divider straight out of the HWIC slot. OL-5791-01 Installing Interface Cards - Cisco 2811 | Hardware Guide - Page 126
interface cards must be covered with blank panels. Blank panels are required to ensure proper cooling airflow and to prevent electromagnetic interference. Figure 7 shows a typical blank panel. Figure 7 Typical Blank Panel 117044 121066 Installing Interface Cards in Cisco 2800 Series Routers 6 OL - Cisco 2811 | Hardware Guide - Page 127
documentation is related to your product. This documentation was not shipped with your product, but you can access it online at Cisco.com. • Cisco Network Modules and Interface Cards Regulatory Compliance and Safety Information OL-5791-01 Installing Interface Cards in Cisco 2800 Series Routers 7 - Cisco 2811 | Hardware Guide - Page 128
or Website are the property of their respective owners. The use of the word partner does not imply a partnership relationship between Cisco and any other company. (0612R) Copyright © 2004 Cisco Systems, Inc. All rights reserved. Installing Interface Cards in Cisco 2800 Series Routers 8 OL-5791-01 - Cisco 2811 | Hardware Guide - Page 129
Modules in Cisco 2800 Series Routers This document describes how to install or upgrade modules that are located internally within your Cisco 2800 series integrated services router, such as memory modules, advanced integration modules (AIMs), packet voice data modules (PVDMs), and power supplies - Cisco 2811 | Hardware Guide - Page 130
the WIC/HWIC slots and connectors on the Cisco 2811, Cisco 2821, or Cisco 2851 routers. Removing the Cover from Cisco 2801 Routers To remove the cover from a Cisco 2801 router, follow these steps: Step 1 Make sure that the router is turned off and is disconnected from the power supply. Warning - Cisco 2811 | Hardware Guide - Page 131
the unit upside down on a flat surface to access the pry points. Figure 2 Screwdriver Pry Points 121070 1 1 Step 4 Gently slide the chassis cover of the router away from the bottom of the chassis, as shown in Figure 3. OL-5792-04 Installing and Upgrading Internal Modules in Cisco 2800 Series - Cisco 2811 | Hardware Guide - Page 132
the Chassis Cover Figure 3 Removing the Cisco 2801 Chassis Cover 103168 Step 5 Place the router bottom on an antistatic mat, and begin installing modules. Removing the Cover from Cisco 2811 Routers To remove the chassis cover for a Cisco 2811 router, follow these steps. A number 2 Phillips - Cisco 2811 | Hardware Guide - Page 133
may still be some friction to overcome as you complete the removal. However, do not use the screwdriver again as in Step 4. OL-5792-04 Installing and Upgrading Internal Modules in Cisco 2800 Series Routers 5 - Cisco 2811 | Hardware Guide - Page 134
Removing the Chassis Cover Step 6 Lift the cover free of the router chassis. Figure 6 Cisco 2811 Router-Cover in Position for Removal Plastic bezel Approx. 1 inch (25 mm) 103477 Installing and Upgrading Internal Modules in Cisco 2800 Series Routers 6 OL-5792-04 - Cisco 2811 | Hardware Guide - Page 135
power is removed from the DC circuit. Statement 1003 Step 1 Make sure that the router is turned off and disconnected from its power the side with the fans) until the tabs are free from the slots. (See Figure 7.) OL-5792-04 Installing and Upgrading Internal Modules in Cisco 2800 Series Routers 7 - Cisco 2811 | Hardware Guide - Page 136
CF Do Not COMPACT Remove During FLASH Network Operation 1 0 CONSOLE AUX 1005-02/4600 V~ Hz 3A 1 Lift cover 2 Slide cover to free the tabs 103368 Installing and Upgrading Internal Modules in Cisco 2800 Series Routers 8 OL-5792-04 - Cisco 2811 | Hardware Guide - Page 137
, and power supply in Cisco 2821 and Cisco 2851 routers. Figure 8 Module Locations in Cisco 2801 Routers 13 12 14 15 11 8 9 10 16 17 95907 7 6 5 5 2 32 4 1 1 1 ILP fan vents/vent blocking plate 2 System fans 3 VIC or VWIC connector 4 VIC, VWIC, WIC, or HWIC connector 5 Card guide center - Cisco 2811 | Hardware Guide - Page 138
Locating Modules Figure 9 Module Locations in Cisco 2811 Routers 6 4 3 5 7 1 2 1 1 AIM connectors 2 DRAM DIMMs 3 PVDMs 4 Power supply 5 Primary power connector 6 Secondary power connector 7 Fans 103394 Installing and Upgrading Internal Modules in Cisco 2800 Series Routers 10 OL-5792-04 - Cisco 2811 | Hardware Guide - Page 139
Figure 10 Module Locations in Cisco 2821 Router 4 3 2 1 1 Locating Modules 5 103393 1 AIM connectors 2 DRAM DIMMs 3 PVDMs 4 Power supply connectors 5 Fans OL-5792-04 Installing and Upgrading Internal Modules in Cisco 2800 Series Routers 11 - Cisco 2811 | Hardware Guide - Page 140
103978 1 AIM connectors 2 DRAM DIMMs 3 PVDMs 4 Power supply connectors 5 Fans Installing and Removing DRAM DIMMs Cisco 2801 routers have 128 MB of SDRAM installed on the system board. You can install an additional DIMM in the DIMM connector to expand system memory to a maximum of 384 MB. Note - Cisco 2811 | Hardware Guide - Page 141
depending on your router model, for the location of the DIMM connectors. Pull the latches away from the DRAM DIMM at both ends; this lifts the DIMM slightly. Then lift the DIMM out of the connector. See Figure 13. OL-5792-04 Installing and Upgrading Internal Modules in Cisco 2800 Series Routers 13 - Cisco 2811 | Hardware Guide - Page 142
far enough to clear the DIMM, and gently pulling the DIMM up and away from the socket. See Figure 14. Figure 14 Removing a DIMM 2 1 103155 Step 3 Insert the DIMM into the DIMM socket, as shown in Figure 15. Installing and Upgrading Internal Modules in Cisco 2800 Series Routers 14 OL-5792 - Cisco 2811 | Hardware Guide - Page 143
snap over the end of the DIMM. Installing a DRAM DIMM in a Cisco 2811, Cisco 2821, or Cisco 2851 Router To install a DRAM DIMM in a Cisco 2811, Cisco 2821, or Cisco 2851 router, follow these steps Figure 16. OL-5792-04 Installing and Upgrading Internal Modules in Cisco 2800 Series Routers 15 - Cisco 2811 | Hardware Guide - Page 144
contact with your skin. Connect the equipment end of the wrist strap to the metal part of the chassis. Caution Handle AIMs by the edges only. AIMs are ESD-sensitive components and can be damaged by mishandling. Installing and Upgrading Internal Modules in Cisco 2800 Series Routers 16 OL-5792-04 - Cisco 2811 | Hardware Guide - Page 145
Figure 8, Figure 9, Figure 10, or Figure 11, depending on your router model, for the location of the AIMs. Remove the two screws from the AIM as shown in Figure 17. Figure 17 Removing Screws from the AIM 103526 OL-5792-04 Installing and Upgrading Internal Modules in Cisco 2800 Series Routers 17 - Cisco 2811 | Hardware Guide - Page 146
a threaded end. Installing an AIM in a Cisco 2801 Router The Cisco 2801 router has two AIM connectors-AIM slot 0 and AIM slot 1. To install these AIMs, follow the procedures given here. Accessory Kit to Use Some AIMs are provided with multiple accessory kits that contain different configurations of - Cisco 2811 | Hardware Guide - Page 147
Locate the two machine-thread metal standoffs from the accessory kit. Do not use sheet metal-thread standoffs. See Figure 19 for an illustration of the different metal standoffs. Figure 19 Metal Standoffs 121202 OL-5792-04 Installing and Upgrading Internal Modules in Cisco 2800 Series Routers 19 - Cisco 2811 | Hardware Guide - Page 148
against the system board. Step 4 Insert the plastic standoff with a snap fit on the ends (see Figure 20) from the accessory kit into the hole in the system board. See the screws with a Phillips screwdriver. Installing and Upgrading Internal Modules in Cisco 2800 Series Routers 20 OL-5792-04 - Cisco 2811 | Hardware Guide - Page 149
a virtual private network (VPN) encryption AIM or a voice-mail AIM in either slot, but not in both slots. You can install voice and data compression AIMs and ATM AIMs in both slots. Accessory Kit to Use To install AIM modules in Cisco 2811, Cisco 2821, or Cisco 2851 routers, use accessory kit number - Cisco 2811 | Hardware Guide - Page 150
very carefully using a 3/16-inch open-end wrench. The shoulder must be seated tight against the system board. (See Figure 23.) Note The Cisco 2801 router does not have a screw in the with a Phillips screwdriver. Installing and Upgrading Internal Modules in Cisco 2800 Series Routers 22 OL-5792-04 - Cisco 2811 | Hardware Guide - Page 151
Installing and Removing AIMs Figure 23 Connecting an AIM to the System Board-AIM Slot 1 Shown AIM Threaded plastic standoff Metal standoffs AIM slot 0 connector AIM slot 1 connector 72108 OL-5792-04 Installing and Upgrading Internal Modules in Cisco 2800 Series Routers 23 - Cisco 2811 | Hardware Guide - Page 152
installing modules, install the cover on the router. See the "Installing the Chassis Cover" section on page 51. Apply the AIM label to the outside of the chassis as described in the "Applying the AIM Label" section on page 26. Installing and Upgrading Internal Modules in Cisco 2800 Series Routers - Cisco 2811 | Hardware Guide - Page 153
Cover" section on page 51. Refer to the "Verifying AIM Installation" section on page 27 for instructions on formatting the CompactFlash memory card. Figure 25 CompactFlash Memory Card Location on the AIM 120375 OL-5792-04 Installing and Upgrading Internal Modules in Cisco 2800 Series Routers 25 - Cisco 2811 | Hardware Guide - Page 154
27 for a typical label location on the back of a chassis. Note Do not apply the AIM label to a blank cover plate; to any removable network module or interface card; or over any holes, screws, or existing labels. Installing and Upgrading Internal Modules in Cisco 2800 Series Routers 26 OL-5792-04 - Cisco 2811 | Hardware Guide - Page 155
ATA CompactFlash (Read/Write) Configuration register is 0x2102 Use the show diag 0 command to obtain hardware information about an installed AIM. You will see additional output that is not shown in these examples. OL-5792-04 Installing and Upgrading Internal Modules in Cisco 2800 Series Routers 27 - Cisco 2811 | Hardware Guide - Page 156
FF FF FF FF FF FF FF FF . . . Installing and Removing PVDMs Cisco 2801 and Cisco 2811 routers hold up to two Cisco packet voice data modules, version 2 (PVDM2) to support enhanced versions of digital signal processors (DSPs). Cisco 2821 and Cisco 2851 routers hold up to three PVDM-IIs. If only - Cisco 2811 | Hardware Guide - Page 157
can be freely removed from the connector. See Figure 29. Note PVDMs must be removed in order-PVDM 1 then PVDM 0 in Cisco 2801 and 2811 routers, and PVDM 2, then PVDM 1, then PVDM 0 in Cisco 2821 and 2851 routers. OL-5792-04 Installing and Upgrading Internal Modules in Cisco 2800 Series Routers 29 - Cisco 2811 | Hardware Guide - Page 158
and insert it carefully into the PVDM connector. Tilt the PVDM up to the vertical position so that the clips snap into place at both ends. See Figure 30. Installing and Upgrading Internal Modules in Cisco 2800 Series Routers 30 OL-5792-04 - Cisco 2811 | Hardware Guide - Page 159
"Removing the Chassis Cover" section on page 2, and perform the procedure in the "Installing a Power Supply in a Cisco 2811 Router" section on page 33. To replace a power supply in a Cisco 2821 or Cisco 2851 router, remove the chassis cover as described in the "Removing the Chassis Cover" section on - Cisco 2811 | Hardware Guide - Page 160
. Remove the screws that fasten the vent blocking plate to the chassis, and remove the vent blocking plate from the inline power (ILP) supply fan vents. Insert the ILP supply into the chassis. See Figure 32. Installing and Upgrading Internal Modules in Cisco 2800 Series Routers 32 OL-5792-04 - Cisco 2811 | Hardware Guide - Page 161
fans should be visible through the vents that were blocked by the vent blocking plate. Installing a Power Supply in a Cisco 2811 Router Three types of power supplies are available for the Cisco 2811 router: • An AC-input power supply, driven by external AC power • A DC-input power supply, driven - Cisco 2811 | Hardware Guide - Page 162
. Note The AC-input power supply in a Cisco 2811 router uses only one power output cable. The DC-input power supply and the ILP supply each use two power output cables that must be disconnected. On the ILP supply, the ILP cable is also hooked to cable guides on the power supply and the chassis, so - Cisco 2811 | Hardware Guide - Page 163
Retention Screw Replacing the Power Supply 1 2 3 135329 1 Power supply 2 Retention screw location 3 Ribbon Cable Step 4 Slide the power supply toward the fan and toward the system board, and then lift it out. OL-5792-04 Installing and Upgrading Internal Modules in Cisco 2800 Series Routers 35 - Cisco 2811 | Hardware Guide - Page 164
on the duct are captured by the sheet metal retainers in the chassis. See Figure 33. Connect the primary power cable to the power supply. Make sure that the locking feature snaps into position. See Figure 36. Installing and Upgrading Internal Modules in Cisco 2800 Series Routers 36 OL-5792-04 - Cisco 2811 | Hardware Guide - Page 165
Replacing the Power Supply Figure 36 Connecting a Primary Power Cable in a Cisco 2811 Router . 3 2 1 103544 1 Power supply 3 Primary power cable connector, motherboard 2 Primary power cable connector, power supply Step 5 If you are finished installing modules, install the cover on the router. - Cisco 2811 | Hardware Guide - Page 166
Replacing the Power Supply Installing a DC-Input Power Supply The DC-input power supply has two power connectors, as shown in Figure 37. Figure 37 DC-Input Power Supply for the Cisco 2811 Router 135276 3 1 2 1 Retention tab 2 Primary power connector 3 Secondary power connector Follow these - Cisco 2811 | Hardware Guide - Page 167
Replacing the Power Supply Figure 38 Connecting a Secondary Power Cable in a Cisco 2811 Router 1 2 1 Secondary power connector, power supply 2 Secondary power connector, motherboard Step 6 If you are finished installing modules, install the cover on the router. See the "Installing the Chassis Cover" - Cisco 2811 | Hardware Guide - Page 168
Replacing the Power Supply Installing an ILP Supply The ILP supply has two power connectors, as shown in Figure 39. Figure 39 ILP Supply for the Cisco 2811 Router 135277 4 4 3 1 2 1 Retention tab 2 Primary power connector 3 ILP connector 4 ILP cable guides Follow these steps to install the - Cisco 2811 | Hardware Guide - Page 169
Replacing the Power Supply Figure 40 Connecting an ILP Cable in a Cisco 2811 Router . 3 1 3 2 127114 1 ILP cable connector on the power supply 2 ILP cable connector on the motherboard 3 ILP cable guides Step 6 If you are finished installing modules, install the cover on the router. See the " - Cisco 2811 | Hardware Guide - Page 170
) away from the chassis at the center. See Figure 42. c. While you hold the bezel away from the chassis, slide the bezel toward the input-power side until it comes free (about 1/2 inch [12 mm]). Installing and Upgrading Internal Modules in Cisco 2800 Series Routers 42 OL-5792-04 - Cisco 2811 | Hardware Guide - Page 171
Replacing the Power Supply Figure 42 Removing the Bezel from a Cisco 2821 or Cisco 2851 Router . 2 1 Plastic bezel 117350 1 Pull top of bezel away from chassis 2 Slide bezel to release it from chassis OL-5792-04 Installing and Upgrading Internal Modules in Cisco 2800 Series Routers 43 - Cisco 2811 | Hardware Guide - Page 172
cables, and the ILP supply has three power output cables that must be disconnected. Step 4 Use the integrated power supply handle to pull the power supply out through the front of the chassis. See Figure 44. Installing and Upgrading Internal Modules in Cisco 2800 Series Routers 44 OL-5792-04 - Cisco 2811 | Hardware Guide - Page 173
Power Supply from a Cisco 2821 or Cisco 2851 Router 135331 Installing an AC-Input Power Supply The AC-input power supply has a single power connector, as shown in Figure 45. Figure 45 AC_Input Power Supply 1 127780 OL-5792-04 1 Primary power connector Installing and Upgrading Internal Modules - Cisco 2811 | Hardware Guide - Page 174
sure that the locking feature on the power supply end snaps into position. See Figure 46. Figure 46 Primary Power Cable Connection in a Cisco 2821 or Cisco 2851 Router . 2 1 103705 1 Power supply 2 Primary power cable connector Step 4 Step 5 Install the bezel onto the front of the chassis - Cisco 2811 | Hardware Guide - Page 175
the power supply end snaps into position. See Figure 46. Connect the secondary power supply cable to the power supply. Make sure that the locking feature on the power supply end snaps into position. See Figure 48. OL-5792-04 Installing and Upgrading Internal Modules in Cisco 2800 Series Routers 47 - Cisco 2811 | Hardware Guide - Page 176
Replacing the Power Supply Figure 48 Connecting a Secondary Power Cable in Cisco 2821 and Cisco 2851 Routers 2 1 135332 1 Secondary power conector, motherboard 2 Secondary power connector, power supply Step 5 Step 6 Install the bezel onto the front of the chassis as follows: a. Engage the - Cisco 2811 | Hardware Guide - Page 177
the ILP cable to the supply. Make sure that the locking feature on the power supply end snaps into position. You must also route the ILP cable through the hooks on the power supply and chassis.. See Figure 50. OL-5792-04 Installing and Upgrading Internal Modules in Cisco 2800 Series Routers 49 - Cisco 2811 | Hardware Guide - Page 178
Replacing the Power Supply Figure 50 Connecting an ILP Cable in Cisco 2821 and Cisco 2851 Routers . 3 3 3 3 3 1 2 127115 1 ILP cable connector, motherboard 2 ILP cable connector, power supply 3 ILP cable guides Step 6 Step 7 Install the bezel onto the front of the chassis as follows: a. - Cisco 2811 | Hardware Guide - Page 179
on page 4, "Removing the Cisco 2801 Chassis Cover." Replace the three screws and the ground connection that you removed when you opened the chassis. See Figure 1 on page 3, "Removing the Cisco 2801 Chassis Cover." OL-5792-04 Installing and Upgrading Internal Modules in Cisco 2800 Series Routers 51 - Cisco 2811 | Hardware Guide - Page 180
the Chassis Cover Installing the Cover on Cisco 2811 Routers To install the chassis cover on a Cisco 2811 router, follow these steps. A number 2 Phillips screwdriver is required. Step 1 Position the cover so that it rests flat on the chassis, with the front (bezel) end of the cover about - Cisco 2811 | Hardware Guide - Page 181
over the chassis and lower it onto the chassis. Install the three cover screws. Figure 52 Installing Cover on Cisco 2821 and Cisco 2851 Routers 1 2 103964 1 Insert tabs and center the cover 2 Close the cover OL-5792-04 Installing and Upgrading Internal Modules in Cisco 2800 Series Routers 53 - Cisco 2811 | Hardware Guide - Page 182
of their respective owners. The use of the word partner does not imply a partnership relationship between Cisco and any other company. (0612R) Copyright © 2004, 2005 Cisco Systems, Inc. All rights reserved. Installing and Upgrading Internal Modules in Cisco 2800 Series Routers 54 OL-5792-04 - Cisco 2811 | Hardware Guide - Page 183
Removing and Installing CompactFlash Memory Cards in Cisco 2800 Series Routers This document describes installing and replacing CompactFlash memory cards in Cisco 2800 series integrated services routers. It contains the following sections: • Preventing Electrostatic Discharge Damage, page 1 • - Cisco 2811 | Hardware Guide - Page 184
button is projecting from the panel after you insert the CompactFlash memory card, remove the CompactFlash memory card, press the ejector button until it clicks, and reinsert the CompactFlash memory card. Removing and Installing CompactFlash Memory Cards in Cisco 2800 Series Routers 2 OL-5793-01 - Cisco 2811 | Hardware Guide - Page 185
Installing a CompactFlash Memory Card Caution To prevent damage to the ejector mechanism, the ejector button must remain fully seated when not being used to eject a CompactFlash memory card. OL-5793-01 Removing and Installing CompactFlash Memory Cards in Cisco 2800 Series Routers 3 - Cisco 2811 | Hardware Guide - Page 186
Installing a CompactFlash Memory Card CCVP, the Cisco Logo, and the Cisco Square Bridge logo are trademarks of Cisco Systems, Inc.; Changing the Way We Work, Live, Play, and Learn is a service mark of Cisco Systems, Inc.; and Access Registrar, Aironet, BPX, Catalyst, CCDA, CCDP, CCIE, CCIP, CCNA,
-
 1
1 -
 2
2 -
 3
3 -
 4
4 -
 5
5 -
 6
6 -
 7
7 -
8
-
9
-
10
-
11
-
12
-
13
-
14
-
15
-
16
-
17
-
18
-
19
-
20
-
21
-
22
-
23
-
24
-
25
-
26
-
27
-
28
-
29
-
30
-
31
-
32
-
33
-
34
-
35
-
36
-
37
-
38
-
39
-
40
-
41
-
42
-
43
-
44
-
45
-
46
-
47
-
48
-
49
-
50
-
51
-
52
-
53
-
54
-
55
-
56
-
57
-
58
-
59
-
60
-
61
-
62
-
63
-
64
-
65
-
66
-
67
-
68
-
69
-
70
-
71
-
72
-
73
-
74
-
75
-
76
-
77
-
78
-
79
-
80
-
81
-
82
-
83
-
84
-
85
-
86
-
87
-
88
-
89
-
90
-
91
-
92
-
93
-
94
-
95
-
96
-
97
-
98
-
99
-
100
-
101
-
102
-
103
-
104
-
105
-
106
-
107
-
108
-
109
-
110
-
111
-
112
-
113
-
114
-
115
-
116
-
117
-
118
-
119
-
120
-
121
-
122
-
123
-
124
-
125
-
126
-
127
-
128
-
129
-
130
-
131
-
132
-
133
-
134
-
135
-
136
-
137
-
138
-
139
-
140
-
141
-
142
-
143
-
144
-
145
-
146
-
147
-
148
-
149
-
150
-
151
-
152
-
153
-
154
-
155
-
156
-
157
-
158
-
159
-
160
-
161
-
162
-
163
-
164
-
165
-
166
-
167
-
168
-
169
-
170
-
171
-
172
-
173
-
174
-
175
-
176
-
177
-
178
-
179
-
180
-
181
-
182
-
183
-
184
-
185
-
186
 |
 |

Corporate Headquarters:
Copyright © 2004 Cisco Systems, Inc. All rights reserved.
Cisco Systems, Inc., 170 West Tasman Drive, San Jose, CA 95134-1706
USA
Cisco 2800 Series Hardware Documents:
Introduction and Warnings
This introduction discusses the objectives, audience, organization, and conventions of these hardware
documents, and points to related documents that have information beyond the scope of these documents.
This preface contains the following sections:
•
Objectives, page 1
•
Audience, page 2
•
Topics Covered by Hardware Documents, page 2
•
Conventions, page 3
•
Safety Warnings, page 4
•
Related Documentation, page 9
•
Cisco 90-Day Limited Hardware Warranty Terms, page 10
•
Obtaining Documentation, page 11
•
Documentation Feedback, page 12
•
Obtaining Technical Assistance, page 12
•
Obtaining Additional Publications and Information, page 14
Objectives
These hardware documents provide you with comprehensive hardware-related information about
Cisco 2800 series integrated services routers, including platform descriptions, safety information, site
preparation, chassis installation and interconnection, power up, initial configuration, troubleshooting,
interface card and module installation, and procedures for maintenance and upgrades.
These documents provide enough initial software configuration information to establish network
communication. For detailed software configuration information, refer to the Cisco 2800 series software
configuration documents and to the Cisco IOS configuration guides and command reference
publications. These publications are available online. See the
“Obtaining Documentation” section on
page 11
for more information.