Cisco E2500 User Manual
Cisco E2500 Manual
 |
View all Cisco E2500 manuals
Add to My Manuals
Save this manual to your list of manuals |
Cisco E2500 manual content summary:
- Cisco E2500 | User Manual - Page 1
Linksys E-Series Routers User Guide - Cisco E2500 | User Manual - Page 2
Linksys E-Series E1200 E1500 E2500 E3200 E4200 - Cisco E2500 | User Manual - Page 3
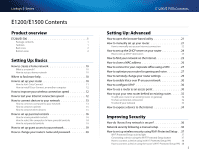
to set up guest access to your network 19 How to change your router's name and password 20 E1200/E1500 Contents Setting Up: Advanced How to open the browser-based utility 21 How to manually set up your router 21 How to manually set up your Internet connection 22 How to set up the DHCP - Cisco E2500 | User Manual - Page 4
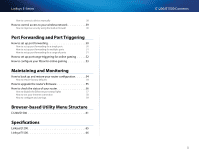
port forwarding for a range of ports 51 How to set up port range triggering for online gaming 52 How to configure your Xbox for online gaming 53 Maintaining and Monitoring How to back up and restore your router configuration 54 How to restore factory defaults 54 How to upgrade the router - Cisco E2500 | User Manual - Page 5
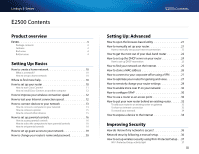
name and password 20 E2500 Contents Setting Up: Advanced How to open the browser-based utility 21 How to manually set up your router 21 How to manually set up your Internet connection 22 How to get the most out of your dual-band router 22 How to set up the DHCP server on your router 24 - Cisco E2500 | User Manual - Page 6
How to restore factory defaults 54 How to upgrade the router's firmware 55 How to check the status of your router 56 How to disable the Ethernet port status lights 57 How to test your Internet connection 58 How to configure and use logs 59 Browser-based Utility Menu Structure E2500 62 - Cisco E2500 | User Manual - Page 7
name and password 20 E3200 Contents Setting Up: Advanced How to open the browser-based utility 21 How to manually set up your router 21 How to manually set up your Internet connection 22 How to get the most out of your dual-band router 22 How to set up the DHCP server on your router 24 - Cisco E2500 | User Manual - Page 8
port forwarding for a range of ports 51 How to set up port range triggering for online gaming 52 How to configure your Xbox for online gaming 53 Maintaining and Monitoring How to back up and restore your router configuration 54 How to restore factory defaults 54 How to upgrade the router - Cisco E2500 | User Manual - Page 9
name and password 20 E4200 Contents Setting Up: Advanced How to open the browser-based utility 21 How to manually set up your router 21 How to manually set up your Internet connection 22 How to get the most out of your dual-band router 22 How to set up the DHCP server on your router 24 - Cisco E2500 | User Manual - Page 10
back up and restore your router configuration 54 How to restore factory defaults 54 E4200 Contents How to upgrade the router's firmware 55 How to check the status of your router 56 How to disable the Ethernet port status lights 57 How to test your Internet connection 58 How to configure - Cisco E2500 | User Manual - Page 11
power adapter •• Setup CD containing router setup software and documentation Product overview Features Wireless-N technology Built with leading 802.11n wireless technology, your router offers maximum speed and range to create an ultra-powerful network designed for home theater performance. Connect - Cisco E2500 | User Manual - Page 12
Ethernet port. On the Internet port, stays on while connected to a modem. On both port types, it flashes while transferring data. Bottom view •• Reset button-Press and hold this button for 5-10 seconds (until the port lights flash at the same time) to reset the router to its factory defaults. You - Cisco E2500 | User Manual - Page 13
power adapter •• Setup CD containing router setup software and documentation Product overview Features Wireless-N technology Built with leading 802.11n wireless technology, your router offers maximum speed and range to create an ultra-powerful network designed for home theater performance. Connect - Cisco E2500 | User Manual - Page 14
Ethernet port. On the Internet port, stays on while connected to a modem. On both port types, it flashes while transferring data. Bottom view •• Reset button-Press and hold this button for 5-10 seconds (until the port lights flash at the same time) to reset the router to its factory defaults. You - Cisco E2500 | User Manual - Page 15
more to your wireless network and the Internet. Simultaneous dual-band N and QoS traffic prioritization technology delivers maximum speed and performance so you can enjoy fast downloads, smooth video and music streaming, and reliable gaming and VoIP. Easy to manage Cisco Connect software helps you - Cisco E2500 | User Manual - Page 16
, turns on while connected to a modem. •• Yellow activity indicator-Flashes to indicate network activity over that port. Bottom view •• Reset button-Press and hold this button for 5-10 seconds (until the port lights flash at the same time) to reset the router to its factory defaults. You can also - Cisco E2500 | User Manual - Page 17
wireless network and the Internet. Simultaneous dual-band N and QoS traffic prioritization technology delivers maximum speed and performance so you can enjoy fast downloads, smooth video and music streaming, and reliable gaming and VoIP. Quick to install Cisco Connect software helps you easily set - Cisco E2500 | User Manual - Page 18
other users on your network or on the Internet, connect a USB drive to this port. For more information, see "Using an External Drive" on page 41. •• Reset button-Press and hold this button for 5-10 seconds (until the port lights flash at the same time) to reset the router to its factory defaults - Cisco E2500 | User Manual - Page 19
indicator Network or Internet port •• Green network activity indicator-On Ethernet ports, turns on when a cable connects the port to another Gigabit Ethernet port. On the Internet port, turns on while connected to a modem. •• Yellow network activity indicator-Flashes to indicate network activity - Cisco E2500 | User Manual - Page 20
with your router or download it from the router's support site at Linksys.com/support. Cisco Connect shows you how to connect your router to your home network, step by step. To get started, see "How to start Cisco Connect" below. If you are an advanced user, you can set up your router manually using - Cisco E2500 | User Manual - Page 21
can download the software from Linksys.com/support. To start Cisco Connect for the first time: 1. Insert the CD into your CD or DVD drive. 2. Click Set up your Linksys Router. If you do not see this: •• For Windows, click Start, Computer, then double-click the CD drive and the Setup icon. •• For Mac - Cisco E2500 | User Manual - Page 22
the router's network name (SSID) and password. To install Cisco Connect onto another computer: 1. See "How to connect a computer using an Easy Setup Key" on page 13. When finished, Cisco Connect has also been installed onto the computer's hard drive. How to improve your wireless connection speed - Cisco E2500 | User Manual - Page 23
click Next. 4. Insert a USB drive into an available USB port on your computer. This USB drive will be your new Easy Setup Key. Cisco Connect detects the newly attached USB drive and copies the router's settings and a copy of Cisco Connect to it. 5. When the files have finished copying, remove the - Cisco E2500 | User Manual - Page 24
Setup Key files, then double‑click Connect. 5. Click Connect to your router, then follow the on-screen instructions. 6. Return to the computer running Cisco Connect, then click Next. 7. Enter a name for the newly connected computer, then click Finish. How to connect a computer manually To connect - Cisco E2500 | User Manual - Page 25
standard. •• If your wireless printer supports WPS (Wi-Fi Protected Setup), you should use WPS to connect it to your network. See "How to set up wireless security using Wi‑Fi Protected Setup" on page 37. To connect a wireless printer to your network: 1. Run Cisco Connect, then click Add device - Cisco E2500 | User Manual - Page 26
Cisco Connect, then click Next. 6. Enter a name for device, then click Finish. For more instructions on connecting a game console to your network, see also: •• "How to optimize your router for gaming and voice" on page 27 •• "How to set up port forwarding" on page 50 •• "How to set up port range - Cisco E2500 | User Manual - Page 27
by others. If you forget your password, you can reset it by correctly answering your secret question. 3. To save your settings, click OK. The Parental controls main screen appears. To access parental controls after the first time: 1. Run Cisco Connect, then click Change under Parental controls - Cisco E2500 | User Manual - Page 28
access on box, then click - (remove). a. On a blank line, enter a website address that you want to block. b. Click Save to save the list and return to the Parental controls main screen. 4. To save your changes, click Finish. 5. Repeat the above steps for each computer that you want to set - Cisco E2500 | User Manual - Page 29
Login Local Network Guest Network Local Access and Guest Access Diagram Setting Up: Basics To set up guest access to your network: 1. Run Cisco Connect, then click Change under Guest Access. The Guest Access screen opens. 2. Under Allow guest access, click yes (default) to allow guest Internet - Cisco E2500 | User Manual - Page 30
Guest access screen. To continue, they must enter the password you provided in the Password field, then click LOGIN. Setting Up: Basics How to change your router's name and password You can change the name and password of your router, but if you do so, all wireless devices connected to your router - Cisco E2500 | User Manual - Page 31
If you set up your router without using Cisco Connect, your router's default password is admin. (You can leave the user name blank.) How to manually set up your router Although running Cisco Connect is the easiest way to set up and maintain your router, advanced users may want to manually configure - Cisco E2500 | User Manual - Page 32
. To manually configure your router's Internet connection: Setup > Basic Setup 1. Log into the browser-based utility (see "How to open the browser-based utility" on page 21). 2. Click the Setup tab, then click the Basic Setup page. Setting Up: Advanced 3. In the Internet Connection Type drop-down - Cisco E2500 | User Manual - Page 33
your network settings to Mixed to provide access to guests without Wireless-N networking. Split your traffic The best way to improve your multimedia wireless performance is to split your wireless traffic between your router's two bands (ranges of radio frequencies). Your router supports the 2.4 GHz - Cisco E2500 | User Manual - Page 34
default setting (Enabled) for both bands. 4. To apply your changes, click Save Settings at the bottom of the screen. Setting Up: Advanced How to set up the DHCP server on your router Your router can be used as a DHCP (Dynamic Host Configuration Protocol) server to automatically assign an IP address - Cisco E2500 | User Manual - Page 35
a client name, IP address, and MAC address of a device to create a DHCP reservation. 6. Click Save Settings. Setting Up: Advanced How to find your network on the Internet Why would I need to find my network on the Internet? If you want to remotely access a USB drive attached to your router or view - Cisco E2500 | User Manual - Page 36
used port 1024, the URL would be: BronzeEagle953.linksysnet.com:1024 Setting Up: Advanced How to clone a MAC address On any home network, each network device has a unique MAC (Media Access Control) address. Some ISPs register the MAC address of the device (usually a router or a computer) connected - Cisco E2500 | User Manual - Page 37
secure connection and access by only authorized users. The default VPN settings in your router have router. This option is enabled by default. Setting Up: Advanced •• PPTP Passthrough - PPTP (Point-to-Point Tunneling Protocol) allows the PPP (Point-to-Point Protocol) to be tunneled through an IP - Cisco E2500 | User Manual - Page 38
Save Settings. TIP You can often find a device's 12-digit MAC address on the bottom of the device. Or, if the device is connected to your network and turned on, you can click the Administration tab in the router's browser-based utility, click the Local Network page, then click DHCP Client Table - Cisco E2500 | User Manual - Page 39
your router's firmware remotely, select Enabled next to Remote Upgrade. 6. To allow remote access from anywhere on the Internet, select Any IP Address (default) next to Allowed Remote IP Address. Otherwise, enter a range of allowed IP addresses. 7. For Remote Management Port, keep the setting of - Cisco E2500 | User Manual - Page 40
disabling your Internet connection through UPnP, select Disabled (default) next to Allow Users to Disable Internet Access. Otherwise, select Enabled. How to use a router as an access point How can I use my old router as an access point? If you have a large area to cover with your wireless signal, or - Cisco E2500 | User Manual - Page 41
click the Wireless Network page and take note of the Channel. 5. Click the Setup tab, then click the Basic Setup page and take note of the DHCP server's IP Address range (192.168.1.100 to 192.168.1.149 by default) To use your old router as an access point: 1. With your computer connected to your - Cisco E2500 | User Manual - Page 42
to your existing wireless network: 1. Insert the Cisco Connect setup CD into a CD/DVD drive on your computer, then follow the on-screen instructions. 2. When you are told to connect your router's Internet port to the LAN/ Ethernet port on your modem, connect your router's Internet port to the LAN - Cisco E2500 | User Manual - Page 43
the address range by using a Mac computer: a. Connect your computer into your upstream network's router. b. From the Dock, click System preferences, click Network, then click Ethernet in the window to the left. A network status window appears. Setting Up: Advanced c. Take note of the IP address - Cisco E2500 | User Manual - Page 44
that device to the Internet so anybody can access it. Your router includes a DMZ (Demilitarized Zone) feature that forwards all inbound ports presented on the WAN interface, except those that are specifically forwarded, to an individual IP address or MAC address. This feature is normally not used - Cisco E2500 | User Manual - Page 45
In the Source IP Address section, select Any IP Address (default) to allow access to your DMZ device from the entire Internet, or select the source range button and enter a range of allowed source addresses. c. In the Destination section, select MAC Address, then click DHCP Client Table. A separate - Cisco E2500 | User Manual - Page 46
is secure? If you configured your router using Cisco Connect, your network is secure. During setup, Cisco Connect creates a name for your network, enables industrystandard WPA/WPA2 wireless security, and assigns a highly secure password for your wireless network and the administrator's account. To - Cisco E2500 | User Manual - Page 47
time. Repeat the instructions for each device that supports Wi-Fi Protected Setup. Connecting a device using the Wi-Fi Protected Setup button Use this method if your device has a Wi-Fi Protected Setup button or prompts you to press the Wi-Fi Protected Setup button on your router. To connect a device - Cisco E2500 | User Manual - Page 48
example below, the router's PIN is 32744781. 5. Follow the device's instructions to complete setup. How to connect a device manually If you have devices that do not support Wi-Fi Protected Setup, note the wireless settings in the Basic Wireless Settings screen, then manually configure those devices - Cisco E2500 | User Manual - Page 49
. If you set up your wireless network manually and have not enabled wireless security, your wireless network will be an "open" network that almost anyone nearby with a Wi-Fi-enabled device could access. What is MAC filtering? The best way to secure your wireless network is to use Cisco Connect to - Cisco E2500 | User Manual - Page 50
disabled by default. •• Filter Internet NAT Redirection-This filter prevents a local computer from using a URL or Internet IP address to access the local server. Select this option to enable the filter. This option is disabled by default. •• Filter IDENT (Port 113)-This filter prevents port 113 from - Cisco E2500 | User Manual - Page 51
E3200, E4200 Why would I need to configure storage? By default, when you connect a storage device to your router, the entire contents of the device are available for read and write access to anyone on your local network (no login credentials are required). However, you can also create shared folders - Cisco E2500 | User Manual - Page 52
Create. How to manage group and user access to shared folders To manage access to shared folders, you need to disable Anonymous Disk Access, then create groups and user accounts on your router. Access to the router is controlled by user accounts, but access to shared folders is controlled by groups - Cisco E2500 | User Manual - Page 53
access By default, no password is needed for read and write access to the drive. Before you can manage group and user access to shared folders, you must disable anonymous disk access. To disable anonymous disk access Name and Description fields. 5. From the Access drop-down list, select read-only to - Cisco E2500 | User Manual - Page 54
How to create a new user Two user accounts (Admin and Guest) are preconfigured for router access. The password for the Admin user is the same password that you use to access the router. By default, the user Admin is a member of the group named Admin, and the user Guest is a member of the group - Cisco E2500 | User Manual - Page 55
an External Drive How to configure your router's storage for remote access For E3200, E4200 Why would I need to access my router's storage remotely? If your router's storage is set up for remote access, you can access your files anywhere you have an Internet connection. To do this, you must enable - Cisco E2500 | User Manual - Page 56
Cisco Connect to set up your router, the FTP Server Name field is already completed with the name of your wireless network. If you set up your router manually, the default name is Cisco followed by the last five digits of the router's serial number. 4. You can also: •• Change the FTP Port (default - Cisco E2500 | User Manual - Page 57
the Internet, you can: •• Use FTP (File Transfer Protocol) client software to connect to your router. You will need to enter your router's IP address. If access to your router requires a user name and password, you will also need to enter those details. For more information on using the FTP client - Cisco E2500 | User Manual - Page 58
open a parent folder. •• Click or right-click a file to download or view it. •• Drag a file from another window and drop it into the FTP window to upload it. (To upload a file, your user account must have write access.) How to set up your router as a media server For E4200 What is a media server and - Cisco E2500 | User Manual - Page 59
networking. If you are connecting wirelessly, you need to know your network's name and password. See your device's documentation for help. 2. On your UPnP device, change the media source to the media server name you specified on your router. (See "How to set up your router as a media server" on - Cisco E2500 | User Manual - Page 60
, to a web server. To set up single port forwarding: Applications & Gaming > Single Port Forwarding 1. Follow your device's instructions for configuring it with a static IP address or use DHCP reservation to assign it a permanent address (see "How to set up the DHCP server on your router" on page 24 - Cisco E2500 | User Manual - Page 61
to forward additional ports to the same IP address. Example: You want to set up your computer so you can remotely access it using VNC software. By default, VNC uses TCP ports 5800 and 5900. To set up single port forwarding for multiple ports: Applications & Gaming > Single Port Forwarding 1. Make - Cisco E2500 | User Manual - Page 62
the software. (See "How to set up the DHCP server on your router" on page 24). In this example, the IP address of the desktop computer with BitTorrent installed is 192.168.1.140. 3. Click the Applications & Gaming tab, then click the Port Range Forwarding page. 4. Enter a descriptive name, then - Cisco E2500 | User Manual - Page 63
using multiple entries of single port forwarding: Applications & Gaming > Single Port Forwarding 1. Connect your Xbox 360 to your router. 1. Log into the browser-based utility (see "How to open the browser-based utility" on page 21). 2. Set up a DHCP reservation for the IP address of the Xbox. (See - Cisco E2500 | User Manual - Page 64
exhausted all other troubleshooting measures, you may want to reset the router to factory defaults. Resetting the router erases all of your settings, so you must restore the settings after. We recommend that you back up your configuration before resetting your router to factory defaults. See "How to - Cisco E2500 | User Manual - Page 65
Sleep mode. It might interrupt the upgrade process. If you are upgrading from a computer with a wireless network connection, make sure that you have strong wireless signal strength. If not, move your computer closer to your router. TIPS Each time you run Cisco Connect, it checks for software updates - Cisco E2500 | User Manual - Page 66
take note of the current firmware version for your router. 3. Using your web browser, connect to Linksys.com/support, then find your router model. 4. Click the Downloads tab, then select the hardware version for your router from the Select Hardware Version drop-down list. Maintaining and Monitoring - Cisco E2500 | User Manual - Page 67
tab, then click the Wireless Network page. Your wireless network status is displayed. 3. Click the Status tab, then click the Local Network page. Your local network's IP address information and the DHCP server settings are displayed. 6. Click the Status tab, then click the Ports page. The link - Cisco E2500 | User Manual - Page 68
E-Series The Cisco Connect main menu opens. 2. Under Router Settings, click Change. 3. Under Port lights, click Off, then click Finish. Maintaining and Monitoring How to test your Internet connection What utilities are included in my router to test my Internet connection? Your router includes two - Cisco E2500 | User Manual - Page 69
, enter an address in the IP or URL Address field of the Traceroute Test section, then click Start to Traceroute. How to configure and use logs What kind of logging capabilities does my router have? Your router can track all traffic for your Internet connection. Your router supports four types of - Cisco E2500 | User Manual - Page 70
drop-down list. •• Incoming Log-The source IP addresses and destination port numbers for incoming Internet traffic •• Outgoing Log-Local IP addresses, destination URLs/IP addresses, and service/port numbers for outgoing Internet traffic •• Security Log-Logins for the browser-based utility •• DHCP - Cisco E2500 | User Manual - Page 71
Diagnostics Ping Test Traceroute Test Factory Defaults Factory Defaults Firmware Upgrade Firmware Upgrade Status Router Router Information Internet Connection Local Network Local Network DHCP Server Wireless Network Wireless Network Ports Rear Port Lights Internet Port Link Local Port Link 61 - Cisco E2500 | User Manual - Page 72
E2500 Setup Basic Setup Language Internet Setup Internet Connection Type Optional Settings Network Setup Router Address DHCP Server Setting Time Settings Time Zone Reboot DDNS DDNS DDNS Service MAC Address Clone MAC Address Clone Advanced Routing NAT Dynamic Routing (RIP) Static Routing Wireless - Cisco E2500 | User Manual - Page 73
Access Advanced features UPnP Back Up and Restore Log Diagnostics Ping Test Traceroute Test Factory Defaults Firmware Upgrade Status Router Router Information Internet Connection Local Network Local Network DHCP Server Wireless Network 5 GHz Wireless Network 2.4 GHz Wireless Network Ports Rear Port - Cisco E2500 | User Manual - Page 74
Access Advanced features UPnP Back Up and Restore Log Diagnostics Ping Test Traceroute Test Factory Defaults Firmware Upgrade Status Router Router Information Internet Connection Local Network Local Network DHCP Server Wireless Network 5 GHz Wireless Network 2.4 GHz Wireless Network Ports Rear Port - Cisco E2500 | User Manual - Page 75
13~15 802.11g: 14.5 ± 1.5dBm @ CH6, all rates 802.11b: 16.5 ± 1.5dBm @ CH6, all rates ≤2.5 dBi, ≤4.0 dBi (2 antennas) Supported Wi-Fi Protected Access™ 2 (WPA2), WEP, wireless MAC filtering Up to 128-bit encryption Specifications Environmental Dimensions Unit Weight Power Certifications Operating - Cisco E2500 | User Manual - Page 76
dBm @ CH6, 54 Mbps 802.11b: 18.0 ± 1.5 dBm @ CH6, all rates ≤3.0 dBi, ≤4.0 dBi, ≤4.5 dBi (3 antennas) Supported Wi-Fi Protected Access 2 (WPA2), WEP, wireless MAC filtering Up to 128-bit encryption Specifications Environmental Dimensions Unit Weight Power Certifications Operating Temp. Storage - Cisco E2500 | User Manual - Page 77
key bits Linksys E2500 Advanced Dual-Band N Router E2500 4 total, 2 internal antennas per each 2.4 GHz & 5 GHz radio band No 802.11b: CCK, QPSK, BPSK 802.11g: OFDM 802.11a: OFDM 802.11n: BPSK, QPSK, 16-QAM, 64-QAM 2.4 GHz 802.11b: -87 dBm @ 11 Mbps 802.11g: -70 dBm @ 54 Mbps 802.11n 20 MHz - Cisco E2500 | User Manual - Page 78
E3200 High Performance Dual-Band N Router E3200 6 total, 3 internal antennas per each 2.4 GHz & 5 GHz radio band No 10/100/1000 Mbps Internet, Ethernet (1-4), USB, Power Reset, Wi-Fi Protected Setup Power, Ethernet (1-4) 802.11b: CCK, QPSK, BPSK 802.11g: OFDM 802.11a: OFDM 802.11n: BPSK, QPSK - Cisco E2500 | User Manual - Page 79
dBi Linksys E4200 Maximum Performance Wireless-N Router E4200 802.11n, 802.11a, 802.11g, 802.11b, 802.3, 802.3u, 802.3ab 2.4 and 5 GHz 10/100/1000 Mbps (Gigabit Ethernet) Power, USB, Internet, Ethernet (1-4) Reset, Wi-Fi Protected Setup Top panel: Power Back panel: Internet, Ethernet (1-4) 6 total - Cisco E2500 | User Manual - Page 80
Visit linksys.com/support for award-winning 24/7 technical support Cisco, the Cisco logo, Flip, and Linksys are trademarks or registered trademarks of Cisco and/or its affiliates in the United States and other countries. A listing of Cisco's trademarks can be found at www.cisco.com/go/trademarks.
-
 1
1 -
 2
2 -
 3
3 -
 4
4 -
 5
5 -
 6
6 -
 7
7 -
8
-
9
-
10
-
11
-
12
-
13
-
14
-
15
-
16
-
17
-
18
-
19
-
20
-
21
-
22
-
23
-
24
-
25
-
26
-
27
-
28
-
29
-
30
-
31
-
32
-
33
-
34
-
35
-
36
-
37
-
38
-
39
-
40
-
41
-
42
-
43
-
44
-
45
-
46
-
47
-
48
-
49
-
50
-
51
-
52
-
53
-
54
-
55
-
56
-
57
-
58
-
59
-
60
-
61
-
62
-
63
-
64
-
65
-
66
-
67
-
68
-
69
-
70
-
71
-
72
-
73
-
74
-
75
-
76
-
77
-
78
-
79
-
80
 |
 |
User Guide
Linksys E-Series Routers