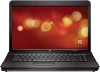
Compaq 600 Compaq 615 Notebook PC and Compaq 610 Notebook PC - Maintenance and
Compaq 600 Manual
 |
View all Compaq 600 manuals
Add to My Manuals
Save this manual to your list of manuals |
Compaq 600 manual content summary:
- Compaq 600 | Compaq 615 Notebook PC and Compaq 610 Notebook PC - Maintenance and - Page 1
Compaq 615 Notebook PC Compaq 610 Notebook PC Maintenance and Service Guide Document Part Number: 533504-001 June 2009 This guide is a troubleshooting reference used for maintaining and servicing the computer. It provides comprehensive information on identifying computer features, components, and - Compaq 600 | Compaq 615 Notebook PC and Compaq 610 Notebook PC - Maintenance and - Page 2
and other countries. Microsoft, Windows, and Windows Vista are U.S. registered trademarks of Microsoft Corporation. SD Logo is a trademark of its proprietor. The information contained herein is subject to change without notice. The only warranties for HP products and services are set forth in the - Compaq 600 | Compaq 615 Notebook PC and Compaq 610 Notebook PC - Maintenance and - Page 3
or rugs or clothing, to block airflow. Also, do not allow the AC adapter to contact the skin or a soft surface, such as pillows or rugs or clothing, during operation. The computer and the AC adapter comply with the user-accessible surface temperature limits defined by the International Standard for - Compaq 600 | Compaq 615 Notebook PC and Compaq 610 Notebook PC - Maintenance and - Page 4
replacement requirements 4-1 Tools required 4-1 Service considerations 4-1 Grounding guidelines 4-2 Component replacement procedures 4-5 Service tag 4-5 Computer feet 4-6 Battery 4-6 Hard drive 4-8 WLAN module 4-12 Memory module 4-16 Optical drive 4-18 Maintenance and Service Guide - Compaq 600 | Compaq 615 Notebook PC and Compaq 610 Notebook PC - Maintenance and - Page 5
Menu 5-10 6 Specifications Computer specifications 6-1 15.6-in display specifications 6-2 Hard drive specifications 6-3 DVD±RW and CD-RW SuperMulti Double-Layer Drive specifications 6-4 DVD-ROM Drive specifications 6-5 System DMA specifications 6-5 System memory map specifications 6-6 System - Compaq 600 | Compaq 615 Notebook PC and Compaq 610 Notebook PC - Maintenance and - Page 6
in Windows XP 8-5 Overview 8-5 Backing up your information 8-5 Performing a recovery 8-6 9 Connector pin assignments Audio-in (microphone 9-1 Audio-out (headphone 9-1 External monitor 9-2 RJ-11 (modem 9-3 RJ-45 (network 9-3 Universal Serial Bus 9-4 Maintenance and Service Guide vi - Compaq 600 | Compaq 615 Notebook PC and Compaq 610 Notebook PC - Maintenance and - Page 7
Contents 10 Power cord set requirements Requirements for all countries and regions 10-1 Requirements for specific countries and regions 10-2 11 Recycling Battery 11-1 Display 11-1 Index vii Maintenance and Service Guide - Compaq 600 | Compaq 615 Notebook PC and Compaq 610 Notebook PC - Maintenance and - Page 8
graphics subsystem with UMA memory and processor with up to 800-MHz FSB: GME965 Intel with graphics subsystem with UMA memory and processor with up to 533-MHz FSB: GLE960 Southbridge: ICH8m Compaq 615 Notebook PC x x x x Compaq 610 Notebook PC x x x x x x (Continued) Maintenance and Service Guide - Compaq 600 | Compaq 615 Notebook PC and Compaq 610 Notebook PC - Maintenance and - Page 9
(1024 + 512, dual-channel) ■ 1024-MB total system memory (512 × 2, dual-channel) ■ 1024-MB total system memory (1024 × 1) ■ 512-MB total system memory (512 × 1) Compaq 615 Notebook PC x x x x x x x x x x Compaq 610 Notebook PC x x x x x x x x x x (Continued) 1-2 Maintenance and Service Guide - Compaq 600 | Compaq 615 Notebook PC and Compaq 610 Notebook PC - Maintenance and - Page 10
Double-Layer Drive with LightScribe ■ 8X DVD-ROM Drive Integrated IDT92HD75 microphone Single mono speaker Headphone jack Microphone jack Integrated 2-megapixel webcam with fixed focus Compaq 615 Notebook PC x x x x x x x x Maintenance and Service Guide Product description Compaq 610 Notebook PC - Compaq 600 | Compaq 615 Notebook PC and Compaq 610 Notebook PC - Maintenance and - Page 11
MMC Plus, including MMC Plus HC), Secure Digital (SD) Memory Card, Secure Digital High Capacity (SDHC) Memory Card, and Secure Digital High Speed (SDHS) Memory Card Compaq 615 Notebook PC x x x x x x x x x x Compaq 610 Notebook PC x x x x x x x x x x (Continued) 1-4 Maintenance and Service Guide - Compaq 600 | Compaq 615 Notebook PC and Compaq 610 Notebook PC - Maintenance and - Page 12
2007 Professional (Japanese only) ■ Windows Vista Business (32 bit, with Windows XP Pro images) with Office 2007 Ready Compaq 615 Notebook PC x x x x x x x x x x x x Product description Compaq 610 Notebook PC x x x x x x x x x x x x x x x x x x (Continued) Maintenance and Service Guide 1-5 - Compaq 600 | Compaq 615 Notebook PC and Compaq 610 Notebook PC - Maintenance and - Page 13
Windows XP Pro ■ Red Flag Linux ■ SRDVD SuSE Linux ■ Office Ready DVD Certified: ■ Microsoft® WHQL ■ SuSE Linux End-user replaceable parts: AC adapter Battery (system) Hard drive Memory modules Optical drive WLAN module Compaq 615 Notebook PC x x x x x x x x x x x x x x x x Compaq 610 Notebook PC - Compaq 600 | Compaq 615 Notebook PC and Compaq 610 Notebook PC - Maintenance and - Page 14
wireless devices. ✎ The antennas are not visible from the outside of the computer. For optimal transmission, keep the areas immediately around the antennas free from applies to your country or region. These notices are located in Help and Support. On: The webcam is in use. Records video and captures - Compaq 600 | Compaq 615 Notebook PC and Compaq 610 Notebook PC - Maintenance and - Page 15
, headphones, ear buds, a headset, or television audio. ✎ When a device is connected to the headphone jack, the computer speakers are disabled. Records sound. Connects an optional computer headset microphone, stereo array microphone, or monaural microphone. 2-2 Maintenance and Service Guide - Compaq 600 | Compaq 615 Notebook PC and Compaq 610 Notebook PC - Maintenance and - Page 16
and Windows shutdown procedures are ineffective, press and hold the power button for at least 5 seconds to turn off the computer. To learn more about your power settings, select Start > Control Panel > System and Maintenance > Power Options. Produces sound. Maintenance and Service Guide 2-3 - Compaq 600 | Compaq 615 Notebook PC and Compaq 610 Notebook PC - Maintenance and - Page 17
Item (1) (2) esc key fn key Component (3) Windows logo key (4) Windows applications key (5) Embedded numeric keypad keys (6) Function when pressed in combination with a function key or the esc key. Displays the Windows Start menu. Displays a shortcut menu for items beneath the pointer. Can be used - Compaq 600 | Compaq 615 Notebook PC and Compaq 610 Notebook PC - Maintenance and - Page 18
wireless device, such as a wireless local area network (WLAN) device and/or a Bluetooth® device, is on. ■ Amber: All wireless devices are off. ■ On: The computer is on. ■ Blinking: The computer is in the Sleep state. ■ Off: The computer is off or in Hibernation. Maintenance and Service Guide 2-5 - Compaq 600 | Compaq 615 Notebook PC and Compaq 610 Notebook PC - Maintenance and - Page 19
scroll zone Scrolls up or down. (4) Right TouchPad button* Functions like the right button on an external mouse. *This table describes factory settings. To view or change pointing device preferences, select Start > Control Panel > Hardware and Sound > Mouse. 2-6 Maintenance and Service Guide - Compaq 600 | Compaq 615 Notebook PC and Compaq 610 Notebook PC - Maintenance and - Page 20
Audio-out (headphone) jack (2) Internal microphone (3) Audio-in (microphone) jack (4) SD Card Reader Description Produces sound when connected to optional powered stereo speakers, headphones, ear buds, a headset, or television audio. ✎ When a device is connected to the headphone jack, the computer - Compaq 600 | Compaq 615 Notebook PC and Compaq 610 Notebook PC - Maintenance and - Page 21
models, also writes to optical discs. Blinking: The optical drive is being accessed. Attaches an optional security cable to the computer. ✎ The security cable is designed to act as a deterrent, but it may not prevent the computer from being mishandled or stolen. 2-8 Maintenance and Service Guide - Compaq 600 | Compaq 615 Notebook PC and Compaq 610 Notebook PC - Maintenance and - Page 22
when all batteries in the computer are fully charged. If the computer is not plugged into an external power source the light stays off until the battery reaches a low battery level. Connects an AC adapter. Connects a network cable. Connect optional USB devices. Maintenance and Service Guide 2-9 - Compaq 600 | Compaq 615 Notebook PC and Compaq 610 Notebook PC - Maintenance and - Page 23
agency that regulates wireless devices in your country. If you replace the module and then receive a warning message, remove the module to restore computer functionality, and then contact technical support through Help and Support. Holds the hard drive. 2-10 Maintenance and Service Guide - Compaq 600 | Compaq 615 Notebook PC and Compaq 610 Notebook PC - Maintenance and - Page 24
This number provides specific information about the product's hardware components. The part number helps a service technician to determine what components and parts are needed. This is the alphanumeric identifier used to locate documents, drivers, and support for the computer. This number describes - Compaq 600 | Compaq 615 Notebook PC and Compaq 610 Notebook PC - Maintenance and - Page 25
Illustrated parts catalog Computer major components 3-2 Maintenance and Service Guide - Compaq 600 | Compaq 615 Notebook PC and Compaq 610 Notebook PC - Maintenance and - Page 26
computer models not equipped with a webcam 538422-001 ✎ See "Display assembly subcomponents" on page 3-9 for display assembly internal component spare part information. Switch cover (includes power button board and cable) 538452-001 Keyboard (includes keyboard cable and Service Guide 3-3 - Compaq 600 | Compaq 615 Notebook PC and Compaq 610 Notebook PC - Maintenance and - Page 27
use only on computer models equipped with a graphics subsystem with 538407-001 UMA memory ■ GM system board for use only on computer models equipped with a graphics subsystem 538409-001 with UMA memory (8) Optical drive connector board 538460-001 (Continued) 3-4 Maintenance and Service Guide - Compaq 600 | Compaq 615 Notebook PC and Compaq 610 Notebook PC - Maintenance and - Page 28
computer models equipped with a graphics subsystem with UMA memory 538457-001 Fan 538455-001 Base enclosure (includes seven rubber feet) 538445-001 Rubber Feet Kit (not illustrated, includes seven feet and eight display bezel screw covers) 538448-001 (Continued) Maintenance and Service Guide - Compaq 600 | Compaq 615 Notebook PC and Compaq 610 Notebook PC - Maintenance and - Page 29
-Ah (63-Wh) Li-ion battery 572191-001 ■ 6-cell, 2.20-Ah (47-Wh) Li-ion battery 572190-001 WLAN module: 802.11a/b/g/n WLAN module for use with all computer models: ■ Broadcom 4322AGN 802.11a Vietnam, Yemen, Zaire, Zambia, and Zimbabwe 518434-002 (Continued) 3-6 Maintenance and Service Guide - Compaq 600 | Compaq 615 Notebook PC and Compaq 610 Notebook PC - Maintenance and - Page 30
, Yemen, Zaire, Zambia, and Zimbabwe 504593-004 802.11a/b/g WLAN modules for use only on computer models equipped with an Intel processor: ■ Intel PRO/wireless 3945 802.11a/b/g WLAN module for use WLAN module for use in South Korea 409280-004 (Continued) Maintenance and Service Guide 3-7 - Compaq 600 | Compaq 615 Notebook PC and Compaq 610 Notebook PC - Maintenance and - Page 31
Drive with LightScribe ■ DVD-ROM Drive For use only on computer models equipped with an Intel processor: ■ DVD±RW and CD-RW SuperMulti Double-Layer Drive with LightScribe ■ DVD-ROM Drive Memory modules: For use only on computer -001 538433-001 538432-001 538431-001 3-8 Maintenance and Service Guide - Compaq 600 | Compaq 615 Notebook PC and Compaq 610 Notebook PC - Maintenance and - Page 32
equipped with a webcam For use only on computer models not equipped with a webcam Webcam module Display hinges Display Cable Kit, includes: Webcam module cable Display panel cable Wireless antenna cable Display enclosure Maintenance and Service Guide Spare part number 538428-001 538427-001 538443 - Compaq 600 | Compaq 615 Notebook PC and Compaq 610 Notebook PC - Maintenance and - Page 33
Illustrated parts catalog Mass storage devices 3-10 Maintenance and Service Guide - Compaq 600 | Compaq 615 Notebook PC and Compaq 610 Notebook PC - Maintenance and - Page 34
-Layer Drive with LightScribe ■ DVD-ROM Drive Illustrated parts catalog Spare part number 538405-001 538404-001 575199-001 538403-001 575198-001 538402-001 538440-001 538439-001 575197-001 538438-001 575196-001 538437-001 538406-001 575200-001 538442-001 538441-001 Maintenance and Service Guide - Compaq 600 | Compaq 615 Notebook PC and Compaq 610 Notebook PC - Maintenance and - Page 35
Wireless module compartment cover Hard drive cover (includes three captive screws, secured by C-clips) Memory module compartment cover (includes one captive screw, secured by a C-clip) RJ-11 connector cover Optical drive bay bezel Spare part number 538450-001 3-12 Maintenance and Service Guide - Compaq 600 | Compaq 615 Notebook PC and Compaq 610 Notebook PC - Maintenance and - Page 36
AC adapters: ■ 90-W PFC HP Smart Adapter (for use only on computer models equipped with graphics subsystems with discrete memory) ■ 65-W PFC HP Smart Adapter (for use only on computer models equipped with graphics subsystems with UMA memory) Power cords 538449-001 Maintenance and Service Guide 3-13 - Compaq 600 | Compaq 615 Notebook PC and Compaq 610 Notebook PC - Maintenance and - Page 37
Intel processor in South Korea 65-W PFC HP Smart Adapter (for use only on computer models equipped with graphics subsystems with UMA memory) 90-W PFC HP Smart Adapter (for use only on computer models equipped with graphics subsystems with discrete memory) RTC battery Intel PRO/wireless 3945 802.11a - Compaq 600 | Compaq 615 Notebook PC and Compaq 610 Notebook PC - Maintenance and - Page 38
replacement thermal material) AMD Athlon QL-64 2.10-GHz processor (1-MB L2 cache, includes replacement replacement thermal material) AMD Sempron SI-42 2.10-GHz processor (512-KB L2 cache, includes replacement include a modem module cable. The modem module cable is included in the Cable Kit, spare part - Compaq 600 | Compaq 615 Notebook PC and Compaq 610 Notebook PC - Maintenance and - Page 39
do not include a Bluetooth module cable. The Bluetooth module cables are included in the Cable Kit, spare part number 538465-001. System board for use only on computer models equipped with an AMD processor and a graphics subsystem with UMA memory (includes replacement thermal material) System board - Compaq 600 | Compaq 615 Notebook PC and Compaq 610 Notebook PC - Maintenance and - Page 40
and hard drive bracket) DVD-ROM Drive for use only on computer models equipped with an Intel processor DVD±RW and CD-RW SuperMulti Double-Layer Drive with LightScribe for use only on computer models equipped with an Intel processor Webcam module (Continued) Maintenance and Service Guide 3-17 - Compaq 600 | Compaq 615 Notebook PC and Compaq 610 Notebook PC - Maintenance and - Page 41
processor and a graphics subsystem with discrete memory (includes replacement thermal material) Optical drive connector board Display hinges Display Cable Kit ✎ See "Display assembly subcomponents" on page 3-9 for display assembly internal component spare part information. Cable Kit Keyboard for use - Compaq 600 | Compaq 615 Notebook PC and Compaq 610 Notebook PC - Maintenance and - Page 42
on computer models equipped with an AMD processor (includes hard drive connector and hard drive bracket) 250-GB, 7200-rpm hard drive for use only on computer models equipped with an AMD processor (includes hard drive connector and hard drive bracket) (Continued) Maintenance and Service Guide 3-19 - Compaq 600 | Compaq 615 Notebook PC and Compaq 610 Notebook PC - Maintenance and - Page 43
-001 576207-001 576208-001 576209-001 Description DVD-ROM Drive for use only on computer models equipped with an AMD processor (includes bezel and bracket) Intel Celeron 550 2.00-GHz processor (1-MB L2 cache, 533-MHz FSB, includes replacement thermal material) Intel Celeron 560 2.13-GHz processor - Compaq 600 | Compaq 615 Notebook PC and Compaq 610 Notebook PC - Maintenance and - Page 44
during disassembly and reassembly can damage plastic parts. Use care when handling the plastic parts. Apply pressure only at the points designated in the maintenance instructions. Cables and connectors Ä CAUTION: When servicing the computer, be sure that cables are placed in their proper locations - Compaq 600 | Compaq 615 Notebook PC and Compaq 610 Notebook PC - Maintenance and - Page 45
computer, damage to a drive, or loss of information, observe these precautions: ■ Before removing or inserting a hard drive, shut down the computer. If you are unsure whether the computer is off or in Hibernation, turn the computer the computer when you are removing or installing Service Guide - Compaq 600 | Compaq 615 Notebook PC and Compaq 610 Notebook PC - Maintenance and - Page 46
Removal and replacement procedures The following table shows how humidity affects the electrostatic voltage levels ground and that proper materials are selected to avoid static charging. When grounding is not possible, use an ionizer to dissipate electric charges. Maintenance and Service Guide 4-3 - Compaq 600 | Compaq 615 Notebook PC and Compaq 610 Notebook PC - Maintenance and - Page 47
or soldering aids ■ Nonconductive foam ■ Conductive tabletop workstations with ground cords of one megohm resistance ■ Static-dissipative tables or floor mats with hard ties to the ground ■ Field service kits ■ Static awareness labels ■ Material-handling packages ■ Nonconductive plastic bags - Compaq 600 | Compaq 615 Notebook PC and Compaq 610 Notebook PC - Maintenance and - Page 48
This number provides specific information about the product's hardware components. The part number helps a service technician to determine what components and parts are needed. This is the alphanumeric identifier used to locate documents, drivers, and support for the computer. This number describes - Compaq 600 | Compaq 615 Notebook PC and Compaq 610 Notebook PC - Maintenance and - Page 49
and then shut it down through the operating system. 2. Disconnect all external devices connected to the computer. 3. Disconnect the power from the computer by first unplugging the power cord from the AC outlet and then unplugging the AC adapter from the computer. 4-6 Maintenance and Service Guide - Compaq 600 | Compaq 615 Notebook PC and Compaq 610 Notebook PC - Maintenance and - Page 50
Turn the computer upside down on a flat surface, with the battery bay toward you. 2. Slide the battery release latches 1 to release the battery. 3. Remove the battery 2 from the computer. Install the battery by inserting it into the battery bay until you hear a click. Maintenance and Service Guide - Compaq 600 | Compaq 615 Notebook PC and Compaq 610 Notebook PC - Maintenance and - Page 51
. 2. Disconnect all external devices connected to the computer. 3. Disconnect the power from the computer by first unplugging the power cord from the AC outlet and then unplugging the AC adapter from the computer. 4. Remove the battery (see "Battery" on page 4-6). 4-8 Maintenance and Service Guide - Compaq 600 | Compaq 615 Notebook PC and Compaq 610 Notebook PC - Maintenance and - Page 52
screws 1 that secure the hard drive cover to the computer. 3. Lift the right side 2 of the hard drive cover to detach it from the computer. 4. Remove the hard drive cover 3. The hard drive cover is included in the Plastics Kit, spare part number 538450-001. Maintenance and Service Guide 4-9 - Compaq 600 | Compaq 615 Notebook PC and Compaq 610 Notebook PC - Maintenance and - Page 53
and replacement procedures 5. Loosen the Phillips PM2.5×11.0 captive screw 1 that secures the hard drive in the hard drive bay. 6. Grasp the Mylar tab 2 on the hard drive and slide the hard drive 3 to the left. 7. Remove the hard drive 4 from the hard drive bay. 4-10 Maintenance and Service Guide - Compaq 600 | Compaq 615 Notebook PC and Compaq 610 Notebook PC - Maintenance and - Page 54
to replace the hard drive bracket, follow these steps: a. Remove the two Phillips PM3.0×4.0 screws 1 from each side of the hard drive. b. Lift the bracket 2 straight up to remove it from the hard drive. Reverse this procedure to reassemble and install the hard drive. Maintenance and Service Guide - Compaq 600 | Compaq 615 Notebook PC and Compaq 610 Notebook PC - Maintenance and - Page 55
Removal and replacement procedures WLAN module Description Spare part number 802.11a/b/g/n WLAN module for use with all computer models: ■ Broadcom 4322AGN 802.11a/b/g/n WLAN module for use in , Yemen, Zaire, Zambia, and Zimbabwe 518434-002 (Continued) 4-12 Maintenance and Service Guide - Compaq 600 | Compaq 615 Notebook PC and Compaq 610 Notebook PC - Maintenance and - Page 56
Removal and replacement procedures Description Spare part number 802.11a/b/g WLAN modules for use on all computer models: ■ Broadcom 4312G 802.11a/b/g WLAN module for use in Canada, the Cayman Islands, 802.11a/b/g WLAN module for use in South Korea 409280-004 Maintenance and Service Guide 4-13 - Compaq 600 | Compaq 615 Notebook PC and Compaq 610 Notebook PC - Maintenance and - Page 57
to the computer. 3. Disconnect the power from the computer by first unplugging the power cord from the AC outlet and then unplugging the AC adapter from the computer. 4. Remove the battery (see "Battery" on page 4-6). Remove the WLAN module: Ä CAUTION: To prevent an unresponsive system, replace the - Compaq 600 | Compaq 615 Notebook PC and Compaq 610 Notebook PC - Maintenance and - Page 58
the computer.) 6. Remove the WLAN module 3 by pulling the module away from the slot at an angle. ✎ WLAN modules are designed with a notch 4 to prevent incorrect insertion of the WLAN module into the WLAN module slot. Reverse this procedure to install the WLAN module. Maintenance and Service Guide - Compaq 600 | Compaq 615 Notebook PC and Compaq 610 Notebook PC - Maintenance and - Page 59
2. Disconnect all external devices connected to the computer. 3. Disconnect the power from the computer by first unplugging the power cord from the AC outlet and then unplugging the AC adapter from the computer. 4. Remove the battery (see "Battery" on page 4-6). 4-16 Maintenance and Service Guide - Compaq 600 | Compaq 615 Notebook PC and Compaq 610 Notebook PC - Maintenance and - Page 60
from the computer.) 6. Remove the memory module 2 by pulling the module away from the slot at an angle. ✎ Memory modules are designed with a notch 3 to prevent incorrect insertion into the memory module slot. Reverse this procedure to install a memory module. Maintenance and Service Guide 4-17 - Compaq 600 | Compaq 615 Notebook PC and Compaq 610 Notebook PC - Maintenance and - Page 61
connected to the computer. 3. Disconnect the power from the computer by first unplugging the power cord from the AC outlet and then unplugging the AC adapter from the computer. 4. Remove the battery (see "Battery" on page 4-6). Remove the optical drive: 1. Position the computer with the front - Compaq 600 | Compaq 615 Notebook PC and Compaq 610 Notebook PC - Maintenance and - Page 62
the optical drive with the rear toward you. b. Remove the two Phillips PM2.0×3.0 screws 1 that secure the optical drive bracket to the optical drive. c. Remove the optical drive bracket 2. Reverse this procedure to reassemble and install the optical drive. Maintenance and Service Guide 4-19 - Compaq 600 | Compaq 615 Notebook PC and Compaq 610 Notebook PC - Maintenance and - Page 63
Removal and replacement procedures Keyboard and switch cover For use in country or region: ■ For use in Belgium ■ For use in Brazil ■ For use in Bulgaria ■ For BA1 539682-AD1 539682-071 539682-B71 539682-BG1 539682-AB1 539682-281 539682-141 539682-031 539682-001 4-20 Maintenance and Service Guide - Compaq 600 | Compaq 615 Notebook PC and Compaq 610 Notebook PC - Maintenance and - Page 64
external devices connected to the computer. 3. Disconnect the power from the computer by first unplugging the power cord from the AC outlet and then unplugging the AC adapter from the computer. 4. Remove the battery (see "Battery" on page 4-6). Remove the keyboard and switch cover: 1. Position the - Compaq 600 | Compaq 615 Notebook PC and Compaq 610 Notebook PC - Maintenance and - Page 65
Removal and replacement procedures 3. Turn the computer display-side up with the front toward you. 4. Open the computer as far as edge 1 of the keyboard until it rests at an angle. 8. Slide the keyboard 2 back until it rests on the switch cover and display. 4-22 Maintenance and Service Guide - Compaq 600 | Compaq 615 Notebook PC and Compaq 610 Notebook PC - Maintenance and - Page 66
the keyboard. 11. Release the ZIF connector 1 to which the power button board cable is attached, and disconnect the power button board cable 2 from the system board. 12. Remove the switch cover 3. Reverse this procedure to install the keyboard and switch cover. Maintenance and Service Guide 4-23 - Compaq 600 | Compaq 615 Notebook PC and Compaq 610 Notebook PC - Maintenance and - Page 67
unplugging the power cord from the AC outlet and then unplugging the AC adapter from the computer. 4. Remove the battery (see "Battery" on page 4-6). 5. Remove the keyboard and switch cover (see "Keyboard and switch cover" on page 4-20). Remove the speaker: 1. Disconnect the speaker cable 1 from the - Compaq 600 | Compaq 615 Notebook PC and Compaq 610 Notebook PC - Maintenance and - Page 68
by first unplugging the power cord from the AC outlet and then unplugging the AC adapter from the computer. 4. Remove the battery (see "Battery" on page 4-6). 5. Disconnect the wireless antenna cables from the WLAN module (see "WLAN module" on page 4-12). 6. Remove the keyboard and switch cover (see - Compaq 600 | Compaq 615 Notebook PC and Compaq 610 Notebook PC - Maintenance and - Page 69
base enclosure. 4. Turn the computer display-side up with the front toward you. 5. Open the computer as far as possible. 6. Disconnect the display panel cable 1 from the system board. 7. Release the display panel cable from the clip 2 built into the top cover. 4-26 Maintenance and Service Guide - Compaq 600 | Compaq 615 Notebook PC and Compaq 610 Notebook PC - Maintenance and - Page 70
to support the display assembly can result in damage to the display assembly and other computer components. 10. Remove the four Phillips PM2.5×6.0 screws 1 that secure the display assembly to the computer. 11. Lift the display assembly 2 straight up and remove it. Maintenance and Service Guide - Compaq 600 | Compaq 615 Notebook PC and Compaq 610 Notebook PC - Maintenance and - Page 71
procedures 12. If it is necessary to replace the display bezel or any of the display assembly internal components numbers: ❏ 538428-001-for use only on computer models equipped with a webcam ❏ 538427-001-for use only on computer models not equipped with a webcam 4-28 Maintenance and Service Guide - Compaq 600 | Compaq 615 Notebook PC and Compaq 610 Notebook PC - Maintenance and - Page 72
is available using spare part number 538443-001. 18. If it is necessary to replace the display hinges, remove four Phillips PM2.5×5.0 screws 1 that secure the display panel to the display enclosure. 19. Remove the display panel 2 from the display enclosure. Maintenance and Service Guide 4-29 - Compaq 600 | Compaq 615 Notebook PC and Compaq 610 Notebook PC - Maintenance and - Page 73
using spare part number 538462-001. 22. If it is necessary to replace the display panel cable, turn the display panel upside down with the bottom edge toward you. 23. Release the adhesive support strip 1 that secures the display panel cable to the display panel. 24. Disconnect the display panel - Compaq 600 | Compaq 615 Notebook PC and Compaq 610 Notebook PC - Maintenance and - Page 74
shielding. 31. Remove the wireless antenna transceivers and cables 4. The wireless antenna transceivers and cables are included in the Display Cable Kit, spare part number 538463-001. Reverse this procedure to reassemble and install the display assembly. Maintenance and Service Guide 4-31 - Compaq 600 | Compaq 615 Notebook PC and Compaq 610 Notebook PC - Maintenance and - Page 75
unplugging the power cord from the AC outlet and then unplugging the AC adapter from the computer. 4. Remove the battery (see "Battery" on page 4-6). 5. Remove the following components: a. Hard drive (see "Hard drive" on page 4-8) b. Optical drive (see "Optical drive" on page 4-18) c. Keyboard and - Compaq 600 | Compaq 615 Notebook PC and Compaq 610 Notebook PC - Maintenance and - Page 76
Removal and replacement procedures 3. Turn the computer right-side up with the front cable 3 is accessible. 7. Disconnect the TouchPad cable from the system board. 8. Remove the top cover 4 by lifting it straight up. Reverse this procedure to install the top cover. Maintenance and Service Guide - Compaq 600 | Compaq 615 Notebook PC and Compaq 610 Notebook PC - Maintenance and - Page 77
unplugging the power cord from the AC outlet and then unplugging the AC adapter from the computer. 4. Remove the battery (see "Battery" on page 4-6). 5. Remove the following components: a. Hard drive (see "Hard drive" on page 4-8) b. Optical drive (see "Optical drive" on page 4-18) c. Keyboard and - Compaq 600 | Compaq 615 Notebook PC and Compaq 610 Notebook PC - Maintenance and - Page 78
unplugging the power cord from the AC outlet and then unplugging the AC adapter from the computer. 4. Remove the battery (see "Battery" on page 4-6). 5. Remove the following components: a. Hard drive (see "Hard drive" on page 4-8) b. Optical drive (see "Optical drive" on page 4-18) c. Keyboard and - Compaq 600 | Compaq 615 Notebook PC and Compaq 610 Notebook PC - Maintenance and - Page 79
replacement procedures Remove the system board: 1. Disconnect the fan cable 1 from the system board. 2. Remove the Phillips PM2.5×4.0 screw 2 that secures the system board to the base enclosure. 3. Remove the two Phillips PM2.5×4.0 screws 3 that secure the optical drive Maintenance and Service Guide - Compaq 600 | Compaq 615 Notebook PC and Compaq 610 Notebook PC - Maintenance and - Page 80
to replace the optical drive connector board, disconnect the board from the system board. The optical drive connector board is available using spare part number 538460-001. Reverse this procedure to install the system board and optical drive connector board. Maintenance and Service Guide 4-37 - Compaq 600 | Compaq 615 Notebook PC and Compaq 610 Notebook PC - Maintenance and - Page 81
unplugging the power cord from the AC outlet and then unplugging the AC adapter from the computer. 4. Remove the battery (see "Battery" on page 4-6). 5. Remove the following components: a. Hard drive (see "Hard drive" on page 4-8) b. Optical drive (see "Optical drive" on page 4-18) c. Keyboard and - Compaq 600 | Compaq 615 Notebook PC and Compaq 610 Notebook PC - Maintenance and - Page 82
Removal and replacement procedures Remove the fan: 1. Remove the two Phillips PM2.5×6.0 screws 1 that secure the fan to the base enclosure. 2. Remove the fan 2. Reverse this procedure to install the fan. Maintenance and Service Guide 4-39 - Compaq 600 | Compaq 615 Notebook PC and Compaq 610 Notebook PC - Maintenance and - Page 83
unplugging the power cord from the AC outlet and then unplugging the AC adapter from the computer. 4. Remove the battery (see "Battery" on page 4-6). 5. Remove the following components: a. Hard drive (see "Hard drive" on page 4-8) b. Optical drive (see "Optical drive" on page 4-18) c. Keyboard and - Compaq 600 | Compaq 615 Notebook PC and Compaq 610 Notebook PC - Maintenance and - Page 84
Remove the RTC battery: 1. Turn the system board upside down with the front toward you. 2. Remove the RTC battery from the socket on the system board. Removal and replacement procedures Reverse this procedure to install the RTC battery. Maintenance and Service Guide 4-41 - Compaq 600 | Compaq 615 Notebook PC and Compaq 610 Notebook PC - Maintenance and - Page 85
unplugging the power cord from the AC outlet and then unplugging the AC adapter from the computer. 4. Remove the battery (see "Battery" on page 4-6). 5. Remove the following components: a. Hard drive (see "Hard drive" on page 4-8) b. Optical drive (see "Optical drive" on page 4-18) c. Keyboard and - Compaq 600 | Compaq 615 Notebook PC and Compaq 610 Notebook PC - Maintenance and - Page 86
1 that secure the modem module to the system board. 3. Disconnect the modem module 2 from the system board. 4. Disconnect the modem module cable 3 from the modem module. 5. Remove the fingerprint reader board. Reverse this procedure to install the modem module. Maintenance and Service Guide 4-43 - Compaq 600 | Compaq 615 Notebook PC and Compaq 610 Notebook PC - Maintenance and - Page 87
unplugging the power cord from the AC outlet and then unplugging the AC adapter from the computer. 4. Remove the battery (see "Battery" on page 4-6). 5. Remove the following components: a. Hard drive (see "Hard drive" on page 4-8) b. Optical drive (see "Optical drive" on page 4-18) c. Keyboard and - Compaq 600 | Compaq 615 Notebook PC and Compaq 610 Notebook PC - Maintenance and - Page 88
Removal and replacement procedures Remove the heat sink: 1. Turn the system board upside down with the front toward you. ✎ Steps 2 and 3 apply to computer models equipped with graphics subsystems with discrete memory. See steps 4 and 5 for instructions on removing the heat sink on computer models - Compaq 600 | Compaq 615 Notebook PC and Compaq 610 Notebook PC - Maintenance and - Page 89
the heat sink section 6 that services it. Replacement thermal material is included with all system board, heat sink, and processor spare part kits. ✎ Steps 4 and 5 apply to computer models equipped with graphics subsystems with UMA memory. See steps 2 and 3 for instructions on removing the heat sink - Compaq 600 | Compaq 615 Notebook PC and Compaq 610 Notebook PC - Maintenance and - Page 90
that services it. ■ Thermal pads are used on the Northbridge chip 3 and the heat sink section 4 that services it. Replacement thermal material is included with all system board, heat sink, and processor spare part kits. Reverse this procedure to install the heat sink. Maintenance and Service Guide - Compaq 600 | Compaq 615 Notebook PC and Compaq 610 Notebook PC - Maintenance and - Page 91
unplugging the power cord from the AC outlet and then unplugging the AC adapter from the computer. 4. Remove the battery (see "Battery" on page 4-6). 5. Remove the following components: a. Hard drive (see "Hard drive" on page 4-8) b. Optical drive (see "Optical drive" on page 4-18) c. Keyboard and - Compaq 600 | Compaq 615 Notebook PC and Compaq 610 Notebook PC - Maintenance and - Page 92
unplugging the power cord from the AC outlet and then unplugging the AC adapter from the computer. 4. Remove the battery (see "Battery" on page 4-6). 5. Remove the following components: a. Hard drive (see "Hard drive" on page 4-8) b. Optical drive (see "Optical drive" on page 4-18) c. Keyboard and - Compaq 600 | Compaq 615 Notebook PC and Compaq 610 Notebook PC - Maintenance and - Page 93
you hear a click. 2. Lift the processor 2 straight up and remove it. ✎ When you install the processor, the gold triangle 3 on the processor must be aligned with the triangle 4 embossed on the processor socket. Reverse this procedure to install the processor. 4-50 Maintenance and Service Guide - Compaq 600 | Compaq 615 Notebook PC and Compaq 610 Notebook PC - Maintenance and - Page 94
or will not load. ✎ Some of the Computer Setup menu items listed in this guide may not be supported by your computer. An external keyboard or mouse connected to a USB port can be used with Computer Setup only if USB legacy support is enabled. To start Computer Setup, follow these steps: 1. Turn on - Compaq 600 | Compaq 615 Notebook PC and Compaq 610 Notebook PC - Maintenance and - Page 95
follow the on-screen instructions. - or - Use the tab key and the arrow keys to select File > Save changes and exit, and then press enter. Your changes go into effect when the computer restarts. Restoring factory settings in Computer Setup ✎ Restoring defaults will not change the hard drive mode. To - Compaq 600 | Compaq 615 Notebook PC and Compaq 610 Notebook PC - Maintenance and - Page 96
■ View specification information for the processor, cache and memory size, system ROM, video revision, and keyboard controller version. Set or change the date and time on the computer. Replace the configuration settings in Computer Setup with the original factory settings. (Hard drive mode, password - Compaq 600 | Compaq 615 Notebook PC and Compaq 610 Notebook PC - Maintenance and - Page 97
user password or master password. ✎ DriveLock settings are accessible only when you enter Computer Setup by turning on (not restarting) the computer. Enable/disable Automatic DriveLock support. Run Disk Sanitizer to destroy all existing data on the primary hard drive or the drive in the upgrade bay - Compaq 600 | Compaq 615 Notebook PC and Compaq 610 Notebook PC - Maintenance and - Page 98
the boot order. ■ Enable/disable USB legacy support (enabled by default). When enabled, USB legacy support allows the following: ❐ Use of a USB keyboard in Computer Setup even when a Windows operating system is not running. ❐ Startup from bootable USB devices, including a hard drive, diskette drive - Compaq 600 | Compaq 615 Notebook PC and Compaq 610 Notebook PC - Maintenance and - Page 99
media reader. ■ Enable/disable the USB port. Ä Disabling the USB port also disables MultiBay devices and ExpressCard devices on the advanced port replicator. Change, view, or hide security levels for all BIOS menu items. Restore the default security settings. 5-6 Maintenance and Service Guide - Compaq 600 | Compaq 615 Notebook PC and Compaq 610 Notebook PC - Maintenance and - Page 100
keyboard connected by USB can be used with Computer Setup only if USB legacy support is enabled. To start Computer Setup, follow these steps: 1. Turn on or restart the computer. 2. Before Windows opens and while the "F10=ROM Based Setup" message is displayed in the lower-left corner of the screen - Compaq 600 | Compaq 615 Notebook PC and Compaq 610 Notebook PC - Maintenance and - Page 101
for the computer and the batteries in the system. ■ View specification information for the processor, cache and memory size, system ROM, video revision, and keyboard controller version. Replace the configuration settings in Computer Setup with the original factory settings. (Password settings and - Compaq 600 | Compaq 615 Notebook PC and Compaq 610 Notebook PC - Maintenance and - Page 102
. Diagnostics Menu Select HDD Self-Test Options Memory Check Startup check To do this Run a comprehensive self-test on any hard drive in the system. Run a comprehensive test on system memory. Verify the system components needed for starting the computer. Maintenance and Service Guide 5-9 - Compaq 600 | Compaq 615 Notebook PC and Compaq 610 Notebook PC - Maintenance and - Page 103
, USB legacy support allows the following: ❐ Use of a USB keyboard in Computer Setup even when a Windows operating system is not running. ❐ Startup from bootable USB devices, including a hard drive, diskette drive, or optical drive connected by a USB port to the computer. ■ Enable/disable BIOS DMA - Compaq 600 | Compaq 615 Notebook PC and Compaq 610 Notebook PC - Maintenance and - Page 104
6 Specifications Computer specifications Metric U.S. Dimensions Length 25.43 cm 10.01 in Width 37.18 cm 14.64 in Height 3.20 cm 1.26 in Weight 2.49 kg 5.5 lbs Input power Operating voltage 19.0 V dc @ 4.74 A - 65 W Operating current 4.74 A Temperature Operating (not writing to - Compaq 600 | Compaq 615 Notebook PC and Compaq 610 Notebook PC - Maintenance and - Page 105
power consumption Viewing angle Metric U.S. 21.1 cm 33.5 cm 39.6 cm Up to 16.8 million 250:1 (typical) 200 nits (typical) 8.3 in 13.2 in 15.6 in 0.279 × 0.279 mm 1366 × 768 RGB vertical stripe LED 80 × 25 4.0 W ±40° horizontal, +120°/-40° vertical (typical) 6-2 Maintenance and Service Guide - Compaq 600 | Compaq 615 Notebook PC and Compaq 610 Notebook PC - Maintenance and - Page 106
55°C (41°F to 131°F) *1 GB = 1 billion bytes when referring to hard drive storage capacity. Actual accessible capacity is less. Actual drive specifications may differ slightly. ✎ Certain restrictions and exclusions apply. Contact technical support for details. Maintenance and Service Guide 6-3 - Compaq 600 | Compaq 615 Notebook PC and Compaq 610 Notebook PC - Maintenance and - Page 107
±RW and CD-RW SuperMulti Double-Layer Drive specifications Applicable disc Access time Random Cache buffer Data transfer rate 24X CD-ROM 8X DVD 24X CD-R 16X CD-RW 8x DVD+R 4X DVD+RW 8X DVD-R 4X DVD-RW 2.4X DVD+R(9) 5X DVD-RAM Transfer mode Read: CD-DA, CD+(E)G, CD-MIDI, CD-TEXT, CD-ROM, CD-ROM XA - Compaq 600 | Compaq 615 Notebook PC and Compaq 610 Notebook PC - Maintenance and - Page 108
RW, DVD+R, DVD+RW, DVD-RAM CD-R and CD-RW CD DVD < 110 ms < 130 ms 2 MB 3,600 KB/sec 10,800 KB/sec 3,600 KB/sec 3,600 KB/sec System DMA specifications Hardware DMA System function DMA0 Not applicable DMA1* Not applicable DMA2* Not applicable DMA3 Not applicable DMA4 Direct memory - Compaq 600 | Compaq 615 Notebook PC and Compaq 610 Notebook PC - Maintenance and - Page 109
Base memory Video memory Video BIOS System BIOS Extended memory (based on memory installed) PCI bus High precision event timer PCI bus System interrupt specifications Hardware IRQ System function IRQ0 System timer IRQ1 Standard 101-/102-key or Microsoft natural keyboard IRQ8 System CMOS - Compaq 600 | Compaq 615 Notebook PC and Compaq 610 Notebook PC - Maintenance and - Page 110
-key or Microsoft natural keyboard Motherboard resources Microsoft ACPI-compliant embedded controller Motherboard resources Motherboard resources System CMOS/real time clock Motherboard resources Direct memory access controller Motherboard resources Direct memory access controller Program interrupt - Compaq 600 | Compaq 615 Notebook PC and Compaq 610 Notebook PC - Maintenance and - Page 111
Specifications I/O address System function (shipping configuration) Direct memory access controller Numeric data processor Motherboard resources Mobile Intel 4 series express Motherboard resources Motherboard resources Motherboard resources Motherboard resources 6-8 Maintenance and Service Guide - Compaq 600 | Compaq 615 Notebook PC and Compaq 610 Notebook PC - Maintenance and - Page 112
that secure the hard drive cover to the computer (screws are secured on the hard drive cover by C-clips) 2 One captive screw that secures the memory module compartment cover to the computer (screw is secured on the memory module compartment cover by a C-clip) Maintenance and Service Guide 7-1 - Compaq 600 | Compaq 615 Notebook PC and Compaq 610 Notebook PC - Maintenance and - Page 113
Screw listing Phillips PM2.5×11.0 captive screw Color Black Quantity 1 Length 11.0 mm Thread 2.5 mm Head diameter 5.0 mm Where used: One screw that secures the hard drive to the computer (screw is secured to the hard drive bracket) 7-2 Maintenance and Service Guide - Compaq 600 | Compaq 615 Notebook PC and Compaq 610 Notebook PC - Maintenance and - Page 114
Phillips PM3.0×4.0 screw Screw listing Color Silver Quantity 4 Length 4.0 mm Thread 3.0 mm Where used: 4 screws that secure the hard drive bracket to the hard drive Head diameter 5.0 mm Maintenance and Service Guide 7-3 - Compaq 600 | Compaq 615 Notebook PC and Compaq 610 Notebook PC - Maintenance and - Page 115
Screw listing Phillips PM2.5×4.0 screw Color Black Quantity 9 Length 4.0 mm Thread 2.5 mm Where used: 2 screws that secures the WLAN module to the computer Head diameter 5.0 mm Where used: 2 screws that secure the speaker to the top cover 7-4 Maintenance and Service Guide - Compaq 600 | Compaq 615 Notebook PC and Compaq 610 Notebook PC - Maintenance and - Page 116
Where used: 1 One screw that secures the system board to the base enclosure 2 Two screws that secure the optical drive connector board to the base enclosure Screw listing Where used: 2 screws that secure the modem module to the system board Maintenance and Service Guide 7-5 - Compaq 600 | Compaq 615 Notebook PC and Compaq 610 Notebook PC - Maintenance and - Page 117
Screw listing Phillips PM2.5×4.0 screw Color Silver Quantity 2 Length 4.0 mm Thread 2.5 mm Head diameter 5.0 mm Where used: 2 screws that secure the wireless antenna transceivers to the display enclosure 7-6 Maintenance and Service Guide - Compaq 600 | Compaq 615 Notebook PC and Compaq 610 Notebook PC - Maintenance and - Page 118
Slotted Torx T8M2.5×8.0 screw Screw listing Color Black Quantity 8 Length 8.0 mm Where used: 1 Two screws that secure the switch cover to the computer 2 Six screws that secure the top cover to the computer Thread 2.5 mm Head diameter 5.0 mm Maintenance and Service Guide 7-7 - Compaq 600 | Compaq 615 Notebook PC and Compaq 610 Notebook PC - Maintenance and - Page 119
PM2.0×3.0 screw Color Black or silver Quantity 4 Length 3.0 mm Thread 2.0 mm Where used: 2 screws that secure the optical drive bracket to the optical drive Head diameter 4.5 mm Where used: 2 screws that secure the Bluetooth module to the base enclosure 7-8 Maintenance and Service Guide - Compaq 600 | Compaq 615 Notebook PC and Compaq 610 Notebook PC - Maintenance and - Page 120
Phillips PM2.0×3.0 screw Screw listing Color Silver Quantity 8 Length 3.0 mm Thread 2.0 mm Where used: 8 screws that secure the display hinges to the display panel Head diameter 4.5 mm Maintenance and Service Guide 7-9 - Compaq 600 | Compaq 615 Notebook PC and Compaq 610 Notebook PC - Maintenance and - Page 121
Screw listing Phillips PM2.0×2.0 broadhead screw Color Black Quantity 3 Length 2.0 mm Thread 2.0 mm Where used: 3 screws that secure the switch cover to the computer in the battery bay Head diameter 7.0 mm 7-10 Maintenance and Service Guide - Compaq 600 | Compaq 615 Notebook PC and Compaq 610 Notebook PC - Maintenance and - Page 122
Phillips PM2.0×3.0 broadhead screw Screw listing Color Black Quantity 3 Length 3.0 mm Thread 2.0 mm Head diameter 7.0 mm Where used: 3 screws that secure the top cover to the computer in the optical drive bay Maintenance and Service Guide 7-11 - Compaq 600 | Compaq 615 Notebook PC and Compaq 610 Notebook PC - Maintenance and - Page 123
Screw listing Phillips PM2.5×8.0 screw Color Black Quantity 3 Length 8.0 mm Where used: 1 One screw that secures the optical drive to the computer 2 Two screws that secure the keyboard to the computer Thread 2.5 mm Head diameter 5.0 mm 7-12 Maintenance and Service Guide - Compaq 600 | Compaq 615 Notebook PC and Compaq 610 Notebook PC - Maintenance and - Page 124
Phillips PM2.0×4.0 screw Screw listing Color Black Quantity 1 Length 4.0 mm Thread 2.0 mm Where used: One screw that secures the top cover to the base enclosure Head diameter 4.5 mm Maintenance and Service Guide 7-13 - Compaq 600 | Compaq 615 Notebook PC and Compaq 610 Notebook PC - Maintenance and - Page 125
Screw listing Phillips PM2.5×6.0 screw Color Black Quantity 16 Length 6.0 mm Thread 2.5 mm Where used: 4 screws that secure the display assembly to the computer Head diameter 5.0 mm Where used: 8 screws that secure the display bezel to the display assembly 7-14 Maintenance and Service Guide - Compaq 600 | Compaq 615 Notebook PC and Compaq 610 Notebook PC - Maintenance and - Page 126
Where used: 2 screws that secure the top cover to the base enclosure Screw listing Where used: 2 screws that secure the fan to the base enclosure Maintenance and Service Guide 7-15 - Compaq 600 | Compaq 615 Notebook PC and Compaq 610 Notebook PC - Maintenance and - Page 127
Screw listing Phillips PM2.5×5.0 screw Color Black Quantity 4 Length 5.0 mm Thread 2.5 mm Where used: 4 screws that secure the display panel to the display enclosure Head diameter 5.0 mm 7-16 Maintenance and Service Guide - Compaq 600 | Compaq 615 Notebook PC and Compaq 610 Notebook PC - Maintenance and - Page 128
Silver Quantity 4 Length 9.0 mm Thread 2.5 mm Head diameter 5.0 mm Where used: 4 captive screws that secure the heat sink to the system board on computer models with a graphics subsystem with discrete memory (screws are secured on the heat sink by C-clips) Maintenance and Service Guide 7-17 - Compaq 600 | Compaq 615 Notebook PC and Compaq 610 Notebook PC - Maintenance and - Page 129
Screw listing Where used: 4 captive screws that secure the heat sink to the system board on computer models with a graphics subsystem with UMA memory (screws are secured on the heat sink by C-clips) 7-18 Maintenance and Service Guide - Compaq 600 | Compaq 615 Notebook PC and Compaq 610 Notebook PC - Maintenance and - Page 130
Silver Quantity 2 Length 5.0 mm Thread 2.0 mm Head diameter 5.0 mm Where used: 2 captive screws that secure the heat sink to the system board on computer models with a graphics subsystem with discrete memory (screws are secured on the heat sink by C-clips) Maintenance and Service Guide 7-19 - Compaq 600 | Compaq 615 Notebook PC and Compaq 610 Notebook PC - Maintenance and - Page 131
Screw listing Where used: 2 captive screws that secure the heat sink to the system board on computer models with a graphics subsystem with UMA memory (screws are secured on the heat sink by C-clips) 7-20 Maintenance and Service Guide - Compaq 600 | Compaq 615 Notebook PC and Compaq 610 Notebook PC - Maintenance and - Page 132
up the entire hard drive (select models only) ■ Scheduling automatic backups (select models only) ■ Creating system restore points ■ Recovering individual files ■ Restoring the computer to a previous state ■ Recovering information using recovery tools ✎ For detailed instructions, perform a search - Compaq 600 | Compaq 615 Notebook PC and Compaq 610 Notebook PC - Maintenance and - Page 133
and Restore Center. 2. Follow the on-screen instructions to back up your entire computer (select models only) or your files. ✎ Windows includes the User Account Control feature to improve the security of your computer. You may be prompted for your permission or password for tasks such as installing - Compaq 600 | Compaq 615 Notebook PC and Compaq 610 Notebook PC - Maintenance and - Page 134
to recover your original hard drive image. The image includes the Windows operating system and software programs installed at the factory. ✎ If you are unable to boot (start up) your computer, you must purchase a Windows Vista operating system DVD to reboot the computer and repair the operating - Compaq 600 | Compaq 615 Notebook PC and Compaq 610 Notebook PC - Maintenance and - Page 135
screen instructions. You can also order the DVD by calling technical support. For contact information, refer to the Worldwide Telephone Numbers booklet included with the computer. Ä CAUTION: Using a Windows Vista operating system DVD completely erases hard drive contents and reformats the hard drive - Compaq 600 | Compaq 615 Notebook PC and Compaq 610 Notebook PC - Maintenance and - Page 136
is connected to AC power before you start the backup process. The backup process may take over an hour, depending on file size and the speed of the computer. 1. Click Start > All Programs > Accessories > System Tools > Backup. 2. Follow the on-screen instructions. Maintenance and Service Guide 8-5 - Compaq 600 | Compaq 615 Notebook PC and Compaq 610 Notebook PC - Maintenance and - Page 137
completely erases the hard drive. All files you have created and any software installed on the computer are permanently removed. The recovery process reinstalls the original operating system, software, and drivers. Software, drivers, and updates not installed by HP must be manually reinstalled. To - Compaq 600 | Compaq 615 Notebook PC and Compaq 610 Notebook PC - Maintenance and - Page 138
Audio-in (microphone) 9 Connector pin assignments Pin 1 2 3 Audio-out (headphone) Signal Audio signal in Audio signal in Ground Pin Signal 1 Audio out, left channel 2 Audio out, right channel 3 Ground Maintenance and Service Guide 9-1 - Compaq 600 | Compaq 615 Notebook PC and Compaq 610 Notebook PC - Maintenance and - Page 139
analog 8 Ground analog 9 +5 VDC 10 Ground 11 Monitor detect 12 DDC 2B data 13 Horizontal sync 14 Vertical sync 15 DDC 2B clock 9-2 Maintenance and Service Guide - Compaq 600 | Compaq 615 Notebook PC and Compaq 610 Notebook PC - Maintenance and - Page 140
RJ-11 (modem) Pin 1 2 3 4 5 6 7 8 RJ-45 (network) Signal Unused Tip Ring Unused Unused Unused Unused Unused Pin 1 2 3 4 5 6 7 8 Maintenance and Service Guide Signal Transmit + Transmit Receive + Unused Unused Receive Unused Unused Connector pin assignments 9-3 - Compaq 600 | Compaq 615 Notebook PC and Compaq 610 Notebook PC - Maintenance and - Page 141
Connector pin assignments Universal Serial Bus Pin Signal 1 +5 VDC 2 Data 3 Data + 4 Ground 9-4 Maintenance and Service Guide - Compaq 600 | Compaq 615 Notebook PC and Compaq 610 Notebook PC - Maintenance and - Page 142
of 125 or 250 V AC, as required by the power system of each country or region. ■ The appliance coupler must meet the mechanical configuration of an EN 60 320/IEC 320 Standard Sheet C13 connector for mating with the appliance inlet on the back of the computer. Maintenance and Service Guide 10-1 - Compaq 600 | Compaq 615 Notebook PC and Compaq 610 Notebook PC - Maintenance and - Page 143
used. 5. The flexible cord must be Type VCTF, 3-conductor, 0.75-mm² conductor size. Power cord set fittings (appliance coupler and wall plug) must bear the certification mark of the agency responsible for evaluation in the country or region where it will be used. 10-2 Maintenance and Service Guide - Compaq 600 | Compaq 615 Notebook PC and Compaq 610 Notebook PC - Maintenance and - Page 144
liquid crystal display (LCD) panel 2. ✎ The procedures provided in this chapter are general disassembly instructions. Specific details, such as screw sizes, quantities, and locations, and component shapes and sizes, can vary from one computer model to another. Maintenance and Service Guide 11-1 - Compaq 600 | Compaq 615 Notebook PC and Compaq 610 Notebook PC - Maintenance and - Page 145
Recycling Perform the following steps to disassemble the display assembly: 1. Remove all screw covers 1 and screws 2 that secure the display bezel to the display display bezel until the bezel disengages from the display assembly. 3. Remove the display bezel 3. 11-2 Maintenance and Service Guide - Compaq 600 | Compaq 615 Notebook PC and Compaq 610 Notebook PC - Maintenance and - Page 146
4. Disconnect all display panel cables 1 from the display inverter and remove the inverter 2. Recycling 5. Remove all screws 1 that secure the display panel assembly to the display enclosure. 6. Remove the display panel assembly 2 from the display enclosure. 7. Turn the display panel assembly - Compaq 600 | Compaq 615 Notebook PC and Compaq 610 Notebook PC - Maintenance and - Page 147
backlight cover to the display panel. 12. Lift the top edge of the backlight cover 2 and swing it outward. 13. Remove the backlight cover. 14. Turn the display panel right-side up. 15. Remove the backlight cables 1 from the clip 2 in the display panel. 11-4 Maintenance and Service Guide - Compaq 600 | Compaq 615 Notebook PC and Compaq 610 Notebook PC - Maintenance and - Page 148
Recycling 16. Turn the display panel upside down. 17. Remove the backlight frame from the display panel. Å WARNING: The backlight contains mercury. damaging this component and causing exposure to the mercury. 18. Remove the backlight from the backlight frame. Maintenance and Service Guide 11-5 - Compaq 600 | Compaq 615 Notebook PC and Compaq 610 Notebook PC - Maintenance and - Page 149
screws 2 that secure the LCD panel to the display rear panel. 21. Release the LCD panel 3 from the display rear panel. 22. Release the tape 4 that secures the LCD panel to the display rear panel. 23. Remove the LCD panel. 24. Recycle the LCD panel and backlight. 11-6 Maintenance and Service Guide - Compaq 600 | Compaq 615 Notebook PC and Compaq 610 Notebook PC - Maintenance and - Page 150
selecting 5-1, 5-7 restoring factory settings 5-2, 5-8 Security menu 5-4, 5-9 System Configuration menu 5-5, 5-10 using 5-1, 5-7 computer specifications 6-1 connector pinout audio-in jack 9-1 audio-out jack 9-1 external monitor port 9-2 headphone jack 9-1 microphone jack 9-1 modem jack 9-3 monitor - Compaq 600 | Compaq 615 Notebook PC and Compaq 610 Notebook PC - Maintenance and - Page 151
specifications 6-3 hard drive bay 2-10 hard drive bracket, removal 4-11 hard drive cover illustrated 3-12 removal 4-9 hard drive recovery 8-4 hard drive test 5-9 headphone jack connector pinout 9-1 location 2-2, 2-7 heat sink removal 4-44 spare part numbers 3-5, 3-18, 4-44 Maintenance and Service - Compaq 600 | Compaq 615 Notebook PC and Compaq 610 Notebook PC - Maintenance and - Page 152
numeric keypad 2-4 Windows applications 2-4 Windows logo 2-4 L language, changing in Computer Setup 5-5 language, chaning in Computer Setup 5-10 left-side components 2-9 legacy support, USB 5-1, 5-5, 5-7, 5-10 light components 2-5 lights battery 2-9 caps lock 2-5 optical drive 2-8 power 2-5 wireless - Compaq 600 | Compaq 615 Notebook PC and Compaq 610 Notebook PC - Maintenance and - Page 153
audio 1-3 chipset 1-1 display panel 1-2 Ethernet 1-4 external media card 1-4 graphics 1-2 hard drive 1-3 keyboard 1-5 memory 1-2, 1-3 microphone 1-3 modem 1-4 operating system 1-5, 1-6 optical drive 1-3 pointing device 1-5 ports 1-5 power requirements 1-4 processor 1-1 security 1-5 serviceability - Compaq 600 | Compaq 615 Notebook PC and Compaq 610 Notebook PC - Maintenance and - Page 154
menu 5-10 speaker location 2-2, 2-3 spare part number 3-4, 3-18 specifications computer 6-1 display assembly 6-2 DVD±RW and CD-RW SuperMulti Double-Layer Drive 6-4 DVD-ROM Drive 6-5 hard drive 6-3 optical drive 6-4, 6-5 system DMA 6-5 system I/O address 6-7 system interrupt 6-6 system memory map
-
 1
1 -
 2
2 -
 3
3 -
 4
4 -
 5
5 -
 6
6 -
 7
7 -
8
-
9
-
10
-
11
-
12
-
13
-
14
-
15
-
16
-
17
-
18
-
19
-
20
-
21
-
22
-
23
-
24
-
25
-
26
-
27
-
28
-
29
-
30
-
31
-
32
-
33
-
34
-
35
-
36
-
37
-
38
-
39
-
40
-
41
-
42
-
43
-
44
-
45
-
46
-
47
-
48
-
49
-
50
-
51
-
52
-
53
-
54
-
55
-
56
-
57
-
58
-
59
-
60
-
61
-
62
-
63
-
64
-
65
-
66
-
67
-
68
-
69
-
70
-
71
-
72
-
73
-
74
-
75
-
76
-
77
-
78
-
79
-
80
-
81
-
82
-
83
-
84
-
85
-
86
-
87
-
88
-
89
-
90
-
91
-
92
-
93
-
94
-
95
-
96
-
97
-
98
-
99
-
100
-
101
-
102
-
103
-
104
-
105
-
106
-
107
-
108
-
109
-
110
-
111
-
112
-
113
-
114
-
115
-
116
-
117
-
118
-
119
-
120
-
121
-
122
-
123
-
124
-
125
-
126
-
127
-
128
-
129
-
130
-
131
-
132
-
133
-
134
-
135
-
136
-
137
-
138
-
139
-
140
-
141
-
142
-
143
-
144
-
145
-
146
-
147
-
148
-
149
-
150
-
151
-
152
-
153
-
154
 |
 |

Compaq 615 Notebook PC
Compaq 610 Notebook PC
Maintenance and Service Guide
Document Part Number: 533504-001
June 2009
This guide is a troubleshooting reference used for maintaining and servicing the computer. It provides
comprehensive information on identifying computer features, components, and spare parts; troubleshooting
computer problems; and performing computer disassembly procedures.