Compaq Evo D300 Compaq Evo Family of Personal Computers, Small Form Factor Mod
Compaq Evo D300 - Convertible Minitower Manual
 |
View all Compaq Evo D300 manuals
Add to My Manuals
Save this manual to your list of manuals |
Compaq Evo D300 manual content summary:
- Compaq Evo D300 | Compaq Evo Family of Personal Computers, Small Form Factor Mod - Page 1
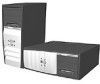
b Hardware Reference Guide Compaq Evo Desktop Family: Small Form Factor Models - Intel Celeron Versions Document Part Number: 243848-002 January 2002 This book provides basic information for upgrading this series of computers. - Compaq Evo D300 | Compaq Evo Family of Personal Computers, Small Form Factor Mod - Page 2
off in this manner indicates that failure to follow directions could result in damage to equipment or loss of information. Printed in the U.S.A. Hardware Reference Guide Second Edition (January 2002) Document Part Number: 243848-002 - Compaq Evo D300 | Compaq Evo Family of Personal Computers, Small Form Factor Mod - Page 3
Additional Drives 2-16 Upgrading the Hard Drive 2-16 Removing a CD-ROM Drive 2-18 Installing an optional CD-ROM or DVD-ROM Drive 2-20 Hardware Reference Guide iii - Compaq Evo D300 | Compaq Evo Family of Personal Computers, Small Form Factor Mod - Page 4
with SCSI Devices B-6 Choosing the Quiet Drive Options B-7 C Battery Replacement D Security Lock Provisions Installing a Security Lock D-1 E Electrostatic Discharge Drive Precautions F-2 Operation F-2 Cleaning F-2 Safety F-2 Shipping Preparation F-3 Index iv Hardware Reference Guide - Compaq Evo D300 | Compaq Evo Family of Personal Computers, Small Form Factor Mod - Page 5
. For a complete listing of the hardware and software installed in your computer, run Compaq Diagnostics for Windows or the INSPECT utility (available on some models). Instructions for using these utilities are provided in the Troubleshooting Guide on the Reference Library CD. Hardware Reference - Compaq Evo D300 | Compaq Evo Family of Personal Computers, Small Form Factor Mod - Page 6
-On Light 4 Dual-State Power Button 5 Hard Drive Activity Light 6 Microphone Connector 7 Stereo Headphone Jack (system) 8 Diskette Drive Activity Light 9 Diskette Eject Button 1-2 Hardware Reference Guide - Compaq Evo D300 | Compaq Evo Family of Personal Computers, Small Form Factor Mod - Page 7
4 Keyboard Connector q Line-in Audio Connector 5 Universal Serial Bus (USB) Connector w Microphone Connector 6 Serial Connector (COM1) e Serial Connector (COM2) 7 Ethernet RJ-45 Connector Hardware Reference Guide 1-3 - Compaq Evo D300 | Compaq Evo Family of Personal Computers, Small Form Factor Mod - Page 8
open pop-up menus in a Microsoft Office application. May perform other functions in other software applications. Provides quick access to specific Internet destinations. 1-4 Hardware Reference Guide - Compaq Evo D300 | Compaq Evo Family of Personal Computers, Small Form Factor Mod - Page 9
Includes the following: Insert, Home, Page Up, Delete, End, and Page Down. ✎ Holding down Ctrl The buttons can be reprogrammed to any program or service of your choice or to any Web site ( Refer to the Readme-user.txt file for instructions about reprogramming the Easy Access Buttons. Locking Guide 1-5 - Compaq Evo D300 | Compaq Evo Family of Personal Computers, Small Form Factor Mod - Page 10
Launches Find Computer Minimizes all open applications Undoes Minimize All Displays the Run dialog box Special Mouse Functions Most software applications support the use of a mouse. The functions assigned to each mouse button depend on the software applications you are using. 1-6 Hardware - Compaq Evo D300 | Compaq Evo Family of Personal Computers, Small Form Factor Mod - Page 11
Product Features Serial Number Location Each computer has a unique serial number which may be located on the cover top or the side panel of the computer. Keep this number available for use when contacting Compaq customer service for assistance. Serial Number Location Hardware Reference Guide 1-7 - Compaq Evo D300 | Compaq Evo Family of Personal Computers, Small Form Factor Mod - Page 12
Product Features 1-8 Hardware Reference Guide - Compaq Evo D300 | Compaq Evo Family of Personal Computers, Small Form Factor Mod - Page 13
lock, use Computer Setup to unlock the lock and disable the Smart Cover Sensor. For more information about Computer Setup, refer to the Computer Setup Guide. 2. If the computer is already on, turn it off and disconnect the power cord from the wall outlet. Å WARNING: To reduce the risk of personal - Compaq Evo D300 | Compaq Evo Family of Personal Computers, Small Form Factor Mod - Page 14
Hardware Upgrades 4. Install any optional equipment. See the applicable sections of this guide or refer to the documentation provided with the optional equipment for instructions. 5. Replace the computer cover. 6. Turn on the monitor, computer, and any devices you want to test. 7. Reconfigure the - Compaq Evo D300 | Compaq Evo Family of Personal Computers, Small Form Factor Mod - Page 15
computer ships with the Smart Cover Lock in the unlocked position. For more information about locking the Smart Cover Lock, refer to the Desktop Management guide. Using the Smart Cover FailSafe Key If you enable the Smart Cover Lock and cannot enter your password to disable the lock, you will need - Compaq Evo D300 | Compaq Evo Family of Personal Computers, Small Form Factor Mod - Page 16
Hardware Upgrades To obtain a FailSafe Key: I Contact your authorized Compaq reseller or service provider. I Refer to the Compaq Web site (www.compaq.com) for ordering information. I Call the the Smart Cover Lock, secure the lock in place with the tamper-proof screws. 2-4 Hardware Reference Guide - Compaq Evo D300 | Compaq Evo Family of Personal Computers, Small Form Factor Mod - Page 17
disconnected from the electrical outlet. 4. Press in the button on each side of the front bezel to release the quick release cover latches. Hardware Reference Guide 2-5 - Compaq Evo D300 | Compaq Evo Family of Personal Computers, Small Form Factor Mod - Page 18
Hardware Upgrades 5. As you slide the computer cover forward, release the buttons and allow them to return to the original position, then lift the cover up and off the unit. ✎ To replace the cover, reverse this procedure. Removing the Computer Cover 2-6 Hardware Reference Guide - Compaq Evo D300 | Compaq Evo Family of Personal Computers, Small Form Factor Mod - Page 19
populated with at least one preinstalled memory module. To achieve the maximum memory support, you may be required to replace the preinstalled DIMM with a higher capacity DIMM. For proper system operation, . In addition, the system will not boot the operating system. Hardware Reference Guide 2-7 - Compaq Evo D300 | Compaq Evo Family of Personal Computers, Small Form Factor Mod - Page 20
, then disconnect the power cord from the power outlet. 3. Remove the computer cover. 4. Rotate the easy access drive bay to an upright position. 2-8 Hardware Reference Guide - Compaq Evo D300 | Compaq Evo Family of Personal Computers, Small Form Factor Mod - Page 21
the memory module sockets. Å WARNING: To reduce risk of personal injury from hot surfaces, allow the internal system components to cool before touching. Hardware Reference Guide 2-9 - Compaq Evo D300 | Compaq Evo Family of Personal Computers, Small Form Factor Mod - Page 22
socket, ensuring that the module is fully inserted and properly seated 3. 9. Repeat steps 6 through 8 for any additional modules that you want to install. 10. Replace the computer cover. 11. If you normally lock the Smart Cover Lock, use Computer Setup to relock the lock and enable the Smart Cover - Compaq Evo D300 | Compaq Evo Family of Personal Computers, Small Form Factor Mod - Page 23
reinstalling the expansion card cage, ensure that the tab on the brace latches into the slot on the side of the power supply. Hardware Reference Guide 2-11 - Compaq Evo D300 | Compaq Evo Family of Personal Computers, Small Form Factor Mod - Page 24
and identify the slot into which you want to insert the expansion card. Location of Expansion Slots in the Expansion Card Cage 2-12 Hardware Reference Guide - Compaq Evo D300 | Compaq Evo Family of Personal Computers, Small Form Factor Mod - Page 25
Hardware Upgrades 6. Remove the retaining screws that secure the slot cover to the expansion card cage. 7. Remove the slot cover from the expansion card cage. Removing the Expansion Slot Cover Hardware Reference Guide 2-13 - Compaq Evo D300 | Compaq Evo Family of Personal Computers, Small Form Factor Mod - Page 26
the card so that the whole connector seats properly in the expansion card slot. 9. Reinstall the retaining screws to secure the card. 2-14 Hardware Reference Guide - Compaq Evo D300 | Compaq Evo Family of Personal Computers, Small Form Factor Mod - Page 27
drive To verify the type, size, and capacity of the storage devices installed in your computer, run Compaq Computer Setup. Refer to the Computer Setup Guide for more information. Hardware Reference - Compaq Evo D300 | Compaq Evo Family of Personal Computers, Small Form Factor Mod - Page 28
I You must install guide screws to ensure the drive will line up correctly in the drive cage. Compaq has provided extra guide screws, installed in the hard drive is located on the left side of the computer. To remove and replace the drive: 1. If you have locked the Smart Cover Lock, use Computer - Compaq Evo D300 | Compaq Evo Family of Personal Computers, Small Form Factor Mod - Page 29
the rear of the bay, then lift the drive from the bay. Removing the Hard Drive (Shown from the Rear of the Chassis) Hardware Reference Guide 2-17 - Compaq Evo D300 | Compaq Evo Family of Personal Computers, Small Form Factor Mod - Page 30
Hardware Upgrades ✎ When replacing the hard drive, transfer the four screws from the old drive to the new one. The screws take the place of drive the computer cover. 5. Rotate the drive cage to the upright position. 6. Rotate the power supply to the upright position. 2-18 Hardware Reference Guide - Compaq Evo D300 | Compaq Evo Family of Personal Computers, Small Form Factor Mod - Page 31
toward the front of the drive cage 2, then lift the drive out of the computer 3. Removing the CD-ROM Drive To replace the drive, reverse the removal procedures. ✎ When replacing the drive, transfer the four screws from the old drive to the new one. The screws take the place of drive rails - Compaq Evo D300 | Compaq Evo Family of Personal Computers, Small Form Factor Mod - Page 32
of the drive. Ä CAUTION: Use only 3/16-inch or 5-mm long screws as guide screws. Longer screws can damage the internal components of the drive. Installing Guide Screws in the CD-ROM or DVD-ROM Drive 3. Position the guide screws on the drive into the J-slots in the drive bay. Slide the drive - Compaq Evo D300 | Compaq Evo Family of Personal Computers, Small Form Factor Mod - Page 33
access drive bay to the normal position. Connecting the Flat Ribbon, Audio, and Power Cables to the CD-ROM or DVD-ROM Drive Hardware Reference Guide 2-21 - Compaq Evo D300 | Compaq Evo Family of Personal Computers, Small Form Factor Mod - Page 34
Hardware Upgrades 7. Remove the bezel blank from the front bezel, if necessary. 8. Replace the computer cover. 9. The system will automatically recognize the drive and reconfigure the computer. Ä CAUTION: When servicing the computer, ensure that cables are placed in their proper locations during the - Compaq Evo D300 | Compaq Evo Family of Personal Computers, Small Form Factor Mod - Page 35
Evo Small Form Factor Desktop Dimensions Height Width Depth Approximate Weight Weight Supported (maximum distributed load) Temperature Range Operating Nonoperating Relative Humidity (noncondensing) 180-264 VAC 200-240 VAC 50-60 Hz 120 W 2 A 160 kg-cal/hr 80 kg-cal/hr Hardware Reference Guide A-1 - Compaq Evo D300 | Compaq Evo Family of Personal Computers, Small Form Factor Mod - Page 36
Specifications A-2 Hardware Reference Guide - Compaq Evo D300 | Compaq Evo Family of Personal Computers, Small Form Factor Mod - Page 37
drives are available from Compaq in kits that include a special drive cable. The configuration of the drive employs a cable-select feature that identifies the drive as device 0 (primary drive) or device 1 (secondary performance. This cable is standard on select models. Hardware Reference Guide B-1 - Compaq Evo D300 | Compaq Evo Family of Personal Computers, Small Form Factor Mod - Page 38
or a half-height drive into a half-height bay. I Install guide screws to ensure that the drive lines up correctly in the drive cage. Compaq has provided extra guide screws installed in the front of the computer chassis behind the front - Compaq Evo D300 | Compaq Evo Family of Personal Computers, Small Form Factor Mod - Page 39
Wide-Ultra SCSI, Ultra-Wide SCSI, Wide Ultra2 SCSI, Ultra 320 SCSI, or Ultra 160 SCSI controller supports up to 15 SCSI devices per channel. I If using multiple SCSI devices, Compaq recommends that the devices 6 and 8 through 15-available for all other SCSI devices Hardware Reference Guide B-3 - Compaq Evo D300 | Compaq Evo Family of Personal Computers, Small Form Factor Mod - Page 40
For additional information about optional SCSI devices, refer to the documentation included with the device or contact your Compaq authorized dealer, reseller, or service provider. Ä CAUTION: Do not route cables near the air intake to the power supply. Cables routed in this manner can block airflow - Compaq Evo D300 | Compaq Evo Family of Personal Computers, Small Form Factor Mod - Page 41
the boot order is changed in the F10 Setup. When replacing a hard drive, the replacement drive should be of the same type as the drive being removed. If you are replacing an Ultra ATA hard drive with a SCSI hard drive, with an internal connector on the system board. Hardware Reference Guide B-5 - Compaq Evo D300 | Compaq Evo Family of Personal Computers, Small Form Factor Mod - Page 42
a SCSI Cable Select models ship with a multimode SCSI cable that supports Low Voltage Differential (LVD) or single-ended devices. The cable kit or contact your Compaq authorized dealer, reseller, or service provider. Using SCSISelect with SCSI Devices The SCSI host Hardware Reference Guide - Compaq Evo D300 | Compaq Evo Family of Personal Computers, Small Form Factor Mod - Page 43
Lists all SCSI devices and SCSI ID numbers ✎ For additional information about configuring POST message display status, refer to the Computer Setup Guide on the Reference Library CD. Choosing the Quiet Drive Options ✎ The Quiet Drive is an optional feature and may or may not be included on your - Compaq Evo D300 | Compaq Evo Family of Personal Computers, Small Form Factor Mod - Page 44
the Quiet Drive option is not displayed, your computer does not contain a Quiet drive. 7. To apply and save changes, select File > Save Changes. B-8 Hardware Reference Guide - Compaq Evo D300 | Compaq Evo Family of Personal Computers, Small Form Factor Mod - Page 45
the battery, it is important to back up the computer CMOS settings. When the battery is removed or replaced, the CMOS settings will be cleared. Refer to the Troubleshooting Guide for information on backing up the CMOS settings. N Batteries, battery packs, and accumulators should not be disposed of - Compaq Evo D300 | Compaq Evo Family of Personal Computers, Small Form Factor Mod - Page 46
Battery Replacement Ä CAUTION: Static electricity can damage the electronic components of the system board. 4. Depending on the type of battery holder on your system board, complete the following instructions to replace the battery. Type 1 a. Lift the battery out of its holder. Removing a Coin Cell - Compaq Evo D300 | Compaq Evo Family of Personal Computers, Small Form Factor Mod - Page 47
Battery Replacement b. Slide the replacement battery into position, positive side up. The battery holder automatically secures the battery in the proper position. Type 2 a. of the battery. b. When the battery pops up, lift it out. Removing a Coin Cell Battery (Type 2) Hardware Reference Guide C-3 - Compaq Evo D300 | Compaq Evo Family of Personal Computers, Small Form Factor Mod - Page 48
to complete this procedure. 5. Replace the computer cover or access panel. 6. Plug in the computer and turn on power to the computer. 7. Reset the date and time, your passwords, and any special system setups, using Compaq Computer Setup. Refer to the Computer Setup Guide. If you normally lock the - Compaq Evo D300 | Compaq Evo Family of Personal Computers, Small Form Factor Mod - Page 49
may be sharp. Be sure to install the bracket so that sharp edges do not extend from the edges of the computer chassis. Hardware Reference Guide D-1 - Compaq Evo D300 | Compaq Evo Family of Personal Computers, Small Form Factor Mod - Page 50
may be sharp. Be sure to install the bracket so that sharp edges do not extend from the edges of the computer chassis. D-2 Hardware Reference Guide - Compaq Evo D300 | Compaq Evo Family of Personal Computers, Small Form Factor Mod - Page 51
may be sharp. Be sure to install the bracket so that sharp edges do not extend from the edges of the computer chassis. Hardware Reference Guide D-3 - Compaq Evo D300 | Compaq Evo Family of Personal Computers, Small Form Factor Mod - Page 52
Security Lock Provisions Installing a Kensington Cable Lock (may vary by model) Installing a Kensington Cable Lock (may vary by model) D-4 Hardware Reference Guide - Compaq Evo D300 | Compaq Evo Family of Personal Computers, Small Form Factor Mod - Page 53
straps with a minimum of 1 megohm +/- 10 percent resistance in the ground cords. To provide proper ground, wear the strap snug against the skin. Hardware Reference Guide E-1 - Compaq Evo D300 | Compaq Evo Family of Personal Computers, Small Form Factor Mod - Page 54
work mat. If you do not have any of the suggested equipment for proper grounding, contact your Compaq authorized dealer, reseller, or service provider. ✎ For more information on static electricity, contact your Compaq authorized dealer, reseller, or service provider. E-2 Hardware Reference Guide - Compaq Evo D300 | Compaq Evo Family of Personal Computers, Small Form Factor Mod - Page 55
of heat and cold. For information about the recommended temperature and humidity ranges for your computer, refer to Appendix A, "Specifications," in this guide. I Keep liquids away from the computer and keyboard. I Never cover the ventilation slots on the monitor with any type of material. I Turn - Compaq Evo D300 | Compaq Evo Family of Personal Computers, Small Form Factor Mod - Page 56
damage the finish. Safety If any object or liquid falls into the drive, immediately unplug the computer and have it checked by an authorized Compaq service provider. F-2 Hardware Reference Guide - Compaq Evo D300 | Compaq Evo Family of Personal Computers, Small Form Factor Mod - Page 57
devices in their original packing boxes or similar packaging with sufficient packing material to protect them. ✎ For environmental nonoperating ranges, see Appendix A, "Specifications," in this guide. Hardware Reference - Compaq Evo D300 | Compaq Evo Family of Personal Computers, Small Form Factor Mod - Page 58
Routine Computer Care and Shipping Preparation F-4 Hardware Reference Guide - Compaq Evo D300 | Compaq Evo Family of Personal Computers, Small Form Factor Mod - Page 59
B battery replacement C-1 C CD-ROM drive installing 2-20 removing 2-18 Components Keyboard 1-4 components front expansion card 2-12 F front panel components 1-2 H hard drive Hardware Reference Guide Index installation guidelines B-1 upgrading 2-16 I installation sequence 2-1 installing additional - Compaq Evo D300 | Compaq Evo Family of Personal Computers, Small Form Factor Mod - Page 60
random access memory) 2-7 security lock provisions D-1 serial number 1-7 shipping preparation F-1 smart cover lock failsafe key 2-3 specifications A-1 U Ultra ATA devices B-1 W Windows Logo Key 1-6 Index-2 Hardware Reference Guide
-
 1
1 -
 2
2 -
 3
3 -
 4
4 -
 5
5 -
 6
6 -
 7
7 -
8
-
9
-
10
-
11
-
12
-
13
-
14
-
15
-
16
-
17
-
18
-
19
-
20
-
21
-
22
-
23
-
24
-
25
-
26
-
27
-
28
-
29
-
30
-
31
-
32
-
33
-
34
-
35
-
36
-
37
-
38
-
39
-
40
-
41
-
42
-
43
-
44
-
45
-
46
-
47
-
48
-
49
-
50
-
51
-
52
-
53
-
54
-
55
-
56
-
57
-
58
-
59
-
60
 |
 |

b
Hardware Reference Guide
Compaq Evo Desktop Family: Small Form
Factor Models - Intel Celeron Versions
Document Part Number: 243848-002
January 2002
This book provides basic information for upgrading this series of
computers.