Craftsman 21400 Owners Manual
Craftsman 21400 - 10 in. Band Saw Manual
 |
View all Craftsman 21400 manuals
Add to My Manuals
Save this manual to your list of manuals |
Craftsman 21400 manual content summary:
- Craftsman 21400 | Owners Manual - Page 1
this manual and follow all its Safety Rules and Operating Instructions. • Table of Contents • Full One Year Warranty • Safety Instructions • Assembly • Getting to Know Your Bandsaw • Adjustment • Operation • Maintenance • Troubleshooting • Electrical Schematic • Parts List • EspaSol, p. 12 Sears - Craftsman 21400 | Owners Manual - Page 2
Full one year warranty ... 2 Safety instructions ... 2 Assembly... 4 Getting to know your bandsaw 5 Adjustment ... 6 Operation ... 8 Maintenance ... 8 Troubleshooting ... 9 Electrical schematic ... 9 Parts list ... 10 Esparlol 12 If this Craftsman tool fails due to a defect in material - Craftsman 21400 | Owners Manual - Page 3
or replaced. _PECIAL SAFETY RULES FOR BANDSAWS 1. Always stop the Bandsaw before removing scrap pieces from table. 2. Always keep hands and fingers away from the blade. 3. Never attempt to saw stock that does not have a flat surface, unless a suitable support is used. 4. Always hold material firmly - Craftsman 21400 | Owners Manual - Page 4
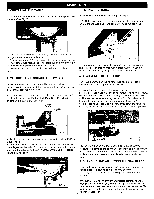
thoroughly with a clean dry cloth. CARTON CONTENTS Item A B C D E F G Description Q'ty. Main Machine 1 Fence Assembly 1 Table 1 Guide Rail 1 Owner's Manual 1 Upper Table Trunnion Assembly 1 Bag of Loose Parts 1 ..._J Hex. Socket Head Cap Screw M6x30 1 Washer6 1 Wing Nut M6 1 Hex - Craftsman 21400 | Owners Manual - Page 5
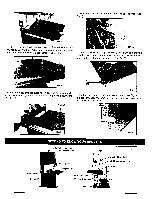
provided in the machine's base. (See Fig. 5) FIG. 2 c. Lay the rip fence onto the guide rail. Adjust the rip fence parallel to the saw blade. Tighten rip fence handle by pressing downward. (See Fig. 3) FIG. 5 f. The bandsaw has a 2-1/2" dust port included. (Sea Fig. 6) It is recommended that when - Craftsman 21400 | Owners Manual - Page 6
end clamp at the rear of the rip fence. Set the fence handle to apply just enough pressure to enable safe operation during cutting. 5. CHANGING AND ADJUSTING THE SAW BLADE This bandsaw is factory-equipped with a general-purpose wood cutting blade, the saw blade is set prior to delivery. To change - Craftsman 21400 | Owners Manual - Page 7
the new saw blade and check the saw blade tracking by turning the upper wheel by hand. The saw blade should run in the center of the bandsaw wheels. g. If need adjust the tracking of the saw blade, proceed as mentioned below" TRACKING THE SAW BLADE" h. Replace the rip fence, the guide rail, the - Craftsman 21400 | Owners Manual - Page 8
adjustment is reached, lock the rear roller guide in position with the guide adjusting screw (D) Fig.16 Guide adjusting screw (C) 9. CHANGING THE DRIVE BELT a. Release the saw blade tension by turning the blade tension knob on the top of bandsaw counterclockwise. b. Using a M6 hex. "L" wrench (not - Craftsman 21400 | Owners Manual - Page 9
. 4. The drive belt has snapped. 1. Rip fence for cutting not used. 2. Feed rate too fast. 3. The blade teeth are dull or damaged. 4, Blade guides not suitably adjusted. 1. The teeth are dull, caused by cutting hard material or long use. 2. The saw blade was fitted the wrong way on the bandsaw. This - Craftsman 21400 | Owners Manual - Page 10
\ 1N - Craftsman 21400 | Owners Manual - Page 11
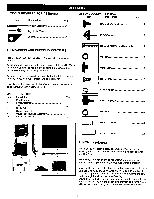
11 DESCRIPTION • Flat Countersunk Rod Guide Guide Rail Fence Carrier Head Screw M6x1O ,Special Screw Washer 10 Fence Handle Roll Pin 3x18 Star Socket Set Screw M6xlO Drive Belt Ball Bearing 12ram Retaining Ring 28 Lower Wheel Tire Retaining Ring 12 Saw Blade Upper Wheel Upper Bearing Bolt - Craftsman 21400 | Owners Manual - Page 12
derechos, por el cual varia, desde un estado al otro estado. Sears, Roebuck y Co, Dept 817 WA, Hoffman Estates, IL 60179 ADVERTENCIA GENERAL DE SEGURIDAD SABER TU HERRAMIENTA DE PODER: Leer el manual de usuarioeuidadesamente.Aprender las aplieeeionesde herramienta, capacidadde trebajo, y - Craftsman 21400 | Owners Manual - Page 13
aproplada. Nunca no poner la rope o joyerias que puede agarrar en partes movidas. Caueho-exclusivo de ealzado estd recornendado pare un calzado mejor. _" el sierra no serd utilizado por un periodo largo. 10. Anotar y seguir las advertencias e instrucciones de seguridad que aparece sobre la puerta - Craftsman 21400 | Owners Manual - Page 14
contenidos Modelo 119.214000 10" Cinta de sierra est& embarcado completamente en una caja a. Separar todas las partes del cart6n y chequear 1 Tabtero 1 Guia de Carril ! Manual de Usuario 1 Asamblaje de Mufi6n de tablero superior 1 Paquete de Partes sueltos 1 •J Enchufe Hex M6x 30 - Craftsman 21400 | Owners Manual - Page 15
d, Ubicar bot6n de tension de filo sobre el tensi6n do file (Ver Fig. 4) b. Ajusiar el guia de carril con dos botones de rosca de comienzo y arandear al tablero. Utilizer el bot6n hex puntando el troni[Io, arandelar y balancear para corregir el tablero de trabajo. (Ver Fig. 2) e. Para asegurar la - Craftsman 21400 | Owners Manual - Page 16
tablero, soltar el tuerca balaneeado sobre el mufi6n de mesa, ubicar el tablero pare el angulo requerido y apretar el tuerca balanceado nuevamente (Ver Fig. 10) FIG. 7 b. Mover el tablero de lugar como requerido, haste que sierra de cinta corre atraves del centre del inserci6n de tablero. c. Si el - Craftsman 21400 | Owners Manual - Page 17
de file desbloqueando los tornillos de ajuste de gufa. (B) Fig. 15 6. RASTREO DE SIERRA DE FILe d. Cuando la ajustaciSn correcta se encuentra, bloquear el parte posterior de guia de rueda en posici6n con el tornillo de gufa de ajuste (B) Fig.15 Seleccionar el rastreo de sierra de file antes de - Craftsman 21400 | Owners Manual - Page 18
tension de sierra de filo presionando el botOn de tension de s_erra sobre el parte superior de sierra de filo en sentido de aguja de reloj. b. Utilizar una para el uso. ADVERTENCIA: Antes de comenzar de chequear si alguna parte de su s_erra defile est,. perdido, malfuncionado, est_m daRaclo o roto - Craftsman 21400 | Owners Manual - Page 19
cinta. ADVERTENClA : Este mdquina debe estar en tierra. Para evitar electrocusi6n o fuego, todas las reparaciones el_ctricas deber estar hecho solamente por electricistas calificados, utilizando los partes reemplazantes aut_ntico. Varilla Motor 19 - Craftsman 21400 | Owners Manual - Page 20
it! For the replacement parts, accessories and owner's manuals that you need to do-it-yourself. For Sears professional installation of home Au Canada pour service en fran(;ais: 1-800-LE-FOYER Mc (1-800-533-6937) www.sears.ca Sesir-s ® Registered Trademark / TM Trademark / $M Service Mark of Sears,
-
 1
1 -
 2
2 -
 3
3 -
 4
4 -
 5
5 -
 6
6 -
 7
7 -
8
-
9
-
10
-
11
-
12
-
13
-
14
-
15
-
16
-
17
-
18
-
19
-
20
 |
 |
Owner's
Manual
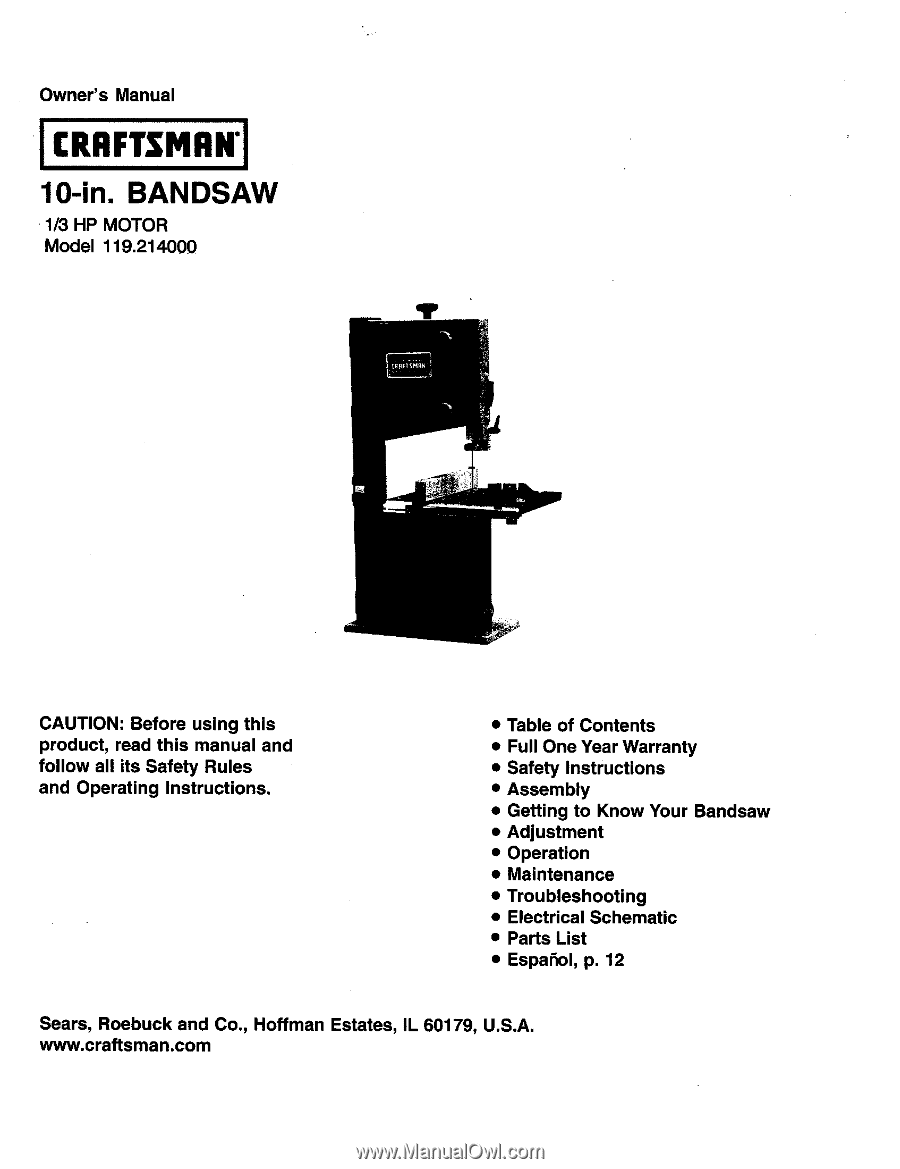
10-in. BANDSAW
1/3 HP MOTOR
Model
119.214000
CAUTION:
Before
using
this
product,
read this
manual
and
follow
all its Safety
Rules
and
Operating
Instructions.
•
Table
of Contents
•
Full One Year Warranty
•
Safety
Instructions
•
Assembly
•
Getting
to Know
Your
Bandsaw
•
Adjustment
•
Operation
•
Maintenance
•
Troubleshooting
•
Electrical
Schematic
•
Parts
List
•
EspaSol,
p. 12
Sears,
Roebuck
and
Co.,
Hoffman
Estates,
IL 60179,
U.S.A.
www.craftsman.com