Cub Cadet TANK LZ 60 TANK L 60 KW Operator's Manual - Page 31
Adjustments
 |
View all Cub Cadet TANK LZ 60 manuals
Add to My Manuals
Save this manual to your list of manuals |
Page 31 highlights
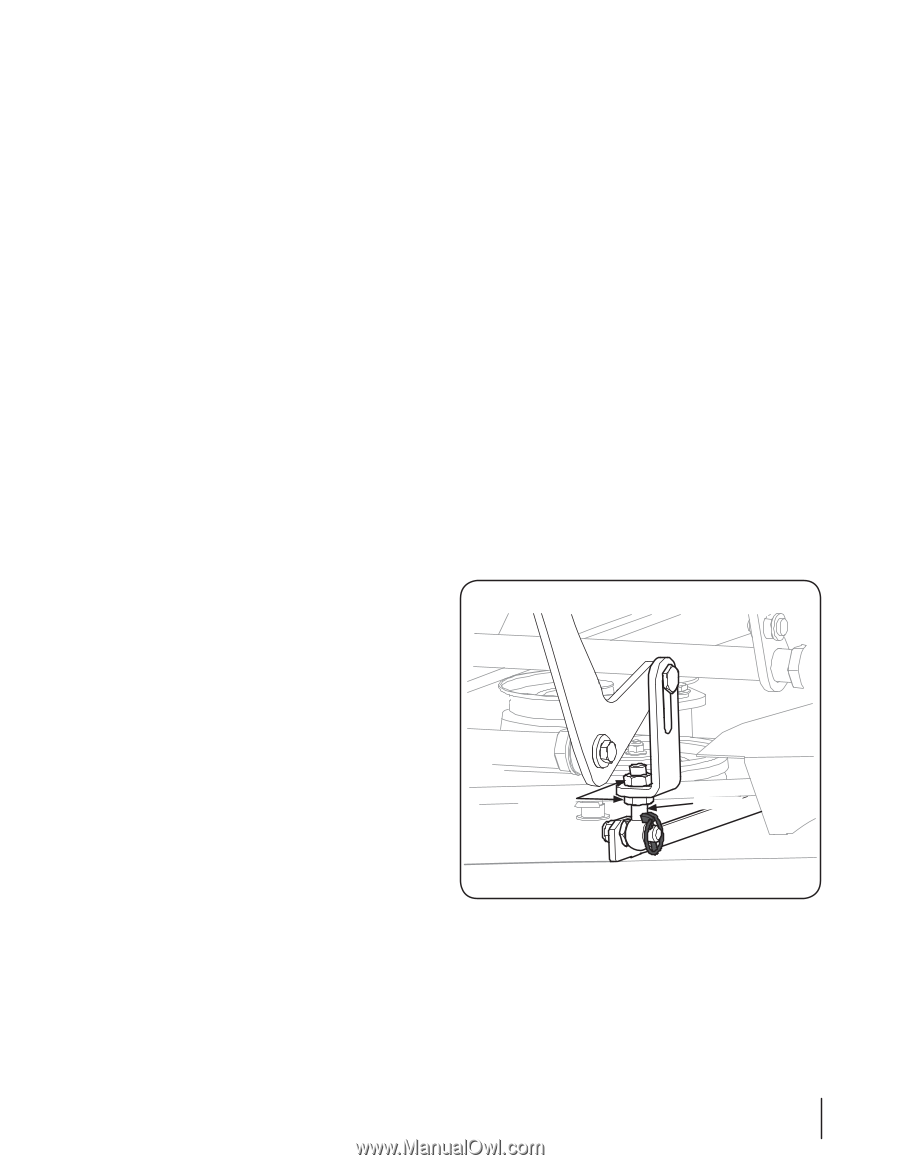
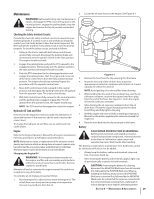
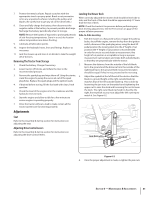
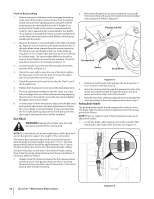
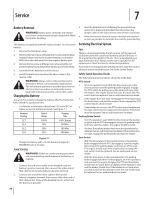
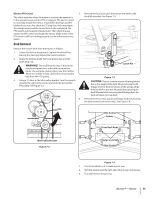
7. Protect the metal surfaces. Repair scratches with the appropriate touch-up spray paint. Brush a rust preventive oil on any unpainted surfaces including the pulleys and blades. (Be careful not to get any oil on the drive belts.) 8. Clean and fully charge the battery, then disconnect the negative cable at the battery to prevent possible discharge. Recharge the battery periodically when in storage. NOTE: Remove the battery if exposed to prolonged periods of sub-freezing temperatures. Store in a cool, dry location where temperatures are above freezing. 9. Lubricate all lubrication points. 10. Inspect the hydraulic hoses, lines and fittings. Replace as necessary. 11. Jack the mower up and store it on blocks to take the weight off of the tires. Removing The Tractor From Storage 1. Check the battery. Charge if necessary. 2. Lower tractor off blocks, and inflate the tires to the recommended pressure. 3. Remove the spark plugs and wipe them off. Using the starter, crank the engine to pump the excess oil out of the spark plug holes. Replace the spark plugs and the ignition leads. 4. If drained before storing, fill the fuel tank with clean, fresh gasoline. 5. Check the level of the engine oil in the crankcase and the hydraulic reservoir tank. 6. Start the engine and allow to idle for a few minutes to ensure engine is operating properly. 7. Drive the tractor without a load to make certain all the tractor systems are functioning properly. Leveling the Mower Deck When correctly adjusted the mower deck should be level side to side, and the front of the deck should be approximately 1⁄4" lower than the rear of deck. NOTE: Check the tractor's tire pressure before performing any deck leveling adjustments. See the Tire section on page 29 for proper inflation pressures. Side-to-Side Leveling 1. Park the mower on a flat paved surface, engage the parking brake, shut off the engine, remove the key from the ignition switch, disconnect the spark plug wires, using the deck lift pedal position the mowing deck into the 4" height of cut position (the 4" height of cut position is recommended in order for one to see and obtain a measurement. Any height of cut position is acceptable as long as a proper measurement can be taken) and rotate both outside blades so that they are perpendicular with the tractor. 2. Measure the distance from the outside of the left blade tip to the ground and the distance from the outside of the right blade tip to the ground. Both measurements taken should be equal. If they're not, proceed to the next step. 3. Adjust the eyebolt at the left front of the deck so that the blade-to-ground height at the right outside blade tip matches that of the left outside blade tip. This is done by loosening the jam nuts on the eyebolt and tightening the upper nut to raise the deck and loosening the nut to lower the deck. The right outer blade tip height is fixed by the right, front eyebolt so you must adjust the left outer tip to match it. See Figure 6-2. Adjustments Seat Refer to the Assembly & Set-Up section for instructions on adjusting the seat. Adjusting Drive Control Levers Refer to the Assembly & Set-Up section for instructions on adjusting the drive control levers. Jam Nuts Eyebolt Figure 6-2 4. Once the proper adjustment is made, re-tighten the jam nuts. Section 6 - Maintenance & Adjustments 31
-
 1
1 -
2
-
3
-
4
-
5
-
6
-
7
-
8
-
9
-
10
-
11
-
12
-
13
-
14
-
15
-
16
-
17
-
18
-
19
-
20
-
21
-
22
-
23
-
24
-
25
-
 26
26 -
 27
27 -
 28
28 -
 29
29 -
 30
30 -
 31
31 -
 32
32 -
 33
33 -
 34
34 -
 35
35 -
 36
36 -
37
-
38
-
39
-
40
-
41
-
42
-
43
-
44
-
45
-
46
-
47
-
48
 |
 |