D-Link DAP-3712 Product Manual
D-Link DAP-3712 Manual
 |
View all D-Link DAP-3712 manuals
Add to My Manuals
Save this manual to your list of manuals |
D-Link DAP-3712 manual content summary:
- D-Link DAP-3712 | Product Manual - Page 1
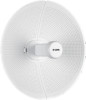
Version 1.00 | 12/11/2020 User Manual 20 km Long Range 802.11ac Wireless Bridge DAP-3712 - D-Link DAP-3712 | Product Manual - Page 2
a Pole 15 Configuration 17 Factory Default Setting 17 Web-based Configuration 18 Wizard 20 Basic Settings 23 Wireless 23 Network 29 QoS 31 Service 34 D-Link DAP-3712 User Manual System 37 Status 39 Info 39 Statistics 41 Network 42 Syslog Info 43 Tools 44 Ping IP 44 Traceroute 45 - D-Link DAP-3712 | Product Manual - Page 3
Section 1 - Product Overview Package Contents DAP-3712 20 km Long Range 802.11ac Wireless Bridge Power Injector Power cord Mounting tie Quick Start Guide D-Link DAP-3712 User Manual 3 - D-Link DAP-3712 | Product Manual - Page 4
with the following: • Microsoft Windows®, Apple Mac OS, or a Linux-based operating system Browser Requirements: • Microsoft Edge, Firefox 60.0, Safari ,or Chrome 68.0.3440.106 D-Link DAP-3712 User Manual 4 - D-Link DAP-3712 | Product Manual - Page 5
2T2R outdoor-deployable wireless bridge that provides wireless connectivity to multiple network locations. The DAP-3712 has a built-in 23 dBi dish antenna that can deliver connectivity at a distance construction, and network overhead, lower actual data throughput rate. D-Link DAP-3712 User Manual 5 - D-Link DAP-3712 | Product Manual - Page 6
timeout • TDMA solves the hidden-node problem in 802.11 networks • Supports 4 operation modes: Access Point, Client, WDS Access Point, WDS Client • Supports point-to-point and point-to- .3at standard power input • Waterproof housing and protection from weather D-Link DAP-3712 User Manual 6 - D-Link DAP-3712 | Product Manual - Page 7
Section 1 - Product Overview Hardware Overview Connection 1 2 1 PoE Port Uses a standard Ethernet cable to connect the device to a PoE power source such as a PoE switch or PoE injector. 2 Reset Button Resets the device to its factory settings. D-Link DAP-3712 User Manual 7 - D-Link DAP-3712 | Product Manual - Page 8
Section 1 - Product Overview Hardware Overview LED Indicators 1 1 Signal Strength Signal strength indicators. One light indicates a weak signal. Two lights indicate a medium signal. Three lights indicate a strong signal. D-Link DAP-3712 User Manual 8 - D-Link DAP-3712 | Product Manual - Page 9
Section 2 - Installation Installation Assembling the Access Point 1. Assemble the dish of the DAP-3712 by sliding the two halves together until they lock in place. 2. Connect the antenna and base through the hole in the center of the dish. D-Link DAP-3712 User Manual 9 - D-Link DAP-3712 | Product Manual - Page 10
of the DAP-3712. Insert the cable into the PoE port, then attach the cover to the device. 4. Connect the adjustment kit to the base of the DAP-3712 by pressing it in until it clicks and locks in place. Use the adjustment kit to position the antenna at the desired. D-Link DAP-3712 User Manual 10 - D-Link DAP-3712 | Product Manual - Page 11
. The radiation pattern and wireless protocol of the DAP-3712 is designed for high-performance bridge connectivity. Using different models or models with mismatched firmware versions may cause problems, such as performance degradation or a reduction in coverage area. D-Link DAP-3712 User Manual 11 - D-Link DAP-3712 | Product Manual - Page 12
the receptacle on the access point. Configuring the First DAP-3712 in Access Point Mode 1. Use an Ethernet cable to connect the LAN port on the DAP-3712 to the PoE Out port on the PoE injector. web browser. Enter 192.168.0.50 in the address field of your browser. D-Link DAP-3712 User Manual 12 - D-Link DAP-3712 | Product Manual - Page 13
Section 2 - Installation 4. Log in to the administration user interface. The default login information is: Username: admin Password: admin 5. Follow the Setup Wizard's instructions to configure the device in Access Point Mode. D-Link DAP-3712 User Manual 13 - D-Link DAP-3712 | Product Manual - Page 14
instructions above to power on the device. Launch the Setup Wizard to configure the device in Client Mode. 2. To avoid an IP address conflict, change the IPv4 address so that it is different from the first DAP-3712 information under Associated Stations (shown below). D-Link DAP-3712 User Manual 14 - D-Link DAP-3712 | Product Manual - Page 15
damage the equipment. Mounting on a Pole 1. Hold the DAP-3712 against the pole in the desired position. 2. Thread the metal mounting tie through the hole on the base of the DAP-3712 and wrap it around the pole. Fasten the tie to secure the device against the pole. D-Link DAP-3712 User Manual 15 - D-Link DAP-3712 | Product Manual - Page 16
Section 2 - Installation Once completed, your network will resemble the following diagram. Client mode DAP-3712 AP mode DAP-3712 PoE injector Switch PoE injector Switch PC1 PC2 PC3 PC4 D-Link DAP-3712 User Manual 16 - D-Link DAP-3712 | Product Manual - Page 17
you how to configure your New D-Link DAP-3712 using the web-based configuration utility. Factory Default Setting The following table shows the DAP-3712's default settings. Features Username Password .255.0 Gateway: 192.168.0.1 disable 802.11 ac auto 80 MHz disable D-Link DAP-3712 User Manual 17 - D-Link DAP-3712 | Product Manual - Page 18
the DAP-3712 web interface, you will need to configure your computer's TCP/IP settings: 1. Right-click the Local Area Connection icon on your computer and click Properties, then click Continue. The Local Area Connection Properties dialog box will appear, as seen below. D-Link DAP-3712 User Manual - D-Link DAP-3712 | Product Manual - Page 19
: 3. In the above figure, the IP address should be set to 192.168.0.*. Here, * can be any number between 1-255 (but not 50, since the DAP-3712's default IP address is 192.168.0.50). D-Link DAP-3712 User Manual 19 - D-Link DAP-3712 | Product Manual - Page 20
bar of your web browser, and the following login interface will appear. Wizard When you log into the DAP-3712 for the first time, the Wizard page will automatic pop-up. You can also click Wizard in the top right corner. To configure the device, follow these steps: D-Link DAP-3712 User Manual 20 - D-Link DAP-3712 | Product Manual - Page 21
the DAP-3712, you will need to change the password. The default password is admin. 2. Country On the next screen, select your country. 3. Network You can change the IP address of the DAP-3712. The default IP is 192.168.0.50. Click Next to advance to the next page. D-Link DAP-3712 User Manual 21 - D-Link DAP-3712 | Product Manual - Page 22
Use this to set the DAP-3712's output power. Power: Encryption: You can select which Wi-Fi encryption the DAP3712 should use: Open, WPA-PSK, WPA2-PSK, WPA/ WPA2 Hybrid-PSK, or IEEE802.1X. Key: To input the WiFI encryption key. The default key is 1234567890abc D-Link DAP-3712 User Manual 22 - D-Link DAP-3712 | Product Manual - Page 23
there are Five tabs: Wireless, Network, QoS, Service, and System. After making changes, click Save to apply them. Wireless In the Wireless tab, you can configure the DAP-3712's Wi-Fi and radio settings. Wireless Toggle the button to enable or disable Wi-Fi. Settings: D-Link DAP-3712 User Manual 23 - D-Link DAP-3712 | Product Manual - Page 24
Wi-Fi and radio settings. Basic Settings Country Code: Use this to select the country where the DAP-3712 is installed. Channel Width: Use this to change the AP's channel width. The default is 80 MHz increased, the signal distance and signal strength will be improved. D-Link DAP-3712 User Manual 24 - D-Link DAP-3712 | Product Manual - Page 25
MIMO: The DAP-3712 supports 2T2R Multi DAP-3712 units. When TDMA+ is enabled, you can also decide whether you want to enable JTrans. JTrans can help prevent an internal wireless attack. The client and access point must be turned on at the same time when JTrans is enabled. D-Link DAP-3712 User Manual - D-Link DAP-3712 | Product Manual - Page 26
: Click this to select which SSID the DAP-3712 should connect to. Lock: Use this to select which SSID and MAC address the DAP-3712 should connect to. If you enable this, the DAP-3712 will only connect to the AP you specify. Cancel: Click this to cancel the scan. D-Link DAP-3712 User Manual 26 - D-Link DAP-3712 | Product Manual - Page 27
attempt to connect to when it operates in Client or Client (WDS) mode. Hidden SSID: When the DAP-3712 is in Access Point or Access Point (WDS) mode, this function will be displayed. Use this to Key: To input the WiFI encryption key. The default key is 1234567890abc D-Link DAP-3712 User Manual 27 - D-Link DAP-3712 | Product Manual - Page 28
this function, the clients which Isolation: are connected to the DAP-3712 will not be able to communicate with each other. Speed to the DAP-3712. MAC Filtering: Use this to set up a list of MAC addresses that you want to allow or disallow to connect to DAP-3712. D-Link DAP-3712 User Manual 28 - D-Link DAP-3712 | Product Manual - Page 29
DAP3712 can only be accessed with this VLAN tag and IP address. In Bridge Mode, users can configure the DAP-3712's LAN interface. IP Protocol: Use this setting to select either Static IP or DHCP IP. IPv4/IPv6 DHCP clients to get the IP address as well as PPPoE. D-Link DAP-3712 User Manual 29 - D-Link DAP-3712 | Product Manual - Page 30
the DAP-3712's bridge Interface policy. Setting: VLAN: This displays the DAP-3712 VLAN ID tag. Ethernet Use this to select the LAN port's speed negotiation Interface mode. Setting: IPv4/IPv6 Use this to add the Static Route rule for the DAPStatic Route: 3712. D-Link DAP-3712 User Manual 30 - D-Link DAP-3712 | Product Manual - Page 31
accept the devices listed in IP Filter Settings and MAC Filter Settings. Deny: Deny the devices listed in IP Filter Settings and MAC Filter Settings. D-Link DAP-3712 User Manual 31 - D-Link DAP-3712 | Product Manual - Page 32
Section 3 - Configuration IP Filter Click Add to add a new IP address to allow or deny. Settings: MAC Filter Click Add to add a new MAC address to accept or Settings: deny. D-Link DAP-3712 User Manual 32 - D-Link DAP-3712 | Product Manual - Page 33
type. Time-sensitive data (like video/ audio data) can be assigned a higher priority than other data. For WMM to be enabled, the wireless client must support it as well. QoS Priority: Use this setting to set the QoS settings on the LAN port. D-Link DAP-3712 User Manual 33 - D-Link DAP-3712 | Product Manual - Page 34
. Internet access is required if this setting is enabled. Time Restart: When this function is enabled, the DAP-3712 will automatically restart according to a schedule that you set. Reboot Period: There are three items can be selected: Every Day, Every Week, and Once. D-Link DAP-3712 User Manual 34 - D-Link DAP-3712 | Product Manual - Page 35
will be saved to the Syslog Log Server server automatically. Settings: Ping The Ping Watchdog sets the DAP-3712 to Watchdog: continuously ping a user-defined IP address (for example, the IP address of the AP be able to re-enable it with modified parameters. D-Link DAP-3712 User Manual 35 - D-Link DAP-3712 | Product Manual - Page 36
Section 3 - Configuration LED LED1, LED2, and LED3 light up to indicate the Configuration: DAP-3712's signal strength. The default ranges are: LED1: -95 dBm to -71 dBm LED2: -71 dBm when the temperature is between 125°C and 150°C, the rate of decline will be 100%. D-Link DAP-3712 User Manual 36 - D-Link DAP-3712 | Product Manual - Page 37
to restore the device to the Factory factory default settings. Settings: Reboot: Click the button to reboot the DAP-3712. Firmware Click the Browse button and choose a firmware Update: file, then click the Update button to upgrade the firmware to the latest version. D-Link DAP-3712 User Manual 37 - D-Link DAP-3712 | Product Manual - Page 38
's password Account: Read-Only Use this to enable a Read Only guest account Account: Change Read- Use this to change the guest account's password Only Account: D-Link DAP-3712 User Manual 38 - D-Link DAP-3712 | Product Manual - Page 39
the DAP-3712's network status Network Mode: This indicates whether the device is in Router Mode or Bridge Mode IP Protocol: This indicates whether the device is configured with a Static IP or DHCP Wired Port This displays the device's LAN MAC Address MAC Address: D-Link DAP-3712 User Manual 39 - D-Link DAP-3712 | Product Manual - Page 40
noise floor value. In order to achieve the best results, a value of less than -95dBm is recommended Transmit Displays the DAP-3712's current Wi-Fi power Power: output Station This will list all of the client devices which are List Info: connected to the DAP-3712. D-Link DAP-3712 User Manual 40 - D-Link DAP-3712 | Product Manual - Page 41
Section 3 - Configuration Statistics There are two subsections: Interface Statics and Throughput. Interface Displays the DAP-3712's traffic Statics: Throughput: Displays the current Ethernet and wireless traffic D-Link DAP-3712 User Manual 41 - D-Link DAP-3712 | Product Manual - Page 42
Section 3 - Configuration Network In this tab, you can see the current IPv4 route table, APR table and bridge table. D-Link DAP-3712 User Manual 42 - D-Link DAP-3712 | Product Manual - Page 43
Section 3 - Configuration Syslog Info This tab shows the current syslog. Click the Clear button to clear the log. D-Link DAP-3712 User Manual 43 - D-Link DAP-3712 | Product Manual - Page 44
to help you manage the device and your network. These tools include Ping IP, Traceroute, Link Test, Antenna Alignment and Spectrum Analyzer. Ping IP You can type in an IP address and check the ping result. IP Address: Enter the IP address that you would like to ping. D-Link DAP-3712 User Manual 44 - D-Link DAP-3712 | Product Manual - Page 45
Section 3 - Configuration Traceroute This allows the user to traceroute an IP address. IP Address: Enter the IP address to traceroute D-Link DAP-3712 User Manual 45 - D-Link DAP-3712 | Product Manual - Page 46
server IP address to check the speed between the two links. Iperf Type: Select Client or Server Iperf Dual: If you select Iperf Dual, the DAP-3712 will conduct a bi-directional speed test. Otherwise, it Iperf Interval: Enter the interval to wait between the tests. D-Link DAP-3712 User Manual 46 - D-Link DAP-3712 | Product Manual - Page 47
Section 3 - Configuration Antenna Alignment When you select this, the DAP-3712 will recalibrate its signal strength. You can check which angle has the best antenna alignment when you install the DAP-3712. D-Link DAP-3712 User Manual 47 - D-Link DAP-3712 | Product Manual - Page 48
Analyzer You can use the Spectrum Analyzer to scan for the best channels. When performing the scan, the DAP-3712 Wi-Fi may disconnect. Spectrum Enter the frequency range to conduct spectrum Analysis analysis on. It will take a few seconds to finish the Range: scan. D-Link DAP-3712 User Manual 48 - D-Link DAP-3712 | Product Manual - Page 49
Transmit Power¹ 27 dBm LEDs Signal strength Wireless Speed Up to 867 Mbps Antenna Type Dish Bandwidth Support 20/40/80 MHz Antenna Gain 23 dBi Beamwidth H: 10°, V: 10° Standards 802.11a rate. Environmental conditions will adversely affect wireless signal range. D-Link DAP-3712 User Manual 49 - D-Link DAP-3712 | Product Manual - Page 50
Appendix A - Technical Specifications LAN Type Static, DHCP VLAN Support Yes Firewall IP / MAC filter Monitors Throughput, interfaces, routes table, bridge table, 90% Weight 900 g (2.0 lbs) Dimensions 372 x 372 x 241 mm (14.6 x 14.6 x 9.5 in) Certifications CE FCC D-Link DAP-3712 User Manual 50 - D-Link DAP-3712 | Product Manual - Page 51
of the FCC RF Rules. This equipment must be installed and operated in accordance with provided instructions and the antenna(s) used for this transmitter must be installed to provide a separation distance of could void the user's authority to operate the equipment. D-Link DAP-3712 User Manual 51
-
 1
1 -
 2
2 -
 3
3 -
 4
4 -
 5
5 -
 6
6 -
 7
7 -
8
-
9
-
10
-
11
-
12
-
13
-
14
-
15
-
16
-
17
-
18
-
19
-
20
-
21
-
22
-
23
-
24
-
25
-
26
-
27
-
28
-
29
-
30
-
31
-
32
-
33
-
34
-
35
-
36
-
37
-
38
-
39
-
40
-
41
-
42
-
43
-
44
-
45
-
46
-
47
-
48
-
49
-
50
-
51
 |
 |

User Manual
Version 1.00 | 12/11/2020
DAP-3712
20 km Long Range 802.11ac Wireless Bridge