D-Link DES-1526 Product Manual
D-Link DES-1526 Manual
 |
UPC - 790069275111
View all D-Link DES-1526 manuals
Add to My Manuals
Save this manual to your list of manuals |
D-Link DES-1526 manual content summary:
- D-Link DES-1526 | Product Manual - Page 1
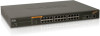
D-Link DES-1526 Web-Smart 26-Port Ethernet Switch with 24 10/100Mbps 802.3af Power Over Ethernet Ports & 2 10/100/1000Mbps Combo Gigabit Ethernet Ports Manual First edition Building Networks for People - D-Link DES-1526 | Product Manual - Page 2
- D-Link DES-1526 | Product Manual - Page 3
installed and used in accordance with this manual, may cause harmful interference to radio product may cause radio interference in which case the user may be required to take adequate measures. Warnung! es un producto de Clase A. En un entorno doméstico, puede causar interferencias de radio, en - D-Link DES-1526 | Product Manual - Page 4
A. Dans un environnement domestique, ce produit pourrait causer des interférences radio, auquel cas l`utilisateur devrait prendre les mesures adéquates. Attenzione! Il presente prodotto appartiene alla classe A. Se utilizzato in ambiente domestico il - D-Link DES-1526 | Product Manual - Page 5
TABLE OF CONTENTS Table of Contents i About This Manual 1 Purpose 1 Terms/Usage 1 Introduction 3 Fast Ethernet Technology 3 Gigabit Ethernet Technology 4 Switching Technology 5 VLAN (Virtual Local Area Network 6 Power over Ethernet (PoE 7 Features 7 Unpacking and Installation 9 Unpacking - D-Link DES-1526 | Product Manual - Page 6
Ports (Port 25F~26F 16 Reset 17 Rear Panel 17 Understanding LED Indicators 19 System LEDs 19 POWER 19 Power Maximum (PWR MAX 19 CPU: Management Indicator 20 Fast Ethernet PoE Port Status LEDs (Port 1 ~ 24 20 Link/ACT: Link/Activity 20 100Mbps 20 PoE Status 20 Gigabit Ethernet Port Status - D-Link DES-1526 | Product Manual - Page 7
the Web Management Utility 23 Discovery List 24 Monitor List 25 View Trap 26 Add Item 27 Delete Item 27 Device Setting 27 Configuration Setting 27 Password Change 28 Firmware Upgrade 29 Web Access 29 Toolbar 30 File TAB 30 View TAB 30 Option TAB 31 Help TAB 31 Configuring the Switch - D-Link DES-1526 | Product Manual - Page 8
35 802.1Q VLAN Settings (Virtual Local Area Network) ..... 37 Trunk Setting 40 Mirror Setting 41 SNMP Setting 42 PoE Setting 50 Device Status 53 Statistic 55 System Setting 56 Trap Setting 57 Set Password 59 Backup Setting 60 Reset Setting 61 Logout 61 Technical Specifications 59 vi - D-Link DES-1526 | Product Manual - Page 9
ABOUT THIS MANUAL Congratulations on your purchase of the DES-1526. This Switch integrates 100Mbps Fast Ethernet and 10Mbps Ethernet network capabilities in a highly flexible package. Since this Switch's Port-1 to Port-24 are Power over Ethernet (PoE) ports, it will automatically detect the presence - D-Link DES-1526 | Product Manual - Page 10
- D-Link DES-1526 | Product Manual - Page 11
describes the features of the DES-1526 and some background information about Fast Ethernet, Gigabit Ethernet, Switching, VLAN, and Power over Ethernet environments, it provides a straightforward upgrade and takes advantage of the existing investment in hardware, software, and personnel training. 3 - D-Link DES-1526 | Product Manual - Page 12
Gigabit Ethernet Technology Gigabit Ethernet is an extension of IEEE 802.3 Ethernet utilizing the same packet structure, format, and support for CSMA/CD protocol, full-duplex, flow control, and management objects, but with a tenfold increase in theoretical throughput over 100Mbps Fast Ethernet and a - D-Link DES-1526 | Product Manual - Page 13
address level of the Ethernet protocol transmitting among connected Ethernet or Fast Ethernet LAN segments. Switching is a cost-effective way of increasing the total network capacity available to users on a local area network. A switch cabling and adapter cards. Switching LAN technology is a marked - D-Link DES-1526 | Product Manual - Page 14
and the need for routers, using faster switching instead. Other VLAN utility includes: Security: Security is increased with the reduction of opportunity in eavesdropping on a broadcast network because data will be switched to only those confidential users within the VLAN. Cost Reduction: A VLAN can - D-Link DES-1526 | Product Manual - Page 15
all locations. Power and Data are integrated onto the same cable. Supporting category 5/5e up to 100 Meters, PoE will provide power to PoE compatible devices, such as IP telephones, wireless LAN access points, and IP security cameras. PoE is already widely adopted in the market, saving up to 50% of - D-Link DES-1526 | Product Manual - Page 16
for half-duplex mode ports Supports 802.1Q VLAN Supports Port-based Trunking Supports Port-mirroring Supports Port-setting for Speed/Disable, Flow control, and Port based QoS (Quality of Service) Easy configuration via Web Browser Easy setting via Web Management Utility Standard 19" Rack-mount size - D-Link DES-1526 | Product Manual - Page 17
the Switch and carefully unpacks its contents. The carton should contain the following items: One DES-1526 One AC power cord, suitable for your area's electrical power connections Four rubber feet to be used for shock cushioning Screws and two mounting brackets CD-ROM with Web Management Utility and - D-Link DES-1526 | Product Manual - Page 18
Leave at least 10cm (4 in.) of space at the front and rear of the hub for ventilation. Install the Switch on a sturdy, level surface that can support its weight, or in an EIA standard-size equipment rack. For information on rack installation, see the next section, titled Rack Mounting. When - D-Link DES-1526 | Product Manual - Page 19
, which can be placed in a wiring closet with other equipment. Attach the mounting brackets at the Switch's front panel (one on each side), and secure them with the provided screws. Figure 2. Combine the Switch with the provided screws. Then, use screws provided with the equipment rack to mount each - D-Link DES-1526 | Product Manual - Page 20
For Legacy devices that are not yet compatible, the PoE port will not offer the power to these devices. This feature allows users to freely and safely mix legacy and Power over Ethernet compatible devices on their network. The Switch supports 10Mbps Ethernet or 100Mbps Fast Ethernet and it runs both - D-Link DES-1526 | Product Manual - Page 21
-45 cable. Figure 4. Connecting Network Cables AC Power The Switch uses the AC power supply 100-240V AC, 50-60 Hz. The power switch is located at the rear of the unit adjacent to the AC power connector and the system fan. The Switch's power supply will adjust to the local power source automatically - D-Link DES-1526 | Product Manual - Page 22
andmay be turned on without having any or all LAN segment cables connected. 14 - D-Link DES-1526 | Product Manual - Page 23
terminal is identified, and the PoE port will supply power to the connected PoE device. The Switch PoE function supports PoE ports priority management. When there is a system power shortage with the PD, the Switch will enforce the PoE port priority management; the lower port number will have - D-Link DES-1526 | Product Manual - Page 24
PoE port will not offer the power to these devices. This feature allows users to freely and safely mix legacy and Power over Ethernet compatible devices on their network. These ports support (Port 25F~26F): The Switch is equipped with two mini-GBIC ports, which supports optional 1000BASE-SX/LX mini- - D-Link DES-1526 | Product Manual - Page 25
Reset: The Reset button is to reset all settings back to the factory defaults. Note: Be sure that you record the settings of your device, or else all settings will be erased when pressing the "Reset" button. Rear Panel Figure 6. Rear panel of the Switch AC Power Connector: This is a three-pronged - D-Link DES-1526 | Product Manual - Page 26
- D-Link DES-1526 | Product Manual - Page 27
INDICATORS The front panel LEDs provide instant status feedback, and helps monitor and troubleshoot when needed. Figure 7. LED indicators of the Switch System LEDs POWER: On : When the Power LED lights on, the Switch is receiving power. Off : When the Power connection. turns off or the - D-Link DES-1526 | Product Manual - Page 28
CPU: Management Indicator Blinking : When the CPU is working, the CPU LED is blinking. On/Off : The CPU is not working. Fast Ethernet PoE Port Status LEDs (Port 1 ~ 24) Link/ACT: Link/Activity On : When the Link/ACT LED lights on, the respective successfully connected to an Ethernet network. - D-Link DES-1526 | Product Manual - Page 29
ACT LED is blinking, the port is transmitting or receiving data on the Ethernet network. Off : There is no link. 1000Mbps On : When the 1000Mbps LED lights on, the respective connected to a 1000Mbps Gigabit Ethernet network. port is Off : When the respective port is connected - D-Link DES-1526 | Product Manual - Page 30
- D-Link DES-1526 | Product Manual - Page 31
, you can easily discover all the Web Management Switches, assign the IP Address, changing the password, and upgrade new firmware. Installing the Web Management Utility The following instructions guide you through the installation of the Web Management utility. 1. Insert the Utility CD in the CD-ROM - D-Link DES-1526 | Product Manual - Page 32
Figure 8. Web Management Utility The Web Management Utility is divided into four parts, Discovery List, Monitor List, Device Setting, and Toolbar function, for detailed instructions, follow the section below. Discovery List This is the list where you can discover all the Web management devices in - D-Link DES-1526 | Product Manual - Page 33
the Monitor List: S: Shows the system symbol of the Web-Smart device, represents a device system that is not alive. IP Address: Shows the current IP address of the device. MAC Address: Shows the device MAC Address. Protocol version: Shows the version of the Utility protocol. Product Name: Shows the - D-Link DES-1526 | Product Manual - Page 34
Trap function can receive the events that happen on the Web Management Switch in the Monitor List. There is a light indicator the Symbol, Time, Device IP, and the Event occurred. (Figure 10) The symbol " " represents the trap signal. This symbol will disappear after you review and click on the event - D-Link DES-1526 | Product Manual - Page 35
IP Address), System name, Location, and DHCP setting. In factory default, the IP address of the DES-1526 will be atomically assigned from a DHCP server (DHCP enabled). If your network has no DHCP server, the DES-1526 will fail to get an IP address, and the DES-1526 will be assigned the default IP - D-Link DES-1526 | Product Manual - Page 36
press the "Set" button to process the data change immediately. Figure 11. Configuration Setting Password Change You can use this when you need to change the password. Fill in the required passwords in the dialog boxes and press the "Set" button to process the password change immediately. Figure 12 - D-Link DES-1526 | Product Manual - Page 37
device has a new function, there will be a new firmware to update the device; use this function to upgrade the firmware. Figure 13. Firmware upgrade Web Access Double click the device in the Monitor List or select a device in the Monitor List and press the "Web Access" button to access the device in - D-Link DES-1526 | Product Manual - Page 38
Monitor Load, and Exit. Monitor Save: To record the settings of the Monitor List to the default settings so that when you open the Web Management Utility the next time, it will automatically load the default recorded setting. Monitor Save As: To record the setting of the Monitor List to an appointed - D-Link DES-1526 | Product Manual - Page 39
; it displays the version of the Web Management Utility. Configuring the Switch The DES-1526 has a Web GUI interface for smart switch configuration. The Switch can be configured through the Web browser. A network administrator can manage, control, and monitor the Switch from the local LAN. This - D-Link DES-1526 | Product Manual - Page 40
the default IP address of the Web Smart Switch is 192.168.0.1, then the manager PC should be set at 192.168.0.x (where x is a number between 2 and 254), and the default subnet mask is 255.255.255.0. Open the Web browser program and Enter IP address http://192.168.0.1 (the factory-default IP address - D-Link DES-1526 | Product Manual - Page 41
Figure 15 After entering the password, the main page appears, and the screen will display the device status. Figure 16 33 - D-Link DES-1526 | Product Manual - Page 42
that you want to configure. There are eleven options: Port Settings, VLAN Settings, Trunk Settings, Mirror Settings, SNMP Settings, PoE Settings, Device Status, Statistics, System Settings, Trap Settings, Password Settings, Backup Settings, and Reset Settings as shown in the Main Menu screen. 34 - D-Link DES-1526 | Product Manual - Page 43
Settings, VLAN Settings, Trunk Settings, Mirror Settings, SNMP Settings, and PoE Settings in Setup menu. Port Settings In the Port Settings menu (Figure , Flow Control, QoS and Link Status. When you need to renew the posted information, press the "Refresh" button. The Link Status in the screen will - D-Link DES-1526 | Product Manual - Page 44
Figure 18. Port Configuration To change the port setting, click on the ID parameter to enter the selected port to configure its Speed/Disable and Flow control. Figure 19. Port Settings. 36 - D-Link DES-1526 | Product Manual - Page 45
. Flow Control: This setting determines whether or not the Switch will be handling flow control. Set FlowCtrl to Enable for avoiding data transfer overflow. If it is set to Disable, there is either no flow control or other hardware/software management. When the 10/100M port is set to full-duplex - D-Link DES-1526 | Product Manual - Page 46
When you select VID Table Setting, press "Add new VID" to create new VID group, from port 01 ~ port 26 (26F), select Untag Port, Tag Port, or Not Member for each port. To save the VID group, press the "Apply" button. To remove the selected VID group, select the VID group and press "Remove the VID" - D-Link DES-1526 | Product Manual - Page 47
When you select Port VLAN setting, fill in each port's PVID value between 1 and 4094. Figure 21. 39 - D-Link DES-1526 | Product Manual - Page 48
The Trunk function enables you to cascade two or more devices with larger bandwidths. There are four Trunking groups to be set; and there are default ports in each member. Checked "Enable" to use the trunk function, select the ports in each member to be trunk, and click "Apply" to activate - D-Link DES-1526 | Product Manual - Page 49
that forwards a copy of each incoming and/or outgoing packet from one port of a network switch to another port where the packet can be studied. It enables the manager to keep close track of switch performance and alter it if necessary. Configuring the port mirroring by assigning a source port from - D-Link DES-1526 | Product Manual - Page 50
used to access this information over the network. The DES-1526 supports the SNMP versions 1. In SNMP v.1, user authentication is accomplished using 'community strings', which function like passwords. The remote user SNMP application and the Switch SNMP must use the same community string. SNMP - D-Link DES-1526 | Product Manual - Page 51
the Switch), or less serious like a port status change. The Switch generates traps and sends them to the trap recipient (or network manager). Typical network management software. In addition, the DES-1526 also supports its own proprietary enterprise MIB as an extended Management Information Base - D-Link DES-1526 | Product Manual - Page 52
Configure SNMP Community: Figure 24. SNMP Community Setting Add Group: To add a SNMP Community group, press the "Add Group" button. The Add SNMP Community configuration window will pop up. Fill in the community name and assign the community enable read_only or read_write. Press the "Apply" button to - D-Link DES-1526 | Product Manual - Page 53
Delete Group: To delete previously defined SNMP Community group, press the "Delete Group" button. The Delete SNMP Community configuration window will pop up; check the delete dialog box. Press "Apply" to delete the selected SNMP Community Group. Figure 26. Delete SNMP Community group Modify Group: - D-Link DES-1526 | Product Manual - Page 54
than the System power Threshold setting. Add Trap: To create a recipient of SNMP traps generated by the Switch's SNMP agent, press the "Add Trap" button, and the SNMP Trap Set window will pop up. You can fill in the community name and trap IP address of the remote management station that will - D-Link DES-1526 | Product Manual - Page 55
Figure 29. Add SNMP Trap System Events: Monitoring the Switch status. Device bootup: A trap when the Switch Bootup was successful. Fiber Port Events: Monitoring the Fiber port status. Link Up/Link Down: A trap when there is linking status in the fiber port. Abnormal* Receive Error: A trap when there - D-Link DES-1526 | Product Manual - Page 56
the twisted pair port. Abnormal*: 50 error packet count within 10 seconds. PoE Events: Monitoring the PoE ports status. PoE Power fail: A trap when the port's power source fails or the PD64012 to configure its community name, IP address, and events. Press "Apply" to save changes of the SNMP Trap. 48 - D-Link DES-1526 | Product Manual - Page 57
Figure 31. Modify SNMP Trap 49 - D-Link DES-1526 | Product Manual - Page 58
including, Port Enable, Power limit, Power (W), Voltage(V), Current (mA), Classification, Port status, System Budget Power, Support Total Power, Remainder Power, and The ratio of system power supply. Note: The PoE Status information of Power current, Power Voltage, and Current is the power usage - D-Link DES-1526 | Product Manual - Page 59
. To configure the settings, click on the ID parameter to enter the selected port. Figure 33. PoE Port Setting Poe Enable: Select to enable or disable the PoE function. Power limit: This function allows you to manually set the port power current limitation to be given to the PD. To protect the DWL - D-Link DES-1526 | Product Manual - Page 60
52 - D-Link DES-1526 | Product Manual - Page 61
power supply is large than or smaller than the System power Threshold setting, the Switch will send trap event to the Management Station. Note: When there is a system power shortage with the PD, the Switch will enforce the PoE port priority management. The lower port number will have the higher - D-Link DES-1526 | Product Manual - Page 62
Figure 35. System Status 54 - D-Link DES-1526 | Product Manual - Page 63
Statistics The Statistics Menu screen will display the status of each port packet count. Figure 36. Statistic For detailed packet information, click on the ID parameter as Figure 26. 55 - D-Link DES-1526 | Product Manual - Page 64
Timeout, IP Address, Subnet Mask, and Gateway. Through the Web Management Utility, you can easily recognize the device by using the System Name and the Location Name. The Login Timeout is to set the idle time-out for security issues, When there is no action when running the Web Smart Utility and - D-Link DES-1526 | Product Manual - Page 65
Web Management Utility. Set the Trap IP Address of the manager where the trap is to be sent. Figure 39. Trap Setting System Events: Monitoring the system's trap. Device Bootup: A trap when booting up the system. Illegal Login: A trap when there is an incorrect password login. It will record the IP - D-Link DES-1526 | Product Manual - Page 66
status. Link Up/Link Down: A trap when there is linking status in PoE port's power is on and off. Power over current: A trap when the PoE port's power is over current. Power short circuit: A trap when the PoE port's power circuit was short. Power threshold on/off: A trap when the radio of the system - D-Link DES-1526 | Product Manual - Page 67
the manager to secure the Web Management Switch. You can use this function to change the password. If you forget the password, press the "Reset" button in the rear panel of the Switch. The current setting includes VLAN, Port Setting... etc. will be lost and the Switch will be restored to the default - D-Link DES-1526 | Product Manual - Page 68
Backup Setting The backup tools help you to backup the current setting of the Switch. Once you need to backup the setting, press the "Backup" button to save the setting. of the recorded file. Figure 41. Backup Setting Note: When restoring a recorded file, the current password will not be erased. 60 - D-Link DES-1526 | Product Manual - Page 69
will be retrieved from DHCP server (factory default is DHCP enabled) or the default IP address of 192.168.0.1 will be used when the device fails to retrieve the IP address from DHCP server. Figure 42. Reset Setting Logout When you select this function, the Web configuration will log out and return - D-Link DES-1526 | Product Manual - Page 70
- D-Link DES-1526 | Product Manual - Page 71
(full-duplex) Star 10BASET: 2-pair UTP Cat. 3, 4, 5; up to 100m 100BASE-TX: 2-pair UTP Cat. 5; up to 100m 1000BASE-T: 4-pair UTP Cat. 5; up to 100m PoE: 4-pair UTP Cat. 5; up to 100m 24 x 100BASE-TX PoE Ethernet ports 2 x 1000BASE-T Gigabit Ethernet ports 2 x mini-GBIC ports (shared) 59 - D-Link DES-1526 | Product Manual - Page 72
Power over Ethernet Standard Power current PD Classification PoE pin assignment Safety protection IEEE 802.3af Up to 15.4W per port(Maximum 170W per device) Auto PD classification identify Power(+): pin 3 & pin 6 in - D-Link DES-1526 | Product Manual - Page 73
ing Rate: MAC Address Learning: Transmits Method: RAM Buffer: Store-and-forward 4K entries per device 10Mbps Ethernet: 14,880/pps 100Mbps Fast Ethernet: 148,800/pps 1000Mbps Gigabit Ethernet: 1,488,000/pps Automatic update Store-and-forward 768K bytes per device Warranty Information (All countries - D-Link DES-1526 | Product Manual - Page 74
Stromnetz zu trennen. Vervenden Sie keine Flüssig- oder Aerosolreiniger. Am besten dient ein angefeuchtetes Tuch zur Reinigung. 4. Um eine Beschädigung des Gerätes zu vermeiden sollten Sie nur Zubehörteile verwenden, die vom Hersteller zugelassen sind. 5. Das Gerät is vor Feuchtigkeit zu schützen - D-Link DES-1526 | Product Manual - Page 75
sich mit allen Fragen die Service und Repartur betreffen an Ihren Servicepartner. Somit stellen Sie die Betriebssicherheit des Gerätes sicher. 18. earlier expiration of original warranty period. When D-Link provides replacement, then the defective product becomes the property of D-Link. After an RMA - D-Link DES-1526 | Product Manual - Page 76
obligation under this software warranty shall be to replace any defective software product with product which substantially conforms to D-Link's applicable product documentation. Purchaser assumes responsibility for the selection of appropriate application and system/platform software and associated - D-Link DES-1526 | Product Manual - Page 77
) that is replaced by D-Link, or for which the purchase price is refunded, shall become the property of D-Link upon replacement or refund. Limited Software Warranty: D-Link warrants that the software portion of the product ("Software") will substantially conform to D-Link's then current functional - D-Link DES-1526 | Product Manual - Page 78
Any hardware, software, firmware or other products or services provided by anyone other than D-Link; Products that have been purchased from inventory clearance or liquidation sales or other sales in which D-Link, the sellers, or the liquidators expressly disclaim their warranty obligation pertaining - D-Link DES-1526 | Product Manual - Page 79
warranty provides specific legal rights and the product owner may also have other rights which vary from state to state. Trademarks: D-Link is a registered trademark of D-Link Systems in accordance with the instructions, may cause harmful equipment off and on, the user is encouraged to try to correct - D-Link DES-1526 | Product Manual - Page 80
1 REGISTRATION Register your product on-line at: http://support.dlink.com/register Product registration is entirely voluntary and failure to complete or return this form will not diminish your warranty rights. 68 - D-Link DES-1526 | Product Manual - Page 81
referred to in this limited warranty as "D-LINK") with this limited warranty. The Term "D-LINK Hardware Product" is limited to the hardware components and all its internal components including firmware. The term "D-LINK Hardware Product" DOES NOT include any software applications or programs. 69 - D-Link DES-1526 | Product Manual - Page 82
Period set forth below ("Limited Product Warranty Period"), if the product is used and serviced in accordance with the user manual and other documentation provided to the purchaser at the time of purchase (or as amended from time to time). D-LINK does not warrant that the products will operate - D-Link DES-1526 | Product Manual - Page 83
fans and accessories that are provided with 2 year warranty. The warranty period stated in this card supersedes and replaces the warranty period as stated in the user's manual or in the purchase contract for the relevant products. For the avoidance of doubt, if you have purchased the relevant DLINK - D-Link DES-1526 | Product Manual - Page 84
eingeschränkten Garantie verkauft wurden. Der Begriff „D-LINK Hardware-Produkte" beinhaltet nur Hardwarekomponenten und deren Bestandteile einschließlich Firmware. Der Begriff "D-LINK Hardware-Produkte" umfasst KEINE Software-Anwendungen oder -programme. Räumlicher Geltungsbereich der eingeschr - D-Link DES-1526 | Product Manual - Page 85
Probleme wegen: (a) unerlaubter Veränderung oder Hinzufügung, (b) Fahrlässigkeit, Missbrauch oder Zweckentfremdung, einschließlich des Gebrauchs des mit dem Zeitpunkt, zu dem das Produkt von D-LINK gekauft wurde. Als Nachweis für den Zeitpunkt des Kaufs gilt der datierte Kauf- oder Lieferbeleg. Es - D-Link DES-1526 | Product Manual - Page 86
werden, gehen in das Eigentum von D-LINK über. Die verbliebene eingeschränkte Garantie des entfernten Teils oder Produkts wird auf das Link (Europe) Ltd. 4th Floor, Merit House Edgware Road Colindale London NW9 5 AB Vereinigtes Königreich Telefon: +44-020-8731-5555 Fax: +44-020-8731-5511 www.dlink - D-Link DES-1526 | Product Manual - Page 87
de « Produit Matériel D-LINK » se limite aux composants matériels et à l'ensemble de leurs composants internes, notamment le firmware. Le terme de « Produit Matériel D-LINK dans tout pays où D-LINK ou ses prestataires agréés proposent le service de garantie, sous réserve des modalités énoncées dans - D-Link DES-1526 | Product Manual - Page 88
à l'acheteur utilisateur final initial du Produit Matériel DLINK. Elle est non cessible à quiconque se procure le Produit Matériel D-LINK auprès de l'acheteur utilisateur final initial. Type de produit Période de Garantie Switches gérés (switches comportant un agent SNMP Cinq (5) ans intégr - D-Link DES-1526 | Product Manual - Page 89
soit rapporté à un Centre de Service Agréé D-LINK pendant la période de garantie. D-LINK assure la réparation ou le remplacement dans un Centre de Service Agréé D-LINK. Les composants, pièces ou produits retirés dans le cadre de cette garantie limitée deviennent propriété de D-LINK. La pièce ou le - D-Link DES-1526 | Product Manual - Page 90
. El término "producto de hardware D-LINK" se restringe a los componentes de hardware y a los componentes internos de estos, incluyendo el firmware. El término "producto de hardware D-LINK" NO incluye ni las aplicaciones ni los programas de software. Cobertura geográfica de la garantía limitada del - D-Link DES-1526 | Product Manual - Page 91
de hardware DLINK, y no es transferible a otras personas que reciban el producto de hardware D-LINK del originario compradorusuario final. Tipo de producto Período de garantía del producto Conmutadores gestionados (p. ej., conmutadores con agente SNMP integrado) (incluyendo módulos y software de - D-Link DES-1526 | Product Manual - Page 92
figura en esta tarjeta sustituye y reemplaza al período de garantía que consta en el manual del usuario o en el contrato de compra de los productos correspondientes. Para evitar dudas: si usted ha comprado el producto D-LINK correspondiente como consumidor, sus derechos legales no se ven afectados - D-Link DES-1526 | Product Manual - Page 93
interne compreso il firmware. Il termine "Prodotto hardware D-LINK" NON comprende eventuali applicazioni o programmi software. Ambito geografico della con il manuale d'uso e con ogni altra documentazione fornita all'acquirente all'atto dell'acquisto (e relativi emendamenti). D-LINK non garantisce - D-Link DES-1526 | Product Manual - Page 94
guasto di prodotti o servizi non forniti da DLINK o non soggetti a una garanzia successiva di D-LINK o a un accordo di manutenzione; (e) LINK dal primo acquirente. Tipo di prodotto Periodo di garanzia Switch (solo switch dotati di agente SNMP incorporato) 5 (cinque) anni (inclusi moduli e software - D-Link DES-1526 | Product Manual - Page 95
LINK entro il periodo di garanzia. La riparazione o la sostituzione verranno eseguite da D-LINK presso un Centro di Assistenza autorizzato D-LINK proprietà di D-LINK. Il pezzo o modello o composizione; D-LINK può a sua D-LINK può richiedere che venga esibita la prova di acquisto. Garante D-Link
-
 1
1 -
 2
2 -
 3
3 -
 4
4 -
 5
5 -
 6
6 -
 7
7 -
8
-
9
-
10
-
11
-
12
-
13
-
14
-
15
-
16
-
17
-
18
-
19
-
20
-
21
-
22
-
23
-
24
-
25
-
26
-
27
-
28
-
29
-
30
-
31
-
32
-
33
-
34
-
35
-
36
-
37
-
38
-
39
-
40
-
41
-
42
-
43
-
44
-
45
-
46
-
47
-
48
-
49
-
50
-
51
-
52
-
53
-
54
-
55
-
56
-
57
-
58
-
59
-
60
-
61
-
62
-
63
-
64
-
65
-
66
-
67
-
68
-
69
-
70
-
71
-
72
-
73
-
74
-
75
-
76
-
77
-
78
-
79
-
80
-
81
-
82
-
83
-
84
-
85
-
86
-
87
-
88
-
89
-
90
-
91
-
92
-
93
-
94
-
95
 |
 |

D-Link DES-1526
Web-Smart 26-Port
Ethernet Switch with
24 10/100Mbps 802.3af
Power Over Ethernet Ports
&
2 10/100/1000Mbps Combo Gigabit Ethernet Ports
Manual
First edition
Building Networks for People