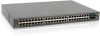
D-Link DES-3250TG Product Manual
D-Link DES-3250TG Manual
 |
UPC - 790069250651
View all D-Link DES-3250TG manuals
Add to My Manuals
Save this manual to your list of manuals |
D-Link DES-3250TG manual content summary:
- D-Link DES-3250TG | Product Manual - Page 1
D-Link ™ DES-3250TG Standalone Layer 2 Switch User's Guide - D-Link DES-3250TG | Product Manual - Page 2
the marks and names or their products. D-Link Computer Corporation disclaims any proprietary interest in trademarks and used in accordance with this user's guide, may cause harmful interference to radio es un producto de Clase A. En un entorno doméstico, puede causar interferencias de radio, en - D-Link DES-3250TG | Product Manual - Page 3
802.1w Rapid Spanning Tree ...16 Link Aggregation...17 VLANs ...18 IP Addresses ...23 Internet Protocols ...26 Packet Headers...30 Web-Based Switch Management...35 Introduction ...35 Before You Start ...35 Getting Started ...35 Configuring the Switch ...36 User Accounts Management ...36 Save Changes - D-Link DES-3250TG | Product Manual - Page 4
...40 IP Address...41 Switch Information...43 Advanced Settings...44 Port Configuration...45 Port Mirroring ...47 Link Aggregation ...48 IGMP...50 Spanning Tree...53 Forwarding Filtering...58 VLANs ...60 Port Bandwidth ...65 SNTP Settings ...66 Port Security ...68 QOS (Quality of Service) ...70 - D-Link DES-3250TG | Product Manual - Page 5
Link DES-3250TG Standalone Layer 2 Switch Intended Readers The DES-3250 User's Guide contains information for setup and management and of the DES-3250TG switch. This guide and tells you how to avoid the problem. CAUTION: A CAUTION indicates a potential for property damage, personal injury, or death. - D-Link DES-3250TG | Product Manual - Page 6
D-Link DES-3250TG Standalone Layer 2 Switch Safety Instructions Use the following safety guidelines to environment. If the system gets wet, see the appropriate section in your troubleshooting guide or contact your trained service provider. • Do not push any objects into the openings of your system - D-Link DES-3250TG | Product Manual - Page 7
D-Link DES-3250TG Standalone Layer 2 Switch Safety Instructions (continued) • To help prevent electric shock, plug . Thus, "component" refers to any system as well as to various peripherals or supporting hardware. CAUTION: Installing systems in a rack without the front and side stabilizers installed - D-Link DES-3250TG | Product Manual - Page 8
D-Link DES-3250TG Standalone Layer 2 Switch Safety Instructions (continued) Always load the rack from the bottom provided to components in the rack. Do not step on or stand on any component when servicing other components in a rack. NOTE: A qualified electrician must perform all connections to DC - D-Link DES-3250TG | Product Manual - Page 9
D-Link DES-3250TG Standalone Layer 2 Switch 1 INTRODUCTION This section describes the functionality features of the DES-3250TG. Features The DES-3250TG Switch was designed for easy installation and high performance in an environment where traffic on the network and the number of users increase - D-Link DES-3250TG | Product Manual - Page 10
D-Link DES-3250TG Standalone Layer 2 Switch • IEEE 802.3ab compliant for 1000BASE-T (Copper) alternative backup paths and prevention of network loops. • SNMP V1, V2C, and V3 are supported. • Fully configurable in-band control for SNMP based software. • Flash memory for software upgrades. This can be - D-Link DES-3250TG | Product Manual - Page 11
only. However, the DES-3250TG implements counters for both receive and transmit functions. 802.1p MIB (RFC 2674). Ether-Like MIB (RFC 2358) - dot3StatsTable. • Supports Web-based management. • CLI management support. • TFTP support. • BOOTP support. • DHCP Client support. • Password enabled. Fast - D-Link DES-3250TG | Product Manual - Page 12
items: • One DES-3250TG Standalone Layer 2 Switch • Mounting kit: 2 mounting brackets and screws • Four rubber feet with adhesive backing • One AC power cord • This User's Guide with Registration Card If any item is found missing or damaged, please contact your local D-Link reseller for replacement - D-Link DES-3250TG | Product Manual - Page 13
D-Link DES-3250TG Standalone Layer 2 Switch Figure 2-1. Installing rubber feet for desktop installation Rack Installation The DES-3250TG can be mounted in an EIA standard-sized, 19-inch rack, which can be placed in a wiring closet with other equipment. To install, attach the - D-Link DES-3250TG | Product Manual - Page 14
D-Link DES-3250TG Standalone Layer 2 Switch Power on The DES-3250TG switch can be used with AC power supply follows: • All LED indicators will momentarily blink. This blinking of the LED indicators represents a reset of the system • The power LED indicator is always on after the power is turned ON - D-Link DES-3250TG | Product Manual - Page 15
D-Link DES-3250TG Standalone Layer 2 Switch 3 IDENTIFYING EXTERNAL COMPONENTS This chapter describes the front panel, rear panel, side panels, and optional plug-in module, and LED indicators of the DES-3250TG. Front Panel The front panel of the Switch consists of LED indicators, an RS-232 - D-Link DES-3250TG | Product Manual - Page 16
D-Link DES-3250TG Standalone Layer 2 Switch The system fans are used to dissipate heat. connector of the provided power cord into this socket, and the male side of the cord into a power outlet. Supported input voltages range from 100 ~ 240 VAC at 50 ~ 60 Hz. Side Panels Each side panel contains heat - D-Link DES-3250TG | Product Manual - Page 17
D-Link DES-3250TG Standalone Layer 2 Switch LED Indicators The LED indicators of the Switch include Power, Console, and Link/Act. The following shows the LED indicators for the Switch along with an explanation of each indicator. Figure 3-5. The LED Indicators ● Power - This indicator on - D-Link DES-3250TG | Product Manual - Page 18
D-Link DES-3250TG Standalone Layer 2 Switch 4 CONNECTING THE SWITCH This chapter describes how to connect the DES-3250TG to your Ethernet/Fast Ethernet/Gigabit Ethernet network. The Switch's auto-detection feature allows all 48 10/100 ports to support both MDIII and MDI-X connections. Switch to End - D-Link DES-3250TG | Product Manual - Page 19
D-Link DES-3250TG Standalone Layer 2 Switch Figure 4-2. Switch connected to a port on a hub or switch using a straight or crossover cable 10BASE-T Device For a 10BASE-T device, the Switch's LED indicators should display the following: ● Link/Act indicator is ON. 100BASE-TX Device For a 100BASE-TX - D-Link DES-3250TG | Product Manual - Page 20
can manage, control, and monitor the switch from the console program. The DES-3250TG contains a CPU, memory for data storage, flash memory for configuration data, operational programs, and SNMP agent firmware. These components allow the switch to be actively managed and monitored from either - D-Link DES-3250TG | Product Manual - Page 21
D-Link DES-3250TG Standalone Layer 2 Switch • Flow Control None Make sure the terminal or PC you are using to make this connection is configured to match these settings. If you are having problems making this connection on a PC, make sure the emulation is set to VT100. If you still don't see - D-Link DES-3250TG | Product Manual - Page 22
SNMP packets through the IP protocol. • Collecting information about the status and current configuration of network devices. • Modifying the configuration of network devices. The DES-3250TG has a software program called an 'agent' that processes SNMP requests, but the user program that makes the - D-Link DES-3250TG | Product Manual - Page 23
Link DES-3250TG Standalone Layer 2 Switch from a factory reset in that configuration the standard MIB-II, the Switch also supports its own proprietary enterprise MIB as an extended variables usually related to user-customized configurations. Examples of these are the Switch's IP Address, Spanning Tree - D-Link DES-3250TG | Product Manual - Page 24
D-Link DES-3250TG Standalone The aging time can be from 10 to 1,000,000 seconds with a default value of 300 seconds. A very long aging time can result in dynamic forwarding the terminology is the same as STP. Most of the settings configured for STP are also used for RSTP. This section introduces some - D-Link DES-3250TG | Product Manual - Page 25
D-Link DES-3250TG Standalone Layer 2 Switch 802.1d STP Disabled Blocking Listening all ports operating in full-duplex mode are considered to be P2P ports, unless manually overridden through configuration. 802.1d/802.1w Compatibility RSTP can interoperate with legacy equipment and is capable - D-Link DES-3250TG | Product Manual - Page 26
of the master port is applied to all members of the link aggregation group. Thus, when configuring the ports in a link aggregation group, you only need to configure the master port. The DES-3250TG supports link aggregation groups, which may include from two to eight switch ports each, except - D-Link DES-3250TG | Product Manual - Page 27
-3250TG 1. The DES-3250TG supports IEEE 802.1Q VLANs. The port untagging function can be used to remove the 802.1Q tag from packet headers to maintain compatibility with devices that are tagunaware (that is, network devices that do not support IEEE 802.1Q VLANs or tagging). 2. The switch's default - D-Link DES-3250TG | Product Manual - Page 28
D-Link DES-3250TG Standalone Layer 2 Switch Figure 5- 3. IEEE 802.1Q Packet Forwarding 802. 802.1Q/802.1p tag. The tag is contained in the following two octets and consists of 3 bits or user priority, 1 bit of Canonical Format Identifier (CFI - used for encapsulating Token Ring packets so they can be - D-Link DES-3250TG | Product Manual - Page 29
Link DES-3250TG Standalone Layer 2 Switch The EtherType and VLAN ID are inserted after the MAC source address, but before the original EtherType/Length or Logical Link are defined on the switch, all ports are then assigned to a default VLAN with a PVID equal to 1. Untagged packets are assigned the - D-Link DES-3250TG | Product Manual - Page 30
D-Link DES-3250TG Standalone Layer 2 Switch not? If the configures one VLAN, VID = 1, called the "default" VLAN. The factory default setting assigns all ports on the switch to the "default" VLAN. Packets cannot cross VLANs. If a member of one VLAN wants to connect to another VLAN, the link - D-Link DES-3250TG | Product Manual - Page 31
D-Link DES-3250TG Standalone Layer 2 Switch IP Addresses The Internet Protocol (IP) was designed for routing data between network sites. Later, it was adapted for routing between networks (referred to as "subnets") within a site. The IP defines a way of generating a unique number that can be - D-Link DES-3250TG | Product Manual - Page 32
Link DES-3250TG Standalone Layer 2 Switch Address Classes Address classes refer to the range of numbers in the subnet mask. Grouping the subnet masks into classes makes the task of dividing a network into subnets a bit easier. There are five address classes. The first four bits in the IP default - D-Link DES-3250TG | Product Manual - Page 33
Link DES-3250TG of bits in either the subnet mask or the node portion of the IP address. Multiplying the number of subnets by the number of nodes available uses an 11-bit subnet mask. (There are three additional bits added to the default Class A subnet mask). So the number of subnets is: 23 - 2 = - D-Link DES-3250TG | Product Manual - Page 34
D-Link DES-3250TG Standalone Layer 2 Switch 9 255.255.128.0 /17 510 32766 10 255.255 Protocols This is a brief introduction to the suite of Internet Protocols frequently referred to as TCP/IP. It is intended to give the reader a reasonable understanding of the available facilities and some - D-Link DES-3250TG | Product Manual - Page 35
D-Link DES-3250TG Standalone Layer 2 Switch Protocol Layering The Internet Protocol (IP) divides the tasks necessary to route and forward packets across networks by using a layered approach. Each layer has clearly defined tasks, protocol, and interfaces for - D-Link DES-3250TG | Product Manual - Page 36
D-Link DES-3250TG Standalone Layer 2 Switch Figure 5- 7. The Protocol Stack Between two protocol stacks, members of the same layer are To connect to the Internet usually requires a router and a modem or other device to connect to an Internet Service Provider's WAN. These are Layer 3 functions. 28 - D-Link DES-3250TG | Product Manual - Page 37
D-Link DES-3250TG Standalone Layer 2 Switch Layer 3 Commonly referred to as the routing layer, this layer provides logical partitioning of networks (subnetting), scalability, security, and Quality of Service (QoS). The backbone of the Internet is built using Layer 3 functions. IP is the premier - D-Link DES-3250TG | Product Manual - Page 38
D-Link DES-3250TG Standalone Layer 2 Switch Because these functions are required by a large number functions required for any user on one network to communicate with any user on another connected network. The communication interface between TCP and IP is relatively simple. When IP received a packet, - D-Link DES-3250TG | Product Manual - Page 39
D-Link DES-3250TG Standalone Layer 2 Switch Figure 5- 8. TCP Packet Header When packets have and give permission for more data to be sent. IP TCP sends its packets to IP with the source and destination IP addresses. IP is only concerned with these IP addresses. It is not concerned with the contents - D-Link DES-3250TG | Product Manual - Page 40
D-Link DES-3250TG Standalone Layer 2 Switch Figure 5- 9. IP Packet Header The flags and fragment offset between the MAC address of a network node and its IP address. There must be a database of Ethernet addresses and their corresponding IP addresses. Different protocol families can be in use on the - D-Link DES-3250TG | Product Manual - Page 41
Link DES-3250TG Standalone Layer 2 Switch When a packet is received, the headers are removed. The Ethernet Network Interface Card (NIC) removes the Ethernet header and checks the checksum. It then looks at the type code. If the type code is for IP, the packet is given to IP. IP then removes the IP - D-Link DES-3250TG | Product Manual - Page 42
D-Link DES-3250TG Standalone Layer 2 Switch the network will contain a database of computer names and their corresponding IP and MAC addresses. The user's computer will send a query to the name database computer, and the database computer will send a response. Both the query and the response are - D-Link DES-3250TG | Product Manual - Page 43
configure it. Thus, all settings encountered in web-based management are the same as those found in the console program. Note: This Web-based Management Module does not accept Chinese language input (or other languages requiring 2 bytes per character). Before You Start The DES-3250TG switch supports - D-Link DES-3250TG | Product Manual - Page 44
D-Link DES-3250TG Standalone Layer 2 Switch To begin managing your Switch simply run the browser you have installed on your computer and point it to the IP address you have defined for the device. The URL in the address bar should read something like: http://123.123.123.123, where the numbers - D-Link DES-3250TG | Product Manual - Page 45
D-Link DES-3250TG Standalone Layer 2 Switch 4. Please remember that Apply makes changes to the switch configuration for the current session only. All changes (including User additions or updates) must be entered into non-volatile ram using the Save Changes command on the Main Menu - if you want - D-Link DES-3250TG | Product Manual - Page 46
D-Link DES-3250TG Standalone Layer 2 Switch Click the Save Configuration button to save the current switch configuration in NV-RAM. The following dialog box will confirm that the configuration has been saved: Figure 6- 5. Save Configuration Confirmation dialog box Click the OK button to continue. - D-Link DES-3250TG | Product Manual - Page 47
D-Link DES-3250TG Standalone Layer 2 Switch to be assigned to the IP interface named System and the y's represent the corresponding subnet mask. 2. Alternatively, you can enter the commands config ipif System ipaddress xxx.xxx.xxx.xxx/z at the command line prompt. Where the x's represent the IP - D-Link DES-3250TG | Product Manual - Page 48
on the DES-3250TG switch using the Web-based Manager, you can perform any of the tasks described in the following sections. Configuration The Configuration menu consists of the following folders and screens: IP Address, Switch Information, Advanced Settings, Port Configuration, Port Mirroring, Link - D-Link DES-3250TG | Product Manual - Page 49
the Configuration menu to open the following window: Figure 6- 8. IP Address Settings window Note: The switch's factory default IP address is 10.90.90.90 with a subnet mask of 255.0.0.0 and a default gateway of 0.0.0.0. To manually assign the switch's IP address, subnet mask, and default gateway - D-Link DES-3250TG | Product Manual - Page 50
D-Link DES-3250TG Standalone Layer 2 Switch DHCP Manual IP Address Subnet Mask Default Gateway BOOTP server. If this option is set, the Switch will first look for a BOOTP server to provide it with this information before using the default or previously entered settings. The switch will send out a - D-Link DES-3250TG | Product Manual - Page 51
Information link in the Configuration menu. Figure 6- 9. Switch Information (Basic Settings) window This window shows which (if any) external modules are installed, and the switch's MAC Address (assigned by the factory and unchangeable). In addition, the Boot PROM Version and Firmware Version - D-Link DES-3250TG | Product Manual - Page 52
D-Link DES-3250TG listed here. Advanced Settings Click Advanced Settings on the Configuration menu: Figure 6- 10. Switch Information (Advanced IGMP Snooping allows the switch to read the Multicast Group IP address and the corresponding MAC address from IGMP packets that pass through - D-Link DES-3250TG | Product Manual - Page 53
to Enabled. Please note that when the user sets Asymetric VLANs to Disabled, then the factory default VLAN setting is restored. Syslog Global State To enable Syslog Global State, toggle to Enabled. Port Configuration Click the Port Configuration link in the Configuration menu: 45 - D-Link DES-3250TG | Product Manual - Page 54
D-Link DES-3250TG Standalone Layer 2 Switch Figure 6- 11. Port Configuration window The From and To drop-down dialog boxes allow different ports to be selected for configuration. Use the State pull-down menu to either enable or disable the selected port. Use the Speed/Duplex pull-down menu to select - D-Link DES-3250TG | Product Manual - Page 55
D-Link DES-3250TG Standalone Layer 2 Switch Mini-GBIC plug-in module is used, the options Description From and To State Speed/Duplex Enter the desired range of ports to be configured in these fields. Toggle the State field to either enable or disable a given port. Toggle the Speed - D-Link DES-3250TG | Product Manual - Page 56
D-Link DES-3250TG Standalone Layer 2 Switch Figure 6- 12. Setup Port Mirroring be configured as full duplex. The configuration of the Master Port in the group becomes the configuration for all of the ports in the aggregation group. All configuration options - including the VLAN configuration - - D-Link DES-3250TG | Product Manual - Page 57
D-Link DES-3250TG Standalone Layer 2 Switch The Spanning Tree Protocol will treat a link aggregation group as a single link. STP will use the port parameters of the Master Port in the calculation of port cost and in determining the state of the link aggregation group. If two redundant link - D-Link DES-3250TG | Product Manual - Page 58
D-Link DES-3250TG Standalone Layer 2 Switch Type aggregation group. Select Static or LACP (Link Aggregation Control Protocol). IGMP IGMP Snooping To configure IGMP Snooping: From the Configuration menu, select the IGMP folder, and then click IGMP Snooping to open the following window: - D-Link DES-3250TG | Product Manual - Page 59
D-Link DES-3250TG Standalone Layer 2 Switch configured. VLAN Name Allows the entry of the name of the VLAN for which IGMP Snooping is to be configured. Query Interval Allows the entry of a value between 1 and 65535 seconds, with a default of 125 seconds. This specifies the length of time - D-Link DES-3250TG | Product Manual - Page 60
D-Link DES-3250TG Standalone Layer 2 Switch Querier State State This field can be Router Ports Entry under the IGMP folder on the Configuration menu: Figure 6- 17. Current Static Router Ports Entries window To add a static router port configuration, click the pointer icon: Figure 6- 18. Static - D-Link DES-3250TG | Product Manual - Page 61
D-Link DES-3250TG Standalone Layer 2 Switch The following fields are displayed: Parameter implemented. On the port level, the settings are implemented on a user-defined Group of ports basis. STP Switch Settings To globally configure STP on the switch, click the Spanning Tree folder, and then the - D-Link DES-3250TG | Product Manual - Page 62
D-Link DES-3250TG Standalone Layer 2 Switch Figure 6- 19. Switch Spanning Tree Settings window Note: The factory default setting should cover the majority of installations. It is advisable to keep the default settings as set at the factory unless it is absolutely necessary to change them. The - D-Link DES-3250TG | Product Manual - Page 63
Link DES-3250TG can be specified from 1 to 10. The default value is 3. This allows you to control whether Hello Time cannot be longer than the Max. Age. Otherwise, a configuration error will occur. Observe the following formulas when setting the above parameters user-defined Group of ports basis. 55 - D-Link DES-3250TG | Product Manual - Page 64
D-Link DES-3250TG Standalone Layer 2 Switch To configure STP, click the Spanning Tree folder on the Configuration menu and then click on the STP Port Settings link: Figure 6- 20. STP Port Settings window 56 - D-Link DES-3250TG | Product Manual - Page 65
D-Link DES-3250TG Standalone Layer 2 Switch In addition to setting Spanning Tree parameters for use on the switch level, the switch allows for the configuration of a group of ports. This STP Group will use the switch-level parameters entered above, with the addition of Port Priority and Port Cost. - D-Link DES-3250TG | Product Manual - Page 66
DES-3250TG Standalone Layer 2 Switch P2P edge port normally should not receive BPDU packets. If a BPDU packet is received it automatically loses edge port status. No indicates the port does not have edge port status. Select Yes or No. Choosing Yes indicates a point-to-point (p2p) shared link - D-Link DES-3250TG | Product Manual - Page 67
D-Link DES-3250TG Standalone Layer 2 Switch Displays the currently selected MAC address MAC address into the switch's forwarding table, click on the Forwarding Filtering folder on the Configuration menu and then click Multicast Forwarding: Figure 6- 22. Static Multicast Forwarding Settings window To - D-Link DES-3250TG | Product Manual - Page 68
D-Link DES-3250TG Standalone Layer 2 Switch Port None Egress Select the port number The VLAN menu adds an entry to edit the VLAN definitions and to configure the port settings for IEEE 802.1Q VLAN support. Go to the Configuration menu, select the VLANs folder, and click Static VLAN Entry to open - D-Link DES-3250TG | Product Manual - Page 69
D-Link DES-3250TG Standalone Layer 2 Switch To edit an existing 802.1Q VLAN, click the corresponding pointer icon in the Modify column on the 802.1Q Static VLANs - D-Link DES-3250TG | Product Manual - Page 70
D-Link DES-3250TG Standalone Layer 2 Switch Egress Forbidden specified as None. When an window, shown below, allows you to determine whether the switch will share its VLAN configuration information with other GVRP (GARP VLAN Registration Protocol)-enabled switches. In addition, Ingress can - D-Link DES-3250TG | Product Manual - Page 71
Port VLAN ID(PVID) D-Link DES-3250TG Standalone Layer 2 Switch 63 - D-Link DES-3250TG | Product Manual - Page 72
D-Link DES-3250TG Standalone Layer 2 Switch Figure 6- 27. 802.1Q Port Settings window The following fields can be set: Parameter Description From and To PVID GVRP Ingress < - D-Link DES-3250TG | Product Manual - Page 73
D-Link DES-3250TG Standalone Layer 2 Switch packet. Disabled disables Ingress filtering. To enable or disable GVRP, globally, on the switch: Go to the Configuration menu and click Advanced Settings. Toggle the drop-down menu for GVRP Status between Enabled and Disabled. Click Apply to let your - D-Link DES-3250TG | Product Manual - Page 74
Link DES-3250TG will not permit you to set the bandwidth rate manually. SNTP Settings The DES-3250TG supports Simple Network Time Protocol (SNTP), an adaptation of SNTP is also designed to operate in a dedicated server configuration including an integrated radio clock. With careful design and control - D-Link DES-3250TG | Product Manual - Page 75
D-Link DES-3250TG Standalone Layer 2 Switch Figure 6- 29. Current Time window To use SNTP, toggle the SNTP State in the Current Time: SNTP Settings section to Enabled and enter the IP address of the relay the SNTP Primary Server and/or the SNTP Secondary Server. Enter an SNTP polling interval in the - D-Link DES-3250TG | Product Manual - Page 76
D-Link DES-3250TG Standalone Layer 2 Switch Figure 6- 30. Time Zone and DST Settings window This window allows you to set the Daily Saving Time repeated and annual settings. - D-Link DES-3250TG | Product Manual - Page 77
D-Link DES-3250TG Standalone Layer 2 Switch Figure 6- 31. Port Security Settings window The following fields can be set: Parameter From & To Description Use this to specify a consecutively numbered group of ports on the switch for configuration. 69 - D-Link DES-3250TG | Product Manual - Page 78
Link DES-3250TG Standalone Layer 2 Switch Admin State Max Learning Addr.(0-10) Lock Address Mode - D-Link DES-3250TG | Product Manual - Page 79
Link DES-3250TG Standalone Layer 2 Switch Remember that the DES-3250TG has four priority queues (and thus four Classes of Service) for each port on the switch. Traffic Control This window allows you to manage traffic control on the switch. Click Traffic control in the QoS folder on the Configuration - D-Link DES-3250TG | Product Manual - Page 80
D-Link DES-3250TG Standalone Layer 2 Switch Threshold threshold set above. This is one second, then further packets of that type will be dropped. 802.1p Default Priority The switch allows the assignment of a default 802.1p priority to each port on the switch. Click 802.1p default_priority - D-Link DES-3250TG | Product Manual - Page 81
D-Link DES-3250TG Standalone Layer 2 Switch 73 - D-Link DES-3250TG | Product Manual - Page 82
D-Link DES-3250TG Standalone Layer 2 Switch Figure 6- 33. 802.1p default_priority Settings window This window allows you to assign a default 802.1p priority to any given port on the switch. The priority queues are numbered from 0 − the lowest priority − to 7 − the highest priority. 802.1p User - D-Link DES-3250TG | Product Manual - Page 83
D-Link DES-3250TG Standalone Layer 2 Switch (QOS Output) Scheduling Click QoS on the Configuration menu, and then click scheduling: Figure 6- 35. QoS Output Scheduling window The Max. Packets(O-255 segmentation on the switch. Click Traffic Segmentation in the QoS folder on the Configuration menu: 75 - D-Link DES-3250TG | Product Manual - Page 84
D-Link DES-3250TG Standalone Layer 2 Switch Figure 6- 36. Traffic Segmentation Setting window Enter a source port number in the first field and the range of the ports that you - D-Link DES-3250TG | Product Manual - Page 85
Click Apply to let your changes take effect. LACP The DES-3250TG supports Link Aggregation Control Protocol. LACP allows you to bundle several physical manual, the member ports of an LACP trunk group can only be from a trunk with a peer LACP trunk group. Link Aggregation Figure 6- 37. Port Link - D-Link DES-3250TG | Product Manual - Page 86
LACP Port D-Link DES-3250TG Standalone Layer 2 Switch Figure 6- 39. Link Aggregation Settings window 78 - D-Link DES-3250TG | Product Manual - Page 87
Link DES-3250TG criteria can be specified on a basis of VLAN, MAC address, or IP address. Creating an access profile is divided into two basic parts. The is described below in two parts. Click Access Profile Table on the Configuration menu to open the Access Profile Table window: Figure 6- 40. Access - D-Link DES-3250TG | Product Manual - Page 88
D-Link DES-3250TG Standalone Layer 2 Switch Figure 6- 42. Access Profile (IP) Configuration window Configure the following Access Profile settings: Parameter Description Profile ID (1255) Access Profile Vlan Source MAC/IP Mask Destination MAC/IP Mask 802.1p Type in a unique identifier number - D-Link DES-3250TG | Product Manual - Page 89
D-Link DES-3250TG Standalone Layer 2 Switch Dscp Ethernet type (for Ethernet Access Profiles only) Protocol (for IP address Access Profiles only) each packet header and use this as the, or part of the criterion for forwarding. Selecting this option instructs the switch to examine the DiffServ Code - D-Link DES-3250TG | Product Manual - Page 90
Link DES-3250TG Standalone Layer 2 Switch Mode form (hex 0x0-0xffff). Select protocol id to instruct the switch to examine each frame's Protocol ID field. user mask − Specify that the rule applies to the IP protocol ID and the mask options behind the IP 6- 44. Access Rule Configuration window 82 - D-Link DES-3250TG | Product Manual - Page 91
D-Link DES-3250TG Standalone Layer 2 Switch Configure the following Access Rule Configuration settings (additional for this access. This value can be set from 1 to 255. Select this option to instruct the switch to use the 802.1p priority value entered in the adjacent field for packets that - D-Link DES-3250TG | Product Manual - Page 92
click Apply to let your changes take effect. PAE Access Entity The DES-3250TG implements the server-side of the IEEE 802.1x Port-based Network Access Control. This mechanism is intended to allow only authorized users, or other network devices, access to network resources by establishing criteria for - D-Link DES-3250TG | Product Manual - Page 93
D-Link DES-3250TG Standalone Layer 2 Switch Figure 6- 47. First 802.1X Authenticator Settings window Click the selection button on the far left that corresponds to the port you want to configure . Figure 6- 48. Second 802.1X Authenticator Settings window Configure the following 802.1x port - D-Link DES-3250TG | Product Manual - Page 94
D-Link DES-3250TG Standalone Layer attempt. Select the time to wait for a response from a supplicant (user) for all EAP packets, except for the Request/Identity packets. Select the 1x port settings are displayed and can be configured using the window below. Click Port Capability Settings on - D-Link DES-3250TG | Product Manual - Page 95
D-Link DES-3250TG Standalone Layer 2 Switch Figure 6- 49. 802.1X Capability Settings window 87 - D-Link DES-3250TG | Product Manual - Page 96
D-Link DES-3250TG Standalone Layer 2 Switch To set up the switch's 802.1x port-based authentication, select which ports are to be configured in the and To Ports being configured for 802.1x settings. Capability Two role choices can be selected: Authenticator − A user must pass the authentication - D-Link DES-3250TG | Product Manual - Page 97
D-Link DES-3250TG Standalone Layer 2 Switch Oper Dir PortStatus Request, Response, Success, Fail, Timeout, Idle clicked Apply. Click Reauthenticate Port(s) on the PAE Access Entity folder on the Configuration menu to open the Reauthenticate Port(s) window: Figure 6- 51. Reauthenticate Port window - D-Link DES-3250TG | Product Manual - Page 98
D-Link DES-3250TG Standalone Layer 2 Switch RADIUS Server The RADIUS feature of the switch allows you to facilitate centralized user configure: First, Second or Third. Radius Server Set the RADIUS server IP. Authentic Port Set the RADIUS authentic server(s) UDP port. The default - D-Link DES-3250TG | Product Manual - Page 99
D-Link DES-3250TG Standalone Layer 2 Switch Management The DES-3250TG allows you to manage the switch via the Management menu. The menu consists of the following folders and screens: Security IP, User Accounts, and SNMPV3. See below for further description. Security IP Some settings must be entered - D-Link DES-3250TG | Product Manual - Page 100
to the switch configuration for the current session only. All changes (including User additions or updates) must be entered into non-volatile ram using the Save Changes command on the Maintenance menu - if you want these changes to be permanent. SNMPV3 The DES-3250TG supports the Simple Network - D-Link DES-3250TG | Product Manual - Page 101
D-Link DES-3250TG Standalone Layer 2 Switch Figure 6- 57. SNMP User Table Configuration window To display the current SNMP User Table Configuration, click the User Name in the first column of the SNMP User Table window. Figure 6- 58. SNMP User Table Display window The following parameters are - D-Link DES-3250TG | Product Manual - Page 102
D-Link DES-3250TG Standalone Layer 2 Switch checked configure also: Auth-Protocol In the Space provided, that the HMACSHA-96 authentication level will be used. If Encryption (V3 only) is checked configure also: Priv-Protocol In the Space provided, type an alphanumeric string of between 8 and - D-Link DES-3250TG | Product Manual - Page 103
D-Link DES-3250TG Standalone Layer 2 Switch Figure 6- 60. SNMP View Table Configuration window Parameter View Name access. SNMP Group Table The SNMP Group created with this table maps SNMP users (identified in the SNMP User Table) to the views created in the previous menu. Figure 6- 61. SNMP - D-Link DES-3250TG | Product Manual - Page 104
D-Link DES-3250TG Standalone Layer 2 Switch Figure 6- 62. SNMP Group Table Configuration window To display the current SNMP Group Table Configuration, click the Group Name in used to identify the new SNMP group of SNMP users. This name is used to specify the SNMP group created can request SNMP messages. - D-Link DES-3250TG | Product Manual - Page 105
Link DES-3250TG Standalone Layer 2 Switch Security Level version 1 will be used. SNMPv2 - Specifies that SNMP version 2c will be used. The SNMP v2c supports The community string acts like a password to permit access to the agent string: • An Access List of IP addresses of SNMP managers that are - D-Link DES-3250TG | Product Manual - Page 106
Link DES-3250TG Standalone Layer 2 Switch Figure 6- 64. SNMP Community Table Configuration window To delete an existing entry, click the selection button in the Delete column on the far right that corresponds to the port you want to configure. To create a new entry, configure like a password to give - D-Link DES-3250TG | Product Manual - Page 107
D-Link DES-3250TG Standalone Layer 2 Switch SNMP Host Table Use the SNMP Host will appear. Figure 6- 66. SNMP Host Table Configuration window Parameter Host IP Address SNMP Version Community String/SNMPv3 User Name Description Type the IP address of the remote management station that will serve - D-Link DES-3250TG | Product Manual - Page 108
D-Link DES-3250TG Standalone Layer 2 Switch Figure 6- 67. SNMP Engine ID Configuration window To change the Engine ID, type the new Engine ID in the space provided and click the Apply button. Monitoring The DES-3250TG provides extensive network monitoring capabilities that can be viewed under the - D-Link DES-3250TG | Product Manual - Page 109
D-Link DES-3250TG Standalone Layer 2 Switch seconds. The default value is one second. Record [200] Number Select number of times the Switch will be polled between 20 and 200. The default value is 20. Show/Hide Check to display Utilization. Clear Clicking this button clears all statistics - D-Link DES-3250TG | Product Manual - Page 110
D-Link DES-3250TG Standalone Layer 2 Switch Figure 6- 70. Rx Packets Analysis window (table for Bytes and Packets) The following fields can be set: Parameter Description Time Interval [1s ] Select the desired setting between 1s and 60s, where "s" stands for seconds. The default value is one - D-Link DES-3250TG | Product Manual - Page 111
UMB-cast (RX) D-Link DES-3250TG Standalone Layer 2 Switch Figure 6- 71. Rx Packets Analysis window (line graph for Unicast, Multicast, and Broadcast Packets) Time Interval [1s ] Select the desired setting between 1s and 60s, where "s" stands for seconds. The default value is one second. 103 - D-Link DES-3250TG | Product Manual - Page 112
Link DES-3250TG Standalone Layer 2 Switch Record [200] Number Select number of times the Switch will be polled between 20 and 200. The default Clicking this button instructs the Switch to display a table rather than a line graph. View Line Chart Clicking this button instructs the Switch to - D-Link DES-3250TG | Product Manual - Page 113
D-Link DES-3250TG Standalone Layer 2 Switch Figure 6- 74. Tx Packets Analysis window (table for Bytes and Packets) The following fields can be set: Parameter Description Time Interval [1s ] Select the desired setting between 1s and 60s, where "s" stands for seconds. The default value is one - D-Link DES-3250TG | Product Manual - Page 114
D-Link DES-3250TG Standalone Layer 2 Switch Errors The Web Manager allows port error statistics compiled by the Switch's management agent to be viewed as either a line graph or a - D-Link DES-3250TG | Product Manual - Page 115
D-Link DES-3250TG Standalone Layer 2 Switch Time Interval [1s ] Select the desired setting between 1s and 60s, where "s" stands for seconds. The default value is one second. Record [200] Number Select number of times the Switch will be polled between 20 and 200. The default value is 20. - D-Link DES-3250TG | Product Manual - Page 116
Transmitted (TX) D-Link DES-3250TG Standalone Layer 2 Switch Figure 6- 77. Tx Error Analysis window (line graph 1s ] Select the desired setting between 1s and 60s, where "s" stands for seconds. The default value is one second. Record [200] Number Select number of times the Switch will be polled - D-Link DES-3250TG | Product Manual - Page 117
D-Link DES-3250TG Standalone Layer 2 Switch ExDefer LateColl Show/Hide Clear View Table View all statistics counters on this window. Clicking this button instructs the Switch to display a table rather than a line graph. Clicking this button instructs the Switch to display a line graph rather than a - D-Link DES-3250TG | Product Manual - Page 118
D-Link DES-3250TG Standalone Layer 2 Switch Figure 6- 80. Rx Size Analysis window (table) The following fields can be set: Parameter Description Time Interval [1s ] Select the desired setting between 1s and 60s, where "s" stands for seconds. The default value is one second. Record [200] - D-Link DES-3250TG | Product Manual - Page 119
D-Link DES-3250TG Standalone Layer 2 Switch 512-1023 1024-1518 Show/Hide Clear View Table all statistics counters on this window. Clicking this button instructs the switch to display a table rather than a line graph. Clicking this button instructs the Switch to display a line graph rather than a - D-Link DES-3250TG | Product Manual - Page 120
D-Link DES-3250TG Standalone Layer 2 Switch Figure 6- 81. MAC Address Table window The . Enter a port number for the forwarding table to be browsed by. Allows the user to move to a sector of the database corresponding to a user defined port, VLAN, or MAC address. The VLAN ID of the VLAN the port - D-Link DES-3250TG | Product Manual - Page 121
D-Link DES-3250TG Standalone Layer 2 Switch Port Learned Next address table. The port that 's IGMP Snooping table to be viewed. IGMP Snooping allows the switch to read the Multicast Group IP address and the corresponding MAC address from IGMP packets that pass through the switch. The number of - D-Link DES-3250TG | Product Manual - Page 122
D-Link DES-3250TG Standalone Layer 2 Switch Figure 6- 83. IGMP Snooping Forwarding Table window Enter the switch's current VLAN configuration. Router Port This displays which of the switch's ports are currently configured as router ports. A router port configured by a user (using the console or Web - D-Link DES-3250TG | Product Manual - Page 123
D-Link DES-3250TG Standalone Layer 2 Switch Figure 6- 85. Router Port window Static router ports are configured by the user and dynamically assigned router ports are configured by the switch. Port Access Control To view the Authenticator Status for Auth PAE State, Backend State, and Port Status, - D-Link DES-3250TG | Product Manual - Page 124
D-Link DES-3250TG Standalone Layer 2 Switch Figure 6- 87. Download Firmware from Server window Enter the IP address of the TFTP server in the Server IP Address field. The TFTP server must be on the same IP subnet as the switch. Enter the path and the filename to the firmware file on the TFTP server. - D-Link DES-3250TG | Product Manual - Page 125
D-Link DES-3250TG Standalone Layer 2 Switch Upload Log to TFTP Server To upload the history log for the switch, click on the Maintenance folder, the TFTP Services folder, and then click on the Upload log to TFTP Server link: Figure 6- 90. Upload log to TFTP Server window Enter the IP address of the - D-Link DES-3250TG | Product Manual - Page 126
section, tells PING to keep sending data packets to the specified IP address until the program is stopped. Save Changes The DES-3250TG has two levels of memory, normal RAM and non-volatile or NV-RAM. To retain any configuration changes permanently, highlight Save Changes on the Maintenance menu. The - D-Link DES-3250TG | Product Manual - Page 127
Reboot Reset D-Link DES-3250TG Standalone Layer 2 Switch Figure 6- 94. Reboot window Reset System Figure 6- 95. Reset window Reset Config Figure 6- 96. Reset System window Figure 6- 97. Reset Config window 119 - D-Link DES-3250TG | Product Manual - Page 128
Logout D-Link DES-3250TG Standalone Layer 2 Switch Figure 6- 98. Logout Web Setup window Click Apply if you want to logout of the Web configuration program and return to the main page. 120 - D-Link DES-3250TG | Product Manual - Page 129
D-Link DES-3250TG Standalone Layer 2 Switch 7 WARRANTY All countries and regions except USA Wichtige 17. Wenden Sie sich mit allen Fragen die Service und Repartur betreffen an Ihren Servicepartner. Somit stellen Sie die Betriebssicherheit des Gerätes sicher. 18. Zum Netzanschluß dieses - D-Link DES-3250TG | Product Manual - Page 130
D-Link DES-3250TG Standalone Layer 2 Switch INTERRUPTION OF A D- LINK PRODUCT, HOWEVER CAUSED AND ON ANY THEORY OF LIABILITY. THIS LIMITATION WILL APPLY EVEN IF DLINK HAS BEEN ADVISED OF THE POSSIBILITY OF SUCH DAMAGE. IF YOU PURCHASED A D-LINK PRODUCT IN THE UNITED STATES, SOME STATES DO NOT ALLOW - D-Link DES-3250TG | Product Manual - Page 131
covered in the operating manual for the product, and normal maintenance; Damage that occurs in shipment, due to act of God, failures due to power surge, and cosmetic damage; Any hardware, software, firmware or other products or services provided by anyone other than D-Link; Products that have been - D-Link DES-3250TG | Product Manual - Page 132
D-Link DES-3250TG Standalone Layer 2 Switch A TECHNICAL SPECIFICATIONS General Standards: Protocols: Data Transfer Rates: Ethernet Fast Ethernet Gigabit Ethernet Topology: Network Cables: 10BASE-T: 100BASE-TX: IEEE 802.3 10BASE-T - D-Link DES-3250TG | Product Manual - Page 133
D-Link DES-3250TG Standalone Layer 2 Switch Power Consumption: DC fans: Operating Temperature: Storage Temperature: Humidity: Dimensions: Weight: EMI: Safety: ) 1,488,000 pps per port (for 1000Mbps) Automatic update Max age: 10-1,000,000 seconds. Default = 300. 4 Priority Queues per port 125 - D-Link DES-3250TG | Product Manual - Page 134
D-Link DES-3250TG Standalone Layer 2 Switch B UNDERSTANDING AND TROUBLESHOOTING THE SPANNING TREE PROTOCOL When the spanning-tree algorithm determines a port should be transitioned to the forwarding state, the following occurs: • The port is put - D-Link DES-3250TG | Product Manual - Page 135
D-Link DES-3250TG Standalone Layer 2 Switch Listening State The listening state is the first transition for a port from the blocking state. Listening is an opportunity for the switch - D-Link DES-3250TG | Product Manual - Page 136
D-Link DES-3250TG Standalone Layer 2 Switch Learning State A port in the learning state prepares to participate in frame forwarding. The port enters the learning state from the listening - D-Link DES-3250TG | Product Manual - Page 137
D-Link DES-3250TG Standalone Layer 2 Switch Forwarding State A port in the forwarding state forwards packets. The port enters the forwarding state from the learning state when the forward - D-Link DES-3250TG | Product Manual - Page 138
D-Link DES-3250TG Standalone Layer 2 Switch Disabled State A port in the disabled state does not participate in frame forwarding or STP. A port in the disabled state is virtually - D-Link DES-3250TG | Product Manual - Page 139
D-Link DES-3250TG Standalone Layer 2 Switch Troubleshooting STP Spanning Tree Protocol Failure A failure in the STA generally leads to a bridging loop. A bridging loop in an STP environment comes from a port that should be in the blocking state, but is forwarding packets. 131 - D-Link DES-3250TG | Product Manual - Page 140
Link DES-3250TG than the MAX AGE (default of 20 seconds), it configuration error for a point-to-point link. If one port is configured Link Unidirectional links can be caused by an undetected failure in one side of a fiber cable, or a problem with a ports transceiver. Any failure that allows a link - D-Link DES-3250TG | Product Manual - Page 141
same type of failure. If a link is experiencing a high rate of physical default settings) and a single BPDU would reset the timer. If the MAX AGE is set too low, this time is reduced. Resource Errors The DES-3250TG of the network can also cause problems. The default values for STP give a maximum - D-Link DES-3250TG | Product Manual - Page 142
D-Link DES-3250TG Standalone Layer 2 Switch in controlling broadcast storms. The best way to determine if a data loop exists is to capture traffic on a saturated link and check if similar packets are seen multiple times. Generally, if all the users of a given domain are having trouble connecting to - D-Link DES-3250TG | Product Manual - Page 143
22 IP address 42 IP Address 13 IP Addresses and SNMP Community Names 13 IP Configuration 40 Factory Default 15 Trap Type Authentication Failure 15 Cold Start 14 Link Change Event 15 New Root 15 System Restart 14 Topology Change 15 Traps 14 trunk group 17 Unpacking 4 Untagging 19 User - D-Link DES-3250TG | Product Manual - Page 144
FAX: 20-2-635-6192 URL: www.dlink-me.com E-MAIL: [email protected] & [email protected] D-Link Finland Pakkalankuja 7A, FIN- 0150 VANTAA, Finland TEL: 358-9-2707-5080 FAX: 358-9-2702-5081 URL: www.dlink-fi.com D-Link France Le Florilege, No. 2, Allea de la Fresnerie, 78330 Fontenay Le Fleury - D-Link DES-3250TG | Product Manual - Page 145
098 India TEL: 91-022-652-6696/6578/6623 FAX: 91-022-652-8914/8476 URL: www.dlink-india.com, www.dlink.co.in & [email protected] E-MAIL: [email protected] Italy D-Link Mediterraneo Srl/D-Link Italia Via Nino Bonnet n. 6/B, 20154, Milano, Italy TEL: 39-02-2900-0676 FAX: 39-02-2900-1723 - D-Link DES-3250TG | Product Manual - Page 146
, London NW9 5AB United Kingdom TEL: 44 (0) 20-8731-5555 FAX: 44 (0) 20-8731-5511 BBS: 44 (0) 181-235-5511 URL: www.dlink.co.uk E-MAIL: [email protected] D-Link U.S.A. 53 Discovery Drive, Irvine, CA 92618, USA TEL: 1-949-788-0805 FAX: 1-949-753-7033 BBS: 1-949-455-1779 & 1-949-455-9616 - D-Link DES-3250TG | Product Manual - Page 147
REGISTRATION Register your product on-line at: http://support.dlink.com/register Product registration is entirely voluntary and failure to complete or return this form will not diminish your warranty rights. - D-Link DES-3250TG | Product Manual - Page 148
Reseller's full address Answers to the following questions help us to support your product: 1. Where and how will the product primarily organization use ? XNS/IPX TCP/IP DECnet Others 4. What network operating system(s) does your organization use ? D-Link LANsmart Novell NetWare NetWare Lite - D-Link DES-3250TG | Product Manual - Page 149
-
 1
1 -
 2
2 -
 3
3 -
 4
4 -
 5
5 -
 6
6 -
 7
7 -
8
-
9
-
10
-
11
-
12
-
13
-
14
-
15
-
16
-
17
-
18
-
19
-
20
-
21
-
22
-
23
-
24
-
25
-
26
-
27
-
28
-
29
-
30
-
31
-
32
-
33
-
34
-
35
-
36
-
37
-
38
-
39
-
40
-
41
-
42
-
43
-
44
-
45
-
46
-
47
-
48
-
49
-
50
-
51
-
52
-
53
-
54
-
55
-
56
-
57
-
58
-
59
-
60
-
61
-
62
-
63
-
64
-
65
-
66
-
67
-
68
-
69
-
70
-
71
-
72
-
73
-
74
-
75
-
76
-
77
-
78
-
79
-
80
-
81
-
82
-
83
-
84
-
85
-
86
-
87
-
88
-
89
-
90
-
91
-
92
-
93
-
94
-
95
-
96
-
97
-
98
-
99
-
100
-
101
-
102
-
103
-
104
-
105
-
106
-
107
-
108
-
109
-
110
-
111
-
112
-
113
-
114
-
115
-
116
-
117
-
118
-
119
-
120
-
121
-
122
-
123
-
124
-
125
-
126
-
127
-
128
-
129
-
130
-
131
-
132
-
133
-
134
-
135
-
136
-
137
-
138
-
139
-
140
-
141
-
142
-
143
-
144
-
145
-
146
-
147
-
148
-
149
 |
 |

D-Link ™ DES-3250TG
Standalone Layer 2 Switch
User’s Guide