D-Link DI-707 User Manual
D-Link DI-707 Manual
 |
UPC - 790069241000
View all D-Link DI-707 manuals
Add to My Manuals
Save this manual to your list of manuals |
D-Link DI-707 manual content summary:
- D-Link DI-707 | User Manual - Page 1
D-Link DI-707 User Manual - D-Link DI-707 | User Manual - Page 2
within ninety (90) days after the date of original retail purchase of the Hardware. If a completed Registration Card is not received by an authorized D-Link Service Office within such ninety (90) day period, then the Warranty Period shall be ninety (90) days from the date of purchase. Product Type - D-Link DI-707 | User Manual - Page 3
(90) days after the product is purchased and/or licensed. The addresses/telephone/fax list of the nearest Authorized D-Link Service Office is provided in the back of this manual. FAILURE TO PROPERLY COMPLETE AND TIMELY RETURN THE REGISTRATION CARD MAY AFFECT THE WARRANTY FOR THIS PRODUCT. Submitting - D-Link DI-707 | User Manual - Page 4
covered in the operating manual for the product, and normal maintenance; Damage that occurs in shipment, due to act of God, failures due to power surge, and cosmetic damage; and Any hardware, software, firmware or other products or services provided by anyone other than D-Link. Disclaimer of Other - D-Link DI-707 | User Manual - Page 5
verwendet werden. Der Einsatz von ungeeigneten Ersatzteilen kann eine weitere Beschädigung hervorrufen. 17. Wenden Sie sich mit allen Fragen die Service und Repartur betreffen an Ihren Servicepartner. Somit stellen Sie die Betriebssicherheit des Gerätes sicher. 18. Zum Netzanschluß dieses Gerätes - D-Link DI-707 | User Manual - Page 6
Link Systems Inc., as stipulated by the United States Copyright Act of 1976. CE Mark Warning This is a Class B product. In a domestic environment, this product may cause radio interference, in which case the user and used in accordance with the instructions, may cause harmful interference to radio - D-Link DI-707 | User Manual - Page 7
If this equipment does cause harmful interference to radio or television reception, which can be determined by turning the equipment off and on, the user is encouraged to try to correct the interference by one or more of the following measures: -Reorient or relocate the receiving antenna. -Increase - D-Link DI-707 | User Manual - Page 8
3 Network Settings and Software Installation 7 3.1 Make correct network settings to the computer 7 Chapter 4 Configuring The DI-707 9 4.1 Start-up and Log in 9 4.2 Status 10 4.3 Tools 11 4.4 Setup 12 4.5 DHCP Server 14 4.6 Virtual Server 15 4.7 Special AP 16 4.8 Access Control 17 4.9 Misc - D-Link DI-707 | User Manual - Page 9
is easy for non-technical users to configure and operate. Instructions for installing and configuring the DI-707 can be found in this manual. Before you install and use the DI-707, please read this manual carefully to fully understand the functions of the DI-707. 1.1 Functions and Features l Cable - D-Link DI-707 | User Manual - Page 10
Host supported DMZ Host fully exposes a networked computer to the Internet. Use this feature when the special application sensing tunnel feature does not allow an application to function properly. 1.2 Packing List l One DI-707 l One power cord l User Manual l Quick Installation Guide l Two - D-Link DI-707 | User Manual - Page 11
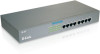
your cable (or DSL) modem or Ethernet router. Port 1-7: the ports where you will connect DI-707. The WAN port is linked The WAN port is sending or receiving data The LAN port is linked The LAN port is sending or receiving data DI-707 is functioning properly DI-707 is working for some service DI-707 - D-Link DI-707 | User Manual - Page 12
LAN Loop connection has been detected The corresponding port is linked The corresponding port is sending or receiving data The corresponding port D-type male connector Power on/off On/Off 2.2. Installation Requirements The DI-707 can be positioned at any convenient place in your office or house. - D-Link DI-707 | User Manual - Page 13
cable from your computer's Ethernet port to one of the LAN ports of the DI-707. Figure 2-5 Setup of LAN connections for DI-707. 2. Setup WAN connection: prepare an Ethernet cable for connecting the DI-707 to your cable/xDSL modem or Ethernet backbone. Figure 2-5 illustrates the WAN connection - D-Link DI-707 | User Manual - Page 14
straight through Ethernet cable to that UPLINK port. 4. Power on: Connect the power cord to a power outlet and turn the power switch on. The DI-707 will automatically enter the self-test phase. When in the self-test phase, the indicators M1 and M2 will be lighted ON for about 5 seconds, - D-Link DI-707 | User Manual - Page 15
default IP address of the DI-707 is 192.168.0.1, and the default subnet mask is 255.255.255.0. These addresses can be changed to meet your need, but the default values are used in this manual 2ms TTL=64 A communication link between your computer and the DI-707 has been successfully established. - D-Link DI-707 | User Manual - Page 16
LED of the DI-707 and the link LED of network card on your computer must be lighted. 2. Is the TCP/IP environment of your computers properly configured? Tip: If the IP address of the DI-707 is 192.168.0.1, the IP address of your computer must be 192.168.123.X and default gateway must be - D-Link DI-707 | User Manual - Page 17
established, you will see the web user interface of the DI-707. There are two appearances of web user interface: for general users and for system administrator. To log in as an administrator, enter the system password (the factory setting is "admin") in the System Password field and click on the Log - D-Link DI-707 | User Manual - Page 18
provides the function for observing the DI-707's working status: A. WAN Port Status. If the WAN port is assigned a dynamic IP, a "Renew" or "Release" button may appear. You can click this button to renew or release the IP manually. B. Modem Status. C. Firmware version and WAN's MAC Address. 10 - D-Link DI-707 | User Manual - Page 19
you to change the administrator password, view the log, and clone the MAC address. You can also reboot the DI-707 by clicking the Reboot button. Note: We strongly recommend that the system password be changed for security reasons. If you forget the system password, please refer to Appendix A to - D-Link DI-707 | User Manual - Page 20
Setup This option is crucial to enable the DI-707 to work properly. The setting items and the web appearance depend on the WAN type. Choose correct WAN type before you start. 1. LAN IP Address: the DI-707's IP address. The default their services. D. Dial-up Network : To surf the Internet via PSTN/ISDN - D-Link DI-707 | User Manual - Page 21
the DI-707 to renew its IP address automatically when the lease time is expired even if the system is idle. 4.4.3 PPP over Ethernet 1. PPPoE Account and Password : the account and password your ISP assigned to you. If you don't want to change the password, keep it empty. 2. PPPoE Service Name - D-Link DI-707 | User Manual - Page 22
in your LAN environment. Fortunately, DHCP provides a rather simple approach to handle all these settings. The DI-707 supports the function of DHCP server. If you enable the DI-707's DHCP server and configure your computers as "automatic IP allocation" mode, then when your computer is powered - D-Link DI-707 | User Manual - Page 23
packets to protect your Intranet, so all hosts behind the DI-707 are invisible to the outside world. If you wish, you can make some of them accessible by enabling the Virtual Server Mapping. A virtual server is defined as a Service Port, and all requests to this port will be redirected - D-Link DI-707 | User Manual - Page 24
work with a pure NAT router. Special Applications enables some of these applications to work with a NAT router. If Special Applications is still packets to the specified port numbers are allowed to pass the firewall. The DI-707 provides some predefined settings in the gray pad on the bottom of the - D-Link DI-707 | User Manual - Page 25
addresses. You can assign the members of Group 1, 2 and 3. The others are all members of the Default Group. Second, you have to assign the access rights of each group. Access rights can allow or block users to access specified TCP and UDP ports. For example: If you want IP addresses 50-99 - D-Link DI-707 | User Manual - Page 26
only when needed. 2. Remote Administrator Host: In general, only Intranet users can browse the built-in web pages to perform administrative tasks. This IP address is 0.0.0.0, any host can connect to the DI-707 to perform administrative tasks. When this feature is enabled, the web port will be - D-Link DI-707 | User Manual - Page 27
, there should be some messages and console prompt ">" appeares in the terminal. In the console mode, you may reset the IP address and the system password of the DI-707. Please remember to execute the SR command to save the changes you have made. For example, 19 Rev: 10102000 - D-Link DI-707 | User Manual - Page 28
installed one network card on your personal computer. If not, please refer to your network card manual. Moreover, the Section B.2 tells you how to set TCP/IP values for working with the DI-707 correctly. B.1 Install TCP/IP protocol into your PC 1. Click Start button and choose Settings, then click - D-Link DI-707 | User Manual - Page 29
Click OK to complete the install procedure and restart your PC to enable the TCP/IP protocol. B.2 Set TCP/IP protocol for working with the DI-707 1. Click Start button and choose Settings, then click Control Panel. 2. Double click Network icon. Select the TCP/IP line that has been associated to your - D-Link DI-707 | User Manual - Page 30
4. You have two setting methods: A. Get IP via DHCP server a. Select Obtain an IP address automatically in the IP Address tab. b. Don't input any value in the Gateway tab. c. Choose Disable DNS in the DNS Configuration tab. 22 Rev: 10102000 - D-Link DI-707 | User Manual - Page 31
B. Configure IP manually a. Select Specify an IP address in the IP Address tab. The default IP address of the DI-707 is 192.168.0.1. So please use 192.168.123.xxx (xxx is between 1 and 253) for IP Address field and 255.255.255.0 for Subnet - D-Link DI-707 | User Manual - Page 32
c. In the DNS Configuration tab, add the DNS values which are provided by the ISP into DNS Server Search Order field and click Add button. 24 Rev: 10102000 - D-Link DI-707 | User Manual - Page 33
LAN • 1 x 10BASE-T WAN • 1 x RS-232 (DB-9) LED's: • Power • WAN Activity • LAN Activity • M1 • M2 • COM Status • COL (Collision) • LOOP • Link/Act. (Link Activity) • 100M (10/100 Status) • FDX (Full Duplex Status) Power: • DC 5V 2A Operating Temperature: • 5 C ~ 55 C Humidity: • 10% ~ 90% 25 Rev - D-Link DI-707 | User Manual - Page 34
-900900 (New Zealand) URL: www.dlink.com.au E-MAIL: [email protected], [email protected] CANADA D-LINK CANADA 2180 Winston Park Drive, Oakville, -6696 FAX: 91-22-652-8914 URL: www.dlink-india.com E-MAIL: [email protected] ITALY D-LINK ITALIA Via Nino Bonnet No. 6/b, 20154 Milano, Italy - D-Link DI-707 | User Manual - Page 35
Fax Reseller's full address Answers to the following questions help us to support your product: 1. Where and how will the product primarily be used 4. What network operating system(s) does your organization use ? oD-Link LANsmart oNovell NetWare oNetWare Lite oSCO Unix/Xenix oPC NFS o3Com 3+ - D-Link DI-707 | User Manual - Page 36
28 Rev: 10102000
-
 1
1 -
 2
2 -
 3
3 -
 4
4 -
 5
5 -
 6
6 -
 7
7 -
8
-
9
-
10
-
11
-
12
-
13
-
14
-
15
-
16
-
17
-
18
-
19
-
20
-
21
-
22
-
23
-
24
-
25
-
26
-
27
-
28
-
29
-
30
-
31
-
32
-
33
-
34
-
35
-
36
 |
 |

D-Link
DI-707
User Manual