Dacor DO130 Use & Care Manuals
Dacor DO130 Manual
 |
View all Dacor DO130 manuals
Add to My Manuals
Save this manual to your list of manuals |
Dacor DO130 manual content summary:
- Dacor DO130 | Use & Care Manuals - Page 1
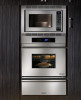
Use and Care Manual Distinctive Wall Oven For use with single and double wall oven models DO130 and DO230 Style varies - single model, DO130 shown Ta b l e o f C o n t e n t s Important Safety Instructions 1 Getting to Know Your Oven 3 Operating Your Oven 8 Cooking Tips 21 Care and Cleaning 23 - Dacor DO130 | Use & Care Manuals - Page 2
© 2010 Dacor, all rights reserved. - Dacor DO130 | Use & Care Manuals - Page 3
Safety Instructions The Important Safety Instructions and warnings in this manual cannot cover all possible problems and conditions that may occur. Use common sense and caution when installing, maintaining or operating this appliance. Always contact the Dacor Customer Service Team about problems or - Dacor DO130 | Use & Care Manuals - Page 4
should perform all other service. • Before performing any type of service, make sure that the electrical power to the oven is turned off at the circuit breaker or fuse box. • Only use the oven for cooking tasks expected of a home appliance as outlined in this manual. This oven is not intended for - Dacor DO130 | Use & Care Manuals - Page 5
single and double oven models. • Both models are equipped with Dacor's Pure Convection cooking system (see page 13 for description). On double oven models, only the upper oven is equipped for convection cooking. Control panel Control panel Single Wall Oven - Model D0130 Double Wall Oven - Model - Dacor DO130 | Use & Care Manuals - Page 6
. There are six sets of rack supports inside the oven chamber. They support the adjustable oven racks. They are numbered from the oven cleaner and covers the moving fan blades for safety purposes. M Oven rack N Bake element Single oven models come with a set of three oven racks. Double oven models - Dacor DO130 | Use & Care Manuals - Page 7
Getting to Know Your Oven A B C 6 5 4 E 3 2 1 F G H D JKL M N (below floor) B B 5 - Dacor DO130 | Use & Care Manuals - Page 8
or the time, use the number keypad. Use these keys to set the oven to turn on or off automatically at a later time. On double ovens, there is a set of delay timed cooking keys for each oven. See page 15 for instructions. Use the TIMER 1 and TIMER 2 keys to time an event. The two timers - Dacor DO130 | Use & Care Manuals - Page 9
Getting to Know Your Oven A B C D E F G HG Control Panel - Single Oven J K Control Panel - Double Oven 7 - Dacor DO130 | Use & Care Manuals - Page 10
and hold the BROIL key (under UPPER OVEN on double ovens). 2. The display will indicate the temperature scale. Before You Cook... • Dacor recommends turning the oven on for one hour at 500°F to parts can cause an undesirable smell the first few times the oven is used. • When you use your oven - Dacor DO130 | Use & Care Manuals - Page 11
great for heavier foods and the optional Dacor baking stone. 1. Hold the GlideRack oven rack with the guides fully extended away from you (see the diagram below). 2. Align both sets of safety clips (right and left) on the back of the guides with the oven rack supports as shown. 3. Begin to slide the - Dacor DO130 | Use & Care Manuals - Page 12
too soon. Turning Off Your Oven To turn the oven off, press the CANCEL · SECURE key. On double ovens, press the CANCEL · SECURE key under UPPER OVEN or LOWER OVEN. note After you turn off the oven, the cooling fans may continue to run until the oven's internal parts have cooled down. Changing the - Dacor DO130 | Use & Care Manuals - Page 13
will stop working and "OFF" will appear on the display. Only the CANCEL · SECURE and the oven light keys remain functional. On double ovens, pressing either CANCEL · SECURE key locks the control panel for both ovens. • To reactivate the control panel, press and hold the CANCEL · SECURE key for three - Dacor DO130 | Use & Care Manuals - Page 14
out nicely in this m1 ode.2 Look through the oven door window to check the progress of baking whenever possible. Baking Tips • For best results, use a single rack in the lowest position when using bake mode. For cooking on multiple racks, Dacor recommends using one of the convection modes. See the - Dacor DO130 | Use & Care Manuals - Page 15
by Pure Convection allows you to use more oven capacity at once. Use this mode for single rack baking, multiple rack bakin1g, roa2sting, and mode for single rack baking. The combination of the convection fan and bottom heat source is best for fruit crisps, custard pies, double-crusted fruit - Dacor DO130 | Use & Care Manuals - Page 16
poultry, insert the thermometer probe between the body and leg into the thickest part of the inner thigh. To ensure an accurate reading, the tip of and turn. Season the second side just before removing the food from the oven. • To prevent sticking, lightly grease the broiler grill. Excess grease will - Dacor DO130 | Use & Care Manuals - Page 17
to be timed on the keypad 1 2 and press START. To enter 11 hours, 30 minutes, press 1-1-3-0. To time 25 minutes, press 2-5. When you press START, the 2. Set the START TIME only, then turn the oven off manually when you are done cooking. 3. Turn the oven on manually and set it to turn off at a later - Dacor DO130 | Use & Care Manuals - Page 18
cook time as the temperature increases above 350°F. Other Things to Know About Delayed Timed Cooking When the oven is in delay timed mode... • Push the CLOCK key to view the clock (current time). "OPn" will appear on the display. • For double ovens, the meat probe can only be used in the upper - Dacor DO130 | Use & Care Manuals - Page 19
Your Oven Meat Probe Instructions 1. Prepare the meat for cooking prior to setting the oven. Insert the meat probe skewer into the center of the meat. Make sure that the skewer is not inside any fatty portions of the meat and does not touch any bones. The point should rest in the thickest part - Dacor DO130 | Use & Care Manuals - Page 20
Poultry Hot Line: (800) 535-4355 www.fsis.usda.gov Dehydrating/Defrosting Your oven can be used to dehydrate or defrost foods at low heat settings in the Food Type Dehydrating Temperature Fruit Vegetables Meat 100°F 125°F 150°F Dacor recommends that you use one of the timers to time the process - Dacor DO130 | Use & Care Manuals - Page 21
the center of the oven rack. Solving Discoloration Problems To prevent darkening during the sugar dissolves. Remove the saucepan from the cooktop and allow it to cool. Dip fruit into oven. Instead, defrost according to the food manufacturer's suggestions. You can defrost casseroles in the refrigerator - Dacor DO130 | Use & Care Manuals - Page 22
off the Sabbath feature or turn off the oven. On double ovens, both CANCEL · SECURE keys remain active so you can turn off one oven and leave the other oven running. • On double ovens, you may repeat steps 2 - 4 to start the other oven. Double oven models are equipped for Pure Convection only in the - Dacor DO130 | Use & Care Manuals - Page 23
calibrate the temperature inside the oven to match the display value without the help of a service technician. Due to various conditions • When you are cooking a food item that is very heavy, Dacor recommends the optional GlideRack oven rack. You can pull it out further than a standard rack, making - Dacor DO130 | Use & Care Manuals - Page 24
unevenly and will not give good baking results. • Use medium gauge aluminum sheets with low sides when preparing cookies, biscuits and cream puffs. Dacor cookie sheets, with their low profiles, will give you the best results. • Bake most frozen foods in their original foil containers, placed flat - Dacor DO130 | Use & Care Manuals - Page 25
solutions specified in this manual. • To avoid burns, turn off the oven and make sure that all parts are cool before cleaning. • To prevent damage, do not use abrasive or corrosive cleaners or applicators such as steel wool or scouring pads, on any part of the oven unless instructed to do so. Use - Dacor DO130 | Use & Care Manuals - Page 26
instructed. 2. Close the oven door. 3. Press the SELF CLEAN key. 4. Press the START TIME key. 5. Enter the desired start time. For example, press 1-2-3-0 for 12:30 surfaces with Dacor Cooktop Cleaning Creme. Use it according to the directions on the package. You may scrub the oven light lens with - Dacor DO130 | Use & Care Manuals - Page 27
will be exposed. The convection filter is located in the back of the oven chamber (upper chamber only on double ovens). Clean the filter regularly. If you allow it to become clogged, the oven's convection cooking modes will not work properly. You also need to remove the filter during the self clean - Dacor DO130 | Use & Care Manuals - Page 28
will also prevent food from sticking. Parts and Accessories Description Dacor Part Number Halogen light bulb (12 Volt, 20 Watt) 100429 Meat probe 72723 Standard broil pan kit 12157 30 inch standard type oven rack 62139 30 inch GlideRack type oven rack 72915*, ARGO30** Large capacity - Dacor DO130 | Use & Care Manuals - Page 29
the Problem Solution Guide on page 28. To replace a light bulb: 1. Replace the light bulb(s) only with Dacor part number 100429. See the facing page for ordering information 2. Turn off power to the oven at the circuit breaker panel or fuse box. 3. Hold your hand under the lens for support and - Dacor DO130 | Use & Care Manuals - Page 30
You Call for Service Problem Solution Guide NOTE: See Common Problems When Using the Bake Mode on page 12 for problems with cooking food. Problem May Be Caused By What to Do Nothing works. Oven not connected to electrical power. Have a licensed electrician connect the oven to a properly wired - Dacor DO130 | Use & Care Manuals - Page 31
stays on the display indicates a problem that cannot be resolved by the customer. Meat probe connected. Oven is set to self clean. What to Do The cooling fan may run for a while after the oven is turned off, until the internal parts have cooled. Call for service. Oven will not start Sabbath mode - Dacor DO130 | Use & Care Manuals - Page 32
Problem Solution Guide and the problem has not been remedied, please contact us at one of the numbers below. Prior to requesting service, it is helpful to be familiar with the warranty terms and conditions in the Warranty section on this page. For warranty repairs, call: Dacor Distinctive Service - Dacor DO130 | Use & Care Manuals - Page 33
Notes 31 - Dacor DO130 | Use & Care Manuals - Page 34
Notes 32 - Dacor DO130 | Use & Care Manuals - Page 35
fold here NO POSTAGE NECESSARY IF MAILED IN THE UNITED STATES BUSINESS REPLY MAIL FIRST-CLASS MAIL PERMIT NO 1600 CITY OF INDUSTRY CA POSTAGE WILL BE PAID BY ADDRESSEE DACOR ATTN WARRANTY PROCESSING DEPT PO BOX 90070 CITY OF INDUSTRY CA 91715-9907 - Dacor DO130 | Use & Care Manuals - Page 36
,000 E. $200,000 - $250,000 F. Over $250,000 5. What other brands of appliances do you have in your kitchen? A. Cooktop C. Dishwasher B. Oven D. Refrigerator 6. Would you buy or recommend another Dacor product? Yes Comments: No Thank you very much for your assistance. The information
-
 1
1 -
 2
2 -
 3
3 -
 4
4 -
 5
5 -
 6
6 -
 7
7 -
8
-
9
-
10
-
11
-
12
-
13
-
14
-
15
-
16
-
17
-
18
-
19
-
20
-
21
-
22
-
23
-
24
-
25
-
26
-
27
-
28
-
29
-
30
-
31
-
32
-
33
-
34
-
35
-
36
 |
 |

Use and Care Manual
Distinctive Wall Oven
Part No. 106733
Rev. G
For use with single and double wall oven models DO130 and DO230
Style varies - single model, DO130 shown
Table of Contents
Important Safety Instructions
...........................................
1
Getting to Know Your Oven
............................................
3
Operating Your Oven
....................................................
8
Cooking Tips
..............................................................
21
Care and Cleaning
.....................................................
23
Before You Call for Service
...........................................
28
Warranty and Service
.................................................
30
Notes
........................................................................
31
Warranty Card
...............................................
Back Cover