Danby DMW077BLSDD Product Manual
Danby DMW077BLSDD Manual
 |
View all Danby DMW077BLSDD manuals
Add to My Manuals
Save this manual to your list of manuals |
Danby DMW077BLSDD manual content summary:
- Danby DMW077BLSDD | Product Manual - Page 1
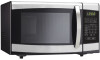
MICROWAVE Owner's Use and Care Guide Guide d'utilisation et soins de Propriètaire Model • Modèle DMW077BLSDD V2.06.10.DM - Danby DMW077BLSDD | Product Manual - Page 2
MICROWAVE OVEN Owner's Use and Care Guide 1-13 • Welcome • Important Safety Information • Installation Guide • Operation • Care and Maintenance • Troubleshooting • Warranty FOUR À MICRO-ONDES Guide d'utilisation et soins de Propriètaire 14-26 • Bienvenue • Information de Sécurité Important • Guide - Danby DMW077BLSDD | Product Manual - Page 3
will be part of your family for a long time. BEFORE USING YOUR MICROWAVE Write down the model and serial numbers here. They are on a label located on the back of the oven. Model Number Serial Number Date Purchased Staple your receipt to this manual. You will need it to obtain service under warranty - Danby DMW077BLSDD | Product Manual - Page 4
TV interference caused by UNAUTHORIZED MODIFICATION to this microwave oven. It is the responsibility of the user to correct such interference. PRECAUTIONS TO AVOID POSSIBLE EXPOSURE TO EXCESSIVE MICROWAVE ENERGY For your safety the information in this manual must be followed to minimize the risk of - Danby DMW077BLSDD | Product Manual - Page 5
this manual. Do not use corrosive chemicals or vapors in this appliance. • This microwave oven is specifically designed to instructions in the Care and Maintenance section(s) of this manual. • This appliance should be serviced only by qualified service personnel. Contact nearest authorized service - Danby DMW077BLSDD | Product Manual - Page 6
: SUPERHEATED WATER If you see arcing, press the "STOP/Clear" button and correct the problem. Arcing is the microwave term for sparks in the oven. Arcing is caused by: • Metal or foil touching the side of the oven. • Foil not molded to food (upturned edges act like antennae). • Metal, such as twist - Danby DMW077BLSDD | Product Manual - Page 7
in this manual. TV dinners may be microwaved in foil trays less than 3/4" high; remove the top foil cover and return the tray to the box. When using foil in the microwave, keep the foil at least 1 inch away from the sides of the oven. • Plastic cookware designed for microwave cooking is very - Danby DMW077BLSDD | Product Manual - Page 8
support, and shafts in their proper positions. 7) Make sure that the power supply cord is undamaged and does not run under the microwave oven or over any hot or sharp surfaces. 8) The socket must be readily accessible so that it can be easily unplugged in an emergency. SPECIAL CORD SET INSTRUCTIONS - Danby DMW077BLSDD | Product Manual - Page 9
INSTRUCTIONS FEATURES OF YOUR MICROWAVE 1) Oven Window: Screen allows cooking to be viewed while keeping microwave energy confined in oven. 2) Turntable Shaft 3) Roller Ring 4) Removable Glass Turntable: Turntable and support must be in place when using the oven. The turntable . 9) NUMBER KEYS 10 - Danby DMW077BLSDD | Product Manual - Page 10
INSTRUCTIONS POWER LEVELS 11 power levels are available: Level Power Display 10 9 8 7 6 5 4 3 2 1 0 100% 90% 80% 70% 60% 50% 40% 30% 20% 10% 0% PL10 PL9 PL8 PL7 PL6 PL5 PL4 PL3 PL2 PL1 PL0 SETTING THE CLOCK Your microwave clock is a 12-hour system. When the microwave oven number - Danby DMW077BLSDD | Product Manual - Page 11
OPERATING INSTRUCTIONS POTATO a) Press " POTATO " repeatedly until the number you wish appears in the display, "1","2","3" will display this range, no "beep" will sound and the microwave will not function until valid numbers are input. 3) The default microwave power is power level 3. If you want to - Danby DMW077BLSDD | Product Manual - Page 12
state, press " CLOCK ", the LED will display clock for three seconds. 2) In the microwave cooking state, press " POWER " to inquire microwave power level, and the current microwave power will be displayed. After three seconds, the oven will turn back to the previous state. In multi-stage state, the - Danby DMW077BLSDD | Product Manual - Page 13
be cleaned with a damp cloth. To prevent damage to the operating parts inside the oven, water should not be allowed to seep into the ventilation openings. 4) or around the outside of the oven door, wipe with a soft cloth. This may occur when the microwave oven is operated under high humidity - Danby DMW077BLSDD | Product Manual - Page 14
be necessary. Use this troubleshooting guide for a possible solution. If the unit continues to operate improperly, call an authorized service depot or Danby's Toll Free Number 1-800-263-2629 for assistance. PROBLEM POSSIBLE CAUSE Oven will not start a. Electrical cord for oven is not plugged in - Danby DMW077BLSDD | Product Manual - Page 15
be required for warranty claims; so, please retain bill of sale. In the event warranty service is required, present this document to our AUTHORIZED SERVICE DEPOT. Danby Products Limited PO Box 1778, Guelph, Ontario, Canada N1H 6Z9 Telephone: (519) 837-0920 FAX: (519) 837-0449 1-800-263-2629 04/09 - Danby DMW077BLSDD | Product Manual - Page 16
Danby. Nous sommes fiers de nos produits de qualité et nous croyons en un service fiable. Vous le constaterez à ce guide pratique et su ton amical de notre personnel du service nous puissions mieux vous servir... Lisez ce guide: Il contient des instructions qui vous aideront à utiliser et entretenir - Danby DMW077BLSDD | Product Manual - Page 17
VITER UNE EXPOSITION EXCESSIVE À L'ÉNERGIE MICRO-ONDE Afin d'assurer votre sécurité, les consignes de ce guide doivent être suivies afin de réduire les risques d'incendie ou d'explosion, de dommages à la . Le four doit être réglé ou réparé par un technicien qualifié. CONSERVEZ CES INSTRUCTIONS! 15 - Danby DMW077BLSDD | Product Manual - Page 18
la porte aux sections «Entretien et nettoyage» de ce guide. • Toute réparation doit être effectuée par un personnel qualifié seulement. Contactez le centre de service autorisé le plus près pour vérification,réparation ou risque de se propager si la porte est ouverte. CONSERVEZ CES INSTRUCTIONS! 16 - Danby DMW077BLSDD | Product Manual - Page 19
température INTERNE d'au moins 71,1°C (160°F) et la volaille 82,2°C (180°F). La cuisson à ces températures prévient habituellement les maladies alimentaires. CONSERVEZ CES INSTRUCTIONS! 17 - Danby DMW077BLSDD | Product Manual - Page 20
à micro-ondes. Vérifiez l'emballage pour une utilisation adéquate. INSTRUCTIONS DE MISE À LA TERRE • Le fond de certains plateaux de le papier d'aluminium que de la façon décrite dans ce disjoncteur. guide. Les plateaux télé peuvent être cuits au micro-ondes dans des plateaux d'aluminium - Danby DMW077BLSDD | Product Manual - Page 21
GUIDE D'INSTALLATION y a n'importe quels dommages, ne pas fonctionner le four mais contacte un personnel de service qualifié. 3) Ce four de micro-onde doit être placé sur une surface plate peut être facilement débranché dans une urgence. INSTRUCTIONS DE CORDE: DANGER: Risque de Décharge Électrique. - Danby DMW077BLSDD | Product Manual - Page 22
confinée à l'intérieur du four. 2) Axe du plateau tournant. 3) Anneau de roulement. 4) Plateau tournant en verre amovible: Le plateau tournant et le support doivent être mis en place lorsque vous utilisez le four. Le plateau tournant peut être retiré pour le nettoyage. 5) Panneau de commande - Danby DMW077BLSDD | Product Manual - Page 23
FONCTIONNEMENT NIVEAUX DE PUISSANCE Dix niveaux de puissance sont disponibles: Level Power Display 10 9 8 7 6 5 4 3 2 1 0 100% 90% 80% 70% 60% 50% 40% 30% 20% 10% 0% PL10 PL9 PL8 PL7 PL6 PL5 PL4 PL3 PL2 PL1 PL0 RÉGLAGE DE L'HORLOGE LÉGUMES FRAIS L'horloge de votre four à micro- - Danby DMW077BLSDD | Product Manual - Page 24
FONCTIONNEMENT DURÉE DE DÉCONGÉLATION LÉGUMES CONGELÉS 1) Appuyez sur la touche «DURÉE DE DÉCONGÉLATION»; l'afficheur à DEL affichera « dEF2 » 2) Appuyez sur les touches numériques pour saisir la durée de décongélation. La plage de temps acceptée est entre 00 m 01 et 99 m 99; si la durée saisie - Danby DMW077BLSDD | Product Manual - Page 25
FONCTIONNEMENT FONCTION DE MÉMOIRE DEMANDE 1) Appuyez sur la touche « 0 / MÉMOIRE » pour choisir la procédure mémorisée 1 à 3. L'écran à DEL affichera consécutivement 1, 2, 3. 2) Si la procédure est réglée, appuyez sur la touche « DÉMARRER/+30 SEC. » pour l'utiliser. Dans la négative,continuez à - Danby DMW077BLSDD | Product Manual - Page 26
SOINS ET ENTRETIEN 1) Éteignez le four et retirez la fiche de courant de la prise murale avant de nettoyer celui-ci. 2) Conservez l'intérieur du four propre. Lorsque la nourriture éclabousse ou coule sur les parois du four, essuyez avec un chiffon humide. On peut utiliser un détergent doux si le - Danby DMW077BLSDD | Product Manual - Page 27
est mineur et n'exige pas un appel de service. Utilisez ce guide pour trouver des solutions. Si l'appareil ne fonctionne toujours pas, appelez un depot de service autorise ou le numero de telephone sans frais Danby 1-800-263-2629 pour de plus amples renseignements. PROBLEME Le four ne se met pas en - Danby DMW077BLSDD | Product Manual - Page 28
acheteur initial de l'appareil vendu par Danby Products Limited (Canada) ou Danby Products Inc. (E.- U. d'A) (ci-après "Danby") ou par l'un des ses quiconque autre que la station de service agréée où à des fins commerciales, toutes les obligations de Danby en vertu de cette garantie seront annul - Danby DMW077BLSDD | Product Manual - Page 29
MICROWAVE OVEN Model • Modèle DMW077BLSDD Microwave Oven The model number can be found on the serial plate located on the back panel of the unit. All repair parts are available for purchase or special order when you visit your nearest service depot. To request service and/or the location of the
-
 1
1 -
 2
2 -
 3
3 -
 4
4 -
 5
5 -
 6
6 -
 7
7 -
8
-
9
-
10
-
11
-
12
-
13
-
14
-
15
-
16
-
17
-
18
-
19
-
20
-
21
-
22
-
23
-
24
-
25
-
26
-
27
-
28
-
29
 |
 |

Model • Modèle
DMW077BLSDD
MICROWAVE
Owner’s Use and Care Guide
Guide d’utilisation et soins de Propriètaire
V2.06.10.DM