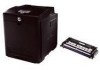
Dell 3130cn User Guide
Dell 3130cn - Color Laser Printer Manual
 |
UPC - 335531305295
View all Dell 3130cn manuals
Add to My Manuals
Save this manual to your list of manuals |
Dell 3130cn manual content summary:
- Dell 3130cn | User Guide - Page 1
Dell 3330dn Laser Printer User's Guide June 2009 www.dell.com | support.dell.com - Dell 3130cn | User Guide - Page 2
optional drawer ...25 Attaching cables...26 Installing the printer on a wired network...27 Installing printer software...29 Verifying printer setup...30 Printing a menu settings page...30 Printing a network setup page ...30 Loading paper and specialty media 32 Setting the Paper Size and Paper Type - Dell 3130cn | User Guide - Page 3
printer ...48 Paper types and weights supported by the printer ...49 Paper capacities...50 Software overview 51 Status Monitor Center...51 Driver Profiler...51 Dell Printer Alert Utility...51 Installing the optional XPS driver...52 Dell Toner Management System...53 Printing Status Window...53 Dell - Dell 3130cn | User Guide - Page 4
Accessing jam areas...64 200 paper jam...65 201 paper jam...66 202 paper jam...67 231 paper jam...69 233 paper jam...70 234 paper jam...70 235 paper jam...71 242 paper jam...71 251 paper jam...72 Understanding printer menus 74 Menus list...74 Paper menu...75 Default Source menu...75 Paper Size/Type - Dell 3130cn | User Guide - Page 5
attached to a network ...126 Printer attached locally to a computer ...127 Replacing supplies...127 Replacing the toner cartridge ...127 Replacing the photoconductor kit ...129 Moving the printer...132 Moving the printer to another location...132 Administrative support 133 Using the Embedded Web - Dell 3130cn | User Guide - Page 6
...140 Envelope seals when printing...140 Solving option problems...140 Option does not operate correctly or quits after it is installed 140 Drawers...141 Flash memory card...141 Memory card ...141 Solving paper feed problems...142 Paper frequently jams ...142 Paper jam message remains after jam is - Dell 3130cn | User Guide - Page 7
Solid black or white streaks appear on transparencies or paper 152 Embedded Web Server does not open...152 Check the network connections ...152 Check the network settings ...152 Appendix 153 Index 155 Contents 7 - Dell 3130cn | User Guide - Page 8
8 - Dell 3130cn | User Guide - Page 9
replaced. Replace it only with the same or equivalent type of lithium battery. Do not recharge, disassemble, or incinerate a lithium battery. Discard used batteries according to the manufacturer's instructions and local regulations. CAUTION-POTENTIAL INJURY: Before moving the printer, follow - Dell 3130cn | User Guide - Page 10
• Lift the printer off of the optional drawer and set it aside instead of trying to lift the drawer and printer at the same time. Note: Use the handholds located on both sides of the printer to lift it off the optional drawer. Safety information 10 - Dell 3130cn | User Guide - Page 11
here Setup documentation-The setup documentation came with the printer. User's Guide-The User's Guide is available on the Software and Documentation CD. For updates, check our Web site at support.dell.com. Windows or Mac Help-Open a printer software program or application, and then click Help. Click - Dell 3130cn | User Guide - Page 12
changes, or advanced at the same time, documentation and drivers for your technical reference material for experienced users or printer are already installed on your computer. technicians • Supplies and accessories for my printer • Replacement cartridges Dell Printer Supplies Web site-dell - Dell 3130cn | User Guide - Page 13
4 System board door 5 Standard 250-sheet tray (Tray 1) 6 Multipurpose feeder door 7 Paper stop 8 Standard exit bin The following illustration shows the printer back with its basic features or parts: 1 Rear door 2 Ethernet port 3 USB port 4 Parallel port 5 Power cord socket 6 Power switch 7 Locking - Dell 3130cn | User Guide - Page 14
Configured models The following illustration shows the printer configured with an optional drawer: 1 Optional tray (Tray 2) Understanding the printer control panel The following diagram shows the printer control panel: Learning about the printer 14 - Dell 3130cn | User Guide - Page 15
is in the Ready state. 2 Back button ( ) Returns the display to the previous screen 3 Cancel button ( ) Stops all printer activity When printing, pressing causes Stopping to appear momentarily. Then the Stopped screen appears offering a list of settings that you may select. 4 Indicator light - Dell 3130cn | User Guide - Page 16
, it remains in effect until new settings are saved or until factory defaults are restored. Settings chosen from a software program can also change or override the user default settings selected from the printer control panel. 3, 4, 5, 6 Navigation buttons Press the up or down arrow buttons to - Dell 3130cn | User Guide - Page 17
20 lb paper. It collects print jobs facedown. The standard exit bin includes a paper stop that keeps paper from sliding out the front of the bin as it stacks. The paper stop also aids in neater stacking of the paper. To open the paper stop, pull it so it flips forward. Learning about the printer 17 - Dell 3130cn | User Guide - Page 18
Notes: • Do not leave the paper stop in the open position if you are printing on transparencies. Doing so may cause creases in the transparencies. • When moving the printer to another location, make sure the paper stop is closed. Learning about the printer 18 - Dell 3130cn | User Guide - Page 19
changes yet, if you print the page now it lists all the factory default settings. Once you select and save other settings from the menus, when you print this page, the user default a flat, sturdy, and stable surface. • Keep the printer: - Away from the direct airflow of air conditioners, heaters - Dell 3130cn | User Guide - Page 20
adding optional cards. The instructions in this section explain how to install the available cards; you can also use them to locate a card for removal. Available internal options Memory cards • Printer memory • Flash memory • Fonts Firmware cards • Bar Code • Forms Card • PrintCryptionTM Accessing - Dell 3130cn | User Guide - Page 21
memory card CAUTION-SHOCK HAZARD: If you are accessing the system board or installing optional hardware or memory devices sometime after setting up the printer, then turn the printer off, and unplug the power cord from the wall outlet before continuing. If you have any other devices attached to the - Dell 3130cn | User Guide - Page 22
. 3 Align the memory card with its connector on the system board. Push the latches on the connector open if they are not open already. Additional printer setup 22 - Dell 3130cn | User Guide - Page 23
interchangeable. CAUTION-SHOCK HAZARD: If you are accessing the system board or installing optional hardware or memory devices sometime after setting up the printer, then turn the printer off, and unplug the power cord from the wall outlet before continuing. If you have other devices attached to the - Dell 3130cn | User Guide - Page 24
on the card must touch and be flush against the system board. • Be careful not to damage the connectors. 5 Close the system board door. Additional printer setup 24 - Dell 3130cn | User Guide - Page 25
drawer, and then remove any packing material from the outside of the drawer. 2 Remove the tray from the support unit. 3 Remove any packing material and tape from inside the tray. 4 Insert the tray into the support unit. 5 Place the drawer in the location chosen for the printer. Additional printer - Dell 3130cn | User Guide - Page 26
6 Align the printer with the drawer, and then lower the printer into place. Attaching cables 1 Connect the printer to a computer or a network. • For a local connection, use a USB or parallel cable. • For a network connection, use an Ethernet cable. 2 Connect the power cord to the printer first and - Dell 3130cn | User Guide - Page 27
: • You have completed the initial setup of the printer. • The printer is connected to your network with the appropriate type of cable. For Windows users 1 Insert the Software and Documentation CD. Wait for the Welcome screen to appear. If the CD does not launch after a minute, then do the following - Dell 3130cn | User Guide - Page 28
Continue. 7 From the Easy Install screen, click Install. 8 Type the user password, and then click OK. All the necessary software is installed on the computer. 9 Click Restart when installation is complete. b Add the printer: • For IP printing: In Mac OS X version 10.5 or later 1 From the Apple menu - Dell 3130cn | User Guide - Page 29
communicate with the printer. The printer software is typically installed during the initial printer setup. If you need to install the software after setup, follow these instructions: For Windows users 1 Close all open software programs. 2 Insert the Software and Documentation CD. 3 From the main - Dell 3130cn | User Guide - Page 30
Finder desktop, double-click the printer CD icon that automatically appears. 4 Double-click the Install icon. 5 Follow the instructions on the screen. Using the World Wide Web Updated printer software may be available at www.support.dell.com. Verifying printer setup Once all hardware and software - Dell 3130cn | User Guide - Page 31
that Status is "Connected." If Status is "Not Connected," the LAN drop may not be active or the network cable may be malfunctioning. Consult a system support person for a solution, and then print another network setup page. Additional - Dell 3130cn | User Guide - Page 32
Type When the Paper Size and Paper Type settings are the same for any trays, the trays are automatically linked. Note: If you load a tray with paper that is the same size as the paper that was previously loaded in the tray, you do not need to change the Paper Size setting. 1 Make sure the printer - Dell 3130cn | User Guide - Page 33
) allows the printer to support the size, including support for standard features such as duplex printing and printing multiple pages on one sheet. Note: Select Portrait Height to adjust the paper height setting or Paper Width to adjust the paper width setting, or adjust both. Instructions to adjust - Dell 3130cn | User Guide - Page 34
2 Squeeze and slide the guides to the correct position for the paper size you are loading. Loading paper and specialty media 34 - Dell 3130cn | User Guide - Page 35
A4 or legal, squeeze and slide the length guide backwards to accommodate the length of paper you are loading. If you are loading A6-size paper: a Squeeze and slide the length guide toward the center of the tray to the A5 size position. b Raise the A6 backstop. Notes: • The standard tray accommodates - Dell 3130cn | User Guide - Page 36
the recommended print side facedown. Note: The maximum fill line on the width guide indicates the maximum height for loading paper. Do not load A6-size paper to the maximum fill line; the tray holds only 150 sheets of A6-size paper. 1 Maximum fill line Load letterhead with the top edge of the sheet - Dell 3130cn | User Guide - Page 37
5 Squeeze and slide the guides to lightly touch the side of the stack. 6 Insert the tray. 7 If the paper type you loaded differs from the type that was previously loaded in the tray, then change the Paper Type setting for the tray. Loading paper and specialty media 37 - Dell 3130cn | User Guide - Page 38
Using the multipurpose feeder Opening the multipurpose feeder 1 Grasp the handle, and pull the multipurpose feeder door down. 2 Grasp the raised handle, and pull the extension forward. 3 Grasp the handle, and pull the extension so it flips forward. Loading paper and specialty media 38 - Dell 3130cn | User Guide - Page 39
fully and open. Loading the multipurpose feeder 1 Squeeze the tab located on the right width guide, and move the guides out fully. 2 Prepare the paper or specialty media for loading. • Flex sheets of paper or paper labels back and forth to loosen them, and then fan them. Do not fold or crease - Dell 3130cn | User Guide - Page 40
crease envelopes. 3 Load the paper or specialty media. Notes: • Do not force any paper into the multipurpose feeder. Overfilling may cause jams. • Do not exceed the maximum stack height by forcing paper or specialty media under the stack height limiters which are located on the guides. Loading paper - Dell 3130cn | User Guide - Page 41
stamp and address are shown to illustrate the proper orientation for loading envelopes. Warning-Potential Damage: Never use envelopes with stamps, clasps, snaps, windows, coated linings, or self-stick adhesives. These envelopes may severely damage the printer. Loading paper and specialty media 41 - Dell 3130cn | User Guide - Page 42
guide to adjust the guides to lightly touch the sides of the stack. 5 Slide the paper gently into the multipurpose feeder until it comes to a stop. Paper should lie flat in the multipurpose feeder. Make sure the paper 6 From the printer control panel, set the Paper Size and Paper Type. Linking and - Dell 3130cn | User Guide - Page 43
automatic; they must be set manually from the Paper menu. Warning-Potential Damage: Do not assign a Paper Type name that does not accurately describe the type of paper loaded in the tray. The temperature of the fuser varies according to the specified Paper Type. Paper may not be properly processed - Dell 3130cn | User Guide - Page 44
Web Server to define a name other than Custom Type for each of the custom paper types that are loaded. When a Custom Type name is changed, the menus display the new name instead of Custom Type . To change a Custom Type name: 1 Type the printer IP address into the address field of your - Dell 3130cn | User Guide - Page 45
m2 (24 lb) or heavier paper. Note: Duplex printing is supported only for 60-90 g/m2 (16-24 lb bond) paper. Curl Curl is the tendency for paper to curl at its edges. Excessive curl can cause paper feeding problems. Curl can occur after the paper passes through the printer, where it is exposed to high - Dell 3130cn | User Guide - Page 46
of stability resulting in fewer paper feeding problems and better print quality. Paper containing fibers such as cotton can negatively affect paper handling. Unacceptable paper The following paper types are not recommended for use with the printer: • Chemically treated papers used to make copies - Dell 3130cn | User Guide - Page 47
as premium 24 lb laser papers, 50-90 Sheffield units) and much rougher papers (such as premium cotton papers, 200-300 Sheffield units) have been engineered to work very well in laser printers, despite surface texture. Before using these types of paper, consult your paper supplier. • Suitable sheet - Dell 3130cn | User Guide - Page 48
standard and optional paper sources, the types of paper they support, and capacities. Note: For an unlisted paper size, select the closest larger listed size. Paper sizes supported by the printer Paper size Dimensions Standard Optional tray Multipurpose 250-sheet tray feeder Duplex path A4 - Dell 3130cn | User Guide - Page 49
Standard 250-sheet Optional tray tray Multipurpose feeder Duplex path Bond Letterhead Preprinted Colored Paper Card stock X X X Glossy paper X X X X Paper labels1 X 1 Single-sided paper labels designed for laser printers are supported for occasional use. It is recommended to print - Dell 3130cn | User Guide - Page 50
Paper type Standard 250-sheet Optional tray tray Multipurpose feeder Duplex path Transparencies X X Envelopes (smooth)2 X X X 1 Single-sided paper labels designed for laser printers are supported for occasional use. It is recommended to print no more than 20 pages of paper labels a month. - Dell 3130cn | User Guide - Page 51
of an output tray (printer options) • User-defined paper sizes (custom papers) • Simple text and watermarks • Overlay references • Font references • Form associations Dell Printer Alert Utility Note: This application is not available with Windows 2000. The Dell Printer Alert Utility informs you when - Dell 3130cn | User Guide - Page 52
Dell Printers Dell 3330dn Laser Printer. 2 Click Printer Alert Utility. Installing the optional XPS driver The XML Paper Specification (XPS) driver is an optional printer driver designed to make use of the advanced XPS color and graphics features that are only available for users of Windows Vista - Dell 3130cn | User Guide - Page 53
job when you send a job to print. The Printing Status window also displays the level of toner so you can: • Monitor the toner level for your printer. • Click Order Supplies to order replacement toner cartridges. Dell Printer Supplies Reorder Application The Order Supplies dialog box can be launched - Dell 3130cn | User Guide - Page 54
For more information, see "Avoiding jams" on page 63 and "Storing paper" on page 47. Printing a document 1 Load paper into a tray or feeder. 2 From the Paper menu, set the Paper Type and Paper Size based on the paper that is loaded. 3 Do one of the following: For Windows users a With a document open - Dell 3130cn | User Guide - Page 55
tray. Duplex (two-sided) printing from trays Printed letterhead The top edge of the sheet with the logo is placed at the back of the design is placed faceup. tray. Note: Check with the manufacturer or vendor to determine whether the chosen preprinted letterhead is acceptable for laser printers - Dell 3130cn | User Guide - Page 56
and Transparency Texture is set to Rough. Select these settings using the Embedded Web Server, or from the printer control panel Paper menu. • To prevent print quality problems, avoid getting fingerprints on the transparencies. • Before loading transparencies, fan the stack to prevent sheets from - Dell 3130cn | User Guide - Page 57
60%) and the high printing temperature may wrinkle or seal envelopes. Tips on using labels Print samples on the labels being considered for use before buying large quantities. Note: Single-sided paper labels designed for laser printers are supported for occasional use. It is recommended to print 20 - Dell 3130cn | User Guide - Page 58
printing on card stock: • Make sure the Paper Type is Card Stock. • Select the appropriate Paper Texture setting. • Be aware that preprinting, perforation, and creasing may significantly affect the print quality and cause jams or other paper handling problems. • Check with the manufacturer or vendor - Dell 3130cn | User Guide - Page 59
print additional copies as long as the job remains stored in memory. Other types of held jobs include: • Forms from a kiosk • Bookmarks • Jobs Repeat and Reserve jobs continue to be held in the printer until you choose to delete them. For Windows Users 1 With a document open, click File Print. - Dell 3130cn | User Guide - Page 60
, choose Job Routing. 3 Choose your job type (Confidential, Reserve, Repeat, Verify, profiles, forms from a kiosk, bookmarks, or a parked job), and then assign a user name. For a confidential job, also enter a four-digit PIN. 4 Click Print, and then go to the printer to release the job. 5 From the - Dell 3130cn | User Guide - Page 61
to isolate print quality problems. 1 Turn the printer off. 2 Hold down and the right arrow button while turning the printer on. 3 Release For Windows users 1 Click , or click Start and then click Run. 2 In the Start Search or Run box, type control printers. 3 Press Enter, or click OK. The printer - Dell 3130cn | User Guide - Page 62
at the top of the window, click the Delete icon. In Mac OS X version 10.4 and earlier: 1 From the Go menu, choose Applications. 2 Double-click Utilities, and then double-click Print Center or Printer Setup Utility. 3 Double-click the printer icon. 4 From the printer window, select the job to cancel - Dell 3130cn | User Guide - Page 63
maximum height. • Make sure the guides in the paper tray or the manual feeder are properly positioned and are not pressing too tightly against the paper or envelopes. • Push the paper tray in firmly after loading paper. Paper recommendations • Use only recommended paper or specialty media. • Do not - Dell 3130cn | User Guide - Page 64
unit housing the toner cartridge and photoconductor kit. 7 Rear door Jam message numbers and how to access each jam Jam number 200 201 202 231 233 234 235 242 To access the jam access to the jam, remove Tray 1, and then press the For alternative access to the jam, open the front door, - Dell 3130cn | User Guide - Page 65
at the front of the printer, and then remove any jammed sheets. 200 paper jam 1 Remove the tray from the printer. 2 Remove the jam if you see it here. 3 If you do not see it, open the front door, and then remove the photoconductor kit and toner cartridge (unit). Note: When the photoconductor kit - Dell 3130cn | User Guide - Page 66
4 Lift the flap in front of the printer, and remove any jammed sheets. 5 Align and insert the unit. 6 Close the front door. 7 Insert the tray. 8 Press . 201 paper jam CAUTION-HOT SURFACE: The fuser and the inside of the printer near the fuser may be hot. To reduce the risk of injury from a hot - Dell 3130cn | User Guide - Page 67
2 Lift the flap in front of the printer, and then remove any jammed sheets. 3 Align and insert the unit. 4 Close the front door. 5 Press . 202 paper jam CAUTION-HOT SURFACE: The fuser and the inside of the printer near the fuser may be hot. To reduce the risk of injury from a hot component, allow - Dell 3130cn | User Guide - Page 68
3 Open the rear door. 4 Remove the jam. 5 Close the rear door. 6 Close the front door. 7 Press . Clearing jams 68 - Dell 3130cn | User Guide - Page 69
231 paper jam CAUTION-HOT SURFACE: The fuser and the inside of the printer near the fuser may be hot. To reduce the risk of injury from a hot component, allow the surface to cool before removing paper from this area. 1 Open the front door. 2 Open the rear door. 3 Remove the jam. 4 Close the rear - Dell 3130cn | User Guide - Page 70
clear the jam, complete the steps in "231 paper jam" on page 69. 234 paper jam A single jam or multiple jams are in the duplex area of the printer when the printer is turned on. To locate and remove the jammed sheets, complete all the steps in: • "231 paper jam" on page 69 • "233 paper jam" on page - Dell 3130cn | User Guide - Page 71
235 paper jam A duplex print job was sent to the printer using a size of paper not supported for duplex printing. A sheet is jammed in the standard exit bin. 1 To remove the jam, gently pull the jammed sheet out of the standard exit bin. 2 Press . 242 paper jam 1 Remove the optional tray from the - Dell 3130cn | User Guide - Page 72
Remove the jam. 3 Insert the optional tray. 4 Press . 251 paper jam A sheet of paper or specialty media failed to feed completely from the multipurpose feeder. Part of it may be still visible. If it is visible, gently pull the jammed sheet from the front of the multipurpose feeder. Clearing jams 72 - Dell 3130cn | User Guide - Page 73
If the sheet is not visible, complete the following steps: 1 Open the front door, and then remove the unit. 2 Lift the flap at the front of the printer, and then remove any jammed sheets of paper that are short lengths of paper. 3 Align and insert the unit. 4 Close the front door. 5 Press . Clearing - Dell 3130cn | User Guide - Page 74
to change printer settings: Paper Menu Default Source Paper Size/Type Configure MP Substitute Size Paper Texture Paper Weight Paper Loading Custom Types Universal Menu Quality Menu Utilities Menu XPS Menu PDF Menu PostScript Menu PCL Emul Menu HTML Menu Image Menu Understanding printer menus 74 - Dell 3130cn | User Guide - Page 75
size loaded in each tray Notes: • Letter is the US factory default setting. A4 is the international factory default setting. • If the same size and type of paper are in two trays and the Paper Size and Paper Type settings match, then the trays are automatically linked. The multipurpose feeder may - Dell 3130cn | User Guide - Page 76
Paper is the factory default setting for Tray 1. Custom Type is the factory default setting for all other trays. • If available, a user-defined name will appear instead of Custom Type . • Use this menu item to configure automatic tray linking. Specifies the size of the paper being manually - Dell 3130cn | User Guide - Page 77
Envelope 9 Envelope 10 Envelope C5 Envelope B5 Envelope DL Envelope Other Envelope MP Feeder Type Plain Paper Card Stock Transparency Recycled Labels Bond Envelope Rough Envelope Letterhead Preprinted Colored Paper Light Paper Heavy Paper Rough/Cotton Custom Type Description Specifies the paper - Dell 3130cn | User Guide - Page 78
item Manual Paper Type Plain Paper Card Stock Transparency Recycled Labels Bond Letterhead Preprinted Colored Paper Light Paper Heavy Paper Rough/Cotton Custom Type Manual Env Size 7 3/4 Envelope 9 Envelope 10 Envelope C5 Envelope B5 Envelope DL Envelope Other Envelope Manual Env Type Envelope - Dell 3130cn | User Guide - Page 79
the factory default setting. Specifies the relative texture of the bond paper loaded in a specific tray Note: Rough is the factory default setting. Specifies the relative texture of the envelopes loaded in a specific tray Note: Normal is the factory default setting. Understanding printer menus 79 - Dell 3130cn | User Guide - Page 80
in a specific tray Note: Rough is the factory default setting. Specifies the relative texture of the custom paper loaded in a specific tray Notes: • Normal is the factory default setting. • Settings appear only if the custom type is supported. Paper Weight menu Menu item Plain Weight Light Normal - Dell 3130cn | User Guide - Page 81
of the labels loaded in a specific tray Note: Normal is the factory default setting. Specifies the relative weight of the paper loaded in a specific tray Note: Normal is the factory default setting. Specifies the relative weight of the envelopes loaded in a specific tray Note: Normal is the factory - Dell 3130cn | User Guide - Page 82
Heavy as the paper type Note: Off is the factory default setting. Notes: • Duplex sets the printer default to 2-sided printing for every print job unless 1-sided printing is selected from Print Properties. • If Duplex is selected, all print jobs are sent through the duplex unit, including 1-sided - Dell 3130cn | User Guide - Page 83
is available only if the custom type is supported. Notes: • Duplex sets the printer default to 2-sided printing for every print job unless 1-sided printing is selected from Print Properties. • If Duplex is selected, all print jobs are sent through the duplex unit, including 1-sided jobs. Custom - Dell 3130cn | User Guide - Page 84
navigate to the type of report you want, and then press . Menu item Menu Settings Page Device Statistics Network Setup Page Description Prints a report containing information about paper loaded into trays, installed memory, the total page count, alarms, timeouts, the printer control panel language - Dell 3130cn | User Guide - Page 85
the fonts available for the printer language currently set in the printer Note: A separate list is available for PCL and PostScript emulations. Each emulation Description Notes: • Auto is the factory default setting. • This menu item appears only if an optional network card is installed - Dell 3130cn | User Guide - Page 86
the Setup menu if PCL SmartSwitch is set to Off. Sets the printer to perform the special processing required for bidirectional communication following the conventions defined by the NPA protocol Notes: • Auto is the factory default setting. • Changing this setting from the printer control panel and - Dell 3130cn | User Guide - Page 87
setup Print NetWare Setup Page Notes: • The Setup Page contains information about the network printer settings, such as the TCP/IP address. • The NetWare Setup Page menu item appears only on models that support NetWare and shows information about NetWare settings. Network Card menu This menu is - Dell 3130cn | User Guide - Page 88
Description Activates TCP/IP Note: On is the factory default setting. Lets you view the current TCP/IP hostname Note: This can be changed only from the Embedded Web Server. Lets you view or change the current TCP/IP Address information Note: Manually setting the IP address sets the Enable DHCP and - Dell 3130cn | User Guide - Page 89
Menu Network Setup AppleTalk Menu item Activate On Off View Name Description Activates or deactivates AppleTalk support Note: On is the factory default setting. Shows the assigned AppleTalk name Note: The name can be changed only from the Embedded Web Server. Understanding printer menus 89 - Dell 3130cn | User Guide - Page 90
Frames Ethernet 802.2 Ethernet 802.3 Ethernet Type II Ethernet SNAP Packet Burst Yes No NSQ/GSQ Mode Yes No Description Activates or deactivates NetWare support Note: No is the factory default setting. Shows the assigned NetWare login name Note: This can be changed only from the Embedded Web Server - Dell 3130cn | User Guide - Page 91
or reduce the size of the parallel and network buffers. • Changing this setting causes the printer to restart. Mac Binary PS On Off Auto Sets the printer to process Macintosh binary PostScript print jobs Notes: • Auto is the factory default setting. • The Off setting filters print jobs using the - Dell 3130cn | User Guide - Page 92
xxx>.. ENA Gateway ... Parallel menu Menu item PCL SmartSwitch On Off PS SmartSwitch On Off NPA Mode On Off Auto Description Sets the factory default setting. • Changing this setting from the printer control panel and then exiting themenus causes the printer to restart. - Dell 3130cn | User Guide - Page 93
USB and network buffers. • Changing this setting from the printer control panel and then exiting themenus causes the printer to restart. The menu selection problems. Determines whether the printer honors printer hardware initialization requests from the computer Notes: • Off is the factory default - Dell 3130cn | User Guide - Page 94
: • Disabled is the factory default setting for Use SSL. • When the Negotiate setting is used, your SMTP server determines if SSL will be used. Specifies the type of user authentication required for scan to e-mail privileges Note: None is the factory default setting. Understanding printer menus 94 - Dell 3130cn | User Guide - Page 95
range from 0-60 minutes. 5 minutes is the factory default setting. 0 indicates the printer does not impose a lockout time. • "Login timeout" specifies how long the printer remains idle on the Home screen before automatically logging the user off. Settings range from 1-900 seconds. 300 seconds is - Dell 3130cn | User Guide - Page 96
those print jobs does not change to the new default value. • If the printer is turned off, all confidential jobs held in printer RAM will be deleted. Security Audit Log menu Menu item Export Log Delete Log Delete now Do not delete Description Enables an authorized user to export the security log - Dell 3130cn | User Guide - Page 97
and time Note: Date/Time is set in YYYY-MM-DD HH:MM format. Lets you select the time zone Note: GMT is the factory default setting. Sets the printer to use the applicable Daylight Saving Time (DST) start and end times associated with the - Dell 3130cn | User Guide - Page 98
text appearing on the display Note: All languages may not be available for all printers. Minimizes the use of energy, paper, or specialty media Notes: • Off is the factory default setting. Off resets the printer to its factory default settings. • The Energy setting minimizes the power used by the - Dell 3130cn | User Guide - Page 99
also changes the Units of Measurement setting in the Univeral Setup menu and the default size value for each paper source (tray or feeder) in the Paper Size/Type menu. Sets an alarm to sound when the printer requires operator intervention Notes: • Off is the factory default setting for Cartridge - Dell 3130cn | User Guide - Page 100
: • Do Not Restore is the factory default setting. Do Not Restore keeps the user-defined settings. • Restore Now returns all printer settings to the factory default settings except Network/Ports menu settings. All downloads stored in RAM are deleted. Downloads stored in flash memory are not affected - Dell 3130cn | User Guide - Page 101
1 Setup menu Menu item Printer Language PCL Emulation PS Emulation Print Area Normal Whole Page Download Target RAM Flash Description Sets customized by a system support person. Description Sets the default printer language Notes: • PCL emulation uses a PCL interpreter for processing print jobs - Dell 3130cn | User Guide - Page 102
in alphabetical order on the printer control panel. Description Specifies whether duplex (2-sided) printing is set as the default for all print jobs Notes: • 1 sided is the factory default setting. • To set 2-sided printing from the software program: for Windows users, click File Print, and then - Dell 3130cn | User Guide - Page 103
-page images be printed on one side of a sheet of paper Notes: • Off is the factory default setting. • The number selected is the number of page images a multiple-page sheet Notes: • Auto is the factory default setting. The printer chooses between portrait and landscape. • Landscape uses Long Edge - Dell 3130cn | User Guide - Page 104
, or Setup, and change the settings from the Print Quality tab; for Macintosh users, choose File > Print, and then adjust the settings from the Print dialog and pop-up menus. • To set Enhance Fine Lines using the Embedded Web Server, type the network printer IP address in a browser window, and from - Dell 3130cn | User Guide - Page 105
. When formatting is complete, the downloads are loaded back into flash memory. Assists in isolating the source of a print job problem Notes: • When Activate is selected, all data sent to the printer is printed in hexadecimal and character representation and control codes are not executed. • To exit - Dell 3130cn | User Guide - Page 106
Read/Write, Write, or password protected. • Job Buffer Size must not be set to 100%. Description Specifies the set of fonts available Notes: • Resident is the factory default setting. It shows the factory default set of fonts downloaded into RAM. • Download appears only if downloaded fonts exist. It - Dell 3130cn | User Guide - Page 107
page Notes: • 60 is the US factory default setting. 64 is the international factory default setting. • The printer sets the amount of space between each line based on the Lines per Page, Paper Size, and Orientation settings. Select the desired Paper Size and Orientation before setting Lines per Page - Dell 3130cn | User Guide - Page 108
source is not installed. Tray 4 default = 20 Tray 5 default = 21 Envelope default = 6 Manual paper default = 2 Manual envelope default = 3 Tray Renumber Returns all tray, drawer, and feeder assignments to the factory default settings Restore Defaults Yes No Understanding printer menus 108 - Dell 3130cn | User Guide - Page 109
Avant Garde Bodoni Bookman Chicago Clarendon Cooper Black Copperplate Coronet Courier Eurostile Garamond Geneva Gill Sans default setting. Sets the page margin for HTML documents Notes: • 19 mm is the factory default setting. • Margin size can be increased in 1-mm increments. Understanding printer - Dell 3130cn | User Guide - Page 110
the factory default setting. Description Selects the optimal paper size, scaling, and orientation Notes: • On is the factory default setting. GIF or JPEG images. Scales the image to fit the selected paper size Notes: • Best Fit is the factory default setting. • When Auto Fit is set to On, Scaling is - Dell 3130cn | User Guide - Page 111
Changes Wait for the message to clear. Busy Wait for the message to clear. Busy ... Wait for the message to clear. Calibrating Wait for the message to clear. Cancel not available Wait for the message to clear. Canceling Wait for the message to clear. Cartridge Low The toner cartridge is low on toner - Dell 3130cn | User Guide - Page 112
toner cartridge is exhausted. 1 Remove the used toner cartridge, and then install a new one. 2 Press to clear the message. Change to • Press the down arrow button until Continue appears, and then press if the paper was changed Damage: Do not turn the printer off while this message appears - Dell 3130cn | User Guide - Page 113
can use Hex Trace to troubleshoot printer problems. Invalid Engine Code You need to download valid engine code for the printer. Note: Engine code may be downloaded while this message appears on the display. Invalid Network Code You need to download valid network printing code for the internal print - Dell 3130cn | User Guide - Page 114
correct paper type and size. • Cancel the current job. Maintenance Replace the maintenance items and, if necessary, reset the printer maintenance Disabled The printer menus are disabled. The printer settings cannot be changed from the printer control panel. Contact your system support person for - Dell 3130cn | User Guide - Page 115
is near exhaustion. The printer continues printing unless the value for the Cartridge Alarm is changed from the printer control panel or set to completely exhausted. When the photoconductor kit is exhausted, replace it. [PJL RDYMSG] This is the Printer Job Language (PJL) Ready message. It appears - Dell 3130cn | User Guide - Page 116
toner cartridge is exhausted. 1 Remove the used toner cartridge, and then install a new one. 2 Press to clear the message. Replace PC Kit This is the early warning message for the photoconductor kit. The printer continues printing unless the value for the Cartridge Alarm is changed from the printer - Dell 3130cn | User Guide - Page 117
default settings are restored: • All downloaded resources in the printer memory are deleted. This includes fonts, macros, and symbol sets. • All settings return to the factory defaults • See your system support person if you need a password number to enter a specific printer feature, setting, or - Dell 3130cn | User Guide - Page 118
the printer off while Waiting, too many events ... DO NOT POWER OFF appears on the display. 30.yy Invalid refill, change cartridge An unsupported, refilled toner cartridge is installed. Remove the toner cartridge, and then install a new one. 31.yy Replace defective or missing cartridge The toner - Dell 3130cn | User Guide - Page 119
press to clear the message and continue 42.xy Cartridge region mismatch Install a toner cartridge that matches the region number of the printer. x indicates the value of the printer region. y indicates the value of the cartridge region. x and y can have the following values: 1 America 2 EMEA - Dell 3130cn | User Guide - Page 120
stop the defragment operation and continue printing. Downloaded fonts and macros not previously stored in memory may be defective and require replacing. 54 Standard network software error Try printer off and then back on to reset the printer. • Upgrade (flash) the network firmware in the printer - Dell 3130cn | User Guide - Page 121
printing. 88.yy Cartridge nearly low The toner is low. Replace the toner cartridge, and then press to clear the message and continue printing. 88.yy Replace cartridge The toner cartridge is exhausted. 1 Replace the toner cartridge. 2 Press to clear the message. Understanding printer messages 121 - Dell 3130cn | User Guide - Page 122
the photoconductor kit and toner cartridge unit. 2 Remove the jam. 3 Replace the photoconductor kit and toner cartridge unit. 4 Close the front door. 5 Press to continue printing. 202.yy Paper jam The message indicates either where the paper is jammed or the number of pages jammed. 1 Open the front - Dell 3130cn | User Guide - Page 123
paper is jammed or the number of pages jammed. 1 To access the jam, try one or more of the following: • Remove Tray 1. • Open the front door, and then remove the photoconductor kit and toner cartridge unit. • Remove Tray 2. 2 Remove the jam. 3 Replace the photoconductor kit and toner cartridge unit - Dell 3130cn | User Guide - Page 124
grounded outlet. 5 Turn the printer back on. If the service message appears again, contact Customer Support, and report the message. 1565 Emulation error, load emulation option The printer automatically clears the message in 30 seconds and then disables the download emulator on the firmware card - Dell 3130cn | User Guide - Page 125
, unplug the power cord from the wall outlet and disconnect all cables to the printer before proceeding. 2 Remove all paper from the printer. 3 Dampen a clean, lint-free cloth with water. Warning-Potential Damage: Do not use household cleaners or detergents, as they may damage the finish of the - Dell 3130cn | User Guide - Page 126
Conserving supplies Conserving supplies using the printer control panel There are some settings you can change from the printer control panel that will help you conserve toner and paper. For more information, see the following table: Supply Toner Paper or specialty media Path to menu item - Dell 3130cn | User Guide - Page 127
3330dn Laser Printer. In Windows® XP and 2000, Click Start Programs or All Programs Dell Printers Dell 3330dn Laser Printer. 2 Click Dell Printer Supplies Reorder Application. The Order Toner Cartridges window opens. 3 Choose your printer model from the list. 4 Enter your Dell printer Service Tag - Dell 3130cn | User Guide - Page 128
-Potential Damage: When replacing a toner cartridge, do not leave the photoconductor kit exposed to direct light for an extended period of time. Extended light exposure can cause print quality problems. 4 Rotate the cartridge in all directions to distribute the toner. Maintaining the printer 128 - Dell 3130cn | User Guide - Page 129
door by pressing the button on the left side of the printer and lowering the front door. 2 Pull the photoconductor kit and toner cartridge out of the printer as a unit by pulling on the toner cartridge handle. Note: The photoconductor kit and toner cartridge form a unit. Maintaining the printer 129 - Dell 3130cn | User Guide - Page 130
Place the unit on a flat, clean surface. 3 Press the button on the base of the photoconductor kit. Pull the toner cartridge up and out using the handle. Maintaining the printer 130 - Dell 3130cn | User Guide - Page 131
the rollers on the toner cartridge with the tracks. Push the toner cartridge until it clicks into place. 6 Install the unit into the printer by aligning the arrows on the guides of the unit with the arrows in the printer. Push the unit as far as it will go. 7 After you replace the photoconductor kit - Dell 3130cn | User Guide - Page 132
located on both sides of the printer to lift it off the optional drawer. The printer and options can be safely moved to another location by following these precautions: • Any cart used to move the printer must have a surface able to support the full footprint of the printer. Any cart used to move - Dell 3130cn | User Guide - Page 133
the Embedded Web Server, you can view paper tray settings, the level of toner in the print cartridge, the percentage of life remaining in the maintenance kit, and capacity measurements of certain printer parts. To view the device status: 1 Type the printer IP address in the address field of your - Dell 3130cn | User Guide - Page 134
of the jobs for that user are deleted. Note: This functionality is available only on network printers. To modify the confidential print settings: 1 Type the printer IP address into the address Available settings range from 1-240 minutes. The factory default is 30 minutes. Administrative support 134 - Dell 3130cn | User Guide - Page 135
mode, and then press . Setting up e-mail alerts You can have the printer send you an e-mail when the supplies are getting low or when the paper needs to be changed, added, or unjammed. To set up e-mail alerts: 1 Type the printer IP address into the address field of your Web browser. Note: If you - Dell 3130cn | User Guide - Page 136
-Potential Damage: Restore Now returns most printer settings to the original factory default settings. Exceptions include the display language, custom sizes and messages, and Network/Port menu settings. All downloads stored in RAM are deleted. Downloads stored in flash memory are unaffected. 1 From - Dell 3130cn | User Guide - Page 137
Troubleshooting Solving basic printer problems If there are basic printer problems, or the printer is unresponsive, make sure: • The power cord is plugged into the printer and a properly grounded electrical outlet. • The electrical outlet is not turned off by any switch or breaker. • The printer is - Dell 3130cn | User Guide - Page 138
your system support person to make sure the network is functioning correctly. • Copies of the printer software are also available on the Dell Web site at www.Dell.com. MAKE Adobe Acrobat. 2 Click the printer icon. The Print dialog appears. 3 Select Print as image. 4 Click OK. Troubleshooting 138 - Dell 3130cn | User Guide - Page 139
each tray. 2 If necessary, adjust the settings from the Paper Size/Type menu. Note: None of the paper sources, trays, or feeders automatically sense the paper size. You must set the size from the Paper Size/Type menu on the printer control panel or from the Embedded Web Server. Troubleshooting 139 - Dell 3130cn | User Guide - Page 140
allow envelopes to exit there. Solving option problems Option does not operate correctly or quits after it is installed These are possible solutions. Try one or more of the following: RESET THE PRINTER Turn the printer off, wait for about 10 seconds, and then turn the printer on. Troubleshooting 140 - Dell 3130cn | User Guide - Page 141
the option. Mac OS 9 users should make sure the printer is set up in the Chooser. Drawers These are possible solutions. Try one or more of the following: MAKE SURE THE PAPER IS LOADED CORRECTLY 1 Pull the tray completely out. 2 Check for paper jams or misfeeds. 3 Make sure the guides are aligned - Dell 3130cn | User Guide - Page 142
. CHECK THE GUIDES Move the guides in the tray to the correct positions for the paper size loaded. LOAD PAPER FROM A FRESH PACKAGE The paper may have absorbed moisture due to high humidity. Store the paper in its original wrapper until you use it. Paper jam message remains after jam is cleared The - Dell 3130cn | User Guide - Page 143
Customer Support. You may have a printer part that requires adjustment or replacement. Isolating print quality problems To help isolate print quality problems, print the print quality test pages, but first make sure the standard tray is loaded: 1 Turn the printer off. 2 Load letter- or A4-size paper - Dell 3130cn | User Guide - Page 144
: • Remove and reinstall the toner cartridge. • Remove and reinstall the photoconductor kit. If the printer still prints blank pages, it may need to be serviced. For more information, contact Customer Support. Characters have jagged or uneven edges If you are using downloaded fonts, verify that the - Dell 3130cn | User Guide - Page 145
Type setting matches the paper loaded in the tray. • For Macintosh users: From the Print dialog, make sure the Paper Type setting matches the paper loaded in the tray. • From the printer control panel Paper menu, make sure the Paper Type setting matches the paper loaded in the tray. Troubleshooting - Dell 3130cn | User Guide - Page 146
THE PAPER TYPE SETTING • For Windows users: From Print Properties, make sure the Media Type setting matches the paper loaded in the tray. • For Macintosh users: From the Print dialog, make sure the Paper Type setting matches the paper loaded in the tray. • From the printer control panel Paper menu - Dell 3130cn | User Guide - Page 147
users: From the Print dialog, make sure the Paper Type setting matches the paper loaded in the tray. • From the printer control panel Paper menu, make sure the Paper Type setting matches the paper loaded in the tray. THE TONER CARTRIDGE MAY BE DEFECTIVE Replace the toner cartridge. Troubleshooting - Dell 3130cn | User Guide - Page 148
: 1 From the printer control panel, check the Paper Type setting from the Paper menu. 2 Before sending the job to print, specify the correct type setting: • For Windows users, specify the type from Print Properties. • For Macintosh users, specify the type from the Print dialog. THE TONER IS LOW When - Dell 3130cn | User Guide - Page 149
: THE TONER CARTRIDGE MAY BE DEFECTIVE Replace the toner cartridge. THERE IS TONER IN THE PAPER PATH Contact Customer Support. Toner rubs off These are possible solutions. Try one or more of the following: CHECK THE PAPER TYPE SETTING Make sure the Paper Type setting matches the paper loaded in - Dell 3130cn | User Guide - Page 150
the following: THE TONER CARTRIDGE MAY BE DEFECTIVE Replace the toner cartridge. THERE IS TONER IN THE PAPER PATH Contact Customer Support. Transparency print quality is poor CHECK THE TRANSPARENCIES Use only transparencies recommended by the printer manufacturer. CHECK THE PAPER TYPE SETTING Load - Dell 3130cn | User Guide - Page 151
the Print dialog, or the printer control panel, select another tray or feeder to feed paper for the job. THE TONER CARTRIDGE IS DEFECTIVE Replace the toner cartridge. MAKE SURE THE PAPER PATH IS CLEAR Paper could be caught between the photoconductor kit and the fuser. Check the paper path around the - Dell 3130cn | User Guide - Page 152
the printer manufacturer. • Make sure the Paper Type setting matches what is loaded in the tray or feeder. • Make sure the Paper Texture setting is correct for the type of paper or specialty media loaded in the tray or feeder. MAKE SURE THE TONER IS DISTRIBUTED EVENLY IN THE TONER CARTRIDGE Remove - Dell 3130cn | User Guide - Page 153
.ca (Canada only) • Anonymous file transfer protocol (FTP) ftp.dell.com Log in as user: anonymous, and use your email address as your password. • Electronic Support Service [email protected] [email protected] [email protected] (Latin America and Caribbean countries only) apsupport - Dell 3130cn | User Guide - Page 154
Warranty and Return Policy Dell Inc. ("Dell") manufactures its hardware products from parts and components that are new or equivalent to new in accordance with industry-standard practices. For information about the Dell warranty for your printer, refer to the Product Information Guide. Appendix 154 - Dell 3130cn | User Guide - Page 155
59 printing for Windows users 59 Confidential Print menu 96 configurations printer 12 Configure MP menu 78 configuring supply notifications 134 conserving supplies 126 control panel, printer 14 factory defaults, restoring 136 custom paper type assigning 43 Custom Type changing name 44 Custom - Dell 3130cn | User Guide - Page 156
for Windows users 59 Hex Trace 113 Hex Trace ready 113 HTML menu 109 I Image menu 110 indicator light 14 information, finding 11 installing printer software 29 Invalid Engine Code 113 Invalid Network Code 113 IPv6 menu 89 J jams accessing jam areas 64 avoiding 63 jams, avoiding cutting paper and - Dell 3130cn | User Guide - Page 157
paper jams accessing jam areas 64 avoiding 63 paper jams, clearing 200 65 201 66 202 67 231 69 233 70 234 70 235 71 242 71 251 72 Paper Loading menu 82 Paper Size/Type menu 75 paper sizes supported by the printer 48 paper stop, using 17 Paper Texture menu 79 paper types duplex support 49 supported - Dell 3130cn | User Guide - Page 158
printer messages 1565 Emulation error, load emulation option 124 200.yy Paper jam 122 202.yy Paper jam 122 231.yy Paper jam 122 233.yy Paper jam 123 234.yy Paper jam 123 235.yy Paper jam 123 24x.yy Paper jam 123 251.yy Paper jam 124 30.yy Invalid refill, change cartridge 118 31.yy Replace defective - Dell 3130cn | User Guide - Page 159
menu 97 setting paper size 32 paper type 32 TCP/IP address 88 Universal Paper Size 32 setting up the printer on a wired network (Macintosh) 27 on a wired network (Windows) 27 Setup menu 101 SMTP Setup menu 94 software Driver Profiler 51 printer alert utility 51 printer supplies reorder application - Dell 3130cn | User Guide - Page 160
shading 149 toner rubs off 149 toner specks 150 troubleshooting, printer options drawers 141 flash memory card 141 memory card 141 option not working 140 U Universal Paper Size 83 setting 32 Universal Setup menu 83 unlinking trays 43 USB menu 91 USB port 26 USB/USB 117 Utilities menu 105
-
 1
1 -
 2
2 -
 3
3 -
 4
4 -
 5
5 -
 6
6 -
 7
7 -
8
-
9
-
10
-
11
-
12
-
13
-
14
-
15
-
16
-
17
-
18
-
19
-
20
-
21
-
22
-
23
-
24
-
25
-
26
-
27
-
28
-
29
-
30
-
31
-
32
-
33
-
34
-
35
-
36
-
37
-
38
-
39
-
40
-
41
-
42
-
43
-
44
-
45
-
46
-
47
-
48
-
49
-
50
-
51
-
52
-
53
-
54
-
55
-
56
-
57
-
58
-
59
-
60
-
61
-
62
-
63
-
64
-
65
-
66
-
67
-
68
-
69
-
70
-
71
-
72
-
73
-
74
-
75
-
76
-
77
-
78
-
79
-
80
-
81
-
82
-
83
-
84
-
85
-
86
-
87
-
88
-
89
-
90
-
91
-
92
-
93
-
94
-
95
-
96
-
97
-
98
-
99
-
100
-
101
-
102
-
103
-
104
-
105
-
106
-
107
-
108
-
109
-
110
-
111
-
112
-
113
-
114
-
115
-
116
-
117
-
118
-
119
-
120
-
121
-
122
-
123
-
124
-
125
-
126
-
127
-
128
-
129
-
130
-
131
-
132
-
133
-
134
-
135
-
136
-
137
-
138
-
139
-
140
-
141
-
142
-
143
-
144
-
145
-
146
-
147
-
148
-
149
-
150
-
151
-
152
-
153
-
154
-
155
-
156
-
157
-
158
-
159
-
160
 |
 |
Dell 3330dn Laser Printer
User's Guide
June 2009
www.dell.com | support.dell.com