Dell 5330dn IPS Configuration Guide
Dell 5330dn - Workgroup Laser Printer B/W Manual
 |
UPC - 884116002406
View all Dell 5330dn manuals
Add to My Manuals
Save this manual to your list of manuals |
Dell 5330dn manual content summary:
- Dell 5330dn | IPS Configuration Guide - Page 1
Configuring the IP Address on the Dell 5330dn printer 1. Press the Menu Button and press ↓ until you come to Network I/O Ports and press the "Check Mark". 2. Press the ↓ until TCP/IP (IPv4) shows up and press the "Check Mark". 3. Use the ↓ to get to IPv4 Activate and press the "Check Mark" to make
-
 1
1
 |
 |

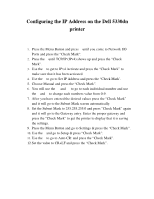
Configuring the IP Address on the Dell 5330dn
printer
1.
Press the Menu Button and press
↓
until you come to Network I/O
Ports and press the “Check Mark”.
2.
Press the
↓
until TCP/IP (IPv4) shows up and press the “Check
Mark”.
3.
Use the
↓
to get to IPv4 Activate and press the “Check Mark” to
make sure that it has been activated.
4.
Use the
↓
to go to Set IP Address and press the “Check Mark’.
5. Choose Manual and press the “Check Mark”.
6.
You will use the
←
and
→
to go to each individual number and use
the
↑
and
↓
to change each numbers value from 0-9.
7. After you have entered the desired values press the “Check Mark”
and it will go to the Subnet Mask screen automatically.
8. Set the Subnet Mask to 255.255.255.0 and press “Check Mark” again
and it will go to the Gateway entry. Enter the proper gateway and
press the “Check Mark” to get the printer to display that it is saving
the settings.
9. Press the Menu Button and go to Settings & press the “Check Mark”.
10.
Use the
↓
and go to Setup & press “Check Mark”.
11.
Use the
↓
to go to Auto CR: and press the “Check Mark”.
12.Set the value to CR+LF and press the “Check Mark”.