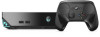
Dell Alienware Alpha R2 Alienware Steam Machine R2 Service Manual
Dell Alienware Alpha R2 Manual
 |
View all Dell Alienware Alpha R2 manuals
Add to My Manuals
Save this manual to your list of manuals |
Dell Alienware Alpha R2 manual content summary:
- Dell Alienware Alpha R2 | Alienware Steam Machine R2 Service Manual - Page 1
Alienware Steam Machine R2 Service Manual Computer Model: Alienware Steam Machine R2 Regulatory Model: D07U Regulatory Type: D07U002/D07U003 - Dell Alienware Alpha R2 | Alienware Steam Machine R2 Service Manual - Page 2
use of your computer. CAUTION: A CAUTION indicates either potential damage to hardware or loss of data and tells you how to avoid the problem. WARNING: A WARNING indicates a potential for property damage, personal injury, or death. © 2016 Dell Inc. All rights reserved. This product is protected by - Dell Alienware Alpha R2 | Alienware Steam Machine R2 Service Manual - Page 3
Contents Before working inside your computer 8 Before You Begin 8 Safety instructions 8 Recommended tools 10 After working inside your computer 11 Technical overview 12 Inside View Of Your Computer 12 System-board components 13 Removing the base - Dell Alienware Alpha R2 | Alienware Steam Machine R2 Service Manual - Page 4
Replacing the top cover 24 Procedure...24 Post-requisites 24 Removing the bottom USB-port 25 Prerequisites...25 Procedure...25 Replacing the bottom USB-port 29 Procedure...29 Post-requisites 29 Removing the power-button board 30 Prerequisites...30 Procedure...30 Replacing the power-button - Dell Alienware Alpha R2 | Alienware Steam Machine R2 Service Manual - Page 5
Replacing the processor heat-sink 42 Procedure...42 Post-requisites 43 Removing the video-card fan 44 Prerequisites...44 Procedure...45 Replacing the video-card fan 47 Procedure...47 Post-requisites 47 Removing the memory modules 48 Prerequisites...48 Procedure...48 Replacing the memory - Dell Alienware Alpha R2 | Alienware Steam Machine R2 Service Manual - Page 6
Replacing the processor 58 Procedure...58 Post-requisites 59 Removing the front-panel light board 60 Prerequisites...60 Procedure...60 Replacing the front-panel light board 63 Procedure...63 Post-requisites 63 Removing the wireless card 64 Prerequisites...64 Procedure...64 Replacing the - Dell Alienware Alpha R2 | Alienware Steam Machine R2 Service Manual - Page 7
Replacing the system board 75 Procedure...75 Post-requisites 75 Removing the coin-cell battery 77 Prerequisites...77 Procedure...77 Replacing the coin-cell battery 79 Procedure...79 Post-requisites 79 BIOS setup program 80 Overview...80 Entering System Setup 80 System setup options 80 Boot - Dell Alienware Alpha R2 | Alienware Steam Machine R2 Service Manual - Page 8
you ordered. Before You Begin 1 Save and close all open files and exit all open applications. 2 Shut down your computer. The shut-down instruction varies depending on the operating system installed on your computer. - Windows 10: Click Start → Power → Shut down. - Console Mode: On the Home screen - Dell Alienware Alpha R2 | Alienware Steam Machine R2 Service Manual - Page 9
pins and contacts. CAUTION: You should only perform troubleshooting and repairs as authorized or directed by the Dell technical assistance team. Damage due to servicing that is not authorized by Dell is not covered by your warranty. See the safety instructions that shipped with the product or at www - Dell Alienware Alpha R2 | Alienware Steam Machine R2 Service Manual - Page 10
Recommended tools The procedures in this document may require the following tools: • Philips screwdriver • Flat-head screwdriver • Plastic scribe 10 - Dell Alienware Alpha R2 | Alienware Steam Machine R2 Service Manual - Page 11
After working inside your computer CAUTION: Leaving stray or loose screws inside your computer may severely damage your computer. 1 Replace all screws and ensure that no stray screws remain inside your computer. 2 Connect any external devices, peripherals, or cables you removed before working on - Dell Alienware Alpha R2 | Alienware Steam Machine R2 Service Manual - Page 12
shipped with your computer and follow the steps in Before working inside your computer. After working inside your computer, follow the instructions in After working inside your computer. For more safety best practices, see the Regulatory Compliance home page at www.dell.com/regulatory_compliance - Dell Alienware Alpha R2 | Alienware Steam Machine R2 Service Manual - Page 13
System-board components 1 processor socket (PROCESSOR) 2 processor-fan cable connector (CPUFAN) 3 M.2 Solid-state drive slot (NGFSSD) 4 jumper plug (P215) 5 memory-module slot (XMM1) 6 video-card fan cable connector (GPUFAN) 7 front-panel light board cable connector (LOGOCON) 8 USB-port cable - Dell Alienware Alpha R2 | Alienware Steam Machine R2 Service Manual - Page 14
shipped with your computer and follow the steps in Before working inside your computer. After working inside your computer, follow the instructions in After working inside your computer. For more safety best practices, see the Regulatory Compliance home page at www.dell.com/regulatory_compliance - Dell Alienware Alpha R2 | Alienware Steam Machine R2 Service Manual - Page 15
3 Lift the base cover off the top cover. 1 screws (4) 2 base cover 15 - Dell Alienware Alpha R2 | Alienware Steam Machine R2 Service Manual - Page 16
shipped with your computer and follow the steps in Before working inside your computer. After working inside your computer, follow the instructions in After working inside your computer. For more safety best practices, see the Regulatory Compliance home page at www.dell.com/regulatory_compliance - Dell Alienware Alpha R2 | Alienware Steam Machine R2 Service Manual - Page 17
shipped with your computer and follow the steps in Before working inside your computer. After working inside your computer, follow the instructions in After working inside your computer. For more safety best practices, see the Regulatory Compliance home page at www.dell.com/regulatory_compliance - Dell Alienware Alpha R2 | Alienware Steam Machine R2 Service Manual - Page 18
3 Lift the hard-drive assembly off the chassis. 1 hard-drive assembly 2 screw 4 Remove the screws that secure the hard-drive bracket to the hard drive. 18 - Dell Alienware Alpha R2 | Alienware Steam Machine R2 Service Manual - Page 19
5 Lift the hard drive off the hard-drive bracket. 1 hard-drive bracket 3 screws (4) 2 hard drive 19 - Dell Alienware Alpha R2 | Alienware Steam Machine R2 Service Manual - Page 20
shipped with your computer and follow the steps in Before working inside your computer. After working inside your computer, follow the instructions in After working inside your computer. For more safety best practices, see the Regulatory Compliance home page at www.dell.com/regulatory_compliance - Dell Alienware Alpha R2 | Alienware Steam Machine R2 Service Manual - Page 21
shipped with your computer and follow the steps in Before working inside your computer. After working inside your computer, follow the instructions in After working inside your computer. For more safety best practices, see the Regulatory Compliance home page at www.dell.com/regulatory_compliance - Dell Alienware Alpha R2 | Alienware Steam Machine R2 Service Manual - Page 22
Procedure CAUTION: The chassis is not secured to the top cover. To avoid damaging the computer, ensure to hold the chassis and top cover together before turning it over. 1 Hold the chassis along with the top cover and then turn the computer over. 1 top cover 2 chassis 22 - Dell Alienware Alpha R2 | Alienware Steam Machine R2 Service Manual - Page 23
2 Lift the top cover off the chassis. 1 top cover 23 - Dell Alienware Alpha R2 | Alienware Steam Machine R2 Service Manual - Page 24
shipped with your computer and follow the steps in Before working inside your computer. After working inside your computer, follow the instructions in After working inside your computer. For more safety best practices, see the Regulatory Compliance home page at www.dell.com/regulatory_compliance - Dell Alienware Alpha R2 | Alienware Steam Machine R2 Service Manual - Page 25
shipped with your computer and follow the steps in Before working inside your computer. After working inside your computer, follow the instructions in After working inside your computer. For more safety best practices, see the Regulatory Compliance home page at www.dell.com/regulatory_compliance - Dell Alienware Alpha R2 | Alienware Steam Machine R2 Service Manual - Page 26
the cable-routing hole on the chassis. 1 USB-port cable 2 cable-routing hole 3 Turn the computer over. 4 Remove the USB-port cable from the routing guides on the chassis. 5 Remove the screw that secures the USB-port bracket to the chassis. 6 Lift the USB-port bracket at an angle to release - Dell Alienware Alpha R2 | Alienware Steam Machine R2 Service Manual - Page 27
7 Lift the USB-port bracket off the chassis. 1 USB-port cable 2 USB-port bracket 3 screw 4 routing guides 5 chassis 8 Remove the screw that secures the USB port to the chassis. 27 - Dell Alienware Alpha R2 | Alienware Steam Machine R2 Service Manual - Page 28
9 Slide and remove the USB port, along with the cable, from under the tab on the chassis. 1 USB-port cable 3 tab 5 chassis 2 screw 4 USB port 28 - Dell Alienware Alpha R2 | Alienware Steam Machine R2 Service Manual - Page 29
your computer. After working inside your computer, follow the instructions in After working inside your computer. For more safety USB-port bracket to the chassis 5 Route the USB-port cable through the routing guides on the chassis and slide the cable through the cable-routing hole on the chassis. - Dell Alienware Alpha R2 | Alienware Steam Machine R2 Service Manual - Page 30
shipped with your computer and follow the steps in Before working inside your computer. After working inside your computer, follow the instructions in After working inside your computer. For more safety best practices, see the Regulatory Compliance home page at www.dell.com/regulatory_compliance - Dell Alienware Alpha R2 | Alienware Steam Machine R2 Service Manual - Page 31
2 Press the tabs on the power-button module to release the module from the front panel. 1 tabs (4) 3 power-button board cable 2 power-button module 31 - Dell Alienware Alpha R2 | Alienware Steam Machine R2 Service Manual - Page 32
3 Turn the chassis over and remove the antenna cable from the routing guides on the power-button module. 1 power-button board cable 2 routing guides 4 Use a plastic scribe to release the tabs at the bottom of the power-button module from the slots on the chassis. 32 - Dell Alienware Alpha R2 | Alienware Steam Machine R2 Service Manual - Page 33
5 Remove the power-button module along with its cable through the slot on the front panel. 1 plastic scribe 3 power-button board 2 tabs (2) 33 - Dell Alienware Alpha R2 | Alienware Steam Machine R2 Service Manual - Page 34
6 Push the tab that secures the power-button board to the power-button board bracket. 1 tab 3 power-button board cable 2 power-button board 4 power-button board bracket 7 Lift and slide the power-button board to release it from the power-button board bracket. 34 - Dell Alienware Alpha R2 | Alienware Steam Machine R2 Service Manual - Page 35
8 Remove the power-button board along with its cable off the power-button board bracket. 1 power-button board cable 3 power-button board 2 tab 4 power-button board bracket 35 - Dell Alienware Alpha R2 | Alienware Steam Machine R2 Service Manual - Page 36
inside your computer. After working inside your computer, follow the instructions in After working inside your computer. For more safety best chassis over. 7 Route the antenna cable through the routing guides on the power-button board module. Post-requisites 1 Replace the top cover. 2 Replace the - Dell Alienware Alpha R2 | Alienware Steam Machine R2 Service Manual - Page 37
shipped with your computer and follow the steps in Before working inside your computer. After working inside your computer, follow the instructions in After working inside your computer. For more safety best practices, see the Regulatory Compliance home page at www.dell.com/regulatory_compliance - Dell Alienware Alpha R2 | Alienware Steam Machine R2 Service Manual - Page 38
2 Disconnect the processor-fan cable from the system board (CPUFAN). 1 processor fan 3 processor-fan cable 2 tabs (2) 38 - Dell Alienware Alpha R2 | Alienware Steam Machine R2 Service Manual - Page 39
shipped with your computer and follow the steps in Before working inside your computer. After working inside your computer, follow the instructions in After working inside your computer. For more safety best practices, see the Regulatory Compliance home page at www.dell.com/regulatory_compliance - Dell Alienware Alpha R2 | Alienware Steam Machine R2 Service Manual - Page 40
shipped with your computer and follow the steps in Before working inside your computer. After working inside your computer, follow the instructions in After working inside your computer. For more safety best practices, see the Regulatory Compliance home page at www.dell.com/regulatory_compliance - Dell Alienware Alpha R2 | Alienware Steam Machine R2 Service Manual - Page 41
2 Lift the processor heat sink off system board. 1 captive screws (4) 2 processor heat sink 41 - Dell Alienware Alpha R2 | Alienware Steam Machine R2 Service Manual - Page 42
shipped with your computer and follow the steps in Before working inside your computer. After working inside your computer, follow the instructions in After working inside your computer. For more safety best practices, see the Regulatory Compliance home page at www.dell.com/regulatory_compliance - Dell Alienware Alpha R2 | Alienware Steam Machine R2 Service Manual - Page 43
2 Align the captive screws on the processor heat sink with the screw holes on the system board. 1 processor heat sink 3 system board 2 captive screws 4 back panel 3 Tighten the captive screws that secure the processor heat sink to the system board. Post-requisites 1 Replace the processor fan. 2 - Dell Alienware Alpha R2 | Alienware Steam Machine R2 Service Manual - Page 44
shipped with your computer and follow the steps in Before working inside your computer. After working inside your computer, follow the instructions in After working inside your computer. For more safety best practices, see the Regulatory Compliance home page at www.dell.com/regulatory_compliance - Dell Alienware Alpha R2 | Alienware Steam Machine R2 Service Manual - Page 45
Procedure 1 Disconnect the video-card fan cable from the system board (GPUFAN). 1 video-card fan cable 2 video-card fan 45 - Dell Alienware Alpha R2 | Alienware Steam Machine R2 Service Manual - Page 46
2 Press the tabs and lift the video-card fan off the system board. 1 video-card fan 2 tabs (2) 46 - Dell Alienware Alpha R2 | Alienware Steam Machine R2 Service Manual - Page 47
shipped with your computer and follow the steps in Before working inside your computer. After working inside your computer, follow the instructions in After working inside your computer. For more safety best practices, see the Regulatory Compliance home page at www.dell.com/regulatory_compliance - Dell Alienware Alpha R2 | Alienware Steam Machine R2 Service Manual - Page 48
shipped with your computer and follow the steps in Before working inside your computer. After working inside your computer, follow the instructions in After working inside your computer. For more safety best practices, see the Regulatory Compliance home page at www.dell.com/regulatory_compliance - Dell Alienware Alpha R2 | Alienware Steam Machine R2 Service Manual - Page 49
2 Slide and remove the memory module from the memory-module slot. 1 memory module 3 memory-module slot 2 securing clips (2) 49 - Dell Alienware Alpha R2 | Alienware Steam Machine R2 Service Manual - Page 50
shipped with your computer and follow the steps in Before working inside your computer. After working inside your computer, follow the instructions in After working inside your computer. For more safety best practices, see the Regulatory Compliance home page at www.dell.com/regulatory_compliance - Dell Alienware Alpha R2 | Alienware Steam Machine R2 Service Manual - Page 51
2 Slide the memory module into the memory-module slot and press the memory module down until it clicks into place. NOTE: If you do not hear the click, remove the memory module and reinstall it. 1 memory-module slot 3 notch Post-requisites 1 Replace the processor fan. 2 Replace the top cover. 3 - Dell Alienware Alpha R2 | Alienware Steam Machine R2 Service Manual - Page 52
shipped with your computer and follow the steps in Before working inside your computer. After working inside your computer, follow the instructions in After working inside your computer. For more safety best practices, see the Regulatory Compliance home page at www.dell.com/regulatory_compliance - Dell Alienware Alpha R2 | Alienware Steam Machine R2 Service Manual - Page 53
2 Slide and remove the M.2 SSD card from the M.2 SSD card slot. 1 M.2 SSD card slot 3 screw 2 M.2 SSD card 4 system board 53 - Dell Alienware Alpha R2 | Alienware Steam Machine R2 Service Manual - Page 54
shipped with your computer and follow the steps in Before working inside your computer. After working inside your computer, follow the instructions in After working inside your computer. For more safety best practices, see the Regulatory Compliance home page at www.dell.com/regulatory_compliance - Dell Alienware Alpha R2 | Alienware Steam Machine R2 Service Manual - Page 55
3 Replace the screw that secures the M.2 SSD card to the system board. 1 M.2 SSD card slot 3 notch 5 screw Post-requisites 1 Replace the processor fan. 2 Replace the top cover. 3 Replace the base cover. 2 tab 4 M.2 SSD card 6 system board 55 - Dell Alienware Alpha R2 | Alienware Steam Machine R2 Service Manual - Page 56
shipped with your computer and follow the steps in Before working inside your computer. After working inside your computer, follow the instructions in After working inside your computer. For more safety best practices, see the Regulatory Compliance home page at www.dell.com/regulatory_compliance - Dell Alienware Alpha R2 | Alienware Steam Machine R2 Service Manual - Page 57
3 Lift the processor off the processor socket. 1 release lever 3 processor cover 5 processor 2 tab 4 processor socket 57 - Dell Alienware Alpha R2 | Alienware Steam Machine R2 Service Manual - Page 58
shipped with your computer and follow the steps in Before working inside your computer. After working inside your computer, follow the instructions in After working inside your computer. For more safety best practices, see the Regulatory Compliance home page at www.dell.com/regulatory_compliance - Dell Alienware Alpha R2 | Alienware Steam Machine R2 Service Manual - Page 59
4 Pivot the release lever down and place it under the tab on the processor cover. 1 processor socket 3 tab 5 release lever Post-requisites 1 Replace the processor heat sink. 2 Replace the processor fan. 3 Replace the top cover. 4 Replace the base cover. 2 processor 4 processor cover 59 - Dell Alienware Alpha R2 | Alienware Steam Machine R2 Service Manual - Page 60
shipped with your computer and follow the steps in Before working inside your computer. After working inside your computer, follow the instructions in After working inside your computer. For more safety best practices, see the Regulatory Compliance home page at www.dell.com/regulatory_compliance - Dell Alienware Alpha R2 | Alienware Steam Machine R2 Service Manual - Page 61
2 Slide the front-panel light board cable through the routing-hole on the chassis. 1 chassis 3 routing hole 2 front-panel light board cable 61 - Dell Alienware Alpha R2 | Alienware Steam Machine R2 Service Manual - Page 62
3 Press the front-panel light module tabs to release the module from the front panel. 1 front-panel light module 2 tabs 3 front panel 4 Lift the front-panel light module, along with its cable, off the front panel. 62 - Dell Alienware Alpha R2 | Alienware Steam Machine R2 Service Manual - Page 63
shipped with your computer and follow the steps in Before working inside your computer. After working inside your computer, follow the instructions in After working inside your computer. For more safety best practices, see the Regulatory Compliance home page at www.dell.com/regulatory_compliance - Dell Alienware Alpha R2 | Alienware Steam Machine R2 Service Manual - Page 64
shipped with your computer and follow the steps in Before working inside your computer. After working inside your computer, follow the instructions in After working inside your computer. For more safety best practices, see the Regulatory Compliance home page at www.dell.com/regulatory_compliance - Dell Alienware Alpha R2 | Alienware Steam Machine R2 Service Manual - Page 65
4 Slide and remove the wireless card out of the wireless-card slot. 1 bracket 3 antenna cables (2) 2 screw 4 wireless card 65 - Dell Alienware Alpha R2 | Alienware Steam Machine R2 Service Manual - Page 66
your computer. After working inside your computer, follow the instructions in After working inside your computer. For more safety the tip of the antenna cables indicates color scheme for the wireless card supported by your computer. Connectors on the wireless card Antenna-cable sticker color - Dell Alienware Alpha R2 | Alienware Steam Machine R2 Service Manual - Page 67
shipped with your computer and follow the steps in Before working inside your computer. After working inside your computer, follow the instructions in After working inside your computer. For more safety best practices, see the Regulatory Compliance home page at www.dell.com/regulatory_compliance - Dell Alienware Alpha R2 | Alienware Steam Machine R2 Service Manual - Page 68
antenna cables through the cable-routing hole on the chassis. 1 routing hole 2 antenna cables (2) 2 Turn the computer over. 3 Remove the antenna cable from the routing guides on the power-button module and chassis. 4 Remove the screws that secure the antenna modules to the chassis. 68 - Dell Alienware Alpha R2 | Alienware Steam Machine R2 Service Manual - Page 69
5 Using a plastic scribe, pry and slide the antenna modules, and release the tabs on the antenna modules from the slots on the chassis. 1 antenna cable 2 routing guides 3 antenna modules (2) 4 screws (2) 5 plastic scribe 6 Lift the antenna modules, along with the cable, off the chassis. 69 - Dell Alienware Alpha R2 | Alienware Steam Machine R2 Service Manual - Page 70
your computer. After working inside your computer, follow the instructions in After working inside your computer. For more safety best the antenna modules to the chassis. 4 Route the antenna cable through the routing guides on the chassis and power-button module. 5 Route the antenna cable through - Dell Alienware Alpha R2 | Alienware Steam Machine R2 Service Manual - Page 71
inside your computer. After working inside your computer, follow the instructions in After working inside your computer. For more safety best .com/regulatory_compliance. NOTE: Your computer's Service Tag is stored in the system board. You must enter the Service Tag in the BIOS setup program after - Dell Alienware Alpha R2 | Alienware Steam Machine R2 Service Manual - Page 72
Procedure NOTE: The system board shipped in your computer may differ from the system board shown in the images below. 1 Disconnect the USB-port cable, front-panel light board cable, and powerbutton board cable from the system board. For information on the location of connectors, see "System- board - Dell Alienware Alpha R2 | Alienware Steam Machine R2 Service Manual - Page 73
4 Push the tab at the bottom of the back panel and use a plastic scribe to remove the back panel from the chassis. 1 plastic scribe 2 back panel 3 tab 5 Remove the screws that secure the system board to the chassis. 73 - Dell Alienware Alpha R2 | Alienware Steam Machine R2 Service Manual - Page 74
6 Lift the system board at an angle and remove it from the chassis. 1 system board 2 screws (4) 74 - Dell Alienware Alpha R2 | Alienware Steam Machine R2 Service Manual - Page 75
inside your computer. After working inside your computer, follow the instructions in After working inside your computer. For more safety best .com/regulatory_compliance. NOTE: Your computer's Service Tag is stored in the system board. You must enter the Service Tag in the BIOS setup program after - Dell Alienware Alpha R2 | Alienware Steam Machine R2 Service Manual - Page 76
5 Replace the processor heat sink. 6 Replace the processor fan. 7 Replace the hard drive. 8 Replace the top cover. 9 Replace the base cover. 76 - Dell Alienware Alpha R2 | Alienware Steam Machine R2 Service Manual - Page 77
shipped with your computer and follow the steps in Before working inside your computer. After working inside your computer, follow the instructions in After working inside your computer. For more safety best practices, see the Regulatory Compliance home page at www.dell.com/regulatory_compliance - Dell Alienware Alpha R2 | Alienware Steam Machine R2 Service Manual - Page 78
3 Peel off the coin-cell battery from the system board. 1 coin-cell battery 3 system board 2 coin-cell battery cable 78 - Dell Alienware Alpha R2 | Alienware Steam Machine R2 Service Manual - Page 79
shipped with your computer and follow the steps in Before working inside your computer. After working inside your computer, follow the instructions in After working inside your computer. For more safety best practices, see the Regulatory Compliance home page at www.dell.com/regulatory_compliance - Dell Alienware Alpha R2 | Alienware Steam Machine R2 Service Manual - Page 80
BIOS setup program Overview CAUTION: Unless you are an expert computer user, do not change the settings in the BIOS setup program. Certain changes can make your computer work incorrectly. NOTE: Before you change BIOS setup program, it is recommended that you write down the BIOS setup program screen - Dell Alienware Alpha R2 | Alienware Steam Machine R2 Service Manual - Page 81
. Displays the current time in hh:mm:ss format. Displays the current date in mm/dd/yyy format. Displays the service tag of your computer. Allows you to enter the service tag of your computer. Displays the asset tag of your computer. Displays the processor type. Displays the processor identification - Dell Alienware Alpha R2 | Alienware Steam Machine R2 Service Manual - Page 82
processor. Allows you to enable the Execute Disable mode of the processor. Allows you to limit the maximum value the processor standard CPUID function supports. Allows you to enable or disable multi-core processor. Allows you to enable or disable Intel Turbo Boost Technology mode for the processor - Dell Alienware Alpha R2 | Alienware Steam Machine R2 Service Manual - Page 83
disable the onboard LAN controller. Allows you to boot your computer from a network. Boot Numlock Key Secure Boot Load Legacy OPROM Keyboard Errors USB Boot Support Boot Mode Boot Option #1 Boot Option #2 Boot Option #3 Allows you to set the status of the Num Lock key during boot to On or Off - Dell Alienware Alpha R2 | Alienware Steam Machine R2 Service Manual - Page 84
Boot Boot Option #4 Boot Option #5 Hard Disk Drivers Power Wake Up by Integrated LAN Deep Sleep Control AC Recovery Auto Power On Auto Power On Mode Auto Power On Date Auto Power On Time Displays the fourth boot device. Default: USB Floppy Device. Displays the fifth boot device. Default: Onboard - Dell Alienware Alpha R2 | Alienware Steam Machine R2 Service Manual - Page 85
Security Supervisor Password User Password Set Supervisor Password User Access Level Set User Password Password Check Displays whether the supervisor password is set. Displays whether the user password is set. Allows you to set, change, or delete the supervisor password. The supervisor password - Dell Alienware Alpha R2 | Alienware Steam Machine R2 Service Manual - Page 86
Exit Save Changes and Reset Discard Changes and Reset Load Defaults Allows you to exit system setup and save your changes. Allows you to exit system setup and load previous values for all system setup options. Allows you to load default values for all system setup options. Boot sequence This - Dell Alienware Alpha R2 | Alienware Steam Machine R2 Service Manual - Page 87
shipped with your computer and follow the steps in Before working inside your computer. After working inside your computer, follow the instructions in After working inside your computer. For more safety best practices, see the Regulatory Compliance home page at www.dell.com/regulatory_compliance - Dell Alienware Alpha R2 | Alienware Steam Machine R2 Service Manual - Page 88
Procedure 1 Locate the password jumper (pin number three and four) on the system board. For information on the location of the CMOS jumper, see "System- board components". 2 Remove the jumper plug. 1 jumper plug 2 password jumper (Pin number three and four) 3 Replace the processor fan. 4 Replace - Dell Alienware Alpha R2 | Alienware Steam Machine R2 Service Manual - Page 89
shipped with your computer and follow the steps in Before working inside your computer. After working inside your computer, follow the instructions in After working inside your computer. For more safety best practices, see the Regulatory Compliance home page at www.dell.com/regulatory_compliance - Dell Alienware Alpha R2 | Alienware Steam Machine R2 Service Manual - Page 90
2 Remove the jumper plug from the password jumper (pin number three and four) and place it on the CMOS jumper (pin number five and six). 1 jumper plug 2 CMOS jumper (pin number five and six) 3 password jumper (pin number three and four) 3 Replace the video-card fan. 4 Replace the processor fan. - Dell Alienware Alpha R2 | Alienware Steam Machine R2 Service Manual - Page 91
9 Shut down your computer. 10 Remove the base cover. 11 Remove the top cover. 12 Remove the processor fan. 13 Remove the video-card fan. 14 Remove the jumper plug from the CMOS jumper and replace it on the password jumper (pin number three and four). Post-requisites 1 Replace the video-card fan. 2 - Dell Alienware Alpha R2 | Alienware Steam Machine R2 Service Manual - Page 92
the computer. 2 Go to dell.com/support. 3 If you have your computer's Service Tag, type your computer's Service Tag and click Submit. If you do not have your computer's Service Tag, click Detect My Product to allow Double-click the BIOS update file icon and follow the instructions on the screen. 92
-
 1
1 -
 2
2 -
 3
3 -
 4
4 -
 5
5 -
 6
6 -
 7
7 -
8
-
9
-
10
-
11
-
12
-
13
-
14
-
15
-
16
-
17
-
18
-
19
-
20
-
21
-
22
-
23
-
24
-
25
-
26
-
27
-
28
-
29
-
30
-
31
-
32
-
33
-
34
-
35
-
36
-
37
-
38
-
39
-
40
-
41
-
42
-
43
-
44
-
45
-
46
-
47
-
48
-
49
-
50
-
51
-
52
-
53
-
54
-
55
-
56
-
57
-
58
-
59
-
60
-
61
-
62
-
63
-
64
-
65
-
66
-
67
-
68
-
69
-
70
-
71
-
72
-
73
-
74
-
75
-
76
-
77
-
78
-
79
-
80
-
81
-
82
-
83
-
84
-
85
-
86
-
87
-
88
-
89
-
90
-
91
-
92
 |
 |

Alienware Steam Machine R2
Service Manual
Computer Model: Alienware Steam
Machine R2
Regulatory Model: D07U
Regulatory Type: D07U002/D07U003