Dell DR4100 Symantec NetBackup - Setting up the DR Series System on Symantec N
Dell DR4100 Manual
 |
View all Dell DR4100 manuals
Add to My Manuals
Save this manual to your list of manuals |
Dell DR4100 manual content summary:
- Dell DR4100 | Symantec NetBackup - Setting up the DR Series System on Symantec N - Page 1
Setting up the Dell™ DR Series System on Symantec™ NetBackup™ Dell Engineering July 2015 A Dell Technical White Paper - Dell DR4100 | Symantec NetBackup - Setting up the DR Series System on Symantec N - Page 2
third party products does not necessarily constitute Dell's recommendation of those products. Please consult your Dell representative for additional information. Trademarks used in this text: Dell™, the Dell logo, and PowerVault™ are trademarks of Dell Inc. Other Dell trademarks may be used in this - Dell DR4100 | Symantec NetBackup - Setting up the DR Series System on Symantec N - Page 3
a storage unit for NFS...80 B VTL configuration guidelines ...81 B.1 Managing VTL protocol accounts and credentials ...81 B.1.1 iSCSI Account Details and Management...81 3 Setting up the Dell™ DR Series System on Symantec™ NetBackup™ | July 2015 - Dell DR4100 | Symantec NetBackup - Setting up the DR Series System on Symantec N - Page 4
B.1.2 NDMP account details and management...82 B.1.3 VTL default account summary table...83 B.2 Managing VTL media and space use ...83 B.2.1 General identify newly added VTL media 86 B.2.8 Space reclamation guidelines...88 4 Setting up the Dell™ DR Series System on Symantec™ NetBackup™ | July 2015 - Dell DR4100 | Symantec NetBackup - Setting up the DR Series System on Symantec N - Page 5
provides information about how to set up the Dell DR Series system as: • A CIFS or NFS backup target for Symantec NetBackup • An OST backup target for Symantec NetBackup • A VTL backup target for Symantec NetBackup This document is a quick reference guide and does not include all DR Series system - Dell DR4100 | Symantec NetBackup - Setting up the DR Series System on Symantec N - Page 6
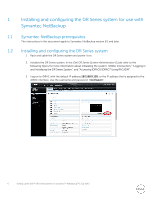
NetBackup prerequisites The instructions in this document apply system. In the Dell DR Series System Administrator Guide, refer to the default IP address 192.168.0.120, or the IP address that is assigned to the iDRAC interface. Use the username and password: "root/calvin". 6 Setting up the Dell - Dell DR4100 | Symantec NetBackup - Setting up the DR Series System on Symantec N - Page 7
4. Launch the virtual console. 5. After the virtual console is open, log on to the system with the username administrator and password St0r@ge! (the "0" in the password is the numeral zero). 6. Set the user-defined networking preferences. 7. View the summary of preferences and confirm that it is - Dell DR4100 | Symantec NetBackup - Setting up the DR Series System on Symantec N - Page 8
St0r@ge! (the "0" in the password is the numeral zero). 9. Join the DR Series system to Active Directory. Note: If you do not want to add the DR Series system to Active Directory, see the DR Series System Owner's Manual for guest logon instructions. a. Select Active Directory from left navigation - Dell DR4100 | Symantec NetBackup - Setting up the DR Series System on Symantec N - Page 9
b. Enter your Active Directory credentials. 9 Setting up the Dell™ DR Series System on Symantec™ NetBackup™ | July 2015 - Dell DR4100 | Symantec NetBackup - Setting up the DR Series System on Symantec N - Page 10
Enable CIFS or Enable NFS check box as needed. NOTE: Symantec NetBackup supports both CIFS and NFS protocols. 3. Select the preferred client access credentials and or NFS Enter Backup Server Info Note: For improved security, Dell recommends adding IP addresses for the following (Not all environments - Dell DR4100 | Symantec NetBackup - Setting up the DR Series System on Symantec N - Page 11
4. Confirm that the container is added. 5. Click Edit. Note down the container share/export path, which you will use later to target the DR Series system. 11 Setting up the Dell™ DR Series System on Symantec™ NetBackup™ | July 2015 - Dell DR4100 | Symantec NetBackup - Setting up the DR Series System on Symantec N - Page 12
2.1 Setting up Symantec NetBackup storage units - Windows 6. Open the NetBackup Administration Console, and then expand Storage, which displays the Storage Units section. 12 Setting up the Dell™ DR Series System on Symantec™ NetBackup™ | July 2015 - Dell DR4100 | Symantec NetBackup - Setting up the DR Series System on Symantec N - Page 13
Disk Type. 9. Enter the Absolute pathname to directory (the UNC path to the DR Series system container share) and click OK. 13 Setting up the Dell™ DR Series System on Symantec™ NetBackup™ | July 2015 - Dell DR4100 | Symantec NetBackup - Setting up the DR Series System on Symantec N - Page 14
to the DR Series system CIFS Share for the step below to complete successfully. See Appendix A for information about setting up the Symantec NetBackup service account correctly. This should be done before the next step. 10. Click View Properties to view the Directory Properties. 14 Setting up the - Dell DR4100 | Symantec NetBackup - Setting up the DR Series System on Symantec N - Page 15
11. Close Directory Properties, and then click OK. 15 Setting up the Dell™ DR Series System on Symantec™ NetBackup™ | July 2015 - Dell DR4100 | Symantec NetBackup - Setting up the DR Series System on Symantec N - Page 16
use UNIX path of the DR Series system container export instead of the UNC path, as shown in the screenshot below. 16 Setting up the Dell™ DR Series System on Symantec™ NetBackup™ | July 2015 - Dell DR4100 | Symantec NetBackup - Setting up the DR Series System on Symantec N - Page 17
2.3 Creating a new backup job with the DR Series system as the target 1. In the NetBackup Administration Console, right-click Policies, and then select New Policy. 2. Enter a new policy name, and then click OK. 17 Setting up the Dell™ DR Series System on Symantec™ NetBackup™ | July 2015 - Dell DR4100 | Symantec NetBackup - Setting up the DR Series System on Symantec N - Page 18
3. In the Attributes tab, select Policy type and Policy storage. 4. In the Schedules tab, click New, and then specify a schedule Name, and select Type of backup. 18 Setting up the Dell™ DR Series System on Symantec™ NetBackup™ | July 2015 - Dell DR4100 | Symantec NetBackup - Setting up the DR Series System on Symantec N - Page 19
5. Click OK and verify that one full backup type schedule was added into the policy. 6. In the Clients tab, click New, enter the client name, and press Enter. 19 Setting up the Dell™ DR Series System on Symantec™ NetBackup™ | July 2015 - Dell DR4100 | Symantec NetBackup - Setting up the DR Series System on Symantec N - Page 20
7. In the Backup Selections tab, click New and then click Remote Folder. 8. Select a backup path, and then click OK. 20 Setting up the Dell™ DR Series System on Symantec™ NetBackup™ | July 2015 - Dell DR4100 | Symantec NetBackup - Setting up the DR Series System on Symantec N - Page 21
9. Click OK. A new policy is added. 10. To run a manual backup right away and monitor the status, right-click the new policy, and select Manual Backup. 21 Setting up the Dell™ DR Series System on Symantec™ NetBackup™ | July 2015 - Dell DR4100 | Symantec NetBackup - Setting up the DR Series System on Symantec N - Page 22
11. Select the new schedule, and then click OK. 12. Click Activity Monitor to monitor the job status. 22 Setting up the Dell™ DR Series System on Symantec™ NetBackup™ | July 2015 - Dell DR4100 | Symantec NetBackup - Setting up the DR Series System on Symantec N - Page 23
the target container 2.4.1 Building the replication relationship between two DR Series systems 1. Create a source container on the first DR Series system. 23 Setting up the Dell™ DR Series System on Symantec™ NetBackup™ | July 2015 - Dell DR4100 | Symantec NetBackup - Setting up the DR Series System on Symantec N - Page 24
2. Create a target container on the second DR Series system. 3. On the first DR Series system, go to the Replication page, and then click Create. 24 Setting up the Dell™ DR Series System on Symantec™ NetBackup™ | July 2015 - Dell DR4100 | Symantec NetBackup - Setting up the DR Series System on Symantec N - Page 25
4. Select a local container as the source container, and then enter the information for the second DR Series system. 5. Click Retrieve Containers, and then select the target container on the list. 25 Setting up the Dell™ DR Series System on Symantec™ NetBackup™ | July 2015 - Dell DR4100 | Symantec NetBackup - Setting up the DR Series System on Symantec N - Page 26
6. Click Create Replication 7. Verify that the replication relationship between the DR Series systems is created. 26 Setting up the Dell™ DR Series System on Symantec™ NetBackup™ | July 2015 - Dell DR4100 | Symantec NetBackup - Setting up the DR Series System on Symantec N - Page 27
- if the source DR Series system container is newly created without having data backed up. 1. Add the source container to NetBackup. 27 Setting up the Dell™ DR Series System on Symantec™ NetBackup™ | July 2015 - Dell DR4100 | Symantec NetBackup - Setting up the DR Series System on Symantec N - Page 28
2. Create a new backup policy. 3. Run the backup job. 28 Setting up the Dell™ DR Series System on Symantec™ NetBackup™ | July 2015 - Dell DR4100 | Symantec NetBackup - Setting up the DR Series System on Symantec N - Page 29
up. 2. Clean up the image, and from the command line, run the following command. NetBackup will automatically run the cleanup job. 29 Setting up the Dell™ DR Series System on Symantec™ NetBackup™ | July 2015 - Dell DR4100 | Symantec NetBackup - Setting up the DR Series System on Symantec N - Page 30
click Initiate Import. Enter the target container path, and then click OK. 2. Click the Results tab, and check the import results. 30 Setting up the Dell™ DR Series System on Symantec™ NetBackup™ | July 2015 - Dell DR4100 | Symantec NetBackup - Setting up the DR Series System on Symantec N - Page 31
3. Go back to the Search tab, select Import, and then click Search Now. 4. Select the import image, and then click Import. 31 Setting up the Dell™ DR Series System on Symantec™ NetBackup™ | July 2015 - Dell DR4100 | Symantec NetBackup - Setting up the DR Series System on Symantec N - Page 32
5. Go to the Activity Monitor or run the bpimagelist command, and check the image import status. 32 Setting up the Dell™ DR Series System on Symantec™ NetBackup™ | July 2015 - Dell DR4100 | Symantec NetBackup - Setting up the DR Series System on Symantec N - Page 33
2.5 Restoring the image from the target DR Series system 1. Click the NetBackup Administrator Console. 2. Select the files that you want to restore, and then click Start Restore of Marked Files. 33 Setting up the Dell™ DR Series System on Symantec™ NetBackup™ | July 2015 - Dell DR4100 | Symantec NetBackup - Setting up the DR Series System on Symantec N - Page 34
3. Run the restore job. 34 Setting up the Dell™ DR Series System on Symantec™ NetBackup™ | July 2015 - Dell DR4100 | Symantec NetBackup - Setting up the DR Series System on Symantec N - Page 35
the page. 2. Enter a container name and select the connection type as RDA. Then select the RDA type as Symantec OpenStorage (OST). 35 Setting up the Dell™ DR Series System on Symantec™ NetBackup™ | July 2015 - Dell DR4100 | Symantec NetBackup - Setting up the DR Series System on Symantec N - Page 36
Container and confirm that the container was added. 3.1.1 Setting up NetBackup for virtual synthetic backup on a Windows or Linux client Note: Make sure that the Dell OST plugin is installed on the DMA client that is used for NetBackup. 1. Launch the NetBackup Console. 36 Setting up the - Dell DR4100 | Symantec NetBackup - Setting up the DR Series System on Symantec N - Page 37
2. Right-click Media and Device Management and select Credentials > Storage Server, and then click New. 3. In the Storage server configuration wizard dialog box, select OpenStorage from the list and click Next. 37 Setting up the Dell™ DR Series System on Symantec™ NetBackup™ | July 2015 - Dell DR4100 | Symantec NetBackup - Setting up the DR Series System on Symantec N - Page 38
name, enter the DR Series system IP address or hostname, and under Storage server type, enter DELL. 5. In the Media server list, select the media server and enter the user name: backup_user, password: St0r@ge! 6. Make sure the storage server creation is successful and that authentication is working - Dell DR4100 | Symantec NetBackup - Setting up the DR Series System on Symantec N - Page 39
The created storage server should now be listed. 7. Right-click Media and Device Management and select Devices -> Disk Pool, and then click New. 39 Setting up the Dell™ DR Series System on Symantec™ NetBackup™ | July 2015 - Dell DR4100 | Symantec NetBackup - Setting up the DR Series System on Symantec N - Page 40
8. In the Disk Pool Configuration Wizard dialog box, select OpenStorage (DELL) for Type. 40 Setting up the Dell™ DR Series System on Symantec™ NetBackup™ | July 2015 - Dell DR4100 | Symantec NetBackup - Setting up the DR Series System on Symantec N - Page 41
9. In the Storage server list, select the DR storage server created previously. 10. Select the OST container created previously, which will be used for backup. 11. Enter the Disk pool name. 41 Setting up the Dell™ DR Series System on Symantec™ NetBackup™ | July 2015 - Dell DR4100 | Symantec NetBackup - Setting up the DR Series System on Symantec N - Page 42
12. Confirm that disk pool creation is successful. 42 Setting up the Dell™ DR Series System on Symantec™ NetBackup™ | July 2015 - Dell DR4100 | Symantec NetBackup - Setting up the DR Series System on Symantec N - Page 43
13. Make sure the disk pool is listed. 14. Right-click NetBackup Management and select Storage > Storage Unit, and then click New Storage Unit. 43 Setting up the Dell™ DR Series System on Symantec™ NetBackup™ | July 2015 - Dell DR4100 | Symantec NetBackup - Setting up the DR Series System on Symantec N - Page 44
15. For the New Storage Unit, enter a Storage unit name, and then specify the Storage unit type as Disk, the Disk type as OpenStorage (DELL), and Storage unit configured for as Backup. Select the disk pool that was created previous steps, and select the media server that will be used - Dell DR4100 | Symantec NetBackup - Setting up the DR Series System on Symantec N - Page 45
17. Right-click Netbackup Management > Policies and click New Policy. 18. Enter a Policy name. 45 Setting up the Dell™ DR Series System on Symantec™ NetBackup™ | July 2015 - Dell DR4100 | Symantec NetBackup - Setting up the DR Series System on Symantec N - Page 46
enabled. The schedule should be set so that first a full backup runs, then an incremental backup, and finally a synthetic full backup. 46 Setting up the Dell™ DR Series System on Symantec™ NetBackup™ | July 2015 - Dell DR4100 | Symantec NetBackup - Setting up the DR Series System on Symantec N - Page 47
47 Setting up the Dell™ DR Series System on Symantec™ NetBackup™ | July 2015 - Dell DR4100 | Symantec NetBackup - Setting up the DR Series System on Symantec N - Page 48
that the policy is created successfully. 24. Activate the policy before proceeding to backup. Right-click the policy and click Activate. 48 Setting up the Dell™ DR Series System on Symantec™ NetBackup™ | July 2015 - Dell DR4100 | Symantec NetBackup - Setting up the DR Series System on Symantec N - Page 49
line interface (CLI), as shown in the following example screenshot. Note: You can schedule the backups or run them at a convenient time. This procedure uses a manual backup configuration. 2. Under Netbackup Management > Policies, right-click the policy created in the previous procedure and select - Dell DR4100 | Symantec NetBackup - Setting up the DR Series System on Symantec N - Page 50
3. Run a manual Full Backup and check the status in the Activity Monitor. Double-click the job to see the detailed status. 4. Run one or more configured Incremental backups to generate a set of backups that can make a synthetic full backup. 50 Setting up the Dell™ DR Series System on Symantec™ - Dell DR4100 | Symantec NetBackup - Setting up the DR Series System on Symantec N - Page 51
is synthesized. Note: The throughput of the final backup should be much faster as it synthesizes the full and incremental backups. 51 Setting up the Dell™ DR Series System on Symantec™ NetBackup™ | July 2015 - Dell DR4100 | Symantec NetBackup - Setting up the DR Series System on Symantec N - Page 52
target container(s) for NetBackup 4.1.1 Creating the NDMP VTL container Before you begin, ensure that the NetBackup OEM patch is installed. Contact Dell Support for the instructions. 1. Create a VTL container in the DR Series system GUI by selecting Containers in the left navigation area, and then - Dell DR4100 | Symantec NetBackup - Setting up the DR Series System on Symantec N - Page 53
3. Select the Is OEM checkbox, NDMP Access Protocol radio button, Unix Dump Marker Type and enter the Access Control IP address. Click Next. 4. Click Create a New Container to finish container creation. 53 Setting up the Dell™ DR Series System on Symantec™ NetBackup™ | July 2015 - Dell DR4100 | Symantec NetBackup - Setting up the DR Series System on Symantec N - Page 54
, and select New. 2. Enter the NDMP host name of the filer from which you want to back up and click OK. 54 Setting up the Dell™ DR Series System on Symantec™ NetBackup™ | July 2015 - Dell DR4100 | Symantec NetBackup - Setting up the DR Series System on Symantec N - Page 55
3. Enter the backup user logon information for the filer and click OK. 4. Click Add again and specify the DR Series system host name and click OK. 55 Setting up the Dell™ DR Series System on Symantec™ NetBackup™ | July 2015 - Dell DR4100 | Symantec NetBackup - Setting up the DR Series System on Symantec N - Page 56
5. Enter the backup user logon information for the DR Series system, and click OK. 6. Click the master server in the navigation pane, and then click Configure Storage Devices. 56 Setting up the Dell™ DR Series System on Symantec™ NetBackup™ | July 2015 - Dell DR4100 | Symantec NetBackup - Setting up the DR Series System on Symantec N - Page 57
7. Click Next>. 8. Click Change, select the NDMP Host check box, and click OK. Click Next>. 57 Setting up the Dell™ DR Series System on Symantec™ NetBackup™ | July 2015 - Dell DR4100 | Symantec NetBackup - Setting up the DR Series System on Symantec N - Page 58
9. Ensure that the DR's host name is selected and click Next. 58 Setting up the Dell™ DR Series System on Symantec™ NetBackup™ | July 2015 - Dell DR4100 | Symantec NetBackup - Setting up the DR Series System on Symantec N - Page 59
10. Verify that the VTL was detected successfully and click Next. 11. Click Next. 59 Setting up the Dell™ DR Series System on Symantec™ NetBackup™ | July 2015 - Dell DR4100 | Symantec NetBackup - Setting up the DR Series System on Symantec N - Page 60
12. Click Next. 13. Click Next. 60 Setting up the Dell™ DR Series System on Symantec™ NetBackup™ | July 2015 - Dell DR4100 | Symantec NetBackup - Setting up the DR Series System on Symantec N - Page 61
14. Click Yes to confirm you want to continue. 15. Click Next. 61 Setting up the Dell™ DR Series System on Symantec™ NetBackup™ | July 2015 - Dell DR4100 | Symantec NetBackup - Setting up the DR Series System on Symantec N - Page 62
16. Click Next. 17. Click Finish. 62 Setting up the Dell™ DR Series System on Symantec™ NetBackup™ | July 2015 - Dell DR4100 | Symantec NetBackup - Setting up the DR Series System on Symantec N - Page 63
18. Go to Media and Device Management > Devices and then select Robots > Inventory Robot. '' 63 Setting up the Dell™ DR Series System on Symantec™ NetBackup™ | July 2015 - Dell DR4100 | Symantec NetBackup - Setting up the DR Series System on Symantec N - Page 64
19. Select the Robot you want to inventory. Select the Update Volume Configuration and Preview Changes options, and then click Start. 20. When it completes, click Yes. 64 Setting up the Dell™ DR Series System on Symantec™ NetBackup™ | July 2015 - Dell DR4100 | Symantec NetBackup - Setting up the DR Series System on Symantec N - Page 65
21. Click Close. 22. Select NetBackup Management > Policies and then select New Policy. 65 Setting up the Dell™ DR Series System on Symantec™ NetBackup™ | July 2015 - Dell DR4100 | Symantec NetBackup - Setting up the DR Series System on Symantec N - Page 66
23. Enter a policy name for the backup job and click OK. 24. Select NDMP for the Policy Type, and select the Allow Multiple Data Streams check box on the Attributes tab. Click the Schedules tab. 66 Setting up the Dell™ DR Series System on Symantec™ NetBackup™ | July 2015 - Dell DR4100 | Symantec NetBackup - Setting up the DR Series System on Symantec N - Page 67
25. Click New on the Schedules tab. 26. Select Full Backup for the initial backup, enter a name, and click OK. 67 Setting up the Dell™ DR Series System on Symantec™ NetBackup™ | July 2015 - Dell DR4100 | Symantec NetBackup - Setting up the DR Series System on Symantec N - Page 68
27. Verify the results, and click the Clients tab. 68 Setting up the Dell™ DR Series System on Symantec™ NetBackup™ | July 2015 - Dell DR4100 | Symantec NetBackup - Setting up the DR Series System on Symantec N - Page 69
28. Click New... on the Clients tab to specify the client you want to backup. 29. Enter the name of the filer and click outside of the edit box. 69 Setting up the Dell™ DR Series System on Symantec™ NetBackup™ | July 2015 - Dell DR4100 | Symantec NetBackup - Setting up the DR Series System on Symantec N - Page 70
30. Select NDMP, NDMP in the drop down menu, and click OK. Then, click the Backup Selections tab. 31. Click New... and enter the path to the location you want to back up. Click OK. 70 Setting up the Dell™ DR Series System on Symantec™ NetBackup™ | July 2015 - Dell DR4100 | Symantec NetBackup - Setting up the DR Series System on Symantec N - Page 71
32. Right-click the policy that you just added and select Manual Backup... to start the backup. 33. Click OK. 71 Setting up the Dell™ DR Series System on Symantec™ NetBackup™ | July 2015 - Dell DR4100 | Symantec NetBackup - Setting up the DR Series System on Symantec N - Page 72
34. Select the Activity Monitor in the navigation pane to watch the progress of the backup job. 35. Select File > Backup, Archive, Restore to start the restore process. 72 Setting up the Dell™ DR Series System on Symantec™ NetBackup™ | July 2015 - Dell DR4100 | Symantec NetBackup - Setting up the DR Series System on Symantec N - Page 73
36. Select File > Specify NetBackup Machines and Policy Type. 37. Select the Clients you want to restore to and from and click OK. 73 Setting up the Dell™ DR Series System on Symantec™ NetBackup™ | July 2015 - Dell DR4100 | Symantec NetBackup - Setting up the DR Series System on Symantec N - Page 74
38. Select the backup you want to restore (green check mark for a full backup). Select the checkbox of the data you want to restore in the bottom left pane. Click the restore icon button in the left toolbar. 74 Setting up the Dell™ DR Series System on Symantec™ NetBackup™ | July 2015 - Dell DR4100 | Symantec NetBackup - Setting up the DR Series System on Symantec N - Page 75
39. Select the location you want to restore to and restore options. Click Start Restore. 40. Monitor the restore progress from the Activity Monitor in the NetBackup Administration Console. 75 Setting up the Dell™ DR Series System on Symantec™ NetBackup™ | July 2015 - Dell DR4100 | Symantec NetBackup - Setting up the DR Series System on Symantec N - Page 76
should run at least 40 hours per week when backups are not taking place, and generally after a backup job has completed. 76 Setting up the Dell™ DR Series System on Symantec™ NetBackup™ | July 2015 - Dell DR4100 | Symantec NetBackup - Setting up the DR Series System on Symantec N - Page 77
backup jobs are completed, the ratios will increase. Backup jobs with a 12-week retention will average a 15x ratio, in most cases. 77 Setting up the Dell™ DR Series System on Symantec™ NetBackup™ | July 2015 - Dell DR4100 | Symantec NetBackup - Setting up the DR Series System on Symantec N - Page 78
Symantec NetBackup service to run with this AD user • Ensure that the following services are run by a service or domain UNC path: o NetBackup Client Service o NetBackup Remote Manager and Monitor Service o NetBackup Service Layer i. To set the password for local CIFS administrator on - Dell DR4100 | Symantec NetBackup - Setting up the DR Series System on Symantec N - Page 79
backups are currently running, as restarting the services causes backup jobs to fail. Double-click on the services one at a time. If you are when the user needs this info] v. Click OK. vi. Restart the NetBackup services from the command line to take effect. For example: \Veritas\ - Dell DR4100 | Symantec NetBackup - Setting up the DR Series System on Symantec N - Page 80
use the Linux command "cat /proc/mounts". The rsize and wsize of the connects in the command output should be 512K. 80 Setting up the Dell™ DR Series System on Symantec™ NetBackup™ | July 2015 - Dell DR4100 | Symantec NetBackup - Setting up the DR Series System on Symantec N - Page 81
default iSCSI password is St0r@ge!iscsi. You can modify this password in the iSCSI tab of the Clients page. Click Edit CHAP Password and enter a new password as needed. IMPORTANT NOTE: iSCSI CHAP passwords setpassword CLI command to change the iSCSI CHAP password as shown in the following example: > - Dell DR4100 | Symantec NetBackup - Setting up the DR Series System on Symantec N - Page 82
NDMP Port: 10000 The default password is St0r@ge! It can be modified by running the ndmp -setpassword command: > ndmp --setpassword Enter new NDMP password:######### Re-type NDMP password:######### NDMP password successfully updated. 82 Setting up the Dell™ DR Series System on Symantec - Dell DR4100 | Symantec NetBackup - Setting up the DR Series System on Symantec N - Page 83
account summary table Service NDMP iSCSI Account ndmp_user Default Credentials St0r@ge! St0r@ge!iscsi CLI deduplication, compression, and encryption at rest. Backup Applications (such as Dell NetVault, Symantec BackupExec, Symantec NetBackup, etc) should be configured so - Dell DR4100 | Symantec NetBackup - Setting up the DR Series System on Symantec N - Page 84
, the initial VTL would be created with 152 (121TB divided by 800GB) pieces of media at 800GB for each piece media. 84 Setting up the Dell™ DR Series System on Symantec™ NetBackup™ | July 2015 - Dell DR4100 | Symantec NetBackup - Setting up the DR Series System on Symantec N - Page 85
space can be reconciled thus enabling the physical space to be reclaimed. B.2.5 VTL media count guidelines Type Capacity Max number of Tapes supported LTO-4 800GiB 2000 LTO-3 400GiB 4000 LTO-2 200GiB 8000 LTO-1 100Gib 10000 LTO-1 50Gib 10000 LTO-1 10GiB 10000 85 Setting up the - Dell DR4100 | Symantec NetBackup - Setting up the DR Series System on Symantec N - Page 86
newly created media. 1. Select the robot of the VTL and perform an inventory update (as when you added the VTL initially). 86 Setting up the Dell™ DR Series System on Symantec™ NetBackup™ | July 2015 - Dell DR4100 | Symantec NetBackup - Setting up the DR Series System on Symantec N - Page 87
2. Select the options, Update Volume Configuration and Preview Changes, and then click Start. 3. Verify that the media is found, and click Yes. 87 Setting up the Dell™ DR Series System on Symantec™ NetBackup™ | July 2015 - Dell DR4100 | Symantec NetBackup - Setting up the DR Series System on Symantec N - Page 88
media to be used at optimal levels and that the underlying physical space be reclaimed accordingly by the scheduled DR reclamation. 88 Setting up the Dell™ DR Series System on Symantec™ NetBackup™ | July 2015 - Dell DR4100 | Symantec NetBackup - Setting up the DR Series System on Symantec N - Page 89
the following steps can be used when a situation dictates that space must be reclaimed manually. 1. Identify the DR Series system VTL tapes that have been written to via Files\Veritas\Volmgr\bin\vmquery.exe" -m %label% 89 Setting up the Dell™ DR Series System on Symantec™ NetBackup™ | July 2015 - Dell DR4100 | Symantec NetBackup - Setting up the DR Series System on Symantec N - Page 90
3. The tapes may now be re-labeled, which will clear the data from the tapes. 4. Click OK in the Label dialog box. 5. Click OK in the warning dialog box. 90 Setting up the Dell™ DR Series System on Symantec™ NetBackup™ | July 2015 - Dell DR4100 | Symantec NetBackup - Setting up the DR Series System on Symantec N - Page 91
: 33595753405 Post Dedupe Bytes : 24926224990 Post Compression Bytes : 22734553886 Post Encryption Bytes : 0 Post Encryption Bytes in GiB : 0.0 GiB Compression Status : Done 91 Setting up the Dell™ DR Series System on Symantec™ NetBackup™ | July 2015
-
 1
1 -
 2
2 -
 3
3 -
 4
4 -
 5
5 -
 6
6 -
 7
7 -
8
-
9
-
10
-
11
-
12
-
13
-
14
-
15
-
16
-
17
-
18
-
19
-
20
-
21
-
22
-
23
-
24
-
25
-
26
-
27
-
28
-
29
-
30
-
31
-
32
-
33
-
34
-
35
-
36
-
37
-
38
-
39
-
40
-
41
-
42
-
43
-
44
-
45
-
46
-
47
-
48
-
49
-
50
-
51
-
52
-
53
-
54
-
55
-
56
-
57
-
58
-
59
-
60
-
61
-
62
-
63
-
64
-
65
-
66
-
67
-
68
-
69
-
70
-
71
-
72
-
73
-
74
-
75
-
76
-
77
-
78
-
79
-
80
-
81
-
82
-
83
-
84
-
85
-
86
-
87
-
88
-
89
-
90
-
91
 |
 |

A Dell Technical White Paper
Setting up the Dell
™
DR Series System on
Symantec
™
NetBackup
™
Dell Engineering
July 2015