Dell P2311H Setup Diagram
Dell P2311H Manual
 |
View all Dell P2311H manuals
Add to My Manuals
Save this manual to your list of manuals |
Dell P2311H manual content summary:
- Dell P2311H | Setup Diagram - Page 1
P2011H/P2211H/P2311H/P2411H Flat Panel Monitor Product Information Guide IMICV 1116 'C' O. rl'"111*-- 1 Verify the contents of the box (Stand and cables are not included when purchased with other stands. I Please refer to the respective stand setup guides for setup instructions.) tAA.,ILiVV4It - Dell P2311H | Setup Diagram - Page 2
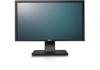
tekan tombol daya NOTE: See the monitor's User's Guide on the Drivers andDocumentation media, for more information. Driver dan media Dokumentasi. 4 1. USB downstream ports 2. Preset 3. Brightness/Contrast 4. Menu 5. Exit 6. Power Button (with power light indicator) 7. Dell Soundbar mounting
-
 1
1 -
 2
2
 |
 |

Setting
Up
Your
Monitor
V'
I
4terega7T
,
a
I
;1
7
-R-
5
1.
7
.
3
I
2LIE.-1
iLITI
n-stuna,natLona.mia,mnt
I
Menyetel
Monitor
!
CAUTION:
!
•
ak
:
i
,,
.-•.
i
,j,,c
):
'1
0
-
).
Before
setting
up
your
,
Dell'm
computer,
Dam
>
e
a
—
-t
sy
I-7
v
L
-
C.fSt
r±i
.M.*I=IgAit
Delfrm
J.
-vac
-gir,
31
-
1fIVRa/tf`PILV)
DellTM
;x"`2.49
'
DellTm
;,
`,E
-
1
S.
N
leSi-al
_
,i-
to
I
Li
GII
see
the
safety
instructions
that
ship
PII
-
4
-
6iiiir:
.
=
1.:1
,
11A0')
IzIMI
-
it
i
,,,jsUllifWgy,,
-
,0A,
-
riAf,..O.R7T7Eiriti31J0
1,
33
.
T
-
ti517T
'
2
LI
Et
21-
-
1'
.
1)}ll
Ail
-
,
-
}.RI
`,.
Et1.
1
XI
-
g
with
your
monitor.
N.Pilf•
-31
I-11-
<
t.-IE
L‘o
g'_SPLI
Al2.
'E
!
PERHATIAN:
riattemAlttaelitRonm
DeIITM
Ta.Ifint
Sebelum
menyetel
monitor
DellTM
Anda,
TaTiiqoiiimatiti4an-a
-
nnlannhit
lihat
petunjuk
keselamatan
yang
disertakan
bersama
monitor
Anda.
Dell
1
M
P2011H/P2211H/P2311H/P2411H
Flat
Panel
Monitor
Product
Information
Guide
IMICV
1116
‘C‘
O.
1
Verify
the
contents
of
the
box
(Stand
and
cables
are
not
included
when
purchased
with
other
stands.
I
Please
refer
to
the
respective
stand
setup
guides
for
setup
instructions.)
tAA.,ILiVV4It
(AUX
-
,
1-T8,'gra.aK,111,3RAV
litlIT
I.rt.a
-
iZ4
,
itgitrtin'Tia•VVP
-
T
)
Vat&
ttt
'J
iZ—wrig3
-,
z'a
,
•nz
Az4lagog..
ix#9,7mrsiv
-
kg-.1
-
m44
,
35
-
atistom.
)
Rto)*lliR
[7200
-
Clt,
LH@gg
Al
-
PJ
al
-1N
Al2
(ELS
- °•
J
,
51-t
T
9-IIOIZOI
J[IM
N
XI
XIOii
g'_Eil-)LiAl2.)
omaopinion1169T@IAfilun@,
ui
lahmq9ila0156imei\rinkail4mium@ultini5
.
6
-
imoi"‘3)
Periksa
kelengkapan
isi
kotak
I
Penyangga
dan
kabel
tidak
disertakan
apabila
dibeli
bersama
penyangga
lainnya.
Harap
lihat
pedoman
penyetelan
penyangga
yang
sesuai
untuk
mendapatkan
petunjuk
pemasangannya.)
rl'"111*--
2
Remove
the
cover
and
place
the
monitor
on
4N37t9Ick
-
AMAR7T
hit.NA_E
INTM‘A,
14E7T73t&A_E
a~
Id
T1171
51-71
_ELI
El
Z
X11
TI
XI
Oil
Al
2
n@mr4
-
mar,U
-
Lepaskan
penutup,
lalu
letakkan
monitor
di
atasnya
3
Attach
the
monitor
stand
i*Aia&
Tatas
Pasang
dudukan
ke
monitor
411•110.••
4
Connect
the
monitor
using
ONLY
ONE
of
the
following
cables:
the
Blue
VGA
cable
or
the
White
DVI
cable
aftik
r
RiCt
-
FM14
1
1
1
r
-
a]
adatOta
frit,0
1
9
VGA
rag..71n
-
tog
DVI
an
-
g
-
o.
VGA
tkKikr
-O,
DVI
d
=9VV1.
-
4
-
6*
-
alts
;ZOi7
-
_x)14.M•It:_71U1Iztsi;ts.0
-
e<t:.-:0,0
*0
VGA
DVI
/7-//1.
SILI
Ed
all
4
Z
-
QH
LFo
9-1I0I
Atg8I-NAI2.
mg-
VGA
DVI
3i101z
oi@a@u@tim@iImulig-uusu,DaihturovichnhavinloioTaielild
.
:
g
-
101911,n0
VGA
alliatriel@gitnoi,Da
DVI
AM')
Hubungkan
monitor
HANYA
dengan
SALAH
SATU
kabel
berikut:
Kabel
DVI
Putih
atau
kabel
VGA
Biru
NOTE:
It
is
recommended
that
you
connect
the
monitor
using
the
White
DVI
cable
for
better
performance.
Aft
II
-
to/9
DVI
PAVA/OltiN
r4itZlIri`gM1
A:
t
Er0.
DVI
gotta.
.E7Tq'io
n
DVI
)IA
q-D
-
c
-
=9VOrc
tt,
:a:
'4'1
ti
DVI
9-I
IOIN5
Al
-g81-01
1'01
dLICF
vilnumq:
21@ivunillii9Eitoi@aauattaaiiiImutifolu
DVI
1151,'
yrriA43
CATATAN:
Untuk
memperoleh
kinerja
yang
lebih
baik,
Anda
dianjurkan
untuk
menghubungkan
monitor
dengan
kabel
DVI
putih.
n
L
t
i
\.!
5
Connect
the
USB
cable
to
the
computer
USB
WilPagA
°
USB
Eggli11
-
1.1
-
NtJL
USB
.'
/L
°
a-$
7
fz#M.1.
-
O
USB
31101
2'
5
7=1-7rEi
all
al
1'
5f.
,
11\12.
m@glu
USB
@9I
@5
Hubungkan
kabel
USB
ke
komputer