Dell P2418HZ Users Guide
Dell P2418HZ Manual
 |
View all Dell P2418HZ manuals
Add to My Manuals
Save this manual to your list of manuals |
Dell P2418HZ manual content summary:
- Dell P2418HZ | Users Guide - Page 1
User's Guide Dell P2418HZ Model No.: P2418HZ Regulatory model: P2418HZc - Dell P2418HZ | Users Guide - Page 2
CAUTION indicates potential damage to hardware or loss of data if instructions are not followed. WARNING: A WARNING indicates a potential for property of the U.S. Environmental Protection Agency. As an ENERGY STAR partner, Dell Inc. has determined that this product meets the ENERGY STAR guidelines - Dell P2418HZ | Users Guide - Page 3
Contents About your monitor 5 Package contents 5 Product features 7 Identifying parts and controls 8 Monitor specifications 12 Universal serial bus (USB) interface 22 Plug and play capability 25 LCD monitor quality and pixel policy 25 Maintenance guidelines 25 Setting up the monitor 26 - Dell P2418HZ | Users Guide - Page 4
the monitor IR Camera driver 52 Setting up Windows Hello 54 Setting up the monitor webcam as default setting 57 Setting up the monitor speaker as default setting 60 Troubleshooting 63 Self-test...63 Built-in diagnostics 65 Common problems 66 Product-specific problems 68 Universal serial - Dell P2418HZ | Users Guide - Page 5
About your monitor Package contents Your monitor ships with the components shown below. Ensure that you have received all the components and Contacting Dell if something is missing. NOTE: Some items may be optional and may not ship with your monitor. Some features or media may not be available - Dell P2418HZ | Users Guide - Page 6
Inc. All rights reserved. USB 6 VGA DP 4 1 2 7 www.dell.com/support/monitors 2 5° 21° Drivers and Documentation Dell™ P1917S Monitor YHVN1A00 Contents: • Device drivers • Quick Setup Guide • User's Guide • Dell Display Manager Software P/N YHVN1 Rev. A00 P/N Q70G19C170012A April 2016 - Dell P2418HZ | Users Guide - Page 7
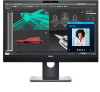
The Dell P2418HZ flat panel display has an active matrix, Thin-Film Transistor (TFT), Liquid Crystal Display (LCD), and LED backlight. The monitor features include: ∞∞ P2418HZ:60.47 cm (23.8 inch) viewable area display (measured diagonally). 1920 x 1080 resolution, plus full-screen support for - Dell P2418HZ | Users Guide - Page 8
Identifying parts and controls Front View 3 45 3 1 2 Front panel controls Label Description 1 Function buttons (For more information, see Operating your monitor) 2 Power on/off button (with LED indicator) 3 Microphone 4 Webcam cover shutter 5 Webcam (Full HD) NOTE: For displays with - Dell P2418HZ | Users Guide - Page 9
. 4 Security lock slot Secures monitor with security lock(sold separately). 5 Barcode, serial number, and Service Refer to this label if you need to Tag label contact Dell for technical support. 6 Cable management slot Use to organize cables by placing them through the slot. About your - Dell P2418HZ | Users Guide - Page 10
Side View 1 2 Label Description Use 1 USB downstream port Connect your USB device. 2x USB 3.0 downstream port (including 1x USB3.0 BC1.2 charging port) NOTE: To use this port, you must connect the USB cable (shipped with your monitor) to the USB-upstream port on the monitor and to your - Dell P2418HZ | Users Guide - Page 11
Bottom View 6 1 234 5 Bottom view without monitor stand Label Description 1 Power port 2 HDMI port 3 DP port 4 VGA port 5 USB connector (x2 downstream, x1 upstream) 6 Stand lock feature Use Connect the power cable. Connect your computer with HDMI cable(optional). Connect your computer to - Dell P2418HZ | Users Guide - Page 12
Viewing angle (vertical / horizontal) Brightness Contrast ratio Aspect ratio Display screen coating Backlight Response time Color depth Color support Built-in devices Dell Display Manager compatibility P2418HZ Active matrix - TFT LCD In-Plane Switching Technology 604.70 mm (23.80 in) 527.04 mm (20 - Dell P2418HZ | Users Guide - Page 13
Connectivity Border width (edge of monitor to active area) Security Adjustability 1xDP (ver 1.2) 1xHDMI (ver 1.4) 1xVGA 1xUSB3.0 port - Upstream 2xUSB3.0 port - Side 2xUSB2.0 port - Bottom 1xHeadphone-out / Microphone-in combo jack 19.8mm (Top) 11.4mm(Left/Right) 43.3mm(Bottom) Security lock slot ( - Dell P2418HZ | Users Guide - Page 14
scan range 56 Hz to 76 Hz (automatic) Maximum preset 1920 x 1080 at 60 Hz resolution Supported video modes Model Video display capabilities (VGA, HDMI & DP playback ) Preset display modes P2418HZ 480i, 480p, 576i, 576p, 720p, 1080i, 1080p Display Mode VESA, 720 x 400 VESA, 640 x 480 VESA - Dell P2418HZ | Users Guide - Page 15
Electrical specifications Model P2418HZ Video input signals ∞∞ Analog RGB, 0.7 Volts +/-5%, positive polarity High Speed 3.3 volts +/- 5% Speaker specifications Model Speaker Frequency Response Operating Temperature P2418HZ 2 x 5.0 W 200 Hz - 20 kHz -25 °C ~ 70 °C About your monitor | 15 - Dell P2418HZ | Users Guide - Page 16
Physical characteristics Model P2418HZ Signal cable type ∞∞ Digital: detachable, HDMI, 19 pins. ∞∞ Digital: detachable, DP, 20 pins. ∞∞ Analog stand assembly 1.96 kg (4.32 lb) Front-frame gloss 2 - 4 Environmental characteristics Model P2418HZ Compliant Standards 16 | About your monitor - Dell P2418HZ | Users Guide - Page 17
Energy Saver feature for Energy Star certified Monitor EPEAT Gold registered in the U.S. EPEAT registration varies by country. See www.epeat.net for registration status by country. TCO-certified display BFR/PVC- Free monitor (excluding external cables) Energy Gauge shows the energy level being - Dell P2418HZ | Users Guide - Page 18
. The OSD functions only in the normal operation mode. When any button is pressed in the Active-off mode, the following message will be displayed: Dell P2418HZ ? No VGA signal from your device. Press any key on the keyboard or move the mouse to wake it up. If there is no display - Dell P2418HZ | Users Guide - Page 19
Pin assignments VGA connector Pin Number 1 2 3 4 5 6 7 8 9 10 11 12 13 14 15 15-pin Side of the Connected Signal Cable Video-Red Video-Green Video-Blue GND Self-test GND-R GND-G GND-B Computer 5V/3.3V GND-sync GND DDC data H-sync V-sync DDC clock About your monitor | 19 - Dell P2418HZ | Users Guide - Page 20
HDMI connector Pin Number 1 2 3 4 5 6 7 8 9 10 11 12 13 14 15 16 17 18 19 19-pin Side of the Connected Signal Cable T.M.D.S. Data 2+ T.M.D.S. Data 2 Shield T.M.D.S. Data 2T.M.D.S. Data 1+ T.M.D.S. Data 1 Shield T.M.D.S. Data 1 T.M.D.S. Data 0+ T.M.D.S. Data 0 Shield T.M.D.S. Data 0T.M.D.S. Clock + - Dell P2418HZ | Users Guide - Page 21
DisplayPort connector Pin Number 1 2 3 4 5 6 7 8 9 10 11 12 13 14 15 16 17 18 19 20 20-pin Side of the Connected Signal Cable ML3 (n) GND ML3 (p) ML2 (n) GND ML2 (p) ML1 (n) GND ML1 (p) ML0 (n) GND ML0 (p) GND GND AUX (p) GND AUX (n) Hot Plug Detect Re-PWR +3.3 V DP_PWR About your monitor | 21 - Dell P2418HZ | Users Guide - Page 22
Universal serial bus (USB) interface This section gives you information about the USB ports that are available on the monitor. NOTE: This monitor is Super-Speed USB 3.0 and High-Speed USB 2.0 compatible. Transfer Speed Super-speed High speed Full speed Data Rate 5 Gbps 480 Mbps 12 Mbps Power - Dell P2418HZ | Users Guide - Page 23
7 GND 8 SSRX- 9 SSRX+ USB 3.0 downstream connector Pin Number 1 2 3 4 5 6 7 8 9 9-pin Side of the Connector VCC DD+ GND SSRXSSRX+ GND SSTXSSTX+ USB 2.0 Downstream Connector Pin Number 1 2 3 4 4-pin Side of the Connector VCC DMD DPD GND About your monitor | 23 - Dell P2418HZ | Users Guide - Page 24
x USB 3.0 upstream - bottom • 2 x USB 2.0 downstream - bottom • 2 x USB 3.0 downstream - side • Power Charging Port- the port with lightning icon; supports fast current charging capability if the device is BC1.2 compatible. NOTE: USB 3.0 functionality requires a USB 3.0-capable computer. NOTE - Dell P2418HZ | Users Guide - Page 25
and Pixel Policy, see Dell Support site at: www.dell.com/support/monitors. Maintenance guidelines Cleaning your monitor WARNING: Before cleaning the monitor, unplug the monitor power cable from the electrical outlet. CAUTION: Read and follow the Safety instructions before cleaning the monitor - Dell P2418HZ | Users Guide - Page 26
applicable for a monitor with a stand. When any other stand is bought, please refer to the respective stand setup guide for the set up instructions. To attach the monitor stand. 1. Follow the instructions on the flaps of carton to remove the stand from the top cushion that secures it. 2. Insert the - Dell P2418HZ | Users Guide - Page 27
6. Attach the stand assembly to the monitor. a. Fit the two tabs on the upper part of the stand to the groove on the back of the monitor. b. Press the stand down till it snaps into place. 7. Place the monitor upright. NOTE: Lift the monitor carefully to prevent it from slipping or falling. Setting - Dell P2418HZ | Users Guide - Page 28
Connecting your monitor WARNING: Before you perform any of the procedures in this section, follow the Safety instructions. NOTE: Do not connect all cables to the computer at the same time. It is recommend to route the cables through the cable-management slot - Dell P2418HZ | Users Guide - Page 29
and the computer. If your monitor displays an image, installation is complete. If it does not display an image, see Universal serial bus (USB) specific problems. 5. Use the cable slot on the monitor stand to organize the cables. Setting up the monitor | 29 - Dell P2418HZ | Users Guide - Page 30
Organizing cables Use the cable-management slot to organize the cables connected to your monitor. 30 | Setting up the monitor - Dell P2418HZ | Users Guide - Page 31
surface. NOTE: This is applicable for a monitor with a stand. When any other stand is bought, please refer to the respective stand setup guide for the set-up instructions. To remove the stand: 1. Place the monitor on a soft cloth or cushion. 2. Press and hold the stand release button. 3. Lift the - Dell P2418HZ | Users Guide - Page 32
securing the plastic cover. 4. Attach the mounting bracket from the wall mounting kit to the monitor. 5. Mount the monitor on the wall by following the instructions that comes with the wall mounting kit. NOTE: For use only with UL or CSA or GS-listed wall mount bracket with minimum weight/load - Dell P2418HZ | Users Guide - Page 33
Operating your monitor Power on the monitor Press the button to turn on the monitor. Using the front panel controls Use the control buttons on the front of the monitor to link up Microsoft® Skype for Business® Software or adjust the characteristics of the image being displayed. As you use these - Dell P2418HZ | Users Guide - Page 34
, make sure that the USB upstream cable is connected between your computer and the monitor. If not, the following message will be displayed: Dell P2418HZ Connect USB cable NOTE: The front panel buttons, excluding Volume Up and Volume Down, function only when Microsoft® Skype for Business® is active - Dell P2418HZ | Users Guide - Page 35
To end an active voice or video call, press the Hook button. 2. Mute To mute the audio, press the Mute button. The mute-button light turns on when audio is muted. 3. Volume Down/Volume Up To adjust the volume, press the Volume Down or Volume Up buttons. The activated OSD shows the numeric values of - Dell P2418HZ | Users Guide - Page 36
36 | Operating your monitor - Dell P2418HZ | Users Guide - Page 37
wait for the OSD menu to automatically close. 1. Press the button to display the OSD main menu. Main menu for analog (VGA) input Dell P2418HZ Brightness / Contrast Auto Adjust Input Source Color Display Energy Menu Others Energy Use 75% 75% Resolution: 1920x1080, 60Hz 2. Press the and buttons - Dell P2418HZ | Users Guide - Page 38
Use this menu to activate brightness/contrast adjustment. Dell P2418HZ Brightness / Contrast Auto Adjust Input Source Color Display the button to decrease the brightness (min. 0 / max. 100). NOTE: Manual adjustment of brightness is disabled when dynamic contrast is switched on. Adjust the - Dell P2418HZ | Users Guide - Page 39
Auto Adjust Use this key to activate automatic setup and adjust menu. Dell P2418HZ Brightness / Contrast Auto Adjust Input Source Color Display Energy Menu Others Resolution: 1920x1080, 60Hz Energy Use Press to adjust the screen automatically. The following dialog - Dell P2418HZ | Users Guide - Page 40
signals. Reset Input Source Select this option to restore default Input Source. Color Use color to adjust the color setting mode. Dell P2418HZ Brightness / Contrast Auto Adjust Input Source Color Display Energy Menu Others Energy Use Preset Modes Input Color Format Reset Color Standard RGB - Dell P2418HZ | Users Guide - Page 41
appears cooler with a blue tint. ∞∞ Custom Color: Allows you to manually adjust the color settings. Press the and buttons to adjust the three colors (R, G, B) values and create your own preset color mode. Dell P2418HZ Brightness / Contrast Auto Adjust Input Source Color Display Energy Menu Others - Dell P2418HZ | Users Guide - Page 42
is connected to a computer or DVD player using the HDMI cable. ∞∞ YPbPr: Select this option if your DVD player supports only YPbPr output. Dell P2418HZ Brightness / Contrast Auto Adjust Input Source Color Display Energy Menu Others Energy Use Input Color Format RGB YPbPr Resolution: 1920x1080 - Dell P2418HZ | Users Guide - Page 43
Display Use the display to adjust image. Dell P2418HZ Brightness / Contrast Auto Adjust Input Source Color Display Energy Menu Others Resolution: 1920x1080, 60Hz Energy Use Aspect Ratio Horizontal Position Vertical Position Wide 16:9 50 - Dell P2418HZ | Users Guide - Page 44
Energy Dell P2418HZ Brightness / Contrast Auto Adjust Input Source Color Display Energy Menu Others Resolution: 1920x1080, 60Hz Energy Use Power Button LED USB On During Active Off During Standby - Dell P2418HZ | Users Guide - Page 45
the settings of the OSD, such as, the languages of the OSD, the amount of time the menu remains on screen and so on. Dell P2418HZ Brightness / Contrast Auto Adjust Input Source Color Display Energy Menu Others Language Rotation Energy Use English Transparency 20 Timer 20 s Lock Reset Menu - Dell P2418HZ | Users Guide - Page 46
You can disable this feature by selecting disable. Enable this feature for best user experience and optimum performance of your monitor. Dell P2418HZ Brightness / Contrast Auto Adjust Input Source Color Display Energy Menu Others DDC/CI Energy Use Enable Disable Resolution: 1920x1080, 60Hz LCD - Dell P2418HZ | Users Guide - Page 47
these preset modes: Game or Movie), the manual brightness adjustment is disabled. Dell P2418HZ To allow manual adjustment of brightness, the Dynamic Contrast will be switched off. Do you want to continue? No Yes When the monitor does not support a particular resolution mode, the following message is - Dell P2418HZ | Users Guide - Page 48
minutes. www.dell.com/support/monitors or Dell P2418HZ ? No HDMI Cable The display will go into Power Save Mode in 4 minutes. www.dell.com/support/monitors or Dell P2418HZ ? No DP Cable The display will go into Power Save Mode in 4 minutes. www.dell.com/support/monitors See Troubleshooting for more - Dell P2418HZ | Users Guide - Page 49
following procedures: If you have a Dell desktop or portable computer: ∞∞ Go to www.dell.com/support, enter your computer's Service Tag, and download the latest driver for your graphics card. If you are using a non-Dell computer (portable or desktop): ∞∞ Go to the support site for your computer and - Dell P2418HZ | Users Guide - Page 50
Extension NOTE: This is applicable for a monitor with a stand. When any other stand is bought, please refer to the respective stand setup guide for set up instructions. Tilt, Swivel With the stand attached to the monitor, you can tilt and swivel the monitor for the most comfortable viewing angle - Dell P2418HZ | Users Guide - Page 51
that is not included with this monitor. To download the graphics driver, go to www.dell. com/support and see the Download section for Video Drivers for latest driver updates. NOTE: When in the Portrait View Mode, you may experience performance degradation in graphic-intensive applications (3D Gaming - Dell P2418HZ | Users Guide - Page 52
, go to www.dell.com/support and download the latest driver for your graphics card. Operating the webcam cover shutter Slide the shutter to the left: Uncover the webcam. Slide the shutter to the right: Cover the webcam. Installing the monitor IR Camera driver Insert the driver disk into your - Dell P2418HZ | Users Guide - Page 53
It will directly transfer to the Realtek PC Camera installation interface. Wait for automatic running of the installation program. When the installation is complete, remove the disk and restart your computer if necessary. Operating your monitor | 53 - Dell P2418HZ | Users Guide - Page 54
Setting up Windows Hello In Windows® 10: Click Windows start menu, click Settings. Click Accounts. Click Sign-in options. You must set up a PIN before you can enroll in Windows Hello. 54 | Operating your monitor - Dell P2418HZ | Users Guide - Page 55
Click Add under PIN enter to Set up a PIN. Enter New PIN and Confirm PIN, and then click OK. Once you've done that, the options to set up Windows Hello will unlock. Click Set up under Windows Hello, enter to Windows Hello setup. The following message is displayed, click Get started. Operating your - Dell P2418HZ | Users Guide - Page 56
Keep looking directly at your screen and position yourself so that your face is in the center of the frame that appears on screen. The webcam will then register your face. When the following message is displayed, click Close to exit Windows Hello setup. Once you have set up, you have another option - Dell P2418HZ | Users Guide - Page 57
webcam as default setting, you need disable the notebook built-in webcam. To identify the notebook built-in webcam and disable it, please follow below instructions: Right-click Integrated Webcam, and click Properties to open the Integrated Webcam Properties. Operating your monitor | 57 - Dell P2418HZ | Users Guide - Page 58
Click Details > Property and select Hardware Ids. 58 | Operating your monitor - Dell P2418HZ | Users Guide - Page 59
show the detail hardware ids of this integrated webcam. The hardware ids of the notebook built-in webcam and the monitor webcam are different.For P2418HZ, the monitor webcam hardware ids will show as below: Right click the Integrated Webcam which has different hardware ids of the - Dell P2418HZ | Users Guide - Page 60
setting When your computer connects multiple speakers, if you want to set up the monitor speaker as default setting, please follow below instructions: Right-click Volume in the Windows task bar notification area. click Playback devices enter to Sound setting interface. 60 | Operating your monitor - Dell P2418HZ | Users Guide - Page 61
If only the HDMI or DP cable is connected from your monitor to the computer, only one speaker named DELL P2418HZ from the monitor will show in the Sound setting interface. click DELL P2418HZ, and then click Set Default, the monitor speaker will be used as the default setting. Operating your monitor - Dell P2418HZ | Users Guide - Page 62
HDMI or DP cable are connected from monitor to the computer, two speakers named DELL P2418HZ and P2418HZ respectively from the monitor will show in the Sound setting interface. The difference between DELL P2418HZ and P2418HZ is only different signal source. You can choose any one to set default, the - Dell P2418HZ | Users Guide - Page 63
self-test mode, the power LED remains white. Dell P2418HZ ? No VGA Cable The display will go into Power Save Mode in 4 minutes. www.dell.com/support/monitors or Dell P2418HZ ? No HDMI Cable The display will go into Power Save Mode in 4 minutes. www.dell.com/support/monitors or Troubleshooting | 63 - Dell P2418HZ | Users Guide - Page 64
Dell P2418HZ ? No DP Cable The display will go into Power Save Mode in 4 minutes. www.dell.com/support/monitors NOTE: This box also appears during normal system operation, if the video cable is dark after you reconnect the cables, check your video controller and computer. 64 | Troubleshooting - Dell P2418HZ | Users Guide - Page 65
a built-in diagnostic tool that helps you determine if any screen abnormality you experience is an inherent problem with your monitor, or with your computer and video card. NOTE: You can run the built-in the monitor is functioning properly. Check the video card and computer. Troubleshooting | 65 - Dell P2418HZ | Users Guide - Page 66
in LCD technology. ∞∞ For more information on Dell Monitor Quality and Pixel Policy, see Dell Support site at www.dell.com/support/monitors. Brightness problems ∞∞ Reset the monitor to Factory Settings (Factory in the video cable connector. ∞∞ Run the built-in diagnostics. 66 | Troubleshooting - Dell P2418HZ | Users Guide - Page 67
pins in the video cable connector. ∞∞ Restart the computer in the safe mode. Safety related issues Intermittent problems ∞∞ Do not perform any troubleshooting steps. ∞∞ Contact Dell immediately. ∞∞ Ensure that the video cable connecting the monitor to the computer is connected properly and is - Dell P2418HZ | Users Guide - Page 68
Product-specific problems Specific Symptoms Possible Solutions Screen image is too ∞∞ Check the Aspect Ratio setting in the Display settings OSD. small ∞∞ ratio) of DVDs, the monitor fill the entire screen may display in full screen. ∞∞ Run the built-in diagnostics. 68 | Troubleshooting - Dell P2418HZ | Users Guide - Page 69
port. Microsoft® Skype for Business® Specific Problems Specific Symptoms Possible Solutions The Hook ∞∞ Ensure DELL P2418HZ" on your system. ∞∞ Turn Off the monitor, unplug the monitor power cord, replug it, and then turn On the monitor. ∞∞ Reset the monitor to Factory Settings. Troubleshooting - Dell P2418HZ | Users Guide - Page 70
possible to the wireless mouse. ∞∞ Use a USB-extender cable to position the wireless USB receiver as far away as possible from the USB 3.0 port. 70 | Troubleshooting - Dell P2418HZ | Users Guide - Page 71
, and/or mechanical hazards. For information on safety instructions, see the Safety, Environmental, and Regulatory Information ( Dell that is convenient for you. Dell provides several online and telephone-based support and service options. Availability varies by country and product, and some services
-
 1
1 -
 2
2 -
 3
3 -
 4
4 -
 5
5 -
 6
6 -
 7
7 -
8
-
9
-
10
-
11
-
12
-
13
-
14
-
15
-
16
-
17
-
18
-
19
-
20
-
21
-
22
-
23
-
24
-
25
-
26
-
27
-
28
-
29
-
30
-
31
-
32
-
33
-
34
-
35
-
36
-
37
-
38
-
39
-
40
-
41
-
42
-
43
-
44
-
45
-
46
-
47
-
48
-
49
-
50
-
51
-
52
-
53
-
54
-
55
-
56
-
57
-
58
-
59
-
60
-
61
-
62
-
63
-
64
-
65
-
66
-
67
-
68
-
69
-
70
-
71
 |
 |

Model No.: P2418HZ
Regulatory model: P2418HZc
User’s Guide
Dell P2418HZ