Dell PowerConnect W-AP105 Ceiling Mounting Kit Installation Guide
Dell PowerConnect W-AP105 Manual
 |
View all Dell PowerConnect W-AP105 manuals
Add to My Manuals
Save this manual to your list of manuals |
Dell PowerConnect W-AP105 manual content summary:
- Dell PowerConnect W-AP105 | Ceiling Mounting Kit Installation Guide - Page 1
Guide The AP-105 ceiling mounting kit provides additional ceiling mounting options for the AP-105 wireless access point(AP). The ceiling mounting kit includes the following items: z Adapter for 15/16-inch (2.4-cm) ceiling tile rails. Use this adapter to mount the AP you to mount the AP-105 unit on a - Dell PowerConnect W-AP105 | Ceiling Mounting Kit Installation Guide - Page 2
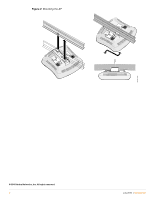
Figure 2 Mounting the AP AP105_007 © 2010 Aruba Networks, Inc. All rights reserved. 2 July 2010 | 0510650-02
-
 1
1 -
 2
2
 |
 |
AP-105 Ceiling Mounting Kit
Installation Guide
0510650-02
|
July 2010
1
The AP-105 ceiling mounting kit provides additional ceiling mounting options for the AP-105 wireless
access point(AP). The ceiling mounting kit includes the following items:
z
Adapter for 15/16-inch (2.4-cm) ceiling tile rails. Use this adapter to mount the AP on rails that are
recessed above the surface of the ceiling tile.
z
Adapter for 9/16-inch (1.4 cm) ceiling tile rails. Use this adapter to adapt the integrated mounting
tabs to narrower rails (recessed or flush).
Using the Ceiling Rail Adapter
The AP-105 enclosure provides integrated mounting tabs that are designed to snap onto a standard,
non-recessed 15/16-inch (1.4 cm) ceiling tile rail; the optional mounting kit is not required for this
installation. The mounting kit includes adapters that allow you to mount the AP-105 unit on a recessed
or non-recessed standard 9/16-inch (1.4 cm) rail or on a recessed standard 15/16-inch (1.4 cm) rail
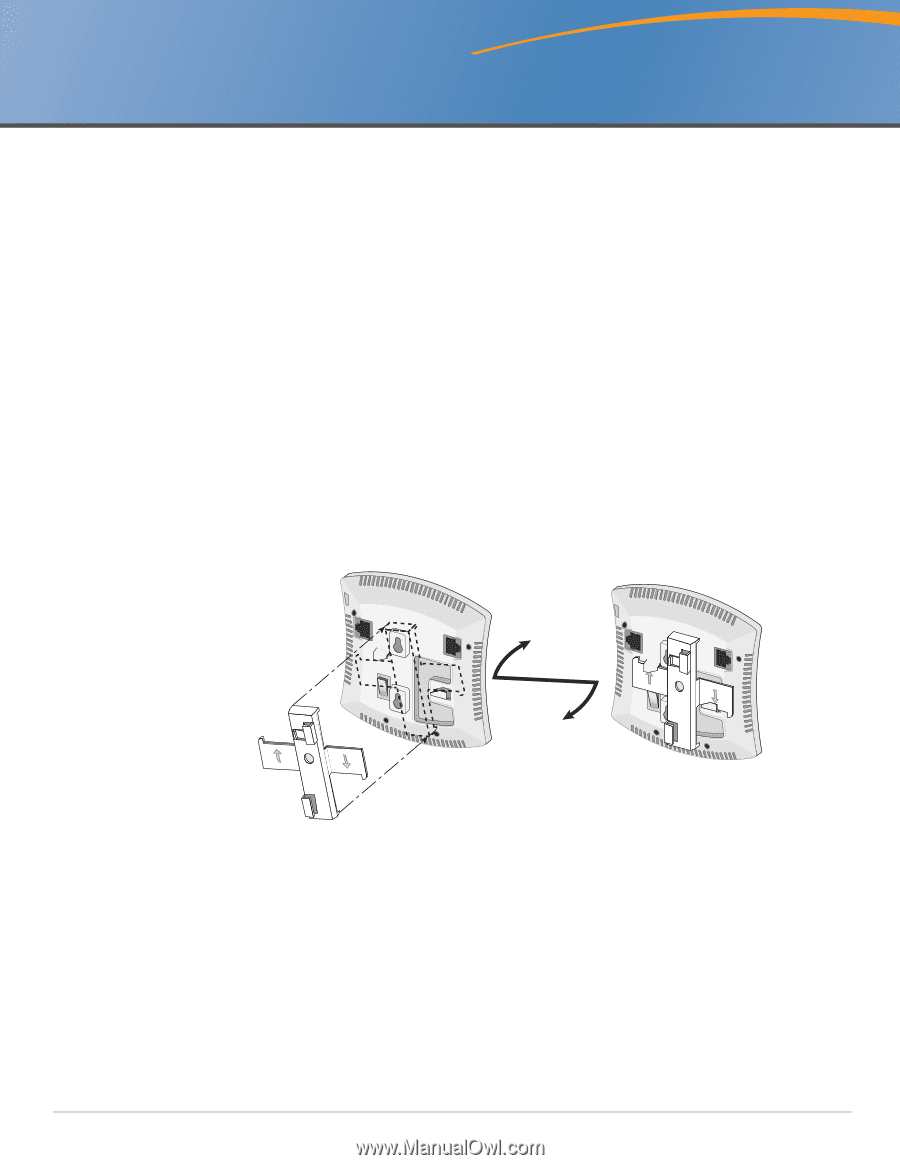
To attach either ceiling rail adapter to the AP-105:
1.
Place the adapter against the back of the AP with the adapter at an angle of approximately 30
degrees to the tabs (see
Figure 1
).
2.
Twist the adapter clockwise until it snaps into place in the tabs (see
Figure 1
).
Figure 1
Attaching the Ceiling Mount Adapter
After the adapter is attached to the AP, mount the AP on a ceiling tile rail as follows:
1.
Align the AP with a ceiling tile rail, placing the AP so that the mounting tabs on the adapter are at an
angle of approximately 30 degrees to the ceiling tile rail (see
Figure 2
).
Make sure that slack in connected cables is above the ceiling tiles.
2.
Pushing toward the ceiling tile, rotate the AP clockwise until it clicks into place on the ceiling tile
rail (see
Figure 2
).
AP105_006