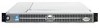
Dell PowerEdge 1750 Installation and Troubleshooting Guide (.htm)
Dell PowerEdge 1750 Manual
 |
View all Dell PowerEdge 1750 manuals
Add to My Manuals
Save this manual to your list of manuals |
Dell PowerEdge 1750 manual content summary:
- Dell PowerEdge 1750 | Installation and
Troubleshooting Guide (.htm) - Page 1
Dell™ Systems Rack Installation Guide Guide d'installation du rack Rack-Installationsanleitung Guía de instalación del estante www.dell.com | support.dell.com - Dell PowerEdge 1750 | Installation and Troubleshooting Guide (.htm) - Page 2
- Dell PowerEdge 1750 | Installation and
Troubleshooting Guide (.htm) - Page 3
Dell™ Systems Rack Installation Guide www.dell.com | support.dell.com - Dell PowerEdge 1750 | Installation and
Troubleshooting Guide (.htm) - Page 4
to hardware or loss of data and tells you how to avoid the problem. CAUTION: A CAUTION indicates a potential for property damage, personal injury the entities claiming the marks and names or their products. Dell Computer Corporation disclaims any proprietary interest in trademarks and trade names other - Dell PowerEdge 1750 | Installation and
Troubleshooting Guide (.htm) - Page 5
Contents CAUTION: Safety Instructions 1-1 Rack Mounting of Systems 1-1 Installation Instructions 1-2 Rack Requirements for VersaRails 1-3 Four-Post Rack Installation 1-3 Before You Begin 1-3 Recommended Tools and Supplies 1-3 RapidRails Rack Kit Contents 1-4 VersaRails Rack Kit Contents - Dell PowerEdge 1750 | Installation and
Troubleshooting Guide (.htm) - Page 6
Slide Assemblies . . . Installing the VersaRails Slide Assemblies . . . Installing the System in the Rack (RapidRails or VersaRails Installing the Cable-Management Arm . . . Opening the Wire Covers Installing the Power Cord Strain Relief . . . Routing Cables Two-Post Rack Kit Components Two-Post - Dell PowerEdge 1750 | Installation and
Troubleshooting Guide (.htm) - Page 7
and rack complies with all applicable safety standards and local electric code requirements. Dell disclaims all liability and warranties in connection with such combinations. • System rack kits are intended to be installed in a rack by trained service technicians. If you install the kit in any other - Dell PowerEdge 1750 | Installation and
Troubleshooting Guide (.htm) - Page 8
. • Do not overload the AC supply branch circuit that provides power to the rack. The total rack servicing other components in a rack. Installation Instructions This installation guide provides instructions for trained service technicians installing one or more systems in a rack cabinet or in an open - Dell PowerEdge 1750 | Installation and
Troubleshooting Guide (.htm) - Page 9
are installed high up in the rack. Recommended Tools and Supplies You may need the following tools and supplies to install the system in a four-post rack: • #2 Phillips screwdriver • Masking tape or a felt-tip pen, for use in marking the mounting holes to be used Rack Installation Guide 1-3 - Dell PowerEdge 1750 | Installation and
Troubleshooting Guide (.htm) - Page 10
www.dell.com | support.dell.com RapidRails Rack Kit Contents The RapidRails rack kit includes the 1-2) NOTE: The nonmetric screws described in illustrations and in procedural steps are identified by size and number of threads-per-inch. For example, a #10 Phillips-head screw with 32 threads per inch - Dell PowerEdge 1750 | Installation and
Troubleshooting Guide (.htm) - Page 11
numbered order: 1 Removing the rack doors 2 Marking the rack 3 Installing the slide assemblies in the rack • RapidRails slide assemblies • VersaRails slide assemblies 4 Installing the system in the rack 5 Installing the cable-management arm 6 Routing cables 7 Replacing . Rack Installation Guide 1-5 - Dell PowerEdge 1750 | Installation and
Troubleshooting Guide (.htm) - Page 12
dell.com | support.dell.com Marking the Rack You must allow 1 U (44 mm, or 1.75 inches) of vertical space for each system numbers in 1-U increments. If you wish, you can make a note of the number system, install the slide assemblies so that the first system bottom of the system you are installing - Dell PowerEdge 1750 | Installation and
Troubleshooting Guide (.htm) - Page 13
holes, place a mark just above the top hole). This mark or piece of tape indicates where the system's upper edge will be located on the vertical rails (see Figure 1-4). Figure 1-4. Marking the Vertical Rails tape square holes and the push button pops out and clicks. Rack Installation Guide 1-7 - Dell PowerEdge 1750 | Installation and
Troubleshooting Guide (.htm) - Page 14
www.dell.com | support.dell.com 3 At the back of the cabinet, pull back on the mounting-bracket flange of the rack. Figure 1-5. Installing the RapidRails Slide Assemblies front of rack 1-8 Rack Installation Guide slide assemblies (2) push button mounting hook mounting-bracket flange support tab - Dell PowerEdge 1750 | Installation and
Troubleshooting Guide (.htm) - Page 15
of the VersaRails slide assemblies so that its mounting-bracket flange fits between the marks or tape (or numbered location) on the rack (see Figure 1-6). The three holes on the front of the mounting bracket -head Phillips screws (5 per slide assembly) front of rack Rack Installation Guide 1-9 - Dell PowerEdge 1750 | Installation and
Troubleshooting Guide (.htm) - Page 16
of the size and weight of the system, never attempt to install the system in the slide assemblies by yourself. 2 Remove the system front bezel: a Unlock the keylock. b Press the right- and left-end tabs. c Pull the bezel away from the system. 3 Lift the system into position in front of the extended - Dell PowerEdge 1750 | Installation and
Troubleshooting Guide (.htm) - Page 17
Rack (RapidRails or VersaRails) bezel thumbscrews (2) shoulder screw on system system release latch slide release latch rack cabinet, as viewed from the back. If you are installing several systems in the rack, consider installing the cable-management arms on alternating sides of - Dell PowerEdge 1750 | Installation and
Troubleshooting Guide (.htm) - Page 18
www.dell.com | support.dell.com To install the cable-management arm on the back of the system, perform the following steps: 1 Facing the back of the rack cabinet, locate the latch on the end of the right slide assembly that you secured to the back vertical rail. 2 Push the tab on the back end of - Dell PowerEdge 1750 | Installation and
Troubleshooting Guide (.htm) - Page 19
lifting the wire over the top of a similar round button on the back part of the arm. The wire cover swings open to enable cables to be routed within the arm. Figure 1-9. Opening the Wire Covers status-indicator cable plug wire covers in open position status indicator Rack Installation Guide 1-13 - Dell PowerEdge 1750 | Installation and
Troubleshooting Guide (.htm) - Page 20
tab and tie wrap power receptacle housing power cord plug Routing Cables 1 Attach the I/O cable connectors to their respective connectors on the system back. For details on cable connections, see your system's Installation and Troubleshooting Guide and the User's Guide. 1-14 Rack Installation - Dell PowerEdge 1750 | Installation and
Troubleshooting Guide (.htm) - Page 21
on each end of the cablemanagement arm). Do not fully tighten the tie wraps at this time (see Figure 1-11). Allow some cable slack in the cable-management arm to prevent damage to the cables. 3 Secure the cables to the cable-management arm: a After connecting the cables to the system, unscrew the - Dell PowerEdge 1750 | Installation and
Troubleshooting Guide (.htm) - Page 22
Supplies You need the following tools and supplies to install the system in a two-post relay rack: • #2 Phillips screwdriver • 11/32-inch wrench or nut driver (if changing bracket to flush-mount configuration) • Masking tape or felt-tip pen to mark the mounting holes 1-16 Rack Installation Guide - Dell PowerEdge 1750 | Installation and
Troubleshooting Guide (.htm) - Page 23
cable Phillips screws (10) stop blocks (2) Two-Post Rack Installation Tasks Installing a two-post rack kit includes the following tasks in their numbered order: 1 Marking the rack 2 Installing the slide assemblies in the rack • Center-mount installation • Flush-mount installation 3 Installing the - Dell PowerEdge 1750 | Installation and
Troubleshooting Guide (.htm) - Page 24
dell.com | support.dell.com 4 Installing the cable-management arm 5 Routing cables Marking the Rack You must allow 1 U (44 mm or 1.75 inches) of vertical space for each system of holes (see Figure 1-13). Figure 1-13. Two-Post, Open-Frame Relay Rack Universal-Hole Spacing 44 mm (1.75 inches [1 Guide - Dell PowerEdge 1750 | Installation and
Troubleshooting Guide (.htm) - Page 25
Open-Frame Relay Rack Wide-Hole Spacing 12.7 mm (0.5 inch) 44 mm (1.75 inches [1 U]) 31.7 mm (1.25 inches) To mark the rack, perform the following steps: 1 Place a mark on the rack's front vertical rails where you want to locate the bottom of the system a two-post, open-frame rack having either - Dell PowerEdge 1750 | Installation and
Troubleshooting Guide (.htm) - Page 26
dell.com | support.dell.com CAUTION: Do not install another system using this rack kit. Use only the rack kit intended for your system. Using the rack kit for another system may result in damage to the system 1 and 2 to install the left slide assembly in the rack. 1-20 Rack Installation Guide - Dell PowerEdge 1750 | Installation and
Troubleshooting Guide (.htm) - Page 27
Figure 1-15. Installing the Slide Assemblies for Center-Mount Configuration two-post open-frame rack 12-24 x 0.5-inch panhead Phillips screws (4 per slide assembly) slide assembly slide release latch Rack Installation Guide 1-21 - Dell PowerEdge 1750 | Installation and
Troubleshooting Guide (.htm) - Page 28
support.dell.com 4 Install the stiffening bracket into the appropriate holes at the back of the slide assemblies and secure the bracket with a 12-24 x 0.5-inch pan-head Phillips screw on each slide assembly (see Figure 1-16). If the vertical rack is 3 inches wide, use the holes at the back end Guide - Dell PowerEdge 1750 | Installation and
Troubleshooting Guide (.htm) - Page 29
screwdriver and an 11/32-inch wrench or nut driver, remove two 12-24 x 0.5-inch pan-head becomes the new extended rear bracket. 7 Repeat steps 4 through 6 to configure the other slide assembly. Figure 1-17. Rotating the Front Mounting Bracket for slide assembly. Rack Installation Guide 1-23 - Dell PowerEdge 1750 | Installation and
Troubleshooting Guide (.htm) - Page 30
.dell.com | support.dell. Configuration two-post open-frame rack joined bracket 12-24 x 0.5-inch panhead Phillips screw (4 each slide) shoulder screw on system system rack. 11 Use an 11/32-inch wrench or nut driver to fully tighten the nuts on the mounting brackets on both slide assemblies that - Dell PowerEdge 1750 | Installation and
Troubleshooting Guide (.htm) - Page 31
-mounted support trays. 1 Pull the slides out to their fully extended position. CAUTION: Because of the size and weight of the system, never attempt to install the system in the slide assemblies by yourself. 2 Remove the system front bezel: a Unlock the keylock. b Press the right- and left-end tabs - Dell PowerEdge 1750 | Installation and
Troubleshooting Guide (.htm) - Page 32
dell.com | support.dell.com 8 Press the slide release latch at the side of each slide and push the system completely into the rack (see Figure 1-18). 9 Push in and turn the captive thumbscrews on each side of the front chassis panel to secure the system two-post rack. 1-26 Rack Installation Guide - Dell PowerEdge 1750 | Installation and
Troubleshooting Guide (.htm) - Page 33
replacing, 1-16 F four-post kit installing cable-management arm, 1-11 installing system, 1-10 marking rack, 1-6 RapidRails kit contents, 1-4 routing cables, 1-14 tools and supplies 1-26 S safety instructions, 1-1 stiffening bracket, 1-22 stop blocks, 1-4, 1-13, 1-17 T tools and supplies four-post kit - Dell PowerEdge 1750 | Installation and
Troubleshooting Guide (.htm) - Page 34
V VersaRails kit contents, 1-4, 1-5 rack requirements, 1-3 VersaRails kit contents list of, 1-4 vertical rails marking, 1-6 one rack unit, 1-6 2 Index - Dell PowerEdge 1750 | Installation and
Troubleshooting Guide (.htm) - Page 35
Systèmes Dell™ Guide d'installation du rack www.dell.com | support.dell.com - Dell PowerEdge 1750 | Installation and
Troubleshooting Guide (.htm) - Page 36
noms de marques et marques commerciales utilisés dans ce document se rapportent aux sociétés propriétaires des marques et des noms de ces produits. Dell Computer Corporation décline tout intérêt dans l'utilisation des marques déposées et des noms de marques ne lui appartenant pas. Octobre 2002 - Dell PowerEdge 1750 | Installation and
Troubleshooting Guide (.htm) - Page 37
de sécurit 2-1 Montage en rack des systèmes 2-1 Instructions d'installation 2-2 Spécifications de rack requises pour les rails VersaRails . . . . 2-3 Installation d'un rack à quatre montants 2-3 Avant de commencer 2-3 Outils et fournitures recommandés 2-4 Contenu du kit - Dell PowerEdge 1750 | Installation and
Troubleshooting Guide (.htm) - Page 38
âssis ouvert . . . Espacement large des trous sur un rack de relais à 2 montants avec châssis ouvert . . . Installation des rails coulissants pour une configuration à montage central . . . . . . Installation de la bride de maintien en position rigide (représentée dans sa position sur un rack 7,62 cm - Dell PowerEdge 1750 | Installation and
Troubleshooting Guide (.htm) - Page 39
: Instructions de sécurité Respectez les consignes de sécurité de ce guide pour assurer votre sécurité personnelle et pour contribuer à protéger votre système et votre environnement de travail des dommages potentiels. Pour obtenir des informations complètes sur la sécurité, reportez-vous au Guide - Dell PowerEdge 1750 | Installation and
Troubleshooting Guide (.htm) - Page 40
www.dell.com | support.dell.com ATTENTION : Instructions de sécurité • Chargez toujours le rack du bas de rack est nécessaire pour chaque système devant être installé dans l'armoire rack. Ce guide comprend les procédures relatives aux kits de rack suivants : • Kit RapidRails dans une armoire rack - Dell PowerEdge 1750 | Installation and
Troubleshooting Guide (.htm) - Page 41
des câbles. Pour plus d'informations sur ces voyants, reportez-vous au Guide de l'utilisateur. de votre système Avant de commencer l'installation, lisez dans le rack, lisez les « Instructions de sécurité » au début de ce document, ainsi que les instructions de sécurité du document Informations sur - Dell PowerEdge 1750 | Installation and
Troubleshooting Guide (.htm) - Page 42
www.dell.com | support.dell.com REMARQUE : Pou savoir comment installer le système lui-même, reportez-vous à « Installation du système dans le d'arrêt (gauche et droite) • Un câble avec voyant d'état • Des fixe-câbles détachables (non représentés à la Figure 2-1) 2-4 Guide d'installation du rack - Dell PowerEdge 1750 | Installation and
Troubleshooting Guide (.htm) - Page 43
taille et le nombre des filetages par pouce. Par exemple, une vis à tête Phillips n° 10 avec 32 filetages est désignée par l'appellation vis 10-32. Guide d'installation du rack 2-5 - Dell PowerEdge 1750 | Installation and
Troubleshooting Guide (.htm) - Page 44
www.dell.com | support.dell.com Figure 2-2. Contenu du kit du rack VersaRails bras de maintien des câbles rails coulissants (2) butée d'arrêt (2) vis Phillips dans un endroit sûr où elles ne risquent pas de tomber accidentellement et de blesser quelqu'un. 2-6 Guide d'installation du rack - Dell PowerEdge 1750 | Installation and
Troubleshooting Guide (.htm) - Page 45
, procédez comme suit : 1 Placez une marque sur les rails verticaux avant du rack, à l'endroit correspondant au bas du système à installer dans l'armoire rack. Guide d'installation du rack 2-7 - Dell PowerEdge 1750 | Installation and
Troubleshooting Guide (.htm) - Page 46
www.dell.com | support.dell.com Le bas de chaque espace 1 U se trouve au milieu de la zone métallique la plus étroite située entre les trous (rep la bride de fixation soit située entre les marques (ou la bande adhésive) placées sur le rack (voir la Figure 2-5). 2-8 Guide d'installation du rack - Dell PowerEdge 1750 | Installation and
Troubleshooting Guide (.htm) - Page 47
le rail coulissant situé sur l'autre côté du rack. 5 Vérifiez que les rails sont montés à la même position sur les rails verticaux de chaque côté du rack. Guide d'installation du rack 2-9 - Dell PowerEdge 1750 | Installation and
Troubleshooting Guide (.htm) - Page 48
www.dell.com | support.dell.com Figure 2-5. Installation des rails coulissants RapidRails rails coulissants (2) bouton poussoir crochet de fixation bride de fixation patte de support avant du rack coulissant au rail vertical avant (voir la Figure 2-6). 2-10 Guide d'installation du rack - Dell PowerEdge 1750 | Installation and
Troubleshooting Guide (.htm) - Page 49
ème, installez le premier système le plus bas possible dans le rack. ATTENTION : Ne retirez jamais plus d'un composant du rack en même temps. Guide d'installation du rack 2-11 - Dell PowerEdge 1750 | Installation and
Troubleshooting Guide (.htm) - Page 50
www.dell.com | support.dell.com 1 Tirez à fond les deux rails coulissants hors du rack jusqu'à ce qu'ils soient bloqués. ATTENTION : En raison de la taille vis à molette captives situées de chaque côté du panneau du châssis avant pour fixer le système sur le rack. 2-12 Guide d'installation du rack - Dell PowerEdge 1750 | Installation and
Troubleshooting Guide (.htm) - Page 51
systèmes dans le rack, envisagez d'installer les bras de maintien des câbles sur les deux côtés du rack afin de faciliter le passage des câbles. Guide d'installation du rack 2-13 - Dell PowerEdge 1750 | Installation and
Troubleshooting Guide (.htm) - Page 52
www.dell.com | support.dell.com Pour installer le bras de maintien des câbles à l'arrière du système, procédez comme suit : 1 En vous plaçant du rail coulissant patte de l'extrémité avant patte de l'extrémité arrière bras de maintien des câbles 2-14 Guide d'installation du rack butée d'arrêt - Dell PowerEdge 1750 | Installation and
Troubleshooting Guide (.htm) - Page 53
la Figure 2-8). La butée d'arrêt empêche le bras de maintien des câbles de revenir vers l'arrière et supporte le poids du bras une fois les câbles montés sur celui-ci. Le kit de rack est équipé de deux s'ouvre afin de permettre le passage des câbles dans le bras. Guide d'installation du rack 2-15 - Dell PowerEdge 1750 | Installation and
Troubleshooting Guide (.htm) - Page 54
www.dell.com | support.dell.com Figure 2-9. Ouverture des protège-câbles fiche du câble à voyant d'état protège-câbles en position ouverte voyant d'état 7 de traction de façon lâche autour des cordons d'alimentation rangés en boucle (voir la Figure 2-10). 2-16 Guide d'installation du rack - Dell PowerEdge 1750 | Installation and
Troubleshooting Guide (.htm) - Page 55
connecteurs respectifs à l'arrière du système. Pour obtenir plus de détails sur les connexions des câbles, reportez-vous au Guide d'installation et de dépannage et au Guide de l'utilisateur. 2 Faites passer le cordon d'alimentation et les câbles d'E/S dans le bras de maintien des câbles, à l'aide de - Dell PowerEdge 1750 | Installation and
Troubleshooting Guide (.htm) - Page 56
www.dell.com | support.dell.com c Faites passer les câbles me à fond vers l'extérieur, les rails coulissants vont se bloquer dans cette position. Pour replacer le système dans le rack, appuyez sur le loquet de dégagement situé sur le côté jamais les portes seul. 2-18 Guide d'installation du rack - Dell PowerEdge 1750 | Installation and
Troubleshooting Guide (.htm) - Page 57
Vous pouvez installer ce kit dans une configuration à montage central ou à encastrement. Ce de blesser d'autres personnes. Reportez-vous aux « Instructions de sécurité » au début de ce à pipe (si vous changez le support pour une configuration à encastrement) • De la bande adhésive ou un - Dell PowerEdge 1750 | Installation and
Troubleshooting Guide (.htm) - Page 58
www.dell.com | support.dell.com Contenu du kit du rack Le kit du rack à deux montants comprend (voir la Figure 2-12) : • Une des rails coulissants dans le rack • Installation à montage central • Installation à encastrement 3 Installation du système dans le rack 2-20 Guide d'installation du rack - Dell PowerEdge 1750 | Installation and
Troubleshooting Guide (.htm) - Page 59
d'un espace de 1 U) sont respectivement de 31,7 mm et 12,7 mm (1,25 pouces et 0,5 pouce) pour la colonne verticale des trous (voir la Figure 2-14). Guide d'installation du rack 2-21 - Dell PowerEdge 1750 | Installation and
Troubleshooting Guide (.htm) - Page 60
www.dell.com | support.dell.com Figure 2-14. Espacement large des trous sur un rack de relais à 2 montants avec châssis ouvert 12,7 mm (0,5 pouce) 44 mm comptez jusqu'au trou suivant dans un rack doté d'un espacement universel des trous) (voir la Figure 2-14). 2-22 Guide d'installation du rack - Dell PowerEdge 1750 | Installation and
Troubleshooting Guide (.htm) - Page 61
contre le rack vertical à deux montants, puis fixez les supports avant et arrière de montage central au rack à l'aide de deux vis Phillips 12x24 x 0,5 pouce (voir la Figure 2-15). 3 Répétez les étapes 1 et 2 pour installer le rail coulissant gauche dans le rack. Guide d'installation du rack 2-23 - Dell PowerEdge 1750 | Installation and
Troubleshooting Guide (.htm) - Page 62
www.dell.com | support.dell.com Figure 2-15. Installation des rails coulissants pour une configuration à montage central rack à deux montants à châssis ouvert vis à tête plate Phillips 12-24 x 0,5 pouce (4 par rail) axes coulissants loquet de dégagement du rail coulissant 2-24 Guide d' - Dell PowerEdge 1750 | Installation and
Troubleshooting Guide (.htm) - Page 63
racks 7,62 cm/3 pouces bride de maintien en position rigide trous pour bride de maintien en position rigide avec racks 7,62 cm/6 pouces axes coulissants Guide d'installation du rack 2-25 - Dell PowerEdge 1750 | Installation and
Troubleshooting Guide (.htm) - Page 64
www.dell.com | support.dell.com Installation à encastrement Le kit de rack à deux montants est fourni configuré pour une 2-17). Le support ainsi assemblé devient le nouveau support arrière étendu. 7 Répétez les étapes 4 à 6 pour configurer l'autre rail coulissant. 2-26 Guide d'installation du - Dell PowerEdge 1750 | Installation and
Troubleshooting Guide (.htm) - Page 65
montage vis à tête plate Phillips 12-24 x 0,5 pouce (2 à retirer par support) REMARQUE : ces vis sont représentées réinstallées sur l'autre rail avez marqué dans le rack à deux montants, effectuez un réglage serré du support arrière étendu contre l'arrière du rack vertical à deux montants, et - Dell PowerEdge 1750 | Installation and
Troubleshooting Guide (.htm) - Page 66
www.dell.com | support.dell.com Figure 2-18. Installation des rails coulissants pour une configuration à encastrement rack à deux montants à châssis ouvert support assemblé Huit vous aviez serrés à la main sur les supports de montage des deux rails coulissants. 2-28 Guide d'installation du rack - Dell PowerEdge 1750 | Installation and
Troubleshooting Guide (.htm) - Page 67
ème avance puis recule lorsque la vis à épaulement avant pénètre dans la fente avant. Utilisez ce loquet pour retirer le système des rails coulissants. Guide d'installation du rack 2-29 - Dell PowerEdge 1750 | Installation and
Troubleshooting Guide (.htm) - Page 68
www.dell.com | support.dell.com 8 Appuyez sur le loquet de dégagement sur le côté de chaque rail pour faire glisser complètement le systè d'un kit du rack à quatre montants ». Vous avez maintenant terminé l'installation du kit de rack dans un rack à deux montants. 2-30 Guide d'installation du rack - Dell PowerEdge 1750 | Installation and
Troubleshooting Guide (.htm) - Page 69
, 2-10 installation du bras de maintien des câbles, 2-30 installation du système rack à deux montants, 2-29 rack à quatre montants, 2-11 instructions de sécurité, 2-1 K kit à deux montants installation des rails coulissants, 2-23 installation du bras de maintien des câbles, 2-30 installation du syst - Dell PowerEdge 1750 | Installation and
Troubleshooting Guide (.htm) - Page 70
R rails verticaux marquage, 2-7 unité à un rack, 2-7 routage des câbles, 2-17, 2-30 S spécifications de rack requises pour les rails VersaRails, 2-3 U unité de rack, 2-7 V VersaRails contenu du kit, 2-5 spécifications de rack requises, 2-3 2 Index - Dell PowerEdge 1750 | Installation and
Troubleshooting Guide (.htm) - Page 71
Dell™-Systeme RackInstallationsanleitung www.dell.com | support.dell.com - Dell PowerEdge 1750 | Installation and
Troubleshooting Guide (.htm) - Page 72
von Hardware oder den Verlust von Daten hin und beschreibt, wie dieses Problem vermieden werden kann. VORSICHT: VORSICHT weist darauf hin, dass die Gefahr eines können ohne Vorankündigung geändert werden. © 2002 Dell Computer Corporation. Alle Rechte vorbehalten. Eine Reproduktion dieses Dokuments - Dell PowerEdge 1750 | Installation and
Troubleshooting Guide (.htm) - Page 73
Montagearbeiten 3-6 Entfernen der Rack-Türen 3-6 Markieren des Racks 3-7 Einbau der RapidRails-Gleitschienen 3-9 Einbau der VersaRails-Gleitschienen 3-10 Einbau des Systems im Rack 3-12 Einbau des Kabelarms 3-13 Verlegen der Kabel 3-17 Wiederanbringen der Rack-Türen 3-19 Montage in einem - Dell PowerEdge 1750 | Installation and
Troubleshooting Guide (.htm) - Page 74
Rack-Einheit Markieren der vertikalen Schienen Einbau der RapidRails-Gleitschienen . . . . Einbau der VersaRails-Gleitschienen . . . . Installation des Systems im Rack (RapidRails oder VersaRails Einbau des Kabelarms ffnen der Kabelabdeckungen Installation der Zugentlastung für die Netzkabel - Dell PowerEdge 1750 | Installation and
Troubleshooting Guide (.htm) - Page 75
Gewicht von mehr als einer Komponente kann das Rack umkippen und Verletzungen verursachen. HINWEIS: Ihr System ist als frei stehende Einheit und für die Verwendung als Komponente in Dell™-Gestellschränken sicherheitszertifiziert, wobei das Customer Rack Kit eingesetzt werden muss. Der Einbau Ihres - Dell PowerEdge 1750 | Installation and
Troubleshooting Guide (.htm) - Page 76
www.dell.com | support.dell.com VORSICHT: Sicherheitshinweise (Fortsetzung) • Bestücken Sie das Rack immer von unten nach enthält Anweisungen für geschulte Servicetechniker zur Montage eines oder mehrerer Systeme in einem Gestellschrank oder einem offenen Relaisgestell. Das RapidRails™ Rack-Kit - Dell PowerEdge 1750 | Installation and
Troubleshooting Guide (.htm) - Page 77
/EIA-310-D-92, der International Electrotechnical Commission (IEC) 297 und der Deutschen Industrie Norm (DIN) 41494 entspricht. Für jedes in einem Rack installierte System wird ein eigenes Rack-Kit benötigt. Montage in einem Rack mit vier Stützen Bevor Sie mit der Installation beginnen, lesen Sie - Dell PowerEdge 1750 | Installation and
Troubleshooting Guide (.htm) - Page 78
www.dell.com | support.dell.com VORSICHT: Die Gestellschränke können sehr schwer sein und leicht diesem Dokument angegebenen Prozeduren genau, um sich selbst und Ihre Mitarbeiter nicht zu gefährden. Ihr System kann sehr groß und schwer sein. Sie sollten die Montage also gründlich vorbereiten und - Dell PowerEdge 1750 | Installation and
Troubleshooting Guide (.htm) - Page 79
Abbildung 3-1. Inhalt des RapidRails-Rack-Kits Kabelarm Gleitschienen (2) Statusanzeigekabel Anschlagblöcke (2) Inhalt des VersaRails-Rack-Kits Das VersaRails-Rack-Kit enthält folgende Teile (siehe Abbildung 3-2): • Ein Paar VersaRails-Gleitschienen • Ein Kabelarm • Zwei Anschlagblöcke (links - Dell PowerEdge 1750 | Installation and
Troubleshooting Guide (.htm) - Page 80
www.dell.com | support.dell.com Abbildung 3-2. Inhalt des VersaRails-Rack-Kits Kabelarm Gleitschienen (2) Einbau der Gleitschienen im Rack • RapidRails-Gleitschienen • VersaRails-Gleitschienen 4 Einbau des Systems im Rack 5 Einbau des Kabelarms 6 Verlegen der Kabel 7 Wiederanbringen der Rack-Tü - Dell PowerEdge 1750 | Installation and
Troubleshooting Guide (.htm) - Page 81
1,75 Zoll) 12,7 mm (0,5 Zoll) 15,9 mm (0,625 Zoll) 15,9 mm (0,625 Zoll) 12,7 mm (0,5 Zoll) VORSICHT: Wenn Sie mehr als ein System installieren, montieren Sie die Gleit-schienen so, dass das erste System in die unterste mögliche Position im Rack zu liegen kommt. Rack-Installationsanleitung 3 - 7 - Dell PowerEdge 1750 | Installation and
Troubleshooting Guide (.htm) - Page 82
www.dell.com | support.dell.com Zum Markieren des Racks gehen Sie wie folgt vor: 1 Bringen Sie auf den vorderen vertikalen Schienen des Racks eine Markierung an der Stelle an, an der sich die Unterseite des Systems befinden soll, das Sie in den Gestellschranks einbauen möchten. Die Unterkante jeder - Dell PowerEdge 1750 | Installation and
Troubleshooting Guide (.htm) - Page 83
Einbau der RapidRails-Gleitschienen 1 Setzen Sie eine der RapidRails-Gleitschienen so an der Vorderseite des Gestell-schranks an, dass der Montagehalterungsflansch zwischen die Markierungen oder das Kreppband an dem Rack zu liegen kommt (siehe Abbildung 3-5). Der Montagehaken auf dem vorderen - Dell PowerEdge 1750 | Installation and
Troubleshooting Guide (.htm) - Page 84
www.dell.com | support.dell.com Abbildung 3-5. Einbau der RapidRails-Gleitschienen Gleitschienen (2) Druckknopf Montagehaken Flansch der Montagehalterung Stützlasche Rack-Vorderseite Einbau der VersaRails-Gleitschienen 1 Setzen Sie eine der VersaRails- - Dell PowerEdge 1750 | Installation and
Troubleshooting Guide (.htm) - Page 85
2 Befestigen Sie die Gleitschiene durch je eine 10-32 x 0,5 Zoll (1,27 cm) KreuzschlitzBundschraube im oberen und unteren Loch des Montageflanschs an der vorderen vertikalen Schiene (siehe Abbildung 3-6). 3 Ziehen Sie den Montagehalterungsflansch auf der Gestellschrank-Rückseite nach hinten, bis - Dell PowerEdge 1750 | Installation and
Troubleshooting Guide (.htm) - Page 86
www.dell.com | support.dell.com Einbau des Systems im Rack VORSICHT: Wenn Sie mehr als ein System installieren, bauen Sie das erste System in der untersten möglichen Position im Rack ein. VORSICHT: Ziehen Sie niemals mehr als eine Komponente gleichzeitig aus dem Rack heraus. 1 Ziehen Sie die beiden - Dell PowerEdge 1750 | Installation and
Troubleshooting Guide (.htm) - Page 87
. Dieses Verfahren beschreibt den Einbau des Kabelarms an der rechten Seite des Gestellschranks (von der Rückseite aus gesehen). Wenn Sie mehrere Systeme im Rack installieren, sollten Sie den Kabelarm für eine einfachere Verlegung der Kabel jeweils abwechselnd auf beiden Seiten des Racks anbringen - Dell PowerEdge 1750 | Installation and
Troubleshooting Guide (.htm) - Page 88
www.dell.com | support.dell.com Um den Kabelarm an der Rückseite des Systems zu installieren, führen Sie folgende Schritte aus: 1 Stellen Sie sich hinter den Gestellschrank und suchen Sie den Riegel am Ende der rechten Gleitschiene, die Sie an der hinteren vertikalen Schiene befestigt haben. 2 Drü - Dell PowerEdge 1750 | Installation and
Troubleshooting Guide (.htm) - Page 89
4 Montieren Sie den Anschlagblock am Riegel am Ende gegenüber der Gleitschiene (siehe Abbildung 3-8). Der Anschlagblock verhindert, dass der Kabelarm nach hinten gleitet und trägt das Gewicht des Arms sowie der montierten - Dell PowerEdge 1750 | Installation and
Troubleshooting Guide (.htm) - Page 90
www.dell.com | support.dell.com Abbildung 3-9. Öffnen der Kabelabdeckungen Stecker des Statusanzeigekabels Geöffnete Kabelabdeckungen Statusanzeige 7 Führen Sie das Kabelende der Statusanzeige durch den Kabelarm und installieren Sie die Anzeige im entsprechenden Steckplatz am hinteren Ende des - Dell PowerEdge 1750 | Installation and
Troubleshooting Guide (.htm) - Page 91
Netzanschlussgehäuse Netzkabelstecker Verlegen der Kabel 1 Schließen Sie die I/O-Kabelstecker an die entsprechenden Anschlüsse auf der Rückseite des Systems an. Näheres zu Kabelsteckern finden Sie in der Anleitung zur Installation und Fehlersuche und in der Bedienungsanleitung. 2 Führen Sie die - Dell PowerEdge 1750 | Installation and
Troubleshooting Guide (.htm) - Page 92
www.dell.com | support.dell.com 3 Befestigen Sie die Kabel am Kabelarm: a Wenn Sie die Kabel am System angeschlossen haben, lösen Sie die Flügelschrauben zwischen der System-Vorderseite und der vorderen vertikalen Schiene. b Ziehen Sie das System in die vollständig ausgezogene Position heraus. c Fü - Dell PowerEdge 1750 | Installation and
Troubleshooting Guide (.htm) - Page 93
Gestellschrank mit vier Stützen abgeschlossen. Montage in einem Zwei-Stützen-Rack Das Zwei-Stützen-Rack-Kit wird für die Montage eines Systems in einem offenen Relaisgestell mit zwei Stützen verwendet, wie man es zum Beispiel bei Telekommunikationsanlagen findet. Es können sowohl 3 Zoll als auch - Dell PowerEdge 1750 | Installation and
Troubleshooting Guide (.htm) - Page 94
www.dell.com | support.dell.com Inhalt des Rack-Kits Inhalt des Zwei-Stützen-Rack-Kits (siehe Abbildung 3-12): • Ein Paar Racks 2 Einbau der Gleitschienen im Rack • Befestigung in Mittenmontage • Befestigung in bündiger Montage 3 Einbau des Systems im Rack 3 - 20 Rack-I nstallationsanleitung - Dell PowerEdge 1750 | Installation and
Troubleshooting Guide (.htm) - Page 95
4 Einbau des Kabelarms 5 Verlegen der Kabel Markieren des Racks Zwischen verschiedenen Systemen, die Sie im Rack mit zwei Stützen installieren, müssen Sie 1 Einheit (U = 44 mm bzw. 1,75 Zoll) vertikalen Abstand lassen. Racks mit universellem Lochabstand Standard-Racks mit zwei Stützen und - Dell PowerEdge 1750 | Installation and
Troubleshooting Guide (.htm) - Page 96
www.dell.com | support.dell.com Abbildung 3-14. Weiter Lochabstand beim offenen Relaisgestell mit zwei Stützen vertikalen Schienen des Racks eine Markierung an der Stelle an, an der sich die Unterseite des Systems befinden soll, das Sie in das Rack mit zwei Stützen einbauen. Die Unterkante jeder - Dell PowerEdge 1750 | Installation and
Troubleshooting Guide (.htm) - Page 97
installieren. VORSICHT: Installieren Sie mit diesem Rack-Kit keine anderen Systeme. Verwenden Sie ausschließlich das für Ihr System konzipierte Rack-Kit. Wenn Sie das Rack-Kit für ein anderes System verwenden, könnte das System beschädigt und Sie selbst oder andere Personen verletzt werden - Dell PowerEdge 1750 | Installation and
Troubleshooting Guide (.htm) - Page 98
www.dell.com | support.dell.com Abbildung 3-15. Montage der Gleitschienen für die Mittenmontage Offenes Rack mit zwei Stützen 12-24 x 0,5-Zoll FlachkopfKreuzschlitzschrauben (4 pro Schiebeeinheit) Gleitschiene Sperrklinke der Gleitschiene 3 - 24 Rack-I nstallationsanleitung - Dell PowerEdge 1750 | Installation and
Troubleshooting Guide (.htm) - Page 99
3-16 gezeigt). Wenn das vertikale Rack 6 Zoll breit ist, verwenden Sie die Löcher 3 Zoll vor den Löchern am hinteren Ende der Gleitschienen. Abbildung 3-16. Installation der Versteifungsklammer (in 3-Zoll breitem Rack) 12-24 x 0,5-Zoll FlachkopfKreuzschlitzschrauben (1 pro Schiebe-einheit) Löcher - Dell PowerEdge 1750 | Installation and
Troubleshooting Guide (.htm) - Page 100
www.dell.com | support.dell.com Bündige Montage Bei der Auslieferung ist das Rack-Kit mit zwei Stützen für Mittenmontage konfiguriert. Um die Gleitschienen für eine bündige Montage vorzubereiten, führen Sie - Dell PowerEdge 1750 | Installation and
Troubleshooting Guide (.htm) - Page 101
Abbildung 3-17. Drehen der vorderen Montagehalterung für bündige Montage Muttern (2 pro Halterung) 12-24 x 0,5-Zoll FlachkopfKreuzschlitzschrauben (2 pro Halterung befestigen) Unterlegscheiben (2 pro Klammer) Montageflansch 12-24 x 0,5-Zoll Flachkopf-Kreuzschlitzschrauben (2 pro Halterung - Dell PowerEdge 1750 | Installation and
Troubleshooting Guide (.htm) - Page 102
www.dell.com | support.dell.com Abbildung 3-18. Einbau der Gleitschienen für die bündige Montage Offenes Rack mit zwei Stützen Zusammengefügte Halterung 12-24 x 0,5-Zoll FlachkopfKreuzschlitzschrauben (4 pro Gleitschiene) Ansatzschraube am System SystemSperrklinke Gleitschiene Sperrklinke der - Dell PowerEdge 1750 | Installation and
Troubleshooting Guide (.htm) - Page 103
). Wenn das vertikale Rack 6 Zoll breit ist, verwenden Sie die Löcher 3 Zoll vor den Löchern am hinteren Ende der Gleitschienen. Einbau des Systems im Rack VORSICHT: Das System ist sehr groß und schwer, also darf es niemals durch eine Einzelperson montiert werden. HINWEIS: Die Systeminstallation in - Dell PowerEdge 1750 | Installation and
Troubleshooting Guide (.htm) - Page 104
www.dell.com | support.dell.com 8 Drücken Sie auf die Sperrklinken an den Seiten der Gleitschienen und schieben Sie das System vollständig ins Rack (siehe Abbildung 3-18). 9 Schrauben Sie das System mit den Rändelschrauben an der Gehäuse-Frontplatte des Racks fest. Einbau des Kabelarms Siehe dazu „ - Dell PowerEdge 1750 | Installation and
Troubleshooting Guide (.htm) - Page 105
Stichwortverzeichnis A Anschlagblöcke, 3-4, 3-5, 3-15, 3-20 Kit-Inhalt RapidRails, 3-4 VersaRails, 3-6 E Einbau Gleitschienen für zwei Stützen, 3-23 Kabelarm, 3-13, 3-30 RapidRails-Gleitschienen, 3-9 VersaRails-Gleitschienen, 3-10 Versteifungsklammer, 3-25 I Inhaltsliste RapidRails-Kit, 3-4 - Dell PowerEdge 1750 | Installation and
Troubleshooting Guide (.htm) - Page 106
Einbau der Gleitschienen, 3-23 Einbau des Kabelarms, 3-30 Markieren des Racks, 3-21 Systeminstallation, 3-29 Werkzeuge und Zubehör, 3-19 2 Stichwortverzeichnis - Dell PowerEdge 1750 | Installation and
Troubleshooting Guide (.htm) - Page 107
Dell www.dell.com | support.dell.com - Dell PowerEdge 1750 | Installation and
Troubleshooting Guide (.htm) - Page 108
c2002 Dell Computer Corporation Dell Computer Corporation Dell、DELL VersaRails RapidRails は、Dell Computer Corporation Dell Computer Corporation 2002 年 10 月 P/N 5X860 Rev. A00 - Dell PowerEdge 1750 | Installation and
Troubleshooting Guide (.htm) - Page 109
目次 4-1 4-1 4-2 VersaRails 4-3 4 RapidRails VersaRails RapidRails VersaRails 4-3 4-3 4-4 4-4 4-4 4-5 4-5 4-6 4-7 4-9 4-11 4-12 4-16 4-17 2 2 4-18 4-18 4-18 4-19 4-19 4-21 4-26 4-27 4-27 目次 3 - Dell PowerEdge 1750 | Installation and
Troubleshooting Guide (.htm) - Page 110
索引 図 図 4-1. 図 4-2. 図 4-3. 図 4-4. 図 4-5. 図 4-6. 図 4-7. 図 4-8. 図 4-9. 図 4-10. 図 4-11. 図 4-12. 図 4-13. 図 4-14. 図 4-15. 図 4-16. 図 4-17. 図 4-18. RapidRails VersaRails 1 1 U RapidRails VersaRails RapidRails または VersaRails 2 2 2 3 4-4 4-5 4-6 4-7 4-9 4-10 - Dell PowerEdge 1750 | Installation and
Troubleshooting Guide (.htm) - Page 111
2 Dell Dell Dell Dell 1 2 1 4-1 - Dell PowerEdge 1750 | Installation and
Troubleshooting Guide (.htm) - Page 112
www.dell.com | support.dell.com AC 80 1 RapidRails VersaRails RapidRails および VersaRails 1 1 • RapidRails 4 • VersaRails 4 • 2 2 4-2 - Dell PowerEdge 1750 | Installation and
Troubleshooting Guide (.htm) - Page 113
VersaRails 注意 : VersaRails ANSI EIA)規格 ANSI/EIA-310-D-92 IEC)297 DIN)41494 1 1 4 はじめに 1 4-3 - Dell PowerEdge 1750 | Installation and
Troubleshooting Guide (.htm) - Page 114
www.dell.com | support.dell.com 4 す。 • #2 RapidRails RapidRails 4-1 RapidRails 1 1 2 1 4-1 図 4-1. RapidRails 2 2) VersaRails VersaRails 4-2 • VersaRails 1 1 2 1 本 • 10-32 x 0.5 10 本 4-4 - Dell PowerEdge 1750 | Installation and
Troubleshooting Guide (.htm) - Page 115
4-2 1 32 10 10-32 図 4-2. VersaRails 2) 2) 10-32 x 0.5 10) 1 2 3 • RapidRails VersaRails 4 5 6 7 4-5 - Dell PowerEdge 1750 | Installation and
Troubleshooting Guide (.htm) - Page 116
www.dell.com | support.dell.com 1 1 U(44mm EIA-310 1 1 U 3 1 U 15.9 mm、15.9 mm、 12.7 mm 4-3 1 U RapidRails 図 4-3. 1 1 U) 1 U(44 mm) 12.7 mm 15.9 mm 15.9 mm 12.7 mm 1 4-6 - Dell PowerEdge 1750 | Installation and
Troubleshooting Guide (.htm) - Page 117
1 1 U 4-3 2 44 mm EIA-310 3 4-4 図 4-4 RapidRails 1 RapidRails 1 4-5 4-7 - Dell PowerEdge 1750 | Installation and
Troubleshooting Guide (.htm) - Page 118
www.dell.com | support.dell.com 2 3 4 1 1 から 3 5 4-8 - Dell PowerEdge 1750 | Installation and
Troubleshooting Guide (.htm) - Page 119
図 4-5. RapidRails 2) VersaRails 1 2 個の VersaRails 4-6 3 3 4-9 - Dell PowerEdge 1750 | Installation and
Troubleshooting Guide (.htm) - Page 120
www.dell.com | support.dell.com 2 2 本の 10-32 x 0.5 4-6 3 4 3 本の 10-32 x 0.5 図 4-6. VersaRails 2) 10-32 x 0.5 5 本) 5 1 1 4 6 4-10 - Dell PowerEdge 1750 | Installation and
Troubleshooting Guide (.htm) - Page 121
1 1 2 1 2 a b c 3 4 5 6 7 4-7 8 4-7 9 4-11 - Dell PowerEdge 1750 | Installation and
Troubleshooting Guide (.htm) - Page 122
www.dell.com | support.dell.com 図 4-7 RapidRails または VersaRails) ベゼル 蝶ネジ(2) 4-12 - Dell PowerEdge 1750 | Installation and
Troubleshooting Guide (.htm) - Page 123
1 2 4-8 3 4-8 図 4-8 4-13 - Dell PowerEdge 1750 | Installation and
Troubleshooting Guide (.htm) - Page 124
www.dell.com | support.dell.com 4 4-8 2 5 6 4-14 - Dell PowerEdge 1750 | Installation and
Troubleshooting Guide (.htm) - Page 125
図 4-9 7 4-9 8 19 mm 9 4-10 10 4-10 4-15 - Dell PowerEdge 1750 | Installation and
Troubleshooting Guide (.htm) - Page 126
www.dell.com | support.dell.com 図 4-10 1 I/O Installation and Troubleshooting Guide 2 4 2 I/O 4-11 3 a b 4-16 - Dell PowerEdge 1750 | Installation and
Troubleshooting Guide (.htm) - Page 127
c 4 5 図 4-11 1 これで 4 4-17 - Dell PowerEdge 1750 | Installation and
Troubleshooting Guide (.htm) - Page 128
www.dell.com | support.dell.com 2 2 2 3 6 2 2 2 2 2 2 • #2 • 11/32 2 4-12 2 柱型)1 組 1 本 1 本 2 個 4-18 - Dell PowerEdge 1750 | Installation and
Troubleshooting Guide (.htm) - Page 129
1 本 • 12-24 x 0.5 10 4-12 図 4-12. 2 2) 12-24 x 0.5 2 10 2 2 1 2 3 4 5 2 1 U(44mm す。 4-19 - Dell PowerEdge 1750 | Installation and
Troubleshooting Guide (.htm) - Page 130
www.dell.com | support.dell.com 2 1 1 U 3 1 U 15.9 mm、 15.9 mm、12.7 mm 4-13 図 4-13. 2 44 mm(1 U) 12.7 mm 15.9 mm 15.9 mm 2 1 U ごとに 2 1 U 31.7 mm、12.7 mm 4-14 図 4-14. 2 12.7 mm 44 mm(1 U) 31.7 mm 1 2 1 U 4-20 - Dell PowerEdge 1750 | Installation and
Troubleshooting Guide (.htm) - Page 131
3 2 44 mm 3 4-13 1 U 15.9、15.9、12.7 mm 1 U 3 4-13 3 44 mm 4-14 1 U (44 mm 31.7 mm 1 U 2 4-14 4-13 4-14 2 1 U 2 1 4-15 2 2 2 12-24 x 0.5 2 4-15 3 手順 1 と 2 4-21 - Dell PowerEdge 1750 | Installation and
Troubleshooting Guide (.htm) - Page 132
www.dell.com | support.dell.com 図 4-15 2 12-24 x 0.5 1 1 本) 4-22 - Dell PowerEdge 1750 | Installation and
Troubleshooting Guide (.htm) - Page 133
4 12-24 x 0.5 4-16 3 4-16 6 3 図 4-16 3 12-24 x 0.5 1 1 本) 3 6 2 1 2 4-17 180 4-23 - Dell PowerEdge 1750 | Installation and
Troubleshooting Guide (.htm) - Page 134
www.dell.com | support.dell.com 2 #2 11/32 2 本 の 12-24 x 0.5 2 2 4-17 3 4 180 4-17 5 2 2 2 4-17 6 2 12-24 x 0.5 2 4-17 7 手順 4 ~ 6 図 4-17 1 2 個) 1 2 個) 12-24 x 0.5 2 4-24 12-24 x 0.5 2 - Dell PowerEdge 1750 | Installation and
Troubleshooting Guide (.htm) - Page 135
8 2 12-24 x 0.5 2 4-18 図 4-18 2 12-24 x 0.5 1 4 本) 9 2 本の 12-24 x 0.5 2 4-18 10 手順 8 と 手順 9 11 11/32 4-25 - Dell PowerEdge 1750 | Installation and
Troubleshooting Guide (.htm) - Page 136
www.dell.com | support.dell.com 12 12-24 x 0.5 4-16 3 4-16 6 3 1 1 1 2 a b c 3 4-18 4 5 6 7 4-18 4-26 - Dell PowerEdge 1750 | Installation and
Troubleshooting Guide (.htm) - Page 137
8 4-18 9 4 い。 4 これで 2 4-27 - Dell PowerEdge 1750 | Installation and
Troubleshooting Guide (.htm) - Page 138
www.dell.com | support.dell.com 4-28 - Dell PowerEdge 1750 | Installation and
Troubleshooting Guide (.htm) - Page 139
索引 数字 2 1-27 1-18 1-26 1-21 1-19 4 RapidRails 1-4 VersaRails 1-4 1-12 1-16 1-4 1-11 1-6 R RapidRails 1-4 V VersaRails 1-4, 1-5 VersaRails 1-4 VersaRails 1-3 VersaRails 1-3 あ 1-1 き RapidRails, 1-4 VersaRails, 1-5 け 1-17, 1-27 1-12, 1-27 1-16, 1-27 配線 , 1-17, 1-27 こ 2 - Dell PowerEdge 1750 | Installation and
Troubleshooting Guide (.htm) - Page 140
RapidRails 1-7 VersaRails 1-9 1-12, 1-27 1-23 な VersaRails 1-4 RapidRails 1-4 ふ 2 1-18 ほ 1-23 ら 1-3 1-6 2 1-19 1-6 2 索引 - Dell PowerEdge 1750 | Installation and
Troubleshooting Guide (.htm) - Page 141
Sistemas Dell™ Guía de montaje del estante www.dell.com | support.dell.com - Dell PowerEdge 1750 | Installation and
Troubleshooting Guide (.htm) - Page 142
y nombres comerciales que puedan utilizarse en este documento se refieren a las empresas que figuran en las marcas y los nombres de sus productos. Dell Computer Corporation renuncia a cualquier interés de propiedad en las marcas y nombres comerciales que no sean los suyos propios. Octubre de 2002 - Dell PowerEdge 1750 | Installation and
Troubleshooting Guide (.htm) - Page 143
Contenido PRECAUCIÓN: Instrucciones de seguridad 5-1 Montaje de sistemas en estante 5-1 Instrucciones de instalación 5-2 Requisitos del estante para VersaRails 5-3 Instalación de estante de cuatro postes 5-3 Antes de empezar 5-3 Herramientas y suministros recomendados 5-4 Contenido del kit - Dell PowerEdge 1750 | Installation and
Troubleshooting Guide (.htm) - Page 144
Índice Figuras Figura 5-1. Figura 5-2. Figura 5-3. Figura 5-4. Figura 5-5. Figura 5-6. Figura 5-7. Figura 5-8. Figura 5-9. Figura 5-10. Figura 5-11. Figura 5-12. Figura 5-13. Figura 5-14. Figura 5-15. Figura 5-16. Figura 5-17. Figura 5-18. Contenido del kit de estante RapidRails . . . . Contenido - Dell PowerEdge 1750 | Installation and
Troubleshooting Guide (.htm) - Page 145
entorno de trabajo frente a posibles daños. Para obtener información completa acerca de la como componente para su uso en un armario de estantes Dell™ utilizando el kit de estante del cliente. La instalaci concebidos para su instalación en estantes por parte de técnicos de servicio con experiencia. - Dell PowerEdge 1750 | Installation and
Troubleshooting Guide (.htm) - Page 146
www.dell.com | support.dell.com PRECAUCIÓN: Instrucciones de seguridad (continuación) • Antes de trabajar en o los estabilizadores delanteros para varios estantes unidos. • Cargue siempre el estante desde la parte inferior hacia arriba, colocando en primer lugar el elemento más pesado. • El estante - Dell PowerEdge 1750 | Installation and
Troubleshooting Guide (.htm) - Page 147
estado de dos colores de los paneles frontal y posterior a la parte posterior de la extensión para tendido de cables. Para obtener más informaci sistema. Si utiliza un kit de estante para otro sistema, pueden causarse daños en el sistema y lesiones personales tanto a uno mismo como a otros. - Dell PowerEdge 1750 | Installation and
Troubleshooting Guide (.htm) - Page 148
www.dell.com | support.dell.com Información de seguridad importante Cuando instale el sistema en el estante, uno mismo y a otros. Esto es más importante aún cuando se instalan sistemas en la parte alta del estante. Herramientas y suministros recomendados Para instalar el sistema en un estante de - Dell PowerEdge 1750 | Installation and
Troubleshooting Guide (.htm) - Page 149
Figura 5-1. Contenido del kit de estante RapidRails extensión para la administración de cables conjuntos deslizantes (2) cable de indicador de estado tope de seguridad (2) Contenido del kit de estante VersaRails El kit de estante VersaRails incluye los siguientes elementos (consulte la Figura - Dell PowerEdge 1750 | Installation and
Troubleshooting Guide (.htm) - Page 150
www.dell.com | support.dell.com Figura 5-2. Contenido del kit de estante VersaRails extensión para la administración de cables conjuntos deslizantes (2) Tornillos Phillips de cabeza de saliente de 10-32 x 0,5 - Dell PowerEdge 1750 | Installation and
Troubleshooting Guide (.htm) - Page 151
estante. Para marcar el estante, realice los pasos siguientes: 1 Coloque una marca en los rieles verticales frontales del estante en los que desee colocar la parte inferior del sistema que está instalando en el armario de estantes. Guía de montaje del estante 5-7 - Dell PowerEdge 1750 | Installation and
Troubleshooting Guide (.htm) - Page 152
www.dell.com | support.dell.com La parte inferior de cada espacio 1-U se encuentra en medio de la verticales cinta en riel vertical Instalación de los conjuntos deslizantes RapidRails 1 En la parte frontal del armario de estantes, coloque uno de los conjuntos deslizantes RapidRails de modo que - Dell PowerEdge 1750 | Installation and
Troubleshooting Guide (.htm) - Page 153
del soporte de montaje hasta que los ganchos de montaje se introduzcan en los orificios cuadrados, y el pulsador salga y emita un clic. 3 En la parte posterior del armario, tire hacia atrás de la brida de soporte de montaje hasta que los ganchos de montaje queden colocados en sus orificios cuadrados - Dell PowerEdge 1750 | Installation and
Troubleshooting Guide (.htm) - Page 154
.dell.com | support.dell.com Figura 5-5. Instalación de los conjuntos deslizantes RapidRails conjuntos deslizantes (2) botón de presión gancho de montaje saliente del soporte de montaje lengüeta de soporte parte frontal del estante Instalación de los conjuntos deslizantes VersaRails 1 En la parte - Dell PowerEdge 1750 | Installation and
Troubleshooting Guide (.htm) - Page 155
orificios superior e inferior de la brida de montaje para sujetar el conjunto deslizante al riel vertical frontal (consulte la Figura 5-6). 3 En la parte posterior del armario, tire hacia atrás del saliente del soporte de montaje hasta que los orificios de montaje queden alineados con los orificios - Dell PowerEdge 1750 | Installation and
Troubleshooting Guide (.htm) - Page 156
www.dell.com | support.dell.com Instalación del sistema en el estante PRECAUCIÓN: Si va a instalar más deslizantes. 6 Coloque los tornillos de pivote posteriores en sus ranuras. 7 Haga descender la parte frontal del sistema y coloque los tornillos de pivote frontales en la ranura frontal situada - Dell PowerEdge 1750 | Installation and
Troubleshooting Guide (.htm) - Page 157
de estantes. Este procedimiento describe el montaje de la extensión para tendido de cables del lado derecho del armario de estantes, visto desde la parte posterior. Si está montando varios sistemas en el estante, considere el montaje de las extensiones para tendido de cables en los lados alternos - Dell PowerEdge 1750 | Installation and
Troubleshooting Guide (.htm) - Page 158
www.dell.com | support.dell.com Para montar la extensión para tendido de cables en la parte posterior del sistema, siga los pasos siguientes: 1 Sitúese frente a la parte posterior del armario de estantes y localice el pestillo situado en el extremo del conjunto deslizante derecho que fijó al riel - Dell PowerEdge 1750 | Installation and
Troubleshooting Guide (.htm) - Page 159
para tendido de cables levantando el centro del cable sobre la parte superior del botón circular repujado en la parte frontal delantera de la extensión y levantando el cable sobre la parte superior del botón circular similar de la parte posterior de la extensión. Guía de montaje del estante 5-15 - Dell PowerEdge 1750 | Installation and
Troubleshooting Guide (.htm) - Page 160
www.dell.com | support.dell.com La cubierta de alambre se abre para permitir que los estado del cable por la extensión para tendido de cables y monte el indicador en su ranura de la parte posterior de la extensión para tendido de cables (consulte la Figura 5-9). 8 Conecte los cables de alimentación - Dell PowerEdge 1750 | Installation and
Troubleshooting Guide (.htm) - Page 161
ón enchufe del cable de alimentación Canalización de cables 1 Conecte los conectores de cables de E/S a sus correspondientes conectores situados en la parte posterior del sistema. Para obtener más detalles sobre las conexiones de cables, consulte la Guía de instalación y solución de problemas y la - Dell PowerEdge 1750 | Installation and
Troubleshooting Guide (.htm) - Page 162
www.dell.com | support.dell.com a Después de conectar los cables al sistema, desenrosque los tornillos mariposa que sujetan la parte delantera del sistema al riel vertical delantero. b Deslice el sistema hacia adelante hasta que esté completamente extraído. c Tienda los cables a lo largo de la - Dell PowerEdge 1750 | Installation and
Troubleshooting Guide (.htm) - Page 163
Colocación de las puertas del estante Consulte los procedimientos para volver a colocar las puertas en la documentación suministrada con el armario de estante. PRECAUCIÓN: Debido al tamaño y al peso de las puertas del armario de estantes, nunca debe intentar montarlas ni desmontarlas sin ayuda. Así - Dell PowerEdge 1750 | Installation and
Troubleshooting Guide (.htm) - Page 164
www.dell.com | support.dell.com Herramientas y suministros recomendados Para montar el sistema en una estructura abierta de dos postes necesita las herramientas y los suministros siguientes • Destornillador Phillips del n.º 2 • Llave - Dell PowerEdge 1750 | Installation and
Troubleshooting Guide (.htm) - Page 165
Figura 5-12. Componentes del kit de estante de dos postes conjuntos deslizantes (2) soporte de refuerzo extensión para la administración de cables tornillos Phillips de cabeza cable de indicador de cónica de 12-24 x estado 0,5 pulgadas (10) tope de seguridad (2) Tareas de instalación del - Dell PowerEdge 1750 | Installation and
Troubleshooting Guide (.htm) - Page 166
www.dell.com | support.dell.com Estantes con separación entre orificios universal Los estantes de dos postes estándar del sector con separación entre orificios universal tienen un patrón alterno - Dell PowerEdge 1750 | Installation and
Troubleshooting Guide (.htm) - Page 167
orificios con separación de centro a centro entre ellos (empezando en la parte superior de un espacio de 1U) de 31,7 mm (1,25 pulgadas) (consulte la Figura 5-14). de estante para otro sistema, pueden causarse daños en el sistema y lesiones personales tanto a uno mismo como a otros. Guía de - Dell PowerEdge 1750 | Installation and
Troubleshooting Guide (.htm) - Page 168
www.dell.com | support.dell.com Montaje centrado El kit de estante de dos postes se entrega con los soportes configurados para el montaje centrado. Para completar la instalación, realice los pasos siguientes: 1 Localice el conjunto deslizante derecho y presione el soporte posterior hacia la parte - Dell PowerEdge 1750 | Installation and
Troubleshooting Guide (.htm) - Page 169
Figura 5-15. Instalación de los conjuntos deslizantes para una configuración de montaje centrado estante de estructura abierta de dos postes Tornillos Phillips de cabeza cónica de 12-24 x 0,5 pulgadas (4 por conjunto deslizante) conjunto deslizante pestillo de liberación de conjunto deslizante Guía - Dell PowerEdge 1750 | Installation and
Troubleshooting Guide (.htm) - Page 170
www.dell.com | support.dell.com 4 Monte el soporte de refuerzo en los orificios apropiados en la parte posterior de los conjuntos 6 pulgadas de anchura, utilice los orificios situados a 3 pulgadas de la parte frontal de los orificios del extremo posterior de los conjuntos deslizantes. Figura 5-16 - Dell PowerEdge 1750 | Installation and
Troubleshooting Guide (.htm) - Page 171
NOTA: Para preparar los conjuntos deslizantes para el montaje al ras, retire el soporte de montaje frontal, gírelo 180 grados y vuelva a colocarlo en el conjunto deslizante opuesto. 2 Con un destornillador Phillips del n.º 2 y una llave de 11/32 pulgadas, quite los dos tornillos Phillips de cabeza - Dell PowerEdge 1750 | Installation and
Troubleshooting Guide (.htm) - Page 172
www.dell.com | support.dell.com Figura 5-17. Rotación del soporte de montaje frontal para el montaje en su sitio en el punto marcado del estante, ajuste el soporte posterior extendido contra la parte posterior del estante vertical de dos postes y fíjelo al riel con dos tornillos Phillips de - Dell PowerEdge 1750 | Installation and
Troubleshooting Guide (.htm) - Page 173
Figura 5-18. Instalación de los conjuntos deslizantes para una configuración de montaje a ras estante de estructura abierta de dos postes soporte unido tornillo Phillips de cabeza cónica de 12-24 x 0,5 pulg. (4 cada conjunto deslizante) conjunto deslizante tornillo de pivote del sistema - Dell PowerEdge 1750 | Installation and
Troubleshooting Guide (.htm) - Page 174
www.dell.com | support.dell.com 12 Monte el soporte de refuerzo en los orificios apropiados en la parte posterior de los 6 pulgadas de anchura, utilice los orificios situados a 3 pulgadas de la parte frontal de los orificios del extremo posterior de los conjuntos deslizantes. Instalación del - Dell PowerEdge 1750 | Installation and
Troubleshooting Guide (.htm) - Page 175
8 Pulse el pestillo de liberación deslizante situada en el lado de cada conjunto deslizante y introduzca completamente el sistema en el estante (consulte la Figura 5-18). 9 Apriete los tornillos mariposa cautivos en cada lado del panel frontal del chasis para sujetar el sistema al estante. Instalaci - Dell PowerEdge 1750 | Installation and
Troubleshooting Guide (.htm) - Page 176
www.dell.com | support.dell.com 5-32 Guía de montaje del estante - Dell PowerEdge 1750 | Installation and
Troubleshooting Guide (.htm) - Page 177
Índice B bloques de detención, 5-4, 5-5, 5-15, 5-20 C cables canalización, 5-31 canalizar, 5-18 canalización de cables, 5-17, 5-31 contenido del kit VersaRails, 5-6 contenido del kit VersaRails lista, 5-5 contenido enumerado kit RapidRails, 5-4 E extensión para administración de cables instalar, 5- - Dell PowerEdge 1750 | Installation and
Troubleshooting Guide (.htm) - Page 178
conjuntos deslizantes VersaRails, 5-10 montar extensión para tendido de cables, 5-13 montar sistema estante de cuatro montantes, 5-12 montar soporte de refuerzo, 5-26 V VersaRails contenido del kit, 5-5, 5-6 requisitos del estante, 5-3 P precauciones para el montaje del estante, 5-3 puertas - Dell PowerEdge 1750 | Installation and Troubleshooting Guide (.htm) - Page 179
- Dell PowerEdge 1750 | Installation and
Troubleshooting Guide (.htm) - Page 180
Printed in the U.S.A. Imprimé aux Etats-Unis. Gedruckt in den USA. Impreso en EE.UU. 05X860A00 P/N 5X860 Rev. A00 www.dell.com | support.dell.com
-
 1
1 -
 2
2 -
 3
3 -
 4
4 -
 5
5 -
 6
6 -
 7
7 -
8
-
9
-
10
-
11
-
12
-
13
-
14
-
15
-
16
-
17
-
18
-
19
-
20
-
21
-
22
-
23
-
24
-
25
-
26
-
27
-
28
-
29
-
30
-
31
-
32
-
33
-
34
-
35
-
36
-
37
-
38
-
39
-
40
-
41
-
42
-
43
-
44
-
45
-
46
-
47
-
48
-
49
-
50
-
51
-
52
-
53
-
54
-
55
-
56
-
57
-
58
-
59
-
60
-
61
-
62
-
63
-
64
-
65
-
66
-
67
-
68
-
69
-
70
-
71
-
72
-
73
-
74
-
75
-
76
-
77
-
78
-
79
-
80
-
81
-
82
-
83
-
84
-
85
-
86
-
87
-
88
-
89
-
90
-
91
-
92
-
93
-
94
-
95
-
96
-
97
-
98
-
99
-
100
-
101
-
102
-
103
-
104
-
105
-
106
-
107
-
108
-
109
-
110
-
111
-
112
-
113
-
114
-
115
-
116
-
117
-
118
-
119
-
120
-
121
-
122
-
123
-
124
-
125
-
126
-
127
-
128
-
129
-
130
-
131
-
132
-
133
-
134
-
135
-
136
-
137
-
138
-
139
-
140
-
141
-
142
-
143
-
144
-
145
-
146
-
147
-
148
-
149
-
150
-
151
-
152
-
153
-
154
-
155
-
156
-
157
-
158
-
159
-
160
-
161
-
162
-
163
-
164
-
165
-
166
-
167
-
168
-
169
-
170
-
171
-
172
-
173
-
174
-
175
-
176
-
177
-
178
-
179
-
180
 |
 |

www.dell.com | support.dell.com
Dell™ Systems
Rack Installation Guide
Guide d'installation du rack
Rack-Installationsanleitung
ラック取り付けガイド
Guía de instalación del estante