Dell PowerEdge 6600 VersaRails Cable Management Arm Bracket (.pdf)
Dell PowerEdge 6600 Manual
 |
View all Dell PowerEdge 6600 manuals
Add to My Manuals
Save this manual to your list of manuals |
Dell PowerEdge 6600 manual content summary:
- Dell PowerEdge 6600 | VersaRails
Cable Management Arm Bracket (.pdf) - Page 1
www.dell.com | support.dell.com About Cautions CAUTION: A CAUTION indicates a potential for property damage, personal injury, or death. Installing the Power Supply CAUTION: See your System Information Guide for complete information about safety precautions and protecting against electrostatic - Dell PowerEdge 6600 | VersaRails
Cable Management Arm Bracket (.pdf) - Page 2
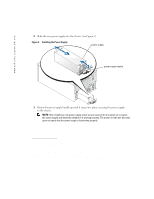
www.dell.com | support.dell.com 2 Slide the new power supply into the chassis (see Figure 2). Figure 2. Installing the Power Supply power supply power supply handle 3 Rotate the power supply handle up until it snaps into place, securing the power supply to the chassis. NOTE: After installing a - Dell PowerEdge 6600 | VersaRails
Cable Management Arm Bracket (.pdf) - Page 3
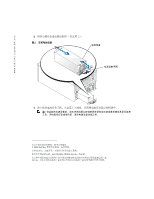
www.dell.com | support.dell.com 关于警告 1 a 1)。 b 1 2004 年 1 月 - Dell PowerEdge 6600 | VersaRails
Cable Management Arm Bracket (.pdf) - Page 4
www.dell.com | support.dell.com 2 2)。 图 2 电源设备 3 2004 Dell Inc Dell Inc Dell 和 DELL 徽标是 Dell Inc Dell Inc - Dell PowerEdge 6600 | VersaRails
Cable Management Arm Bracket (.pdf) - Page 5
www.dell.com | support.dell.com Mention ATTENTION ATTENTION : le message ATTENTION indique une situation potentiellement dangereuse qui, si elle n'est pas évitée, peut provoquer une détérioration du matériel - Dell PowerEdge 6600 | VersaRails
Cable Management Arm Bracket (.pdf) - Page 6
www.dell.com | support.dell.com 2 Faites glisser le nouveau module d'alimentation dans le châssis (voir la . Les informations contenues dans ce document peuvent être modifiées sans préavis. © 2004 Dell Inc. Tous droits réservés. Imprimé aux États-Unis. Toute reproduction sous quelque forme que - Dell PowerEdge 6600 | VersaRails
Cable Management Arm Bracket (.pdf) - Page 7
www.dell.com | support.dell.com Warnungen VORSICHT: VORSICHT zeigt eine möglicherweise gefährliche Situation an, die bei Nichtbeachtung zu Sachschäden, Körperverletzungen oder zum Tod führen könnte. Netzteil installieren - Dell PowerEdge 6600 | VersaRails
Cable Management Arm Bracket (.pdf) - Page 8
www.dell.com | support.dell.com 2 Schieben Sie das neue Netzteil in das Gehäuse (siehe Abbildung 2). das Netzteil ordnungsgemäß funktioniert. Irrtümer und technische Änderungen vorbehalten. © 2004 Dell Inc. Alle Rechte vorbehalten. Gedruckt in den USA. Eine Reproduktion dieses Dokuments in - Dell PowerEdge 6600 | VersaRails
Cable Management Arm Bracket (.pdf) - Page 9
www.dell.com | support.dell.com 1 a ( 図 1 b 2 3 1 1 2004 年 1 月 - Dell PowerEdge 6600 | VersaRails
Cable Management Arm Bracket (.pdf) - Page 10
www.dell.com | support.dell.com 2 2 図 2 電源装置 3 2004 Dell Inc Printed in the U.S.A. Dell Inc Dell および DELL ロゴは Dell Inc Dell Inc - Dell PowerEdge 6600 | VersaRails
Cable Management Arm Bracket (.pdf) - Page 11
www.dell.com | support.dell.com 1 a ( 그림 1 참조 ). b 2 3 1 2004 년 1 월 - Dell PowerEdge 6600 | VersaRails
Cable Management Arm Bracket (.pdf) - Page 12
www.dell.com | support.dell.com 2 2 참조 ). 그림 2 3 2004 Dell Inc. All rights reserved Dell Inc Dell 및 DELL 로고는 Dell Inc Dell Inc - Dell PowerEdge 6600 | VersaRails
Cable Management Arm Bracket (.pdf) - Page 13
www.dell.com | support.dell.com Información sobre los avisos de precaución PRECAUCIÓN: un mensaje de PRECAUCIÓN indica la posibilidad de que el equipo resulte averiado, de sufrir lesiones personales o - Dell PowerEdge 6600 | VersaRails
Cable Management Arm Bracket (.pdf) - Page 14
www.dell.com | support.dell.com 2 Introduzca la nueva fuente de alimentación en el chasis (consulte la figura 2). Figura 2. Instalación de la fuente de alimentación Fuente de alimentación Asa de
-
 1
1 -
 2
2 -
 3
3 -
 4
4 -
 5
5 -
 6
6 -
 7
7 -
8
-
9
-
10
-
11
-
12
-
13
-
14
 |
 |
www.dell.com | support.dell.com
About Cautions
CAUTION:
A CAUTION indicates a potential for property damage, personal injury, or death.
Installing the Power Supply
CAUTION:
See your
System Information
Guide
for complete information about safety precautions
and protecting against electrostatic discharge.
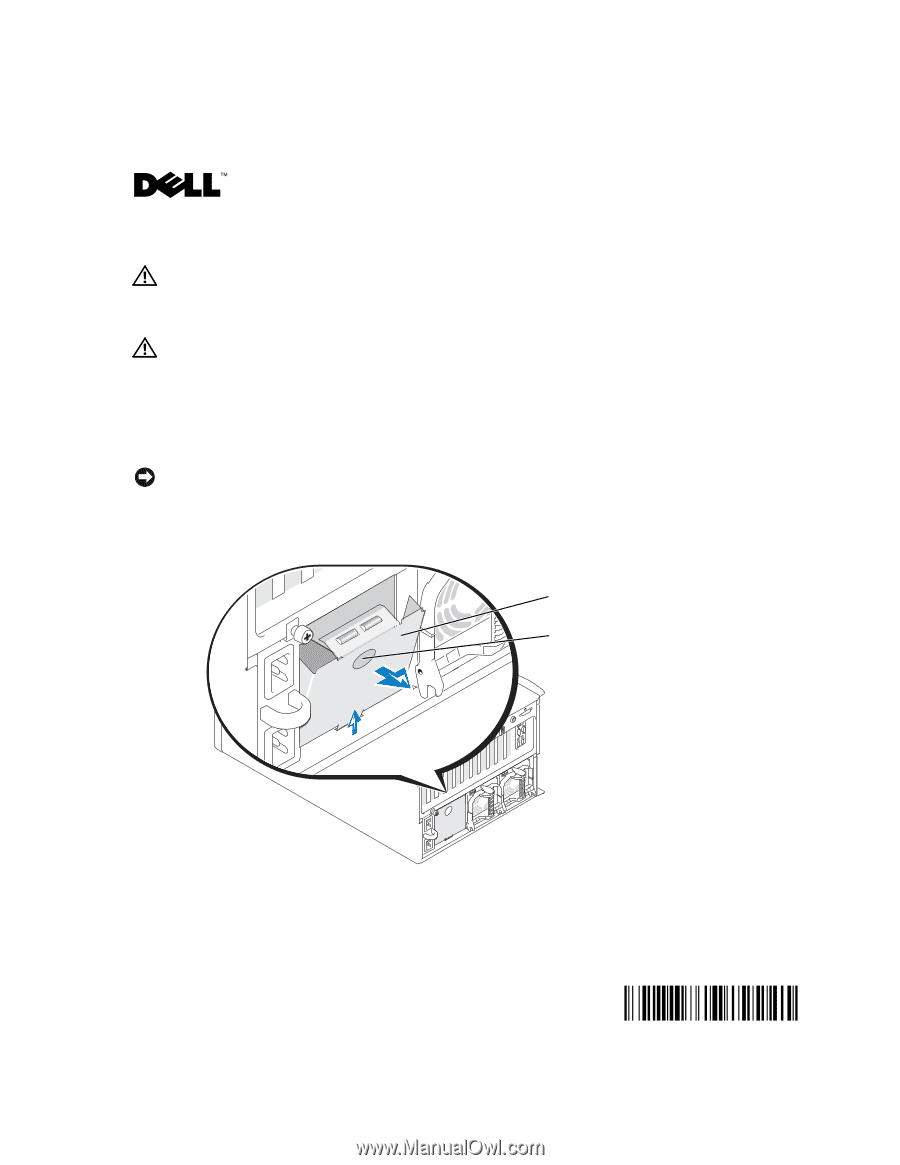
1
Remove the power supply blank.
a
Use the hole in the power supply blank to pull and rotate the blank out of the chassis
(see Figure 1).
b
Remove the blank from the system.
NOTICE:
The power supplies are hot-pluggable. The system requires two power supplies to be installed
for it to operate normally. The system is in the redundant mode when all three power supplies are
installed. Remove and replace only one power supply at a time in a system that is powered on.
Figure 1.
Removing the Power Supply Blank
power supply blank
power supply blank hole
January 2004
0U3964A00