Dell PowerEdge Rack Enclosure 4820 Dell PowerEdge 2420 Rack Installation Guide
Dell PowerEdge Rack Enclosure 4820 Manual
 |
View all Dell PowerEdge Rack Enclosure 4820 manuals
Add to My Manuals
Save this manual to your list of manuals |
Dell PowerEdge Rack Enclosure 4820 manual content summary:
- Dell PowerEdge Rack Enclosure 4820 | Dell PowerEdge 2420 Rack Installation Guide - Page 1
Dell™ PowerEdge™ 2420 Installation Guide Guide d'installation Installationsanleitung Guía de instalación - Dell PowerEdge Rack Enclosure 4820 | Dell PowerEdge 2420 Rack Installation Guide - Page 2
- Dell PowerEdge Rack Enclosure 4820 | Dell PowerEdge 2420 Rack Installation Guide - Page 3
Dell™ PowerEdge™ 2420 Installation Guide - Dell PowerEdge Rack Enclosure 4820 | Dell PowerEdge 2420 Rack Installation Guide - Page 4
CAUTION indicates potential damage to hardware or loss of data if instructions are not followed. WARNING: A WARNING indicates a potential for without the written permission of Dell Inc. is strictly forbidden. Dell, the DELL logo, and PowerEdge are trademarks of Dell Inc. Other trademarks and trade - Dell PowerEdge Rack Enclosure 4820 | Dell PowerEdge 2420 Rack Installation Guide - Page 5
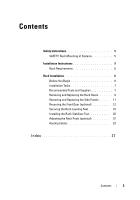
Contents Safety Instructions 5 SAFETY: Rack Mounting of Systems 5 Installation Instructions 5 Rack Requirements 6 Rack Installation 6 Before You Begin 6 Installation Tasks 7 Recommended Tools and Supplies 7 Removing and Replacing the Rack Doors 8 Removing and Replacing the Side Panels . . . - Dell PowerEdge Rack Enclosure 4820 | Dell PowerEdge 2420 Rack Installation Guide - Page 6
4 Contents - Dell PowerEdge Rack Enclosure 4820 | Dell PowerEdge 2420 Rack Installation Guide - Page 7
on any components in the rack. Installation Instructions This installation guide provides instructions for trained service technicians installing a 24-unit (U) rack. Information includes assembling the rack and routing cables through the rack. The 24-U rack can be installed using the recommended - Dell PowerEdge Rack Enclosure 4820 | Dell PowerEdge 2420 Rack Installation Guide - Page 8
rack, carefully read "Important Safety Information," as well as the safety instructions that came with the rack. WARNING: When installing multiple systems in a rack feet for support and to prevent the cabinet from rolling. WARNING: Avoid rolling the rack cabinet over rack. 6 Installation Guide - Dell PowerEdge Rack Enclosure 4820 | Dell PowerEdge 2420 Rack Installation Guide - Page 9
the rack Recommended Tools and Supplies You may need the following tools and supplies to install the rack: • #2 Phillips screwdriver • Flat head screwdriver • 12-mm wrench • Needle-nose pliers • 4-mm Allen wrench (if you want to reverse the direction the front door opens) Installation Guide 7 - Dell PowerEdge Rack Enclosure 4820 | Dell PowerEdge 2420 Rack Installation Guide - Page 10
side panels (included in the rack kit) • 13-mm wrench (for rack removal from pallet) • 17-mm wrench (for rack removal from pallet) Removing and Replacing the Rack Doors WARNING: When storing the the Front Door 2 1 3 4 1 door latch 3 hinge body 8 Installation Guide 2 hinge pin 4 hinge-pin housing - Dell PowerEdge Rack Enclosure 4820 | Dell PowerEdge 2420 Rack Installation Guide - Page 11
the hinge pin out of the door's hinge-pin housing, pull the door slightly away from the rack so that the door clears the hinge body. 4 Release the hinge pin. 5 Lift the door back doors (see Figure 1-2). Figure 1-2. Opening the Back Doors 1 2 1 door handle 2 back door (2) Installation Guide 9 - Dell PowerEdge Rack Enclosure 4820 | Dell PowerEdge 2420 Rack Installation Guide - Page 12
Remove the right door. a While supporting the door, pull the pin for of the hinge body. b Repeat step a for the bottom hinge. c Pull the door away from the rack. Figure 1-3. Removing the Back Doors 1 2 3 1 hinge pin 3 hinge-pin housing 2 hinge body d for the left door. 10 Installation Guide - Dell PowerEdge Rack Enclosure 4820 | Dell PowerEdge 2420 Rack Installation Guide - Page 13
the side stabilizer feet. NOTE: Although removing the side panels is not mandatory for installing systems in a rack, having the sides open makes it easier to install slide assemblies and support rails and to reverse the direction that the front door opens. Removing the Side Panels 1 Pull both - Dell PowerEdge Rack Enclosure 4820 | Dell PowerEdge 2420 Rack Installation Guide - Page 14
Door (optional) NOTE: Use a 4-mm Allen wrench to remove the front-door hinge bodies from the rack and reinstall them on the side opposite their original positions. To reverse the direction that the front door opens (see "Removing and Replacing the Side Panels" on page 11). 12 Installation Guide - Dell PowerEdge Rack Enclosure 4820 | Dell PowerEdge 2420 Rack Installation Guide - Page 15
hinge pin, retention clip, and spring in a safe location. e Using the 4-mm Allen wrench, remove the Allen bolts that secure the hinge body to the rack, and place the bolts with the hinge pin, retention clip, and body spring. f Rotate the hinge body 180 degrees so that the hinge-pin holes - Dell PowerEdge Rack Enclosure 4820 | Dell PowerEdge 2420 Rack Installation Guide - Page 16
right side of the rack with the Allen bolts. h Insert the spring between the top and bottom hinge-pin holes in the bottom hinge body. i Slide the hinge pin into the hinge body. j Insert the retention clip through the hinge so that the retention clip is below the spring. 14 Installation Guide - Dell PowerEdge Rack Enclosure 4820 | Dell PowerEdge 2420 Rack Installation Guide - Page 17
the hinge body to the right side of the rack. 5 Rotate the front door 180 degrees so that its hinge-pin housings are on the right side (see Figure 1-7). Figure 1-7. Rotate Front Door 6 Rehang the front door by reversing the steps in "Removing the Front Door" on page 8." Installation Guide 15 - Dell PowerEdge Rack Enclosure 4820 | Dell PowerEdge 2420 Rack Installation Guide - Page 18
's vertical frame member. b Remove the lock catch and rotate it 180 degrees. c Reinstall the lock catch on the other rack front vertical frame member by aligning the holes of the catch with the holes of the frame member and then reinserting the two Phillips screws. - Dell PowerEdge Rack Enclosure 4820 | Dell PowerEdge 2420 Rack Installation Guide - Page 19
badge release notch (see Figure 1-9). Figure 1-9. Reversing the Front Door Badge 1 2 5 4 1 badge release notch 3 center tab (2) 5 badge hook (2) 3 2 front door badge 4 badge retention clip (2) Installation Guide 17 - Dell PowerEdge Rack Enclosure 4820 | Dell PowerEdge 2420 Rack Installation Guide - Page 20
is resting on an uneven floor surface and the leveling and stabilizing feet are not supporting the weight of the rack. NOTE: If the rack is not leveled properly, you might not be able to install the stabilizer feet, which are necessary to prevent the rack from tipping over. 18 Installation Guide - Dell PowerEdge Rack Enclosure 4820 | Dell PowerEdge 2420 Rack Installation Guide - Page 21
1-10). Figure 1-10. Adjusting the Leveling Feet 1 2 3 1 leveling foot stem 3 leveling pad 2 hex nut 3 Repeat steps 1 and 2 for the remaining leveling feet. 4 Ensure that the rack is level. Installation Guide 19 - Dell PowerEdge Rack Enclosure 4820 | Dell PowerEdge 2420 Rack Installation Guide - Page 22
rack to tip over, potentially resulting in bodily injury under certain circumstances. Therefore, always install the stabilizer feet before installing components in the rack . Installing the Front Stabilizer Feet 1 Open the front door. 2 Reach into the rack the base of the rack frame and align its - Dell PowerEdge Rack Enclosure 4820 | Dell PowerEdge 2420 Rack Installation Guide - Page 23
frame's bottom rail, locate the four holes (see Figure 1-12). 3 Position each stabilizer foot against the base of the rack frame and align its holes with the corresponding holes in the frame. Figure 1-12. Installing the Side Stabilizer Feet 1 1 side stabilizer foot (2 per side) 4 Use - Dell PowerEdge Rack Enclosure 4820 | Dell PowerEdge 2420 Rack Installation Guide - Page 24
holes. Figure 1-13. Adjusting the Rack Posts 1 2 3 1 screws 3 front rack post 2 back rack post NOTE: You may now install systems into the rack. Use the white numbered labels on the front and back of the rack mounting rails to help install products in the rack. 22 Installation Guide - Dell PowerEdge Rack Enclosure 4820 | Dell PowerEdge 2420 Rack Installation Guide - Page 25
distribution unit (PDU) channels in each rack flange allow you to route power cables to the systems mounted in the rack. • Cable clips can be mounted help prevent cords from becoming tangled. You can route cables out of the rack in two ways on a standard configuration: • Through the cable exit at - Dell PowerEdge Rack Enclosure 4820 | Dell PowerEdge 2420 Rack Installation Guide - Page 26
Figure 1-14. Cable-Routing Options 1 2 3 4 1 cable raceway 3 cable clips 5 bottom cable exit 5 2 top cable slot 4 PDU channels (2 per side) 24 Installation Guide - Dell PowerEdge Rack Enclosure 4820 | Dell PowerEdge 2420 Rack Installation Guide - Page 27
. 4 After routing your cables through the top of the rack, close any air gap in the cable slot by pulling the slot cover towards the back of the rack. Use the wingnuts to secure the cover. Figure 1-15. Opening and Closing the Cable Slot 1 2 1 cable slot cover 2 wingnut (2) Installation Guide 25 - Dell PowerEdge Rack Enclosure 4820 | Dell PowerEdge 2420 Rack Installation Guide - Page 28
, making it easier to route cables through the top and bottom of the rack. 1 Open the back doors. 2 Pull and hold the plungers on each side the bars by aligning the tabs on the bars with the corresponding holes in the rack and pushing in and down until the plungers lock into place. Figure 1-16. - Dell PowerEdge Rack Enclosure 4820 | Dell PowerEdge 2420 Rack Installation Guide - Page 29
Index B back door opening, 9 removing, 10 C cables routing, 23 D doors removing, 8 F front door removing, 8-9 reversing, 12 L leveling feet, 18 R rack stabilizer feet, 7, 20 routing cables, 23 S safety instructions, 5 side panels removing, 11 T tools and supplies, 7 Index 27 - Dell PowerEdge Rack Enclosure 4820 | Dell PowerEdge 2420 Rack Installation Guide - Page 30
28 Index - Dell PowerEdge Rack Enclosure 4820 | Dell PowerEdge 2420 Rack Installation Guide - Page 31
Dell™ PowerEdge™ 2420 Guide d'installation - Dell PowerEdge Rack Enclosure 4820 | Dell PowerEdge 2420 Rack Installation Guide - Page 32
ou de perte de données en cas de non-respect des instructions données. AVERTISSEMENT : Un AVERTISSEMENT vous avertit d'un risque d'endommagement l'autorisation écrite de Dell Inc. est strictement interdite. Dell, le logo DELL et PowerEdge sont des marques de Dell Inc. D'autres marques commerciales - Dell PowerEdge Rack Enclosure 4820 | Dell PowerEdge 2420 Rack Installation Guide - Page 33
Table des matières Consignes de sécurit 33 SÉCURITÉ : montage en rack des systèmes . . . . 33 Instructions d'installation 33 Exigences du rack 34 Installation en rack 34 Avant de commencer 34 Tâches d'installation 35 Outils et fournitures recommandés 36 Retrait et remise en place des portes - Dell PowerEdge Rack Enclosure 4820 | Dell PowerEdge 2420 Rack Installation Guide - Page 34
32 Table des matières - Dell PowerEdge Rack Enclosure 4820 | Dell PowerEdge 2420 Rack Installation Guide - Page 35
de support. PRÉCAUTION : Instructions relatives aux systèmes montés en rack : • Votre kit pour rack est homologué pour le rack fourni uniquement rack. • Ne montez pas et ne vous tenez pas debout sur un composant du rack. Instructions d'installation Ce guide d'installation contient des instructions - Dell PowerEdge Rack Enclosure 4820 | Dell PowerEdge 2420 Rack Installation Guide - Page 36
). Installation en rack Avant de commencer rack. AVERTISSEMENT : Si vous installez plusieurs systèmes dans un rack au suivant. AVERTISSEMENT : Les armoires racks peuvent être extrêmement lourdes, rack. Rentrez ses pieds réglables lorsque vous la changez d'emplacement. Évitez de déplacer l'armoire rack - Dell PowerEdge Rack Enclosure 4820 | Dell PowerEdge 2420 Rack Installation Guide - Page 37
rack 2 Retrait et remise en place des panneaux latéraux 3 Inversion du sens d'ouverture de la porte avant et de la plaque (facultatif) 4 Fixation des pieds de mise à niveau 5 Installation des pieds stabilisateurs 6 Ajustement des montants du rack (facultatif) 7 Routage des câbles dans le rack Guide - Dell PowerEdge Rack Enclosure 4820 | Dell PowerEdge 2420 Rack Installation Guide - Page 38
clés des portes et des panneaux latéraux du rack (livrés avec le kit pour rack) • Clé de 13 mm (pour retirer le rack de sa palette) • Clé de 17 mm (pour retirer le rack de sa palette) Retrait et remise en place Le ressort sur l'axe empêche le gond de sortir de son logement. 36 Guide d'installation - Dell PowerEdge Rack Enclosure 4820 | Dell PowerEdge 2420 Rack Installation Guide - Page 39
logement de l'axe du gond 3 Tout en maintenant l'axe du gond hors du logement, tirez légèrement la porte du rack pour la dégager du logement. 4 Lâchez l'axe du gond. 5 Soulevez la porte pour la dégager du gond inf d'endommager le macaron et le revêtement de la porte. Guide d'installation 37 - Dell PowerEdge Rack Enclosure 4820 | Dell PowerEdge 2420 Rack Installation Guide - Page 40
sont conçus pour éviter qu'ils ne sortent complètement des gonds. b Répétez cette opération pour l'axe inférieur. c Dégagez la porte du rack. 38 Guide d'installation - Dell PowerEdge Rack Enclosure 4820 | Dell PowerEdge 2420 Rack Installation Guide - Page 41
a à d pour la porte de gauche. Remise en place des portes arrière Pour remettre en place les portes arrière, procédez à l'inverse du retrait. Guide d'installation 39 - Dell PowerEdge Rack Enclosure 4820 | Dell PowerEdge 2420 Rack Installation Guide - Page 42
rack pour s'assurer un refroidissement adéquat à l'intérieur du rack système dans un rack, il est plus rack, insérez le crochet du panneau rack et le crochet avant dans le trou correspondant à l'avant de la structure du rack (voir la figure 1-4). 2 Avancez la partie supérieure du panneau vers le rack - Dell PowerEdge Rack Enclosure 4820 | Dell PowerEdge 2420 Rack Installation Guide - Page 43
l'ouverture de la porte avant (facultatif) REMARQUE : Utilisez la clé Allen de 4 mm fournie avec le rack pour retirer les logements des gonds de la porte avant et les réinstaller sur le côté opposé. Pour inverser et remise en place des panneaux latéraux" à la page 40). Guide d'installation 41 - Dell PowerEdge Rack Enclosure 4820 | Dell PowerEdge 2420 Rack Installation Guide - Page 44
lieu sûr l'axe, le clip de retenue et le ressort. e À l'aide de la clé Allen de 4 mm, retirez les vis Allen de fixation du gond au rack et placez-les avec le gond, le clip de retenue et le ressort. f Faites pivoter le gond de 180 degrés pour amener les orifices du - Dell PowerEdge Rack Enclosure 4820 | Dell PowerEdge 2420 Rack Installation Guide - Page 45
du gond supérieur 4 clip de retenue 6 corps du gond inférieur g Repérez les orifices de vis supérieurs sur la partie droite du rack et fixez le gond à cet endroit avec les vis Allen. h Insérez le ressort dans les orifices des axes supérieur et inférieur, à la - Dell PowerEdge Rack Enclosure 4820 | Dell PowerEdge 2420 Rack Installation Guide - Page 46
la droite du gond (voir la figure 1-6). c Repérez l'orifice de vis inférieur sur la partie droite du rack et fixez le gond à cet endroit avec la vis Allen. 5 Faites pivoter la porte avant de 180 degrés pour la structure, puis en remettant en place les deux vis Phillips n°1. 44 Guide d'installation - Dell PowerEdge Rack Enclosure 4820 | Dell PowerEdge 2420 Rack Installation Guide - Page 47
avant. a Ouvrez la porte avant. b A l'intérieur de la porte, insérez un tournevis à tête plate dans l'encoche de dégagement du macaron (voir la figure 1-9). Guide d'installation 45 - Dell PowerEdge Rack Enclosure 4820 | Dell PowerEdge 2420 Rack Installation Guide - Page 48
décollez-le de la porte. e Faites pivoter le macaron de 180 degrés afin qu'il soit lisible dans le bon sens une fois réinstallé. 46 Guide d'installation - Dell PowerEdge Rack Enclosure 4820 | Dell PowerEdge 2420 Rack Installation Guide - Page 49
du rack AVERTISSEMENT : Lisez toutes les instructions ci-dessous avant de régler les pieds de mise de niveau. Votre rack est supportent pas son poids. REMARQUE : Si le rack n'est pas correctement de niveau, vous ne pourrez pas installer les pieds stabilisateurs qui lui évitent de basculer. Guide - Dell PowerEdge Rack Enclosure 4820 | Dell PowerEdge 2420 Rack Installation Guide - Page 50
de nivellement 1 2 3 1 axe du pied de nivellement 3 patin de nivellement 2 écrou 6 pans 3 Répétez les étapes 1 et 2 pour les autres pieds de nivellement. 4 Vérifiez que le rack est bien de niveau. 48 Guide d'installation - Dell PowerEdge Rack Enclosure 4820 | Dell PowerEdge 2420 Rack Installation Guide - Page 51
faites correspondre ses trous avec ceux de la structure. 5 Utilisez les écrous, rondelles et écrous à cage fournis pour fixer chaque pied au rack comme illustré dans la figure 1-11. Figure 1-11. Installation des pieds stabilisateurs avant 1 1 pied stabilisateur avant (2) Guide d'installation 49 - Dell PowerEdge Rack Enclosure 4820 | Dell PowerEdge 2420 Rack Installation Guide - Page 52
figure 1-12). 3 Placez chaque pied stabilisateur contre la base de la structure du rack et faites correspondre ses trous avec ceux de la structure. Figure 1-12. Installation des et écrous à cage fournis pour fixer chaque pied au rack comme illustré dans la figure 1-12. 50 Guide d'installation - Dell PowerEdge Rack Enclosure 4820 | Dell PowerEdge 2420 Rack Installation Guide - Page 53
2 montant arrière du rack REMARQUE : Vous pouvez maintenant installer les systèmes dans le rack. Utilisez les étiquettes numérotées blanches situées sur la partie avant et la partie arrière des rails de montage du rack pour vous aider dans l'installation des composants. Guide d'installation 51 - Dell PowerEdge Rack Enclosure 4820 | Dell PowerEdge 2420 Rack Installation Guide - Page 54
câbles Le rack 24U dispose de faire cheminer les câbles d'alimentation des systèmes montés sur le rack. • Vous pouvez monter les clips des câbles dans les canaux PDU de s'entremêler. Vous pouvez faire passer les câbles hors du rack de deux manières différentes pour une configuration standard : • Par - Dell PowerEdge Rack Enclosure 4820 | Dell PowerEdge 2420 Rack Installation Guide - Page 55
Figure 1-14. options de routage des câbles 1 2 3 4 5 1 chemin de câbles 3 clips de câbles 5 sortie de câble inférieure 2 fente de câble supérieure 4 canaux PDU (2 par côté) Guide d'installation 53 - Dell PowerEdge Rack Enclosure 4820 | Dell PowerEdge 2420 Rack Installation Guide - Page 56
haut du rack, refermez toute interstice visible en tirant le cache du logement vers l'arrière du rack. Fixez le cache à l'aide des écrous à ailettes. Figure 1-15. Ouverture et fermeture de l'emplacement des câbles 1 2 1 cache des orifices de câble 2 écrou à ailettes (2) 54 Guide d'installation - Dell PowerEdge Rack Enclosure 4820 | Dell PowerEdge 2420 Rack Installation Guide - Page 57
le passage des câbles par le haut et le bas du rack. 1 Ouvrez les portes arrière. 2 Tirez et maintenez les plots de chaque passer vos câbles, replacez les barres en alignant les baguettes avec les orifices correspondants du rack, puis en les insérant et en appuyant jusqu'à ce que les plots se fixent - Dell PowerEdge Rack Enclosure 4820 | Dell PowerEdge 2420 Rack Installation Guide - Page 58
56 Guide d'installation - Dell PowerEdge Rack Enclosure 4820 | Dell PowerEdge 2420 Rack Installation Guide - Page 59
Couvercle avant inversion, 41 retrait, 36, 38 O Outils et fournitures, 36 P Panneaux latéraux retrait, 40 pieds de mise de niveau, 47 Portes retrait, 36 R Rack, pieds stabilisateurs, 35, 49 Routage des câbles, 52 Index 57 - Dell PowerEdge Rack Enclosure 4820 | Dell PowerEdge 2420 Rack Installation Guide - Page 60
58 Index - Dell PowerEdge Rack Enclosure 4820 | Dell PowerEdge 2420 Rack Installation Guide - Page 61
Dell™ PowerEdge™ 2420 Installationsanleitung - Dell PowerEdge Rack Enclosure 4820 | Dell PowerEdge 2420 Rack Installation Guide - Page 62
ältigung oder Wiedergabe dieser Materialien in jeglicher Weise ohne vorherige schriftliche Genehmigung von Dell Inc. ist strengstens untersagt. Dell, das DELL Logo und PowerEdge sind Marken von Dell Inc. Alle anderen in dieser Dokumentation genannten Marken und Handelsbezeichnungen sind Eigentum der - Dell PowerEdge Rack Enclosure 4820 | Dell PowerEdge 2420 Rack Installation Guide - Page 63
Inhalt Sicherheitshinweise 63 SICHERHEIT: Systeme im Rack montieren . . . . . 63 Installationsanleitung 64 Rackanforderungen 64 Rackinstallation 64 Bevor Sie beginnen 64 Ablauf der Installation 65 Empfohlene Werkzeuge und Zubehör 66 Entfernen und Wiederanbringen der - Dell PowerEdge Rack Enclosure 4820 | Dell PowerEdge 2420 Rack Installation Guide - Page 64
62 Inhalt - Dell PowerEdge Rack Enclosure 4820 | Dell PowerEdge 2420 Rack Installation Guide - Page 65
für den gelieferten Rackschrank zugelassen. Es liegt in Ihrer Verantwortung, dafür zu sorgen, dass die Installation des Systems in einem anderen Rack allen zutreffenden Standards entspricht. Dell übernimmt keinerlei Haftung und Gewährleistung bezüglich der Kombination des Systems mit einem anderen - Dell PowerEdge Rack Enclosure 4820 | Dell PowerEdge 2420 Rack Installation Guide - Page 66
änke können sehr schwer sein und leicht wegrollen. Die Schränke haben keine Bremsen. Bewegen Sie ein Rack nur mit größter Vorsicht. Fahren Sie die höhenverstellbaren Füße ein, bevor Sie ein Rack bewegen. Vermeiden Sie lange bzw. steile Neigungen, unebene Oberflächen oder Rampen, auf denen Sie die - Dell PowerEdge Rack Enclosure 4820 | Dell PowerEdge 2420 Rack Installation Guide - Page 67
. Sie sollten die Installation sorgfältig vorbereiten und planen, um Verletzungen zu vermeiden. Dies gilt besonders, wenn Systeme weiter oben im Rack installiert werden. WARNUNG: Aus Stabilitätsgründen müssen immer mindestens 23 kg in den unteren drei Einheiten des Rackschranks eingebaut werden - Dell PowerEdge Rack Enclosure 4820 | Dell PowerEdge 2420 Rack Installation Guide - Page 68
in entgegengesetzter Richtung öffnen lässt) • Schlüssel für die Racktüren und Seitenteile (im Rack-Kit enthalten) • 13-mm-Schraubenschlüssel (um das Rack vom Lager zu entfernen) • 17-mm-Schraubenschlüssel (um das Rack vom Lager zu entfernen) Entfernen und Wiederanbringen der Racktüren WARNUNG: Legen - Dell PowerEdge Rack Enclosure 4820 | Dell PowerEdge 2420 Rack Installation Guide - Page 69
4 Scharnierstiftgehäuse 3 Halten Sie den aus dem Scharnierstiftgehäuse gezogenen Scharnierstift weiterhin fest und ziehen Sie die Tür vorsichtig von dem Rack weg, sodass die Tür aus dem Scharniergehäuse gleitet. 4 Lassen Sie den Scharnierstift los. 5 Heben Sie die Tür nach oben an, sodass - Dell PowerEdge Rack Enclosure 4820 | Dell PowerEdge 2420 Rack Installation Guide - Page 70
Scharnierstifte sind so konzipiert, dass sie nicht aus dem Scharniergehäuse gezogen werden können. b Wiederholen Sie Schritt a für das untere Scharnier. c Ziehen Sie die Tür von dem Rack weg. 68 Installationsanleitung - Dell PowerEdge Rack Enclosure 4820 | Dell PowerEdge 2420 Rack Installation Guide - Page 71
Abbildung 1-3. Hintere Türen abnehmen 1 2 3 1 Scharnierstift 3 Scharnierstiftgehäuse 2 Scharniergehäuse WARNUNG: Wegen der Größe und des Gewichts der Tür wird empfohlen, diese nach dem Abnehmen mit der Außenfläche nach oben flach hinzulegen. d Bewahren Sie die Tür mit der Außenfläche nach oben an - Dell PowerEdge Rack Enclosure 4820 | Dell PowerEdge 2420 Rack Installation Guide - Page 72
an der Beschichtung zu vermeiden. 5 Wiederholen Sie Schritt 1 bis Schritt 4 für das andere Seitenteil. Wiedereinbauen der Seitenteile 1 Setzen Sie das Seitenteil in das Rack. Achten Sie darauf, dass der hintere Haken am Seitenteil in die hintere Öffnung unten am Rackrahmen und der vordere Haken am - Dell PowerEdge Rack Enclosure 4820 | Dell PowerEdge 2420 Rack Installation Guide - Page 73
Sicherungen (2) Umgekehrtes Einbauen der vorderen Tür (optional) ANMERKUNG: Nehmen Sie mithilfe eines 4-mm-Inbusschlüssel die Scharniergehäuse der vorderen Tür vom Rack ab. Montieren Sie die Gehäuse dann so, dass sie ihrer ursprünglichen Einbauposition gegenüberliegen. Unter Beachtung der folgenden - Dell PowerEdge Rack Enclosure 4820 | Dell PowerEdge 2420 Rack Installation Guide - Page 74
3 Drehen Sie das obere Scharniergehäuse um. a Ziehen Sie den Scharnierstift vorsichtig nach oben, sodass Sie auf den Halteclip zugreifen können (siehe Abbildung 1-5). Abbildung 1-5. Scharniere für die vordere Tür abnehmen 1 6 2 5 4 3 1 Scharnierleiste 3 Unteres Scharnier 5 Halteklammer 2 Oberes - Dell PowerEdge Rack Enclosure 4820 | Dell PowerEdge 2420 Rack Installation Guide - Page 75
e Entfernen Sie mit einem 4-mm-Inbusschlüssel die Inbusbolzen, mit deren Hilfe das Scharniergehäuse am Rack befestigt ist. Bewahren Sie die Bolzen zusammen mit dem Scharnierstift, dem Halteclip und der Scharnierfeder auf. f Drehen Sie das Scharniergehäuse um 180 Grad, sodass - Dell PowerEdge Rack Enclosure 4820 | Dell PowerEdge 2420 Rack Installation Guide - Page 76
a Entfernen Sie die Inbusbolzen, mit deren Hilfe das Scharniergehäuse am Rack befestigt ist. Bewahren Sie die Bolzen gut auf. b Drehen Sie das Kreuzschlitzschrauben, mit denen der Verriegelungshebel am vertikalen Rahmenteil des Racks befestigt ist. b Entfernen Sie den Verriegelungshebel und drehen - Dell PowerEdge Rack Enclosure 4820 | Dell PowerEdge 2420 Rack Installation Guide - Page 77
c Bringen Sie den Verriegelungshebel wieder am vertikalen Rahmenteil des anderen Racks an. Richten Sie dabei die Löcher der Verriegelung nach den Löchern am Rahmen aus und bringen Sie die zwei Kreuzschlitzschrauben wieder an. Abbildung 1-8. Verriegelungshebel der - Dell PowerEdge Rack Enclosure 4820 | Dell PowerEdge 2420 Rack Installation Guide - Page 78
8 Drehen Sie die auf der vorderen Tür angebrachte Plakette um. a Öffnen Sie die vordere Tür. b Führen Sie von der Innenseite der Tür aus einen Senkkopfschraubendreher in die Verriegelungskerbe der Plakette ein (siehe Abbildung 1-9). Abbildung 1-9. Plakette auf der vorderen Tür umdrehen 1 2 5 4 1 - Dell PowerEdge Rack Enclosure 4820 | Dell PowerEdge 2420 Rack Installation Guide - Page 79
höhenverstellbaren Füße mehr als 9,5 mm Zwischenraum zwischen dem Boden und den Rollen entsteht, fahren Sie die Füße langsam ein und stellen Sie das Rack an einen anderen Stellplatz, an dem die höhenverstellbaren Füße nur wenig angepasst werden müssen WARNUNG: Verstellen Sie die Füße, bis jeder Fu - Dell PowerEdge Rack Enclosure 4820 | Dell PowerEdge 2420 Rack Installation Guide - Page 80
könnte umkippen, wenn es auf einem unebenen Untergrund steht und das Gewicht des Racks nicht auf den höhenverstellbaren Füßen und Stabilisatoren lastet. ANMERKUNG: Ist das Rack nicht korrekt ausgerichtet, können die Stabilisatoren eventuell nicht angebracht werden. Ohne die Stabilisatoren könnte - Dell PowerEdge Rack Enclosure 4820 | Dell PowerEdge 2420 Rack Installation Guide - Page 81
bevor Sie Komponenten im Rack installieren. Befestigen der vorderen Stabilisatoren 1 Öffnen Sie die vordere Tür. 2 Fassen Sie in das Rack und ziehen Sie alle Stabilisatoren der mitgelieferten Schrauben, Unterlegscheiben und Käfigmuttern am Rack, wie in Abbildung 1-11 dargestellt. Abbildung 1- - Dell PowerEdge Rack Enclosure 4820 | Dell PowerEdge 2420 Rack Installation Guide - Page 82
Rahmenlöchern aus. Abbildung 1-12. Seitliche Stabilisatoren befestigen 1 1 Seitliche Stabilisatoren (2 pro Seite) 4 Befestigen Sie den Stabilisator mithilfe der mitgelieferten Schrauben, Unterlegscheiben und Käfigmuttern am Rack, wie in Abbildung 1-12 dargestellt. 80 Installationsanleitung - Dell PowerEdge Rack Enclosure 4820 | Dell PowerEdge 2420 Rack Installation Guide - Page 83
Anpassen der Rackstützen (optional) Die Stellungen der Rackstützen lassen sich an Systeme mit unterschiedlicher Tiefe anpassen. 1 Öffnen Sie die Türen des Racks. 2 Entfernen Sie die Schrauben von der Unterseite und der Oberseite der Stützen (siehe Abbildung 1-13). 3 Bewegen Sie die Stütze auf die - Dell PowerEdge Rack Enclosure 4820 | Dell PowerEdge 2420 Rack Installation Guide - Page 84
eine einfache Kabelverlegung (siehe Abbildung 1-14). • Durch vier Stromverteilerröhren (PDU-Röhren) in jedem Rackflansch können die Stromkabel zu den im Rack installierten Systemen geführt werden • In die PDU-Röhren können Kabelklemmen montiert werden, um eine verwicklungsfreie Kabelführung zu erm - Dell PowerEdge Rack Enclosure 4820 | Dell PowerEdge 2420 Rack Installation Guide - Page 85
Abbildung 1-14. Optionen für die Kabelführung 1 2 3 4 1 Kabelkanal 3 Kabelklemmen 5 Unterer Kabelausgang 5 2 Oberer Kabelschlitz 4 PDU-Röhren (2 pro Seite) Installationsanleitung 83 - Dell PowerEdge Rack Enclosure 4820 | Dell PowerEdge 2420 Rack Installation Guide - Page 86
(siehe Abbildung 1-15). 3 Schieben Sie die Kabelschlitzabdeckung in die geöffnete Position in Richtung der Vorderseite des Racks. 4 Nachdem Sie die Kabel durch die Oberseite des Racks geführt haben, schließen Sie die ggf. verbleibende Lücke im Kabelschlitz, indem Sie die Kabelschlitzabdeckung zur - Dell PowerEdge Rack Enclosure 4820 | Dell PowerEdge 2420 Rack Installation Guide - Page 87
die hinteren Türen. 2 Ziehen und halten Sie die Stöpsel auf beiden Seiten des Riegels und ziehen Sie den Riegel nach oben und weg vom Rack (siehe Abbildung 1-16). 3 Nachdem Sie die Kabel verlegt haben, setzen Sie die Riegel wieder ein, indem Sie die Laschen auf den Riegeln an den entsprechenden - Dell PowerEdge Rack Enclosure 4820 | Dell PowerEdge 2420 Rack Installation Guide - Page 88
86 Installationsanleitung - Dell PowerEdge Rack Enclosure 4820 | Dell PowerEdge 2420 Rack Installation Guide - Page 89
Stichwortverzeichnis H Hintere Tür entfernen, 68 öffnen, 68 Höhenverstellbare Füße, 77 K Kabel verlegen, 82 Kabel verlegen, 82 R Rack-Stabilisierungsstandfüße, 65, 79 S Seitenteile entfernen, 70 Sicherheitshinweise, 63 T Türen entfernen, 66 V Vordere Tür entfernen, 66, 68 umdrehen, 71 W Werkzeuge - Dell PowerEdge Rack Enclosure 4820 | Dell PowerEdge 2420 Rack Installation Guide - Page 90
88 Stichwortverzeichnis - Dell PowerEdge Rack Enclosure 4820 | Dell PowerEdge 2420 Rack Installation Guide - Page 91
Dell™ PowerEdge™ 2420 - Dell PowerEdge Rack Enclosure 4820 | Dell PowerEdge 2420 Rack Installation Guide - Page 92
2008 Dell Inc Dell Inc Dell、DELL PowerEdge は Dell Inc Dell Inc 2008 年 10 月 P/N T084M Rev. A00 - Dell PowerEdge Rack Enclosure 4820 | Dell PowerEdge 2420 Rack Installation Guide - Page 93
目次 93 93 93 94 94 94 95 95 96 99 100 106 107 107 108 109 110 索引 115 目次 91 - Dell PowerEdge Rack Enclosure 4820 | Dell PowerEdge 2420 Rack Installation Guide - Page 94
92 目次 - Dell PowerEdge Rack Enclosure 4820 | Dell PowerEdge 2420 Rack Installation Guide - Page 95
AC 24 U 24U 93 - Dell PowerEdge Rack Enclosure 4820 | Dell PowerEdge 2420 Rack Installation Guide - Page 96
注意:24U ANSI EIA)規格 ANSI/ EIA-310-D-92 CEA)規格 CEA-310-E IEC)規格 297 DIN)41494 1 94 - Dell PowerEdge Rack Enclosure 4820 | Dell PowerEdge 2420 Rack Installation Guide - Page 97
3 U 23 kg(50 1 2 3 4 5 6 7 2 12 mm 4 mm 13 mm 17 mm 95 - Dell PowerEdge Rack Enclosure 4820 | Dell PowerEdge 2420 Rack Installation Guide - Page 98
1 1-1 2 1-1 1-1 2 1 3 4 1 3 2 4 96 - Dell PowerEdge Rack Enclosure 4820 | Dell PowerEdge 2420 Rack Installation Guide - Page 99
3 4 5 6 1 1-2 図 1-2 1 2 1 2 2) 97 - Dell PowerEdge Rack Enclosure 4820 | Dell PowerEdge 2420 Rack Installation Guide - Page 100
2 a 1-3 b c 図 1-3 1 2 3 1 3 2 d e a から d 98 - Dell PowerEdge Rack Enclosure 4820 | Dell PowerEdge 2420 Rack Installation Guide - Page 101
1 1-4 2 3 4 5 1 4 1 1-4 2 3 99 - Dell PowerEdge Rack Enclosure 4820 | Dell PowerEdge 2420 Rack Installation Guide - Page 102
図 1-4 1 2 3 1 2) 3 2) 2 2) 4 mm 1 96 2 99 3 a 1-5 100 - Dell PowerEdge Rack Enclosure 4820 | Dell PowerEdge 2420 Rack Installation Guide - Page 103
図 1-5 1 6 2 5 4 3 1 3 5 2 4 6 b c d e 4 mm f 180 1-6 101 - Dell PowerEdge Rack Enclosure 4820 | Dell PowerEdge 2420 Rack Installation Guide - Page 104
図 1-6 1 2 3 4 5 7 6 1 3 5 7 2 4 6 g h i j 102 - Dell PowerEdge Rack Enclosure 4820 | Dell PowerEdge 2420 Rack Installation Guide - Page 105
4 a b 180 1-6 c 5 180 1-7 図 1-7 6 96 7 a 2 b 180 c 2 103 - Dell PowerEdge Rack Enclosure 4820 | Dell PowerEdge 2420 Rack Installation Guide - Page 106
図 1-8 1 2 1 2 ネジ 8 a b 1-9 104 - Dell PowerEdge Rack Enclosure 4820 | Dell PowerEdge 2420 Rack Installation Guide - Page 107
図 1-9 1 2 3 5 4 1 3 2) 5 2) 2 4 2) c d e 180 105 - Dell PowerEdge Rack Enclosure 4820 | Dell PowerEdge 2420 Rack Installation Guide - Page 108
f 4 g 4 9.5 mm 9.5 mm 1 2 12 mm 1-10 106 - Dell PowerEdge Rack Enclosure 4820 | Dell PowerEdge 2420 Rack Installation Guide - Page 109
図 1-10 1 2 3 1 3 2 3 1 と 2 4 1 2 3 107 - Dell PowerEdge Rack Enclosure 4820 | Dell PowerEdge 2420 Rack Installation Guide - Page 110
4 5 1-11 図 1-11 1 1 2) 1 2 4 1-12 3 108 - Dell PowerEdge Rack Enclosure 4820 | Dell PowerEdge 2420 Rack Installation Guide - Page 111
図 1-12 1 1 2) 4 1-12 1 2 1-13 3 109 - Dell PowerEdge Rack Enclosure 4820 | Dell PowerEdge 2420 Rack Installation Guide - Page 112
図 1-13 1 2 3 1 ネジ 3 2 24U 1-14 PDU)の 4 • PDU 2 1-14 1-14 110 - Dell PowerEdge Rack Enclosure 4820 | Dell PowerEdge 2420 Rack Installation Guide - Page 113
図 1-14 1 2 3 4 5 1 3 5 2 4 PDU 2) 1 2 1-15 3 111 - Dell PowerEdge Rack Enclosure 4820 | Dell PowerEdge 2420 Rack Installation Guide - Page 114
4 図 1-15 1 2 1 2 2) 1 2 1-16 3 112 - Dell PowerEdge Rack Enclosure 4820 | Dell PowerEdge 2420 Rack Installation Guide - Page 115
図 1-16 1 1 2) 2 2 2) 113 - Dell PowerEdge Rack Enclosure 4820 | Dell PowerEdge 2420 Rack Installation Guide - Page 116
114 - Dell PowerEdge Rack Enclosure 4820 | Dell PowerEdge 2420 Rack Installation Guide - Page 117
索引 あ 93 け 110 110 こ 95 さ 99 す 106 せ 96-97 反転 , 100 と 96 は 97 98 ら 95, 107 索引 115 - Dell PowerEdge Rack Enclosure 4820 | Dell PowerEdge 2420 Rack Installation Guide - Page 118
116 索引 - Dell PowerEdge Rack Enclosure 4820 | Dell PowerEdge 2420 Rack Installation Guide - Page 119
Dell™ PowerEdge™ 2420 Guía de instalación - Dell PowerEdge Rack Enclosure 4820 | Dell PowerEdge 2420 Rack Installation Guide - Page 120
estrictamente prohibida la reproducción de este material en cualquier forma sin la autorización por escrito de Dell Inc. Dell, el logotipo de DELL y PowerEdge son marcas comerciales de Dell Inc. Otras marcas y otros nombres comerciales pueden utilizarse en este documento para hacer referencia a las - Dell PowerEdge Rack Enclosure 4820 | Dell PowerEdge 2420 Rack Installation Guide - Page 121
colocación de los paneles laterales 128 Inversión de la puerta frontal (opcional 129 Fijación de los pies niveladores del rack. . . . . . 135 Instalación de los pies estabilizadores del rack 137 Ajuste de los postes del rack (opcional 139 Colocación de los cables 140 Índice 145 Contenido 119 - Dell PowerEdge Rack Enclosure 4820 | Dell PowerEdge 2420 Rack Installation Guide - Page 122
120 Contenido - Dell PowerEdge Rack Enclosure 4820 | Dell PowerEdge 2420 Rack Installation Guide - Page 123
instalación del equipo en cualquier otro rack cumpla los estándares correspondientes. Dell declina toda responsabilidad y garantía relacionadas con las combinaciones del equipo con cualquier otro rack. • Antes de instalar el equipo en un rack, instale todos los estabilizadores frontales y laterales - Dell PowerEdge Rack Enclosure 4820 | Dell PowerEdge 2420 Rack Installation Guide - Page 124
se mueven con facilidad gracias a las ruedas. El armario no tiene frenos. Tenga mucho cuidado al mover el armario rack. Cuando traslade el armario rack, pliegue primero los pies niveladores. Evite inclinaciones largas o pronunciadas, superficies irregulares o rampas para evitar perder el control del - Dell PowerEdge Rack Enclosure 4820 | Dell PowerEdge 2420 Rack Installation Guide - Page 125
personales. Por lo tanto, instale siempre los pies estabilizadores antes de instalar los componentes en el rack. ADVERTENCIA: Una vez que haya instalado sistemas en un rack, no extraiga nunca del rack más de un sistema a la vez por sus ensamblajes deslizantes. El peso de más de un sistema extendido - Dell PowerEdge Rack Enclosure 4820 | Dell PowerEdge 2420 Rack Installation Guide - Page 126
el material y las herramientas siguientes para instalar el rack: • Destornillador Phillips del n.º 2 • Destornillador rack (se incluyen en el kit de rack) • Llave de 13 mm (para extraer el rack del palé) • Llave de 17 mm (para extraer el rack del palé) Extracción y colocación de las puertas del rack - Dell PowerEdge Rack Enclosure 4820 | Dell PowerEdge 2420 Rack Installation Guide - Page 127
puerta 3 Herraje móvil 2 Pasador 4 Herraje fijo 3 Mientras mantiene el pasador fuera del herraje fijo de la puerta, separe ligeramente la puerta del rack para que salga del herraje móvil. 4 Libere el pasador. 5 Levante la puerta para que salga del poste del pernio inferior. ADVERTENCIA: Debido al - Dell PowerEdge Rack Enclosure 4820 | Dell PowerEdge 2420 Rack Installation Guide - Page 128
han diseñado para evitar que se extraigan del herraje móvil. b Repita el paso a para la bisagra inferior. c Tire de la puerta para extraerla del rack. 126 Guía de instalación - Dell PowerEdge Rack Enclosure 4820 | Dell PowerEdge 2420 Rack Installation Guide - Page 129
Ilustración 1-3. Extracción de las puertas posteriores 1 2 3 1 Pasador 3 Herraje fijo 2 Herraje móvil ADVERTENCIA: Debido al tamaño y al peso de la puerta, se recomienda colocar la puerta que ha extraído en posición horizontal con la superficie exterior boca arriba. d Coloque la puerta en un - Dell PowerEdge Rack Enclosure 4820 | Dell PowerEdge 2420 Rack Installation Guide - Page 130
no es obligatorio extraer los paneles laterales para instalar sistemas en un rack, el hecho de que los laterales estén abiertos facilita la instalaci salgan de los orificios situados en la parte inferior del armazón del rack. 4 Coloque el panel en un lugar seguro con la superficie exterior boca - Dell PowerEdge Rack Enclosure 4820 | Dell PowerEdge 2420 Rack Installation Guide - Page 131
del panel (2) 3 Panel lateral (2) 2 Pestillo (2) Inversión de la puerta frontal (opcional) NOTA: Utilice una llave Allen de 4 mm para extraer del rack los herrajes móviles de la puerta frontal y para volver a instalarlos en el lado opuesto a como estaban originalmente. Para invertir la direcci - Dell PowerEdge Rack Enclosure 4820 | Dell PowerEdge 2420 Rack Installation Guide - Page 132
gancho de retención y el muelle en un lugar seguro. e Con la llave Allen de 4 mm, extraiga los pernos Allen que fijan el herraje móvil al rack y colóquelos en el mismo lugar que el pasador, el gancho de retención y el muelle del herraje. f Gire el herraje móvil 180 grados para que - Dell PowerEdge Rack Enclosure 4820 | Dell PowerEdge 2420 Rack Installation Guide - Page 133
retención 6 Herraje móvil inferior g Localice los orificios de los pernos superiores situados en el lateral derecho del rack y apriete el herraje móvil en el lateral derecho del rack con los pernos Allen. h Inserte el muelle entre los orificios del pasador superior e inferior situados en el herraje - Dell PowerEdge Rack Enclosure 4820 | Dell PowerEdge 2420 Rack Installation Guide - Page 134
(vea la ilustración 1-6). c Localice los orificios de los pernos inferiores situados en el lateral derecho del rack y utilice los pernos Allen para apretar el herraje móvil en el lateral derecho del rack. 5 Gire la puerta frontal 180 grados para que los herrajes fijos queden en el lado derecho (vea - Dell PowerEdge Rack Enclosure 4820 | Dell PowerEdge 2420 Rack Installation Guide - Page 135
. b Extraiga el cerradero y gírelo 180 grados. c Vuelva a instalar el cerradero en la otra jamba frontal del rack; para ello, alinee los orificios del cerradero con los orificios de la jamba y, a continuación, vuelva a insertar los dos tornillos Phillips. Ilustración 1-8. Inversión del cerradero de - Dell PowerEdge Rack Enclosure 4820 | Dell PowerEdge 2420 Rack Installation Guide - Page 136
8 Invierta la placa de identificación de la puerta frontal. a Abra la puerta frontal. b Desde el interior de la puerta, inserte un destornillador de cabeza plana en la lengüeta de liberación de la placa de identificación (vea la ilustración 1-9). Ilustración 1-9. Inversión de la placa de - Dell PowerEdge Rack Enclosure 4820 | Dell PowerEdge 2420 Rack Installation Guide - Page 137
siga estas pautas. ADVERTENCIA: Cuando ajuste los pies niveladores, asegúrese de que la distancia entre el suelo y las ruedas de cada esquina del rack no sea superior a 9,5 mm. Si deja más de 9,5 mm de espacio libre entre el suelo y las ruedas cuando ajuste los pies niveladores, contraiga lentamente - Dell PowerEdge Rack Enclosure 4820 | Dell PowerEdge 2420 Rack Installation Guide - Page 138
los pies niveladores y estabilizadores no aguantan el peso del rack. NOTA: Si el rack no está nivelado correctamente, es posible que no pueda instalar los pies estabilizadores, que son necesarios para evitar que el rack vuelque. 1 Con un destornillador, baje el pie nivelador hasta que quede - Dell PowerEdge Rack Enclosure 4820 | Dell PowerEdge 2420 Rack Installation Guide - Page 139
lo que puede provocar lesiones personales. Por lo tanto, instale siempre los pies estabilizadores antes de instalar los componentes en el rack. Instalación de los pies estabilizadores frontales 1 Abra la puerta frontal. 2 Tire firmemente de los estabilizadores para separarlos del armazón. 3 Extraiga - Dell PowerEdge Rack Enclosure 4820 | Dell PowerEdge 2420 Rack Installation Guide - Page 140
lateral. 2 Localice los cuatro orificios en el lateral del riel inferior del armazón del rack (vea la ilustración 1-12). 3 Coloque los pies estabilizadores contra la base del armazón del rack y alinee los orificios con los orificios correspondientes del armazón. Ilustración 1-12. Instalación de los - Dell PowerEdge Rack Enclosure 4820 | Dell PowerEdge 2420 Rack Installation Guide - Page 141
en los orificios correspondientes. Ilustración 1-13. Ajuste de los postes del rack 1 2 3 1 Tornillos 3 Poste frontal del rack 2 Poste posterior del rack NOTA: Ahora puede instalar los sistemas en el rack. Utilice las etiquetas blancas numeradas situadas en la parte frontal y posterior de - Dell PowerEdge Rack Enclosure 4820 | Dell PowerEdge 2420 Rack Installation Guide - Page 142
en los canales PDU para que los cables queden fuera del paso y para evitar que se enreden. En una configuración estándar, puede sacar del rack los cables de dos modos: • Mediante la salida de cables situada en la parte inferior de las puertas posteriores (vea la ilustración 1-14) • Mediante la - Dell PowerEdge Rack Enclosure 4820 | Dell PowerEdge 2420 Rack Installation Guide - Page 143
2 Ranura superior para cables 4 Canales PDU (2 por lateral) Apertura y cierre de la ranura superior para cables La ranura superior para cables del rack se puede utilizar para colocar los cables hasta una bandeja. 1 Abra las puertas posteriores. 2 Afloje las palomillas que se encuentran debajo de la - Dell PowerEdge Rack Enclosure 4820 | Dell PowerEdge 2420 Rack Installation Guide - Page 144
, cierre los huecos que queden en la ranura para cables; para ello, tire de la cubierta de la ranura hacia la parte posterior del rack. Utilice las palomillas para fijar la cubierta. Ilustración 1-15. Apertura y cierre de la ranura para cables 1 2 1 Cubierta de la ranura para cables 2 Palomillas - Dell PowerEdge Rack Enclosure 4820 | Dell PowerEdge 2420 Rack Installation Guide - Page 145
ngalos en esa posición y, a continuación, levante la barra y extráigala del rack (vea la ilustración 1-16). 3 Tras pasar los cables, vuelva a colocar las alinee las lengüetas de las barras con los orificios correspondientes del rack y presione los fiadores hacia abajo hasta que queden asentados en su - Dell PowerEdge Rack Enclosure 4820 | Dell PowerEdge 2420 Rack Installation Guide - Page 146
144 Guía de instalación - Dell PowerEdge Rack Enclosure 4820 | Dell PowerEdge 2420 Rack Installation Guide - Page 147
extraer, 124-125 invertir, 129 puerta posterior abrir, 126 extraer, 126 puertas extraer, 124 I instrucciones de seguridad, 121 P paneles laterales extraer, 128 pies estabilizadores del rack, 123, 137 Índice 145 - Dell PowerEdge Rack Enclosure 4820 | Dell PowerEdge 2420 Rack Installation Guide - Page 148
146 Índice
-
 1
1 -
 2
2 -
 3
3 -
 4
4 -
 5
5 -
 6
6 -
 7
7 -
8
-
9
-
10
-
11
-
12
-
13
-
14
-
15
-
16
-
17
-
18
-
19
-
20
-
21
-
22
-
23
-
24
-
25
-
26
-
27
-
28
-
29
-
30
-
31
-
32
-
33
-
34
-
35
-
36
-
37
-
38
-
39
-
40
-
41
-
42
-
43
-
44
-
45
-
46
-
47
-
48
-
49
-
50
-
51
-
52
-
53
-
54
-
55
-
56
-
57
-
58
-
59
-
60
-
61
-
62
-
63
-
64
-
65
-
66
-
67
-
68
-
69
-
70
-
71
-
72
-
73
-
74
-
75
-
76
-
77
-
78
-
79
-
80
-
81
-
82
-
83
-
84
-
85
-
86
-
87
-
88
-
89
-
90
-
91
-
92
-
93
-
94
-
95
-
96
-
97
-
98
-
99
-
100
-
101
-
102
-
103
-
104
-
105
-
106
-
107
-
108
-
109
-
110
-
111
-
112
-
113
-
114
-
115
-
116
-
117
-
118
-
119
-
120
-
121
-
122
-
123
-
124
-
125
-
126
-
127
-
128
-
129
-
130
-
131
-
132
-
133
-
134
-
135
-
136
-
137
-
138
-
139
-
140
-
141
-
142
-
143
-
144
-
145
-
146
-
147
-
148
 |
 |

Dell™ PowerEdge™ 2420
Installation Guide
Guide d’installation
Installationsanleitung
設置ガイド
Guía de instalación