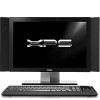
Dell XPS One 20 XPS One Service Manual
Dell XPS One 20 Manual
 |
View all Dell XPS One 20 manuals
Add to My Manuals
Save this manual to your list of manuals |
Dell XPS One 20 manual content summary:
- Dell XPS One 20 | XPS One Service Manual - Page 1
XPS One™ Service Manual Model MTG24 www.dell.com | support.dell.com - Dell XPS One 20 | XPS One Service Manual - Page 2
notice. © 2008 Dell Inc. All rights reserved. Reproduction of these materials in any manner whatsoever without the written permission of Dell Inc. is strictly forbidden. Trademarks used in this text: Dell, the DELL logo, and XPS One are trademarks of Dell Inc.; Microsoft and Windows are either - Dell XPS One 20 | XPS One Service Manual - Page 3
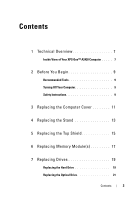
Your XPS One™ A2420 Computer . . . . . 7 2 Before You Begin 9 Recommended Tools 9 Turning Off Your Computer 9 Safety Instructions 9 3 Replacing the Computer Cover 11 4 Replacing the Stand 13 5 Replacing the Top Shield 15 6 Replacing Memory Module(s 17 7 Replacing Drives 19 Replacing - Dell XPS One 20 | XPS One Service Manual - Page 4
25 Replacing the WLAN Card 25 Replacing the TV Tuner Card 26 Replacing the Graphics Card 28 Replacing the Internal Card With Bluetooth® Wireless Technology 30 Replacing the RF Module 31 9 Replacing the Processor Heat Sink Assembly 33 10 Replacing the Processor 37 11 Replacing the Battery - Dell XPS One 20 | XPS One Service Manual - Page 5
Clearing CMOS Settings 49 Contents 5 - Dell XPS One 20 | XPS One Service Manual - Page 6
6 Contents - Dell XPS One 20 | XPS One Service Manual - Page 7
Homepage at www.dell.com/regulatory_compliance. Inside View of Your XPS One™ A2420 Computer 1 2 3 8 7 6 5 1 optical drive 3 hard drive 5 memory modules 7 RF module 4 2 internal card with Bluetooth® wireless technology 4 WLAN card 6 processor heat sink assembly 8 graphics card heat sink Technical - Dell XPS One 20 | XPS One Service Manual - Page 8
8 Technical Overview - Dell XPS One 20 | XPS One Service Manual - Page 9
you shut down your operating system, press and hold the power button for about 4 seconds to turn them off. Safety Instructions Use the following safety guidelines to help protect your computer , see the Regulatory Compliance Homepage at www.dell.com/regulatory_compliance. Before You Begin 9 - Dell XPS One 20 | XPS One Service Manual - Page 10
service technician are authorized to remove the computer cover and access any of the components inside the computer. See the safety instructions power button while the system is unplugged to ground the system board. NOTICE: Before touching anything inside your computer, ground yourself by touching - Dell XPS One 20 | XPS One Service Manual - Page 11
information, see the Regulatory Compliance Homepage at www.dell.com/regulatory_compliance. CAUTION: To guard against electrical shock electrical outlet before removing the cover. NOTICE: Ensure that sufficient space exists to support the system with the cover removed-at least 30 cm (1 ft.) of desk - Dell XPS One 20 | XPS One Service Manual - Page 12
. 2 1 1 captive screws (2) 2 computer cover 5 To replace the computer cover, ensure that all the cables are connected and that no tools or extra parts (including screws) are left inside the computer. 6 Pivot the cover down and into position. 7 Push the cover until it clicks into place. 8 Tighten - Dell XPS One 20 | XPS One Service Manual - Page 13
safety information that shipped with your computer. For additional safety best practices information, see the Regulatory Compliance Homepage at www.dell.com/regulatory_compliance. 1 Follow the procedures in "Before You Begin" on page 9. 2 Remove the computer cover (see "Replacing the Computer Cover - Dell XPS One 20 | XPS One Service Manual - Page 14
4 To replace the stand, align the screw holes on the stand with the screw holes on the chassis. 5 Replace the seven screws that secure the stand. 6 Replace the computer cover (see "Replacing the Computer Cover" on page 11). 14 Replacing the Stand - Dell XPS One 20 | XPS One Service Manual - Page 15
with your computer. For additional safety best practices information, see the Regulatory Compliance Homepage at www.dell.com/regulatory_compliance. CAUTION: Ensure that you disconnect the power cable before removing the top shield. 1 Follow the procedures in "Before You Begin" on page 9. 2 Remove - Dell XPS One 20 | XPS One Service Manual - Page 16
16 Replacing the Top Shield - Dell XPS One 20 | XPS One Service Manual - Page 17
see the Regulatory Compliance Homepage at www.dell.com/regulatory_compliance. 1 Follow the procedures in "Before You Begin" on page 9. 2 Remove the computer cover (see "Replacing the Computer Cover" on page 11). 3 Push apart the securing clips on the memory module connector until the module pops up - Dell XPS One 20 | XPS One Service Manual - Page 18
that memory size has changed, press to continue. 9 Log on to your computer. 10 Right-click the My Computer icon on your Microsoft®Windows® desktop and click Properties. 11 Click the General tab. 12 To verify that the memory is installed correctly, check the amount of memory (RAM) listed. 18 - Dell XPS One 20 | XPS One Service Manual - Page 19
.dell.com/regulatory_compliance. Replacing the Hard Drive 1 Follow the procedures in "Before You Begin" on page 9. 2 Remove the computer cover (see "Replacing the Computer Cover" on page 11). 3 Remove the three screws securing the hard drive carrier to the chassis. 4 Disconnect the hard drive power - Dell XPS One 20 | XPS One Service Manual - Page 20
5 Press the release tab to disconnect the hard drive data cable and lift the hard drive carrier out of the chassis. 1 3 2 1 screws (3) 3 hard drive power cable 2 hard drive data cable 20 Replacing Drives - Dell XPS One 20 | XPS One Service Manual - Page 21
8 Align the screws holes on the hard drive with the screw holes on the hard drive carrier. 9 Replace the four screws that secures the hard drive to the hard drive carrier. 10 Connect the hard drive data cable and power cable. 11 Align the screw holes on the hard drive carrier with the screw holes on - Dell XPS One 20 | XPS One Service Manual - Page 22
4 3 2 1 optical drive lighting cable 3 optical drive data cable connector 2 optical drive data cable 4 screws (3) 6 Remove the four screws securing the optical drive to the optical drive carrier. 7 Remove the two screws securing the optical drive card to the optical drive. 22 Replacing Drives - Dell XPS One 20 | XPS One Service Manual - Page 23
1 optical drive card 2 optical drive carrier 9 To install a new optical drive, prepare the optical drive for installation and check the documentation that accompanied the drive to verify that the drive is configured for your computer. 10 Gently slide the drive into the optical drive carrier until - Dell XPS One 20 | XPS One Service Manual - Page 24
24 Replacing Drives - Dell XPS One 20 | XPS One Service Manual - Page 25
that shipped with your computer. For additional safety best practices information, see the Regulatory Compliance Homepage at www.dell.com/regulatory_compliance. Replacing the WLAN Card 1 Follow the procedures in "Before You Begin" on page 9. 2 Remove the computer cover (see "Replacing the Computer - Dell XPS One 20 | XPS One Service Manual - Page 26
the white cable to the connector marked with a white triangle. 10 Replace the top shield (see "Replacing the Top Shield" on page 15). 11 Replace the computer cover (see "Replacing the Computer Cover" on page 11). Replacing the TV Tuner Card 1 Follow the procedures in "Before You Begin" on page - Dell XPS One 20 | XPS One Service Manual - Page 27
at a 45-degree angle into the system board connector. 7 Replace the two screws that secure the TV tuner card and connect the TV tuner cable to the connector on the card. 8 Replace the stand (see "Replacing the Stand" on page 13). 9 Replace the computer cover (see "Replacing the Computer Cover" on - Dell XPS One 20 | XPS One Service Manual - Page 28
on page 13). 4 Use the marked sequence on the graphics card heat sink, to loosen the six captive screws securing the graphics card heat sink. NOTICE: To ensure maximum cooling for the graphics card, do not touch the heat transfer areas on the graphics card heat sink. The oils in your skin can reduce - Dell XPS One 20 | XPS One Service Manual - Page 29
two screws that secures the graphics card. NOTICE: To prevent damage to the graphics card, follow the marked sequence on the graphics card heat sink to tighten the captive screws. 9 Align and tighten the six captive screws that secure the graphics card heat sink. 10 Replace the stand (see "Replacing - Dell XPS One 20 | XPS One Service Manual - Page 30
practices information, see the Regulatory Compliance Homepage at www.dell.com/regulatory_compliance. 1 Follow the procedures in "Before You Begin" on page 9. 2 Remove the computer cover (see "Replacing the Computer Cover" on page 11). 3 Disconnect the card cable and remove the screw securing the - Dell XPS One 20 | XPS One Service Manual - Page 31
with your computer. For additional safety best practices information, see the Regulatory Compliance Homepage at www.dell.com/regulatory_compliance. 1 Follow the procedures in "Before You Begin" on page 9. 2 Remove on the chassis. 6 Replace the screw that secures the RF module. Replacing Cards 31 - Dell XPS One 20 | XPS One Service Manual - Page 32
7 Replace the computer cover (see "Replacing the Computer Cover" on page 11). 32 Replacing Cards - Dell XPS One 20 | XPS One Service Manual - Page 33
Compliance Homepage at www.dell.com/regulatory_compliance. NOTICE: your system board. For technical service information, see the Setup Guide. 1 Follow the procedures in sufficient time to cool before you touch it. 4 Disconnect the processor fan cable from the CPU FAN connector on the system - Dell XPS One 20 | XPS One Service Manual - Page 34
heat sink assembly. NOTICE: To prevent damage to the processor follow the marked sequence, this ensures equal pressure on the processor at all times. 10 Use the marked sequence on the processor heat sink to tighten the four captive screws at the lower end of the processor heat sink assembly. - Dell XPS One 20 | XPS One Service Manual - Page 35
12 Replace the top shield (see "Replacing the Top Shield" on page 15). 13 Replace the computer cover (see "Replacing the Computer Cover" on page 11). Replacing the Processor Heat Sink Assembly 35 - Dell XPS One 20 | XPS One Service Manual - Page 36
36 Replacing the Processor Heat Sink Assembly - Dell XPS One 20 | XPS One Service Manual - Page 37
dell.com/regulatory_compliance. NOTICE: Do not perform the following steps unless you are familiar with hardware removal and replacement. Performing these steps incorrectly could damage your system board. For technical service information, see the Setup Guide to cool before you touch it. 4 Remove the - Dell XPS One 20 | XPS One Service Manual - Page 38
processor 4 release lever NOTICE: When removing or replacing the processor, do not touch any of the pins inside the socket or allow any objects to fall on the new processor. NOTICE: Ground yourself by touching an unpainted metal surface on the back of the computer. 8 Unpack the new processor - Dell XPS One 20 | XPS One Service Manual - Page 39
not use excessive force when you install the processor. Be careful not to touch or bend the pins on the system board. NOTICE: You must position processor correctly in the socket to avoid permanent damage to the processor. 10 Orient the front and rear alignment notches on the processor with the front - Dell XPS One 20 | XPS One Service Manual - Page 40
Replace the top shield (see "Replacing the Top Shield" on page 15). 19 Replace the computer cover (see "Replacing the Computer Cover" on page 11). 20 Connect your computer and all attached devices to electrical outlets, and then turn them on. 40 Replacing the Processor - Dell XPS One 20 | XPS One Service Manual - Page 41
instructions. 1 Record all the screens in system setup (see "System Setup" on page 43) so that you can restore the correct settings in step 10. system board near the memory modules. NOTICE: If you pry the battery out of its socket with a blunt object, be careful not to touch the system board with - Dell XPS One 20 | XPS One Service Manual - Page 42
. 8 Replace the computer cover (see "Replacing the Computer Cover" on page 11). 9 Connect your computer and devices to electrical outlets, and then turn them on. 10 Enter system setup (see "System Setup" on page 43) and restore the settings you recorded in step 1. 42 Replacing the Battery - Dell XPS One 20 | XPS One Service Manual - Page 43
of memory or set the type of hard drive installed. Before you use System Setup, it is recommended that you write down the system setup screen information for the Microsoft® Windows® desktop, then shut down your computer and try again. System Setup Screens The System Setup screen displays current or - Dell XPS One 20 | XPS One Service Manual - Page 44
options that define the hardware installed on you computer. Options List - Appears on the left side of the System Setup window. The field lists features that define the configuration of your computer, including installed hardware, power conservation, and security features. Scroll up and down the - Dell XPS One 20 | XPS One Service Manual - Page 45
the integrated hard drive errors to be reported during system startup. The factory default setting is Disabled. Displays the BIOS version number and date, system model name and the service tag of the computer. Indicates amount of installed memory, usable memory, memory speed, memory channel mode - Dell XPS One 20 | XPS One Service Manual - Page 46
The factory default setting is Off. Auto Power On Allows power state it was in before the power failure. Device Detect Allows you to enable or disable the device error report. Error Boot Boot Device Priority Sets the boot priority among the available devices. Hard Disk Boot Sets the hard drive - Dell XPS One 20 | XPS One Service Manual - Page 47
to change the boot sequence for the bootable devices installed on your computer. Option Settings • Hard Drive - The computer attempts to boot from the primary hard drive. If no operating system is on the drive, the computer attempts to boot from the next bootable device in the boot sequence. • CD - Dell XPS One 20 | XPS One Service Manual - Page 48
Dell Diagnostics from the Driver and Utilities media and then from the hard drive when the diagnostic tests are complete. You can also use this feature to boot your computer to a USB device such as a memory key, or optical drive the Microsoft Windows desktop, through the list of devices. 4 Press the - Dell XPS One 20 | XPS One Service Manual - Page 49
any of the procedures in this section, follow the safety instructions that shipped with your computer. CAUTION: The computer must 11). 8 Turn on the computer. 9 The message CMOS settings wrong appears on the screen. Restart the computer. The message CMOS checksum error. Press F1 to run setup. Press - Dell XPS One 20 | XPS One Service Manual - Page 50
50 System Setup
-
 1
1 -
 2
2 -
 3
3 -
 4
4 -
 5
5 -
 6
6 -
 7
7 -
8
-
9
-
10
-
11
-
12
-
13
-
14
-
15
-
16
-
17
-
18
-
19
-
20
-
21
-
22
-
23
-
24
-
25
-
26
-
27
-
28
-
29
-
30
-
31
-
32
-
33
-
34
-
35
-
36
-
37
-
38
-
39
-
40
-
41
-
42
-
43
-
44
-
45
-
46
-
47
-
48
-
49
-
50
 |
 |

www.dell.com | support.dell.com
XPS One™ Service Manual
Model MTG24