Dirt Devil M085807HD Revision 1 (7/2009)
Dirt Devil M085807HD Manual
 |
View all Dirt Devil M085807HD manuals
Add to My Manuals
Save this manual to your list of manuals |
Dirt Devil M085807HD manual content summary:
- Dirt Devil M085807HD | Revision 1 (7/2009) - Page 1
1-113354-000 WARNING: Cleaner assembly may include small parts. Small parts can present a choking hazard. For quick reference, please record your vacuum information below. Model #: Mfg. Code: (Mfg. ©2009 Tous droits réservés 1-113354-000 7/09 OWNER'S MANUAL Operating and Servicing Instructions - Dirt Devil M085807HD | Revision 1 (7/2009) - Page 2
INSTRUCTIONS. • BRING CLEANER TO UPRIGHT POSITION WHEN USING THE HOSE AND ATTACHMENTS. • DO NOT LEAVE CLEANER UNATTENDED WHEN PLUGGED IN. • REGULARLY CHECK THE FILTERS when not in use and before servicing. • Do not use outdoors Use only as described in this manual. Use only manufacturer's recom- - Dirt Devil M085807HD | Revision 1 (7/2009) - Page 3
Tool™ (Turbo Tool™ is optional on some mod- els). SAVE THESE INSTRUCTIONS WARNING: To reduce the risk of electric shock, this appliance has a and filters for any blockage. Empty the dirt container and clean filters. After approximately 30 minutes the motor will have cooled and the vacuum will - Dirt Devil M085807HD | Revision 1 (7/2009) - Page 4
that you are equally satisfied with their quality and performance. Thank you for your support of Dirt Devil® products. Visit our website at www.dirtdevil.com TABLE OF CONTENTS Safety Instructions Page 2, 3 Feature Descriptions Page 5 How to Assemble Page 6 Body to Nozzle Assembly Page 6 Tool - Dirt Devil M085807HD | Revision 1 (7/2009) - Page 5
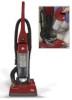
only 9 FRONT VIEW 1. Handle 2. Power Brush* 3. Dirt Container Release Latch 4. Dirt Container Lid 5. See Through Dirt Container 6. Dirt Container Filter 7. Headlight 8. Carpet Height Adjust Knob 9. Bumper 10. Clear Dirt Window 11. Lower Hose BACK VIEW 12. Cord Guide 13. Hose 14. Dust Brush 15 - Dirt Devil M085807HD | Revision 1 (7/2009) - Page 6
(illustration). COMMENT ASSEMBLER LE SUPPORT À ACCESSOIRES 1. Alignez les trous du 2. Insérez deux (2) vis dans support à accessoires les trous et the cleaner, above the on/off switch. Push back dirt window flap. Align tabs on clear dirt passage window with the slots on the lower hose cuff. - Dirt Devil M085807HD | Revision 1 (7/2009) - Page 7
tool caddy. CORD RELEASE 1. Use the cord guides to store the cord out of the way while vacuuming. 7 Plug cord into electrical outlet. Turn cleaner TOOL STORAGE Assemble dirt container lid to the dirt container. ON/OFF PEDAL 1. Insérez la petite extrémité du tuyau dans le support à accessoires du - Dirt Devil M085807HD | Revision 1 (7/2009) - Page 8
droite et vers l'extérieur. Retirez le tuyau du support à accessoires. Insérez le tuyau dans le tuyau WAND 1. Slide the tool hose into the lower dirt hose with the notch facing up. Push together and Keep hair, loose clothing, fingers, and all parts of body away from brush area while cleaner - Dirt Devil M085807HD | Revision 1 (7/2009) - Page 9
dessous en ce qui concerne les instructions sur le nettoyage du filtre. dirt container and grasp the top of filter. 6. 1. 2. 3. DIRT CONTAINER & FILTRATION: REMOVAL & REPLACEMENT WARNING: TO REDUCE THE RISK OF INJURY FROM MOVING PARTS - UNPLUG BEFORE SERVICING. For filter replacement (Part - Dirt Devil M085807HD | Revision 1 (7/2009) - Page 10
that the brushroll end caps are in the correct orientation (6a inset). Rotate brushroll manually to make sure belt is properly aligned. Reattach nozzle guard. 10 Secure by aligning WARNING: TO REDUCE THE RISK OF INJURY FROM MOVING PARTS - UNPLUG CLEANER BEFORE CHANGING BELT OR BRUSHROLL. - Dirt Devil M085807HD | Revision 1 (7/2009) - Page 11
WARNING: TO REDUCE THE RISK OF INJURY FROM MOVING PARTS - UNPLUG BEFORE SERVICING. IF OBSTRUCTION DEVELOPS DURING FLOOR CLEANING: 1. If end. If quarter comes out, there is NO blockage. Depress latch to remove dirt container from cleaner. Remove the two (2) screws located on the inside of - Dirt Devil M085807HD | Revision 1 (7/2009) - Page 12
. 2. Blown fuse or tripped breaker. 2. Check fuse or breaker in home. Replace PROBLEM Cleaner won't run 1. Power cord not firmly 1. Plug unit in firmly. POSSIBLE REASON POSSIBLE SOLUTION WARNING: TO REDUCE RISK OF PERSONAL INJURY - UNPLUG CLEANER BEFORE SERVICING TROUBLESHOOTING GUIDE 12 - Dirt Devil M085807HD | Revision 1 (7/2009) - Page 13
Pág. E7. 4. El Perma Filter® no está 4. Revise la forma de retiro y reemplazo instalado completamente. del Perma Filter® - Pág. E9. Los accesorios información u ordene partes de repuesto. (El número de modelo aparece en el fondo de la aspiradora.) E12 MANUAL DEL PROPIETARIO Instrucciones de - Dirt Devil M085807HD | Revision 1 (7/2009) - Page 14
niño o cerca de niños. • Úsela solamente como se indica en este manual. Use solamente los accesorios recomendados por el fabricante. • No la utilice con el reemplazo, llame al 1-800-321-1134 o a su tienda de partes automotrices. HERRAMIENTA NECESARIA: DESTORNILLADOR PLANO 1. 1a. 2. 3. Oprima el - Dirt Devil M085807HD | Revision 1 (7/2009) - Page 15
ADVERTENCIA: PARA REDUCIR EL RIESGO DE LESIONES CAUSADAS POR LAS PARTES MÓVILES, DESCONECTE LA ASPIRADORA ANTES DE CAMBIAR LA BANDA O en la orientación correcta (inserción 6a). Gire el cepillo giratorio de forma manual para asegurarse que la banda esté alineada apropiadamente. Vuelva a colocar la - Dirt Devil M085807HD | Revision 1 (7/2009) - Page 16
calidad y rendimiento. Gracias por su apoyo a los productos Dirt Devil®. Visite nuestro sitio Web en www.dirtdevil.com ÍNDICE Instrucciones pedir asistencia en los EE.UU. y Canadá: 1-800-321-1134. Use solamente partes de repuesto genuinas Royal®. La garantía no incluye el desgaste anormal, daño como - Dirt Devil M085807HD | Revision 1 (7/2009) - Page 17
del área del cepillo el pelo, la ropa suelta, los dedos y otras partes del cuerpo cuando la aspiradora esté funcionando. La aspiradora debe estar en posición 23 22 12 13 14 15 16 17 21 18 20 19 19 VISTA DE LA PARTE POSTERIOR 12. Guía del Cordón Eléctrico 13. Manguera 14. Cepillo para Polvo - Dirt Devil M085807HD | Revision 1 (7/2009) - Page 18
DE LA ASPIRADORA Ensamble el cuerpo a la base de tal manera que la manguera inferior quede a la derecha. Asegure insertando un (1) tornillo en la parte posterior de la aspiradora, sobre el interruptor de encendido / apagado. Empuje hacia atrás la aleta de la ventana. Alinee las lengüetas de la
-
 1
1 -
 2
2 -
 3
3 -
 4
4 -
 5
5 -
 6
6 -
 7
7 -
8
-
9
-
10
-
11
-
12
-
13
-
14
-
15
-
16
-
17
-
18
 |
 |

OWNER’S MANUAL
Operating and Servicing
Instructions
©2009 All rights reserved
# 1-113354-000
7/09
•
Please read these
instructions carefully
before using your cleaner.
•
Let us help you put your
vacuum together or
answer any questions, call:
1-800-321-1134
(USA & Canada)
www.dirtdevil.com
For quick reference, please record your
vacuum information below.
Model #:
Mfg. Code:
(Mfg. code located on the lower backside of cleaner)
WARNING:
Cleaner
assembly
may
include small parts. Small
parts can present a choking
hazard.
MANUEL DU PROPRIÉTAIRE
Notice d’utilisation et d’entretien
©2009 Tous droits réservés
1-113354-000
7/09
Consignez les renseignements ci-dessous
pour pouvoir les consulter rapidement.
Nº de modèle :
Code de
fabrication :
(Le code de fabrication se trouve sur la partie inférieure
arrière de l’aspirateur)
AVERTISSEMENT:
L’assemblage de l’appareil
comprend des petites pièces.
Ces dernières présentent un
danger d’étouffement.
Español - página E1
Español - página E1
Warranty Registration
•
Online at: www.dirtdevil.com
• Phone: 1-800-321-1134
• Mail: Royal Appliance Mfg
7005 Cochran Rd.
Glenwillow, Ohio 44139
Enregistrement en garantie
•
Sur Internet : www.dirtdevil.com
• Téléphone : 1-800-321-1134
• Adresse postale :
Royal Appliance Mfg
7005 Cochran Rd.
Glenwillow, Ohio 44139 États-Unis
•
Veuillez lire attentivement
ces instructions avant
d’utiliser votre aspirateur.
•
Nous pouvons vous aider
à assembler votre aspira-
teur et à répondre à vos
questions. Pour cela co
posez le :
1-800-321-1134
(É.U. et Canada)
www.dirtdevil.com