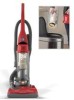
Dirt Devil M088160RED Revision 1 (7/2011)
Dirt Devil M088160RED Manual
 |
View all Dirt Devil M088160RED manuals
Add to My Manuals
Save this manual to your list of manuals |
Dirt Devil M088160RED manual content summary:
- Dirt Devil M088160RED | Revision 1 (7/2011) - Page 1
. (El número de modelo aparece en la parte posterior de la aspiradora.) 28 OWNER'S MANUAL GUIDE D'UTILISATION MANUAL DEL USUARIO Operating and Servicing Instructions Notice d'utilisation et d'entretien Instrucciones de Funcionamiento y Servicio Find GENUINE Replacement Parts at www.dirtdevil - Dirt Devil M088160RED | Revision 1 (7/2011) - Page 2
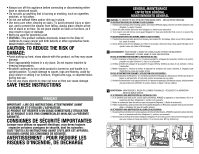
receipt to this Owner's manual. Verification of date of purchase may be required for warranty service of your Dirt Devil® product. Enregistrement de del producto.) GUIDE DE DÉPANNAGE AVERTISSEMENT : POUR RÉDUIRE LE RISQUE DE SE BLESSER, DÉBRANCHER L'ASPIRATEUR AVANT LE SERVICE AVERTISSEMENT : POUR - Dirt Devil M088160RED | Revision 1 (7/2011) - Page 3
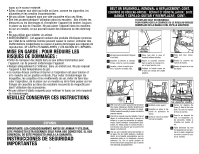
TROUBLESHOOTING GUIDE WARNING: TO REDUCE RISK OF PERSONAL INJURY - UNPLUG CLEANER BEFORE SERVICING WARNING: TO REDUCE THE RISK OF INJURY FROM MOVING PARTS - UNPLUG BEFORE SERVICING. PROBLEM INSTRUCTIONS BEFORE USING THE APPLIANCE. ALWAYS FOLLOW THESE SAFETY INSTRUCTIONS in this manual. Use only - Dirt Devil M088160RED | Revision 1 (7/2011) - Page 4
ashes. • Do not use without filters and/or dirt cup in place. • Use extra care when turned on and handle is in upright position. To avoid damage to carpet . SAVE THESE INSTRUCTIONS FRANÇAIS IMPORTANT : LIRE CES INSTRUCTIONS ATTENTIVEMENT AVANT PARTS - UNPLUG BEFORE SERVICING. IF OBSTRUCTION DEVELOPS - Dirt Devil M088160RED | Revision 1 (7/2011) - Page 5
automotrices. 1. 1b. 2. 3. E Depress latch to remove dirt cup from cleaner. Remove the two (2) screws located on la façon décrite dans ce guide. Utiliser uniquement les accessoires et les Composer le 1 800 321-1134 pour trouver le centre de service le plus près, ou visiter notre site Web à www - Dirt Devil M088160RED | Revision 1 (7/2011) - Page 6
le tuyau car cela risquerait de l'endommager. VEUILLEZ CONSERVER CES INSTRUCTIONS ESPAÑOL IMPORTANTE: LEA CUIDADOSAMENTE ANTES DE ARMAR Y UTILIZAR.. brushroll end caps are in the correct orientation (7a inset). Rotate brushroll manually to make sure belt is properly aligned. F Une fois la nouvelle - Dirt Devil M088160RED | Revision 1 (7/2011) - Page 7
ou visitez le site www.dirtdevil.com pour connaître le centre de service le plus proche. 5 ESTILO DE BANDA Para el reemplazo de la banda objetos en ninguna abertura. • Utilice solamente como se describe en este manual. Utilice únicamente los accesorios y productos recomendados por el fabricante. • - Dirt Devil M088160RED | Revision 1 (7/2011) - Page 8
filter. (Filter will be discolored after use, this will not affect the filter's performance.) Do not brush the filter. The cleaning instructions may vary depending on the dirt conditions. In some cases, more or less cleaning of the filter may be required. ENTRETIEN REGULIER : À chaque fois que vous - Dirt Devil M088160RED | Revision 1 (7/2011) - Page 9
- UNPLUG BEFORE SERVICING. NOTE: Unplug cleaner before changing filter. NOTE: Rinse foam filter once every month. If vacuum is used frequently, ambas asas y girar la tapa al contrario de las manecillas del reloj. E Hold the dirt cup and grasp the top of filter. F Tenez le godet à poussière et - Dirt Devil M088160RED | Revision 1 (7/2011) - Page 10
disconnect it from the electrical outlet. 2. Empty dirt cup. 3. Inspect the nozzle and bag inlet above steps, your cleaner may need servicing. Un protecteur thermique interne protège DEL PISO 1. 2. 3. E Cleaner must be in its upright posi- E Remove the hose from tion. Remove lower hose from - Dirt Devil M088160RED | Revision 1 (7/2011) - Page 11
in mind. We are very proud of our products and hope that you are equally satisfied with their quality and performance. Thank you for your support of Dirt Devil® products. Visit our website at www.dirtdevil.com FÉLICITATIONS ! Vous êtes désormais l'heureux propriétaire d'un - Dirt Devil M088160RED | Revision 1 (7/2011) - Page 12
& Warranty Service Station. Please include complete description of the problem, day of Insérez la petite extrémité du tuyau dans le support à accessoires du côté droit. S Inserte el extremo más peque round slot on outlet. Turn cleaner on forward. Dirt cup lid will right side of tool caddy. (c) - Dirt Devil M088160RED | Revision 1 (7/2011) - Page 13
CUERPO 1. 2. 3. E Place upper handle onto upright. F Placez la poignée du haut à la MATIÈRES ÍNDICE Safety Instructions Page 3-10 Consignes de Utilisation de l'appareil Cómo Funciona Dirt Cup & Filter Removal & Replacement Page Mantenimiento General Troubleshooting Guide Page 26-28 Guide de - Dirt Devil M088160RED | Revision 1 (7/2011) - Page 14
Tope 9. Lower Hose 9. Tuyau inférieur 8. Ventana Transparente 10. Cord Guide 10. Guide du cordon 9. Manguera Inferior 11. Hose 11. Tuyau 10. Guía del CAJA DE ACCESORIOS ASSEMBLER LE SUPPORT À ACCESSOIRES E Push back dirt window flap. Align tabs on clear dirt passage window with the
-
 1
1 -
 2
2 -
 3
3 -
 4
4 -
 5
5 -
 6
6 -
 7
7 -
8
-
9
-
10
-
11
-
12
-
13
-
14
 |
 |

©2011 All rights reserved.
#1-113830-000
R1
7/11
•
Please read these instructions carefully before using your product.
•
Let us help you put your product together, order parts and accessories or answer
any questions.
•
Please Do Not Return This Product To The Store.
•
Lea atentamente estas instrucciones antes de usar su producto.
•
Permítanos ayudarle a armar su producto, encargar piezas y accesorios, o
responder cualquier pregunta.
•
Por favor no devuelva este producto a la tienda.
•
Lire ces instructions attentivement avant d’utiliser ce produit.
•
Permettez-nous de vous aider à assembler votre produit ou à obtenir des pièces et
des accessoires, ou de répondre à vos questions.
•
Ne pas retourner ce produit au magasin.
E
F
S
Find
GENUINE
Replacement Parts at
www.dirtdevil.com
Vous trouverez des pièces de rechange d’
ORIGINE
sur le site
www.dirtdevil.com
Encuentre piezas de repuesto
GENUINAS
en
www.dirtdevil.com
This product uses the following parts:
Ce produit comprend les pièces suivantes :
Este producto usa las siguientes piezas:
BELT STYLE/MODÈLE DE COURROIE
ESTILO DE BANDA
5
FILTER TYPE/TYPE DE FILTRE
TIPO DE FILTRO
F1
OWNER’S MANUAL
GUIDE D’UTILISATION
MANUAL DEL USUARIO
Operating and Servicing Instructions
Notice d’utilisation et d’entretien
Instrucciones de Funcionamiento y Servicio
Call us toll-free:
Customer Service
1-800-321-1134
Mon.-Fri. 8:00 a.m.-7:00 p.m. E.S.T.
(USA & Canada)
www.dirtdevil.com
Appelez-nous sans frais au
1 800 321-1134
du lundi au vendredi, de 8 h à 19 h
(HNE).
(É.U. et Canada)
www.dirtdevil.com
Llámenos gratuitamente
al
1 800 321-1134
,
de lunes a viernes, de 8 a.m. a 7
p.m. (HNE).
(EE.UU. y Canadá)
www.dirtdevil.com
PROBLEMA
MOTIVO POSIBLE
SOLUCIONES POSIBLES
La aspiradora no
funciona
1.
El cordón eléctrico no está
bien conectado en la toma de
corriente.
1.
Enchufe la unidad firmemente
.
2.
Se ha quemado el fusible o se
ha disparado el interruptor de
circuito.
2.
Verifique el fusible o el interruptor de circuito
en la vivienda. Reemplace el fusible restablezca
el interruptor de circuito.
3.
Necesita mantenimiento.
3.
Llévela a un Centro de servicio o llame al
1.800.321.1134.
4.
Protector térmico activado.
4.
Permita que la aspiradora se enfríe durante 30
minutos.
La aspiradora no
aspira o tiene baja
succión
1.
El contenedor para polvo no está
instalado correctamente.
1.
Revise la sección Cómo retirar y volver a
colocar el contenedor para polvo.
2.
El contenedor para polvo está
lleno
.
2.
Vacíe el depósito de polvo.
3.
Filtro tapado.
3.
Retire el filtro y limpie.
4. Banda rota o desgastada.
4. Reemplace la banda.
5. Filtro tapado.
5. Retire el filtro y limpie.
6. Está tapada la boquilla / el paso
de polvo.
6. Retire la manguera inferior; retire la
obstrucción.
El polvo sale de la
aspiradora
1.
El contenedor para polvo está
lleno
.
1.
Vacíe el depósito de polvo
.
2.
El contenedor para polvo no está
instalado correctamente
.
2.
Revise la sección Cómo retirar y volver a
colocar el contenedor para polvo.
3.
La manguera no está instalada
correctamente
.
3.
Consultez à nouveau la section sur l’installation
du tuyau
.
4.
El filtro no está instalado cor
-
rectamente.
4.
Consultez à nouveau la section sur l’installation
du filtre.
Los accesorios de
la aspiradora no
recogen
1.
Manguera tapada
.
1.
Enlever le tuyau et les accessoires, dégager les
obstructions
.
2.
El contenedor para polvo está
lleno
.
2.
Vacíe el depósito de polvo
.
3.
Filtro tapado.
3.
Retire el filtro y limpie.
ADVERTENCIA:
PARA REDUCIR EL RIESGO DE LESIONES PERSONALES, DESCONECTE ANTES DE DAR SERVICIO
GUÍA DE SOLUCIÓN DE PROBLEMAS
CUALQUIER OTRO SERVICIO DEBERÁ SER EFECTUADO POR UN
REPRESENTANTE DE SERVICIO AUTORIZADO
SERVICIO AL CLIENTE
(1-800-321-1134)
En caso de necesitar más ayuda, vea en las Páginas Amarillas para encontrar a un Distribuidor Autorizado Royal
®
. Los
costos de transporte hacia y desde el sitio de reparación serán pagados por el propietario. Las partes de repuesto
utilizadas en esta unidad son de reemplazo fácil y están disponibles con un Distribuidor Autorizado Royal
®
o en otras
tiendas. Siempre identifique su aspiradora por medio del número de modelo cuando pida información u ordene
partes de repuesto. (El número de modelo aparece en la parte posterior de la aspiradora.)
ADVERTENCIA:
PARA REDUCIR EL RIESGO DE LESIONES CAUSADAS POR LAS PARTES MÓVILES, DESCONECTE
ANTES DE DAR SERVICIO.
28