Dynex DX-32L220A12 User Manual (English)
Dynex DX-32L220A12 Manual
 |
View all Dynex DX-32L220A12 manuals
Add to My Manuals
Save this manual to your list of manuals |
Dynex DX-32L220A12 manual content summary:
- Dynex DX-32L220A12 | User Manual (English) - Page 1
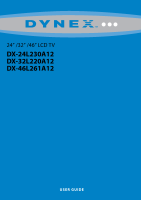
24" /32" /46" LCD TV DX-24L230A12 DX-32L220A12 DX-46L261A12 USER GUIDE - Dynex DX-32L220A12 | User Manual (English) - Page 2
ii Dynex DX-24L230A12/DX-32L220A12/DX-46L261A12 24"/32"/46" LCD TV Contents CHILD SAFETY 1 Important safety instructions 2 Warnings 2 Cautions 3 Installing the stand or wall-mount bracket 4 Installing the stand 4 Installing a wall-mount bracket 4 TV components 5 Package contents 5 Front 5 - Dynex DX-32L220A12 | User Manual (English) - Page 3
system information 35 Restoring settings to default 35 Maintaining 35 Cleaning 35 Servicing 35 Troubleshooting 36 Video and audio 36 Remote control 37 General 37 Specification 39 Programming universal remote controls 40 Programming a different universal remote control 40 For additional - Dynex DX-32L220A12 | User Manual (English) - Page 4
iv - Dynex DX-32L220A12 | User Manual (English) - Page 5
of wall mount does not fit all. Use only a wall mount rated for the weight of your TV and that has been recommended by this TV manufacturer, listed in this manual, or otherwise listed by an independent laboratory as suitable for your TV. • Follow all instructions supplied by the TV and wall mount - Dynex DX-32L220A12 | User Manual (English) - Page 6
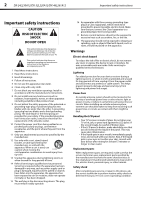
DX-24L230A12/DX-32L220A12/DX-46L261A12 Important safety instructions Important safety instructions CAUTION RISK OF ELECTRIC SHOCK DO NOT OPEN This symbol indicates that dangerous voltage constituting a risk of electric shock is present within your TV. This label is located on the back of your TV - Dynex DX-32L220A12 | User Manual (English) - Page 7
Important safety instructions DX-24L230A12/DX-32L220A12/DX-46L261A12 3 Power source Operate your TV only from the type of power source indicated on the marking label. If you are not sure of the type of power supplied to your home, consult an electrician or your local power company. Cautions Damage - Dynex DX-32L220A12 | User Manual (English) - Page 8
bracket for information about how to correctly hang your TV. Note The length of the wall-mount screws vary depending on the wall-mount bracket you purchased. See the instructions that came with the wall-mount bracket for screw lengths. DX-24L230A12 (24-inch TV) 3.94 in. (100 mm) 3.94 in. (100 mm - Dynex DX-32L220A12 | User Manual (English) - Page 9
32L220A12/DX-46L261A12 5 DX-32L220A12 (32-inch TV) 7.84 in. (200 mm) DX-46L261A12 (46-inch TV) 23.62 in. (600 mm) Wall mount brackets 7.84 in. (200 mm) TV components Package contents • Remote control and batteries (2 AAA) • Stand with screws • Composite cable • AC power cord • Quick Setup Guide - Dynex DX-32L220A12 | User Manual (English) - Page 10
/DX-32L220A12/DX-46L261A12 TV components Side MENU INPUT VOL VOL CH CH SERVICE PORT Back AC IN R AUDIO R AUDIO OUT AUDIO HDMI 2 L L VIDEO AV IN DIGITAL OUTPUT AUDIO VGA HDMI 1 PC IN L AUDIO R Y PB PR COMPONENT IN ANT/ CABLE IN # Item 1 MENU 2 INPUT 3 VOL+/VOL- 4 CH /CH 5 (Power - Dynex DX-32L220A12 | User Manual (English) - Page 11
TV components DX-24L230A12/DX-32L220A12/DX-46L261A12 an HDMI or DVI device (best)" on page 13. Connect Remote control INPUT 1 4 7 INFO POWER 23 56 89 RECALL 0 GUIDE MENU EXIT MUTE VOL CH FAVORITE VI DEO HDMI TV COMP MTS/SAP VGA ZOO M SLEEP CH-LIST PICTURE and adjust settings. Press to - Dynex DX-32L220A12 | User Manual (English) - Page 12
8 DX-24L230A12/DX-32L220A12/DX-46L261A12 Making connections # Button 9 VOL+/VOL- 10 Video Input 11 SLEEP 12 ZOOM 13 PICTURE 14 (Power) 15 RECALL 16 GUIDE 17 EXIT 18 CH+ / CH- 19 FAVORITE 20 MTS/SAP 21 CH-LIST 22 CCD 23 AUDIO Description Press to increase or decrease the volume. - Dynex DX-32L220A12 | User Manual (English) - Page 13
Making connections DX-24L230A12/DX-32L220A12/DX-46L261A12 9 You can use an HDMI jack to connect a DVI device to your TV. You need to attach an HDMI-to-DVI adapter to the end of the HDMI cable that connects to the DVI device. Cautions • Check the - Dynex DX-32L220A12 | User Manual (English) - Page 14
10 DX-24L230A12/DX-32L220A12/DX-46L261A12 Making connections Using DVI (same as HDMI but requires an audio connection) To connect a cable or satellite box using DVI: 1 Turn off your TV and all connected equipment. 2 Connect the incoming cable from the cable wall jack to the cable-in jack on the - Dynex DX-32L220A12 | User Manual (English) - Page 15
Making connections DX-24L230A12/DX-32L220A12/DX-46L261A12 11 Using composite video (good) To connect a cable or satellite box using composite video: 1 Turn off your TV and all connected equipment. 2 Connect the incoming cable from the cable wall jack to the cable-in jack on the cable or satellite - Dynex DX-32L220A12 | User Manual (English) - Page 16
/DX-46L261A12 Making connections Connecting an antenna or cable TV (no box) To connect an antenna or cable TV (no box): 1 Turn off your TV and all connected equipment. 2 Connect a coaxial cable (not provided) to the ANT/CABLE IN jack on the back of your TV and to the antenna or cable TV wall - Dynex DX-32L220A12 | User Manual (English) - Page 17
Making connections DX-24L230A12/DX-32L220A12/DX-46L261A12 13 Connecting an HDMI or DVI device (best) To connect an HDMI or DVI device: 1 Make sure that your TV's power cord is unplugged and the HDMI or DVI device is turned off. 2 Connect an HDMI cable (not provided) to the HDMI1 or HDMI2 jack on - Dynex DX-32L220A12 | User Manual (English) - Page 18
DX-24L230A12/DX-32L220A12/DX-46L261A12 Making connections Connecting a composite video device (good) To connect a composite video device: 1 Make sure that your TV's power output is analog. Side of TV SERVICE PORT Cables are often color-coded to match color-coded jacks. Connect yellow to yellow, - Dynex DX-32L220A12 | User Manual (English) - Page 19
Making connections DX-24L230A12/DX-32L220A12/DX-46L261A12 15 Connecting a camcorder or game console To connect a camcorder or game console: 1 Make sure that your TV's power cord is unplugged and the camcorder or game console is turned off. 2 Connect a composite cable (provided) to the VIDEO and L - Dynex DX-32L220A12 | User Manual (English) - Page 20
16 DX-24L230A12/DX-32L220A12/DX-46L261A12 Making connections Using HDMI To connect a computer using HDMI: 1 Make sure that your TV's power cord is unplugged and the computer is turned off. 2 Connect an HDMI cable (not provided) to an HDMI jack on the back or side of your TV and to the HDMI OUT - Dynex DX-32L220A12 | User Manual (English) - Page 21
Using the remote control DX-24L230A12/DX-32L220A12/DX-46L261A12 17 Connecting a basic home theater system Using digital audio To connect a basic home theater system using digital audio: 1 Make sure that your TV's power cord is unplugged and the home theater system is turned off. 2 Connect a - Dynex DX-32L220A12 | User Manual (English) - Page 22
18 DX-24L230A12/DX-32L220A12/DX-46L261A12 Turning on your TV for the first time Turning on your TV for the first time The first time you turn on your TV, the Setup Wizard opens. The Setup Wizard guides you through setting up basic settings including the menu language, date and time, picture mode, - Dynex DX-32L220A12 | User Manual (English) - Page 23
in this manual are for explanation purposes and may vary from the actual screens on your TV. Picture menu (TV mode) Picture Audio Settings Channels Picture Mode Custom Contrast 70 Brightness 40 Color 60 Tint 0 Sharpness 50 Backlight 30 Advanced Video Reset Picture Settings Move - Dynex DX-32L220A12 | User Manual (English) - Page 24
DX-24L230A12/DX-32L220A12/DX-46L261A12 Adjusting the picture label, broadcast program name, TV rating, signal type, audio manually customize the picture settings. Note You can also press PICTURE to select the picture mode. • Contrast-Adjusts the brightness of the light areas of the picture - Dynex DX-32L220A12 | User Manual (English) - Page 25
Adjusting the picture DX-24L230A12/DX-32L220A12/DX-46L261A12 21 • Tint-Adjusts the color balance of the picture. Use this control to make skin tones look more natural. • Sharpness-Adjusts the color detail of images. If you set this control too high, dark images may appear with light or white edges - Dynex DX-32L220A12 | User Manual (English) - Page 26
22 DX-24L230A12/DX-32L220A12/DX-46L261A12 Adjusting the sound Adjusting the computer image To adjust the computer image: 1 Make sure that your TV is in VGA mode. For more information, see "Selecting the video input source" on page 19. 2 Press MENU. The on-screen menu opens with the Picture menu - Dynex DX-32L220A12 | User Manual (English) - Page 27
Changing channel settings DX-24L230A12/DX-32L220A12/DX-46L261A12 23 • MONO-if there is noise or static on weak stereo broadcasts. • STEREO-for programs broadcast in stereo. • SAP-to listen to a secondary audio program (if available). Note You can also press MTS/SAP on the remote control one or - Dynex DX-32L220A12 | User Manual (English) - Page 28
24 DX-24L230A12/DX-32L220A12/DX-46L261A12 Changing channel settings 4 Press ENTER to start the auto channel scan. 3 Press or to highlight Add/Skip Channels, then press ENTER. The channel list opens. Picture Audio Settings Channels Choose Your TV Source Antenna Cable RF CH : 0 0 Digital - Dynex DX-32L220A12 | User Manual (English) - Page 29
settings DX-24L230A12/DX-32L220A12/DX-46L261A12 25 3 Press or to highlight Favorites, then press ENTER. The Channels-favorites list opens. 2 Press or to highlight Channels, then press . The Channels menu opens. Channel No. 1.2 2.0 2.1 2.2 2.10 6.0 7.0 11.1 12.0 14.0 Picture Audio Settings remote - Dynex DX-32L220A12 | User Manual (English) - Page 30
26 DX-24L230A12/DX-32L220A12/DX-46L261A12 Setting parental controls 2 Press or to highlight Channels, then press . The Channels menu opens. Auto Channel Scan Add/Skip Channels Favorites Channel Label Channel Strength Audio Only Auto Zoom Picture Audio Settings Channels Antenna WGBH-SD Off Off - Dynex DX-32L220A12 | User Manual (English) - Page 31
Setting parental controls DX-24L230A12/DX-32L220A12/DX-46L261A12 27 6 Press the number buttons to rating signal, see "Blocking unrated TV" on page 28. To set parental control levels: 1 Press MENU. The on-screen menu opens with the Picture menu displayed. Picture Audio Settings Channels Picture - Dynex DX-32L220A12 | User Manual (English) - Page 32
DX-46L261A12 Setting parental controls 6 Press or to highlight US (or Canada to set controls for Canada), then press ENTER. The Ratings screen opens. Picture Audio Settings Channels US Parental Locks MPAA Ratings None G PG PG-13 R NC-17 X TV Ratings ALL FV L S V D None TV-Y TV-Y7 TV-G TV-PG TV - Dynex DX-32L220A12 | User Manual (English) - Page 33
DX-24L230A12/DX-32L220A12/DX-46L261A12 29 2 Press or to highlight Settings, then press . The Settings menu opens with Parental Controls highlighted. To lock control buttons: 1 Press MENU. The on-screen menu opens with the Picture menu displayed. Parental Controls Time Closed Caption Menu Settings - Dynex DX-32L220A12 | User Manual (English) - Page 34
Lock, then press or to select On. Button Lock Block Unrated TV System Lock US Canada Change Password RRT Setting Reset RRT Picture Audio Settings Channels No Off On Move Select MENU Back Display an advanced V-Chip ratings table for digital channels. EXIT Exit 6 Press or to highlight RRT - Dynex DX-32L220A12 | User Manual (English) - Page 35
Using closed captioning DX-24L230A12/DX-32L220A12/DX-46L261A12 31 Turning closed captioning on or off To turn closed captioning on or off: 1 Press MENU. The on-screen menu opens with the Picture menu displayed. Selecting the closed captioning mode To select the closed captioning mode: 1 Press - Dynex DX-32L220A12 | User Manual (English) - Page 36
32 DX-24L230A12/DX-32L220A12/DX-46L261A12 Adjusting time settings Customizing digital closed captioning styles To customize digital closed captioning styles: 1 Press MENU. The on-screen menu opens with the Picture menu displayed. Picture Audio Settings Channels Picture Mode Custom Contrast 70 - Dynex DX-32L220A12 | User Manual (English) - Page 37
time settings DX-24L230A12/DX-32L220A12/DX-46L261A12 33 2 Press or to highlight Settings, then press . The Settings menu opens. Parental Controls Time Closed Caption Menu Settings Computer Settings Input Label System Info Restore Default Picture Audio Settings Channels Move Select Set Date - Dynex DX-32L220A12 | User Manual (English) - Page 38
DX-24L230A12/DX-32L220A12/DX-46L261A12 Adjusting menu settings Adjusting menu settings Selecting the menu language To select the on-screen menu language: 1 Press MENU. The on-screen menu opens with the Picture menu displayed. Picture Audio Settings Channels Picture on-screen instructions. 8 When - Dynex DX-32L220A12 | User Manual (English) - Page 39
no user-serviceable parts inside. Turn off your TV, unplug the power cord, then contact an authorized service center. Picture Audio Settings Channels Picture Mode Custom Contrast 70 Brightness 40 Color 60 Tint 0 Sharpness 50 Backlight 30 Advanced Video Reset Picture Settings Move - Dynex DX-32L220A12 | User Manual (English) - Page 40
36 DX-24L230A12/DX-32L220A12/DX-46L261A12 Troubleshooting Troubleshooting Warning Do not try to repair your TV yourself. Contact authorized service personnel. Video and audio Problem Solution Picture does not fill the screen. There are black bars around the picture. No picture (screen is not - Dynex DX-32L220A12 | User Manual (English) - Page 41
Troubleshooting DX-24L230A12/DX-32L220A12/DX-46L261A12 37 Problem Solution The picture has a few bright or dark spots. • A few bright or dark spots on an LCD screen is normal. It does not affect the operation of this TV. Good picture, but no sound. • Increase the volume. • Make sure that the - Dynex DX-32L220A12 | User Manual (English) - Page 42
. • Unplug the power cord, wait a few seconds, then plug the cord back in and turn on your TV. TV keeps turning off • Make sure that the sleep timer is not turned on. See "Setting the sleep timer" on page 33. Note If the problem is not solved by using these troubleshooting instructions, turn off - Dynex DX-32L220A12 | User Manual (English) - Page 43
scan rates: 640 × 480/60Hz, 800 × 600/60Hz, 1024 × 768/60Hz, 1280 × 1024/60Hz, 1920 × 1080/60Hz Analog DX-24L230A12 DX-32L220A12 DX-46L261A12 NTSC NTSC NTSC DIgital Inputs DX-24L230A12 DX-32L220A12 DX-46L261A12 ATSC, 8-VSB, Clear-QAM ATSC, 8-VSB, Clear-QAM ATSC, 8-VSB, Clear-QAM HDMI - Dynex DX-32L220A12 | User Manual (English) - Page 44
your universal remote control has a code search feature, run a code search to identify a code that matches your TV. See your universal remote control's instructions for details. • If your universal remote control has a "Learn" feature, you can manually program it using the Dynex TV remote to "teach - Dynex DX-32L220A12 | User Manual (English) - Page 45
DX-24L230A12/DX-32L220A12/DX-46L261A12 41 Legal notices FCC Part 15 This device complies with Part and used in accordance with the instructions, may cause harmful interference to radio . • Consult the dealer or an experienced radio/TV technician for help. FCC warning Changes or modifications - Dynex DX-32L220A12 | User Manual (English) - Page 46
42 DX-24L230A12/DX-32L220A12/DX-46L261A12 Legal notices - Dynex DX-32L220A12 | User Manual (English) - Page 47
and Canada at Best Buy or Future Shop branded retail stores or websites. What does the warranty not cover? This warranty does not cover: • Customer instruction/education • Installation • Set up adjustments • Cosmetic damage • Damage due to acts of God, such as power surges • Accident(s) • Misuse - Dynex DX-32L220A12 | User Manual (English) - Page 48
www.dynexproducts.com US and Canada Market - (800) 305-2204 Distributed by Best Buy Purchasing, LLC 7601 Penn Ave. South, Richfield, MN 55423 U.S.A. © 2011 BBY Solutions, Inc. All rights reserved. DYNEX is a trademark of BBY Solutions, Inc. Registered in some countries. All other products and brand
-
 1
1 -
 2
2 -
 3
3 -
 4
4 -
 5
5 -
 6
6 -
 7
7 -
8
-
9
-
10
-
11
-
12
-
13
-
14
-
15
-
16
-
17
-
18
-
19
-
20
-
21
-
22
-
23
-
24
-
25
-
26
-
27
-
28
-
29
-
30
-
31
-
32
-
33
-
34
-
35
-
36
-
37
-
38
-
39
-
40
-
41
-
42
-
43
-
44
-
45
-
46
-
47
-
48
 |
 |

24” /32” /46” LCD TV
DX-24L230A12
DX-32L220A12
DX-46L261A12
USER GUIDE