Dynex DX-P9DVD Quick Setup Guide (English)
Dynex DX-P9DVD Manual
 |
View all Dynex DX-P9DVD manuals
Add to My Manuals
Save this manual to your list of manuals |
Dynex DX-P9DVD manual content summary:
- Dynex DX-P9DVD | Quick Setup Guide (English) - Page 1
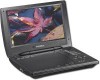
9" Portable DVD Players QUICK SETUP GUIDE DX-P7DVD and DX-P9DVD Congratulations on your purchase of a high-quality Dynex product. Your DX-P7DVD or DX-P9DVD represents the state of the art in personal DVD player design and is designed for reliable and trouble-free performance. Package contents • DVD - Dynex DX-P9DVD | Quick Setup Guide (English) - Page 2
© 2010 BBY Solutions, Inc., All Rights Reserved. DYNEX is a trademark of BBY Solutions, Inc. Registered in some countries. All other products and brand names are trademarks of their respective owners. ENGLISH 10-0035 7" AND 9" PORTABLE DVD PLAYERS I QUICK SETUP GUIDE I DX-P7DVD AND DX-P9DVD
-
 1
1 -
 2
2
 |
 |
DC 9V-12V
POWER
CHG
VOL
AV OUT
DC 9V-12V
7" and 9" Portable DVD Players
QUICK SETUP GUIDE
DX-P7DVD and DX-P9DVD
Congratulations on your purchase of a high-quality
Dynex product. Your DX-P7DVD or DX-P9DVD
represents the state of the art in personal DVD
player design and is designed for reliable and
trouble-free performance.
Package contents
• DVD player with 7" or 9" LCD monitor
• Remote control with battery
• AC to DC adapter
• Car adapter
• A/V cable
• Quick Setup Guide
OPEN
OFF
ON
OFF ON
DVD MENU
DVD MENU
SETUP
SETUP
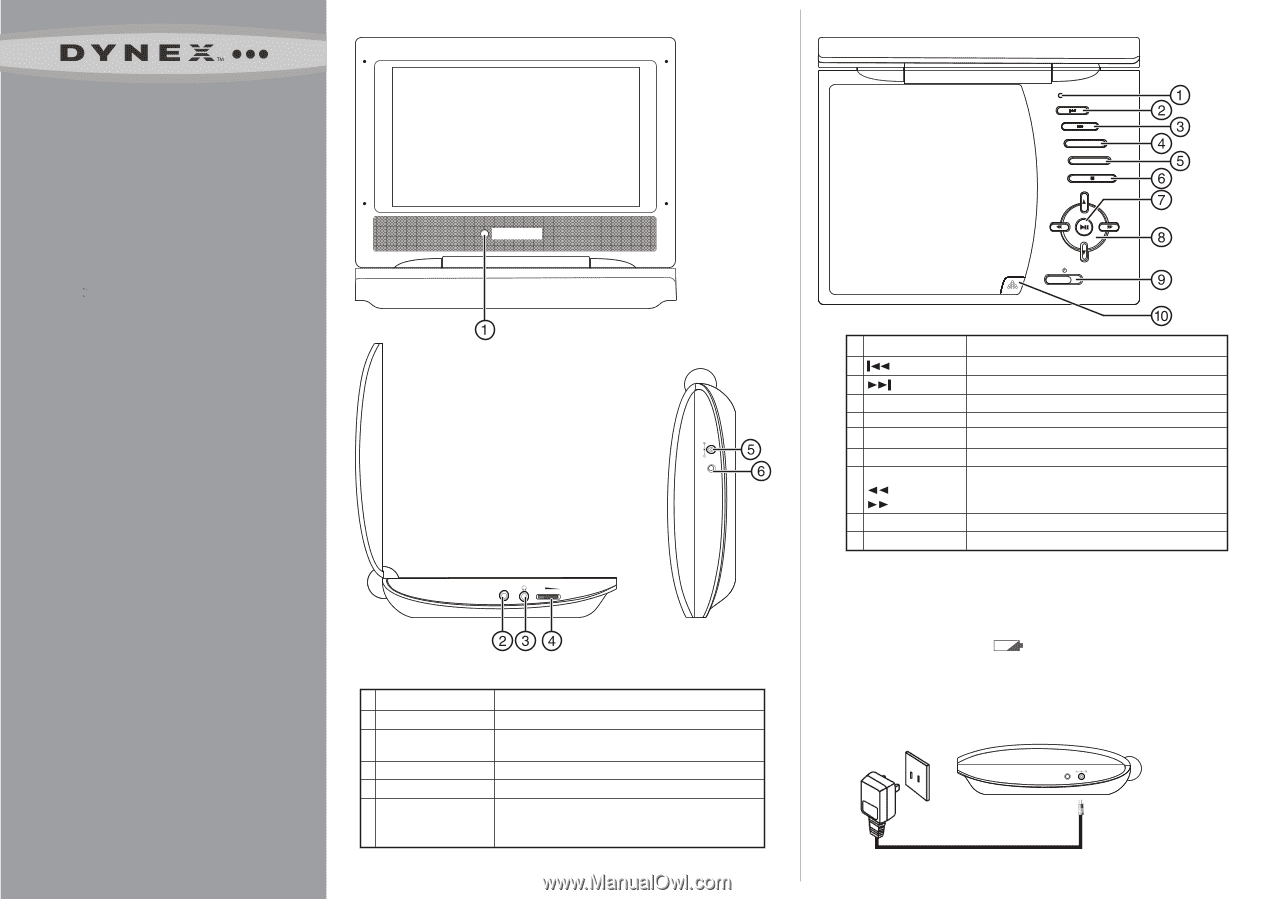
Front and side features
Inside features
Receives signals from the remote control. Do not block.
Use the included AV cable to connect your player to a TV or monitor.
Plug headphones into this jack. When headphones are plugged in,
sound does not come out of your player’s speakers.
Rotate to increase or decrease the volume.
Plug the AC to DC or car power adapter into this jack.
Lights green when your player is on and flashes green when the battery
power is low. Lights red when the battery is charging and flashes red
when you turn off your player and connect it to the car power adapter.
1
Remote control sensor
2
AV OUT jack
3
Headphone jack
4
Volume control
5
DC input jack
6
Power/battery charge indicator
Press to turn off the LCD screen.
Press to go to the previous chapter, track, or scene during disc playback.
Press to go to the next chapter, track, or scene during disc playback.
Press to open or close the
Setup
menu.
Press to open the main DVD menu.
Press to stop disc playback.
Press to start or pause playback.
Press to navigate up or down on a menu.
Press to fast reverse or navigate left on a menu.
Press to fast forward or navigate right on a menu.
Slide to turn your DVD player on or off.
Press to open the disc tray.
1
LCD screen shut off button
2
(prev) button
3
(next) button
4
SETUP
button
5
DVD MENU
6
(stop)
7
=
(play/pause) button
8
or
buttons
(fast rev) button
(fast fwd) buttons
9
Power On/Off switch
10
OPEN
button
Installing remote control battery
The first time you use the remote control, remove the film between the battery and
compartment cover to activate the remote.
Charging the battery
NOTE
: During playback, an icon
appears on the screen, indicating the
amount of power left in the battery. The power indicator on the side of the player
will also alert you when the battery is low by flashing green.
The battery will charge only when the player is connected to a wall
outlet (AC); it will not charge with the car adapter.
1
Plug one end of the wall adapter (AC) into the
DC
input jack on the side of your
player.
2
Plug the other end of the power adapter into a wall outlet.
POWER
CHG