Electrolux E30EW85EPS Installation Instructions
Electrolux E30EW85EPS - Icon 30" Professional Series Electric Double Oven Manual
 |
View all Electrolux E30EW85EPS manuals
Add to My Manuals
Save this manual to your list of manuals |
Electrolux E30EW85EPS manual content summary:
- Electrolux E30EW85EPS | Installation Instructions - Page 1
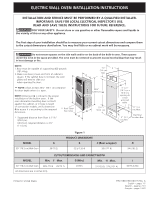
ELECTRIC WALL OVEN INSTALLATION INSTRUCTIONS INSTALLATION AND SERVICE MUST BE PERFORMED BY A QUALIFIED INSTALLER. IMPORTANT: SAVE FOR LOCAL ELECTRICAL INSPECTOR'S USE. READ AND SAVE THESE INSTRUCTIONS FOR FUTURE REFERENCE. FOR YOUR SAFETY: Do not store or use gasoline or other flammable vapors and - Electrolux E30EW85EPS | Installation Instructions - Page 2
Keep these instructions with your Owner's Guide for future reference. IMPORTANT SAFETY INSTRUCTIONS • Be sure your wall oven is installed and grounded properly by a qualified installer or service technician. • This wall oven must be electrically grounded in accordance with local codes or, in - Electrolux E30EW85EPS | Installation Instructions - Page 3
ELECTRIC WALL OVEN INSTALLATION INSTRUCTIONS 3. Electrical connection It is the responsibility and obligation of the consumer to contact a qualified installer to assure that the electrical installation is adequate and is in conformance with the National Electrical Code ANSI/NFPA No. 70-latest - Electrolux E30EW85EPS | Installation Instructions - Page 4
ELECTRIC WALL OVEN INSTALLATION INSTRUCTIONS 4. Remove the oven door Remove the doors, oven grids and grids supports to reduce the weight of the appliance and to facilitate its handling and its installation. (Refer to the Use & Care Guide for the instructions). IMPORTANT Do not lift the oven by the - Electrolux E30EW85EPS | Installation Instructions - Page 5
plate on your oven. Before You Call for Service Read the Avoid Service Checklist and operating instructions in your Use & Care Guide. It may save you time and expense. The list includes common occurrences that are not the result of defective workmanship or materials in this appliance. Refer to the
-
 1
1 -
 2
2 -
 3
3 -
 4
4 -
 5
5
 |
 |

ELECTRIC WALL OVEN INSTALLATION INSTRUCTIONS
A
B
D
I
50
3
/
4
"
(128.9 cm)
C
H
F
G
2" (5.1
cm) Min.
1
1
/
2
"
(3.8 cm)
Min.
11
1
/
2
"*
(29.2 cm)
3" (7.6
cm) Max.
Spacer
** Door Open
(see note)
Electrical
Junction Box
4" X 4"
(10.2 cm x
10.2 cm)
opening to
route
armored
cable.
INSTALLATION AND SERVICE MUST BE PERFORMED BY A QUALIFIED INSTALLER.
IMPORTANT: SAVE FOR LOCAL ELECTRICAL INSPECTOR'S USE.
READ AND SAVE THESE INSTRUCTIONS FOR FUTURE REFERENCE.
FOR YOUR SAFETY:
Do not store or use gasoline or other flammable vapors and liquids in
the vicinity of this or any other appliance.
The first step of your installation should be to measure your current cutout dimensions and compare them
to the cutout dimensions chart below. You may find little or no cabinet work will be necessary.
NOTE:
1. Base must be capable of supporting 400 pounds
(181.4 kg).
2. Make sure base is level and front of cabinet is
square. If the cabinet base is not level, the oven
glides will tend to slide out
when opening the door.
** NOTE:
Allow at least 23¼" (59.1 cm) clearance
for door depth when it is open.
NOTE:
Dimension
G
is critical to the proper
Figure 1
P/N 318201520 (0411) Rev. A
English – pages 1-6
Español – páginas 7-13
Français – pages 14-20
All dimensions are in inches (cm).
Do not remove spacers on the side walls and/or on the back of the built-in oven. These spacers
center the oven in the space provided. The oven must be centered to prevent excess heat buildup that may result
in heat damage or fire.
PRODUCT DIMENSIONS
CUTOUT DIMENSIONS AND CABINET WIDTH
MODEL
30" (76.2 cm) Wall Oven
MODEL
30" (76.2 cm) Wall Oven
A
30 (76.2)
Min.
F
Max.
28
½
(72.4)
29 (73.7)
B
52
1
/
8
(132.4)
G (Min.)
24 (61)
C (Rear wrapper)
28
1
/
4
(71.8)
Min.
H
Max
.
51 (129.5)
51
3
/
4
(131.4)
D
24
1
/
2
(62.2)
I
30 (76.2) Min
installation of the built-in oven.
If the
oven decorative moulding does not butt
against the cabinet, or if noise is heard
on convection models, verify dimension
G
to assure it is according to the required
dimension.
*
Suggested distance from floor is 11½"
(29.2 cm).
Minimum required distance is 4½"
(11.4 cm).
Printed in United States