Electrolux EFME427UIW Complete Owners Guide English
Electrolux EFME427UIW Manual
 |
View all Electrolux EFME427UIW manuals
Add to My Manuals
Save this manual to your list of manuals |
Electrolux EFME427UIW manual content summary:
- Electrolux EFME427UIW | Complete Owners Guide English - Page 1
EN FRONT LOAD DRYER FR SÉCHEUSE Á CHARGEMENT FRONTAL ES SECADORA DE CARGA FRONTAL USE & CARE GUIDE GUIDE D'UTILISATION ET D'ENTRETIEN GUÍA DE USO Y CUIDADO A16331701 June 2019 - Electrolux EFME427UIW | Complete Owners Guide English - Page 2
Requirements 9 Installation 17 Controls and Settings 26 Operating Instructions 36 Normal Operating Sounds 38 Care and Cleaning 39 Troubleshooting 41 Limited Warranty 44 Questions? For toll free telephone support or online support in the US and Canada contact: U.S. 1-877-4ELECTROLUX - Electrolux EFME427UIW | Complete Owners Guide English - Page 3
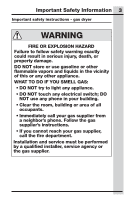
Important Safety Information 3 Important safety instructions - gas dryer WARNING FIRE OR EXPLOSION HAZARD Failure to your gas supplier from a neighbor's phone. Follow the gas supplier's instructions. • If you cannot reach your gas supplier, call the fire department. Installation and service must be - Electrolux EFME427UIW | Complete Owners Guide English - Page 4
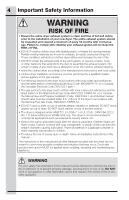
exhaust opening. • Install the clothes dryer according to the manufacturer's instructions and local codes. • Clothes dryer installation and service must be performed by a qualified installer, service agency or the gas supplier. • The electrical service to the dryer must conform with local codes and - Electrolux EFME427UIW | Complete Owners Guide English - Page 5
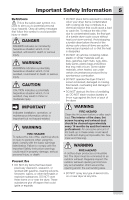
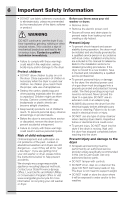
persons when using this dryer, comply with the basic warnings listed below. Failure to comply with the Important Safety Instruction warnings could result in of the dryer, lint screen housing and exhaust duct should be cleaned approximately every 18 months by qualified service professional. An - Electrolux EFME427UIW | Complete Owners Guide English - Page 6
this manual for reference. Refer to the installation sections for detailed grounding procedures. If the dryer is moved to a new location, have it checked and reinstalled by a qualified service professional. • To prevent personal injury or damage to the dryer, the electrical power cord of a gas dryer - Electrolux EFME427UIW | Complete Owners Guide English - Page 7
30 amp) 14-30R 4-wire (fused 30 amp) 240 v Electric Dryer UL-approved service cord must be installed on electric dryers (not provided with unit except those manufactured for sale in Canada). Grounding type wall receptacle 120 v Gas Dryer Do not, under any circumstances, cut, remove, or bypass the - Electrolux EFME427UIW | Complete Owners Guide English - Page 8
Door Striker Optional Heavy Duty Collapsible Drying Rack* Optional Stacking Kit for Mounting on Matching Washer* *Not included with initial purchase - 300 series dryer 27 Setting chart - 400 series dryer 28 Setting chart - 500 series dryer 29 Setting chart - 600 series dryer 30 Cycle selection - Electrolux EFME427UIW | Complete Owners Guide English - Page 9
kit for LP GAS system ˆˆ Gas supply turned on ˆˆ No leaks present at all connections - check with soapy water, NEVER check with flame 240v Electric Supply (Electric Dryer) ˆˆ Approved NEMA 10-30 or 14-30 service ˆˆ Dryer plugged in Final Checks ˆˆ Installation Instructions and Use & Care Guide read - Electrolux EFME427UIW | Complete Owners Guide English - Page 10
wrench or or Pipe wrench LP-resistant for gas thread tape supply (for natural gas or LP supply) Carpenter's External level vent hood 4 inch, rigid metal or 3-wire or 4-wire semi-rigid metal exhaust duct work 240 volt cord kit (electric dryer) NOTE Because of potentially inconsistent - Electrolux EFME427UIW | Complete Owners Guide English - Page 11
or closed loop connectors and marked for use with clothes dryers. For 3-wire cord connection instructions see "Electrical connection (non-Canada) - 3-wire cord gas, causing gas leaks. Use ONLY black iron, stainless steel, or plastic-coated brass piping for gas supply. 1. The gas service to the dryer - Electrolux EFME427UIW | Complete Owners Guide English - Page 12
the gas supply connection to the dryer. 6. The dryer MUST be disconnected from the gas supply piping system during any pressure testing of the gas supply NOT install a booster fan in dryer exhaust duct. • Install all clothes dryers in accordance with the installation instructions in this manual. - Electrolux EFME427UIW | Complete Owners Guide English - Page 13
will be expelled into the laundry area. An accumulation of lint in any area of the home can create a health and fire hazard. • The dryer must be connected to an exhaust outdoors. • Regularly inspect the outdoor exhaust opening and remove any accumulation of lint around the outdoor exhaust opening - Electrolux EFME427UIW | Complete Owners Guide English - Page 14
/CSAZ240 MH. 2. Dryer MUST be exhausted outside (outdoors, not beneath the mobile home) using metal ducting that will not support combustion. Metal ducting to previous sections in this guide for other important exhaust venting system requirements. 5. When installing a gas dryer into a mobile home, a - Electrolux EFME427UIW | Complete Owners Guide English - Page 15
dryer installed in a bedroom, bathroom, recess or closet, MUST be exhausted outdoors. 2. No other fuel burning appliance shall be installed in the same closet as the gas dryer. 3. Your dryer needs the space around it for proper ventilation. DO NOT install your dryer dryer - Electrolux EFME427UIW | Complete Owners Guide English - Page 16
kit (STACKIT7X) required for stacked installation 75.75" (192.5 cm) water supply connection on rear of unit gas supply pipe on rear of gas inlet hose on steam dryer adds 3/4 in. (2 cm) to installation depth. 1 Power supply cord length on gas dryer or electric Canadian dryer approximately 60 inches - Electrolux EFME427UIW | Complete Owners Guide English - Page 17
• This appliance MUST be properly grounded. Electrical shock can result if the dryer is not properly grounded. Follow the instructions in this manual for proper grounding. • DO NOT use an extension cord with this dryer. Some extension cords are not designed to withstand the amounts of electrical - Electrolux EFME427UIW | Complete Owners Guide English - Page 18
with this appliance. If it will not fit the outlet, have a proper outlet installed by a qualified electrician. Grounding requirements gas dryer 1. The dryer is equipped with a threeprong (grounding) plug for your protection against shock hazard and should be plugged directly into a properly - Electrolux EFME427UIW | Complete Owners Guide English - Page 19
proper operation after servicing. 1. Turn off power supply to outlet. 2. Remove the screw securing the terminal block access cover in the lower corner on the back of the dryer. 3. Install a UL-approved strain relief according to the power cord/strain relief manufacturer's instructions in the power - Electrolux EFME427UIW | Complete Owners Guide English - Page 20
proper operation after servicing. 1. Turn off power supply to outlet. 2. Remove the screw securing the terminal block access cover in the lower corner on the back of the dryer. 3. Install a UL-approved strain relief according to the power cord/strain relief manufacturer's instructions in the power - Electrolux EFME427UIW | Complete Owners Guide English - Page 21
Installation 21 Connecting the gas 1. Remove the shipping cap from gas pipe at the rear of the dryer. WARNING DO NOT connect the dryer to L.P. gas service without converting the gas valve. An L.P. conversion kit must be installed by a qualified gas technician. 2. Connect a 1/2 inch (1.27 cm) I.D. - Electrolux EFME427UIW | Complete Owners Guide English - Page 22
to clear any contaminants in the line. Short Hose "Y" Connector Water Inlet on Dryer Cold Water Supply Hose to Washer 6. If there is not room to install turn with pliers. 9. Connect the straight end of the long hose from the kit to the other outlet on the "Y" connector and snug it by hand. Connect - Electrolux EFME427UIW | Complete Owners Guide English - Page 23
. 8. If you have any questions during initial operation, please review the "Avoid Service Checklist" in your Use & Care Guide before calling for service. 9. Place these instructions in a location near the dryer for future reference. NOTE A wiring diagram and technical data sheet are located under - Electrolux EFME427UIW | Complete Owners Guide English - Page 24
tool that won't damage paint). 3. Be sure dryer is unplugged from power source! Screwdriver with #2 square SHOCK HAZARD Failure to disconnect power source before servicing could result in personal injury or even death. plugs manually. 3. Remove both screws from door latch. Save latch and - Electrolux EFME427UIW | Complete Owners Guide English - Page 25
hole of the front panel. Verify reversed door operation 1. Test door for free, smooth swinging operation and secure latching when closed. 2. Plug in dryer and close the door. Start a test cycle: drum should tumble until door is pulled open or cycle is paused or canceled. 2. Reinstall and tighten - Electrolux EFME427UIW | Complete Owners Guide English - Page 26
1 power 4 temperature 7 options/select (set) 2 cycle LED display 5 dryness (dry level) 8 cancel 3 cycle selector 6 time dry (dry time) 9 start/pause This manual covers many models and not all cycles, options, or features listed are available on every model. Consoles shown above for reference only - Electrolux EFME427UIW | Complete Owners Guide English - Page 27
Controls and Settings 27 Setting chart - 300 series dryer CYCLE SETTINGS These temperature, dryness levels and options are available with the following cycles: CYCLE SELECTIONS dry time heavy duty towels normal delicates temperature (temp) - Electrolux EFME427UIW | Complete Owners Guide English - Page 28
28 Controls and Settings Setting chart - 400 series dryer heavy duty towels normal 20min fast dry delicates mixed load time dry These temperature, dryness levels and options are available with the following cycles: CYCLE - Electrolux EFME427UIW | Complete Owners Guide English - Page 29
Controls and Settings 29 Setting chart - 500 series dryer heavy/ towels normal activewear mixed load 18min fast dry delicates time dry instant refresh These temperature, dryness levels and options are available with the following - Electrolux EFME427UIW | Complete Owners Guide English - Page 30
30 Controls and Settings Setting chart - 600 series dryer CYCLE SETTINGS heavy/ towels allergen normal activewear mixed load 15min fast dry delicates time dry instant refresh These temperature, dryness levels and options are available - Electrolux EFME427UIW | Complete Owners Guide English - Page 31
. Room temperature and humidity, type of installation and electrical voltage or gas pressure can also affect drying time. heavy duty (on select models) use the first 90 seconds of Auto Dry cycles to sense the load in the dryer. During this 90 second period the LED display will show 3 dots ( ) - Electrolux EFME427UIW | Complete Owners Guide English - Page 32
(no heat) setting. time dry Select this cycle to manually set the drying time from 30 to 75 minutes (depending into clothing that has been left in the dryer, stored in crowded closets, drawers, or unpacked For best results Follow the fabric care label instructions on items to be dried. sanitize (on - Electrolux EFME427UIW | Complete Owners Guide English - Page 33
similar loads, select less (on select models). Select damp for items you wish to partially dry before hanging or ironing. Drying time (time dry) Manually select or change the drying time for a time dry cycle (on select models) by pressing the time dry button to scroll though the available options - Electrolux EFME427UIW | Complete Owners Guide English - Page 34
. The door can be hinged on the right or left side. NOTE For step-by-step instructions on door reversal, refer to the installation sections of this manual. LuxCareTM Lint Shield filter The dryer is equipped with a clamshell style LuxCareTM Lint Shield filter. hold 'select' 3 s to mute/unmute Other - Electrolux EFME427UIW | Complete Owners Guide English - Page 35
by-step instructions cleaning the lint filter, refer to Cleaning the Filter in the Care and Cleaning section of this Use & Care Guide. Install it in a convenient location. Rear legs on drum backsheet Backsheet of dryer drum Installing drying rack NOTE The drying rack accessory should only be - Electrolux EFME427UIW | Complete Owners Guide English - Page 36
36 Operating Instructions Operating the dryer WARNING To reduce the risk of fire, electric shock or injury to persons, read the Important Safety Information in this Use & Care Guide before operating your dryer. WARNING DO NOT operate dryer without lint filter in place. WARNING Clean the lint - Electrolux EFME427UIW | Complete Owners Guide English - Page 37
when the cycle is completed and hang or fold. • See Care and Cleaning section of this instruction. • CLEAN LINT will be displayed at the end of the cycle as a reminder to remove lint from filter. The dryer WILL NOT operate with the door open. When drying a single large or bulky item, such - Electrolux EFME427UIW | Complete Owners Guide English - Page 38
flame. This noise is normal and will only occur when the gas is ignited in the combustion tube. B E D C Before operating your dryer Read the important instructions in this section of the Use & Care Guide before operating your dryer. WARNING To reduce the risk of fire, electric shock or injury to - Electrolux EFME427UIW | Complete Owners Guide English - Page 39
shock hazards. • DO NOT use any type spray cleanser when cleaning the dryer interior. Hazardous fumes or electrical shock could occur. • Every 18 months a qualified service professional should clean the dryer cabinet interior, lint screen housing and exhaust duct. These areas can collect lint - Electrolux EFME427UIW | Complete Owners Guide English - Page 40
disconnecting the water supply lines (steam models only) and electrical power, please follow the steps below: 1. Review the installation instructions provided with the dryer to ensure the appliance is level and the water and electrical power supply is properly connected. 2. Ensure the water lines - Electrolux EFME427UIW | Complete Owners Guide English - Page 41
Troubleshooting 41 Common drying inquiries Many drying problems involve poor cleaning results, poor soil and stain removal, residues of lint and scum, and fabric damage. For satisfactory drying results, follow these suggestions provided by The Soap and Detergent Association. PROBLEM overload dryer. - Electrolux EFME427UIW | Complete Owners Guide English - Page 42
air supply to support the burner flame (gas models). • LP gas supply tank is empty or there has been a utility interruption of natural gas (gas models). • Replace fuse. • Check to make sure supply valve is open. Refer to the installation instructions provided with the dryer. • See the Installation - Electrolux EFME427UIW | Complete Owners Guide English - Page 43
Troubleshooting 43 PROBLEM POSSIBLE CAUSES SOLUTIONS Drying cycle takes too long, outside of the dryer feels too hot or smells hot. • Lint filter is clogged with lint. • Exhaust duct requirements have not been met. • Electric dryer is connected to a 208 volt circuit. • Drying procedures have not - Electrolux EFME427UIW | Complete Owners Guide English - Page 44
is installed, used, and maintained in accordance with the provided instructions. Exclusions This warranty does not cover the following: 1. Products warranty. Obligations for service and parts under this warranty must be performed by Electrolux or an authorized service company. Product features - Electrolux EFME427UIW | Complete Owners Guide English - Page 45
- Electrolux EFME427UIW | Complete Owners Guide English - Page 46
electrolux.com/shop
-
 1
1 -
 2
2 -
 3
3 -
 4
4 -
 5
5 -
 6
6 -
 7
7 -
8
-
9
-
10
-
11
-
12
-
13
-
14
-
15
-
16
-
17
-
18
-
19
-
20
-
21
-
22
-
23
-
24
-
25
-
26
-
27
-
28
-
29
-
30
-
31
-
32
-
33
-
34
-
35
-
36
-
37
-
38
-
39
-
40
-
41
-
42
-
43
-
44
-
45
-
46
 |
 |

EN
FRONT LOAD DRYER
FR SÉCHEUSE Á CHARGEMENT FRONTAL
ES SECADORA DE CARGA FRONTAL
USE & CARE GUIDE
GUIDE D’UTILISATION ET D’ENTRETIEN
GUÍA DE USO Y CUIDADO
A16331701 June 2019