Electrolux EI30GS55LW Complete Owner's Guide (English)
Electrolux EI30GS55LW Manual
 |
View all Electrolux EI30GS55LW manuals
Add to My Manuals
Save this manual to your list of manuals |
Electrolux EI30GS55LW manual content summary:
- Electrolux EI30GS55LW | Complete Owner's Guide (English) - Page 1
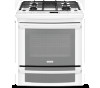
Use & Care Guide Gas Slide-In Range 318 203 890 (1001) Rev. A - Electrolux EI30GS55LW | Complete Owner's Guide (English) - Page 2
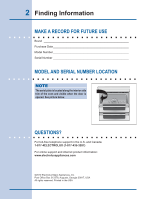
is opened. See picture below. Questions? For toll-free telephone support in the U.S. and Canada: 1-877-4ELECTROLUX (1-877-435-3287) For online support and internet product information: www.electroluxappliances.com ©2010 Electrolux Major Appliances, Inc. Post Office Box 212378, Augusta, Georgia 30917 - Electrolux EI30GS55LW | Complete Owner's Guide (English) - Page 3
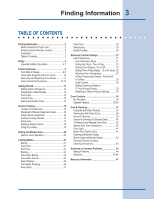
of Contents 3 Safety 4 Important Safety Instructions 4-7 Feature Overview 8 Your Slide-In Range 8-9 Oven Rack Supports and Oven Vents 10 Removing and 40 To Remove and Replace Oven Door 40 Special Door Care Instructions 40 Oven Light 41 Broiler Pan Cleaning Tips 41 Cleaning the Burner - Electrolux EI30GS55LW | Complete Owner's Guide (English) - Page 4
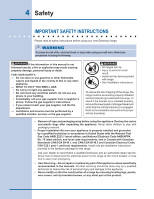
Safety Important Safety Instructions Please read all safety instructions before using your new Electrolux range. ! Warning To reduce the risk of fire, electrical shock, or injury when using your wall oven, follow basic precautions including the following: If the information in this manual is not - Electrolux EI30GS55LW | Complete Owner's Guide (English) - Page 5
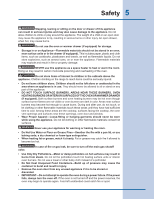
Safety 5 Stepping, leaning or sitting on the door or drawer of this appliance can result in serious injuries and may also cause damage to the appliance. Do not allow children to climb or play around the appliance. The weight of a child on an open door may cause the appliance to tip, resulting in - Electrolux EI30GS55LW | Complete Owner's Guide (English) - Page 6
earthenware, or other glazed utensils are suitable for cooktop service without breaking due to the sudden change in temperature. cause overheating. Air will be blocked from the burner and cause combustion problems. IMPORTANT INSTRUCTIONS FOR USING YOUR OVEN • Use Care When Opening Door or Drawer- - Electrolux EI30GS55LW | Complete Owner's Guide (English) - Page 7
power to the appliance before removing and replacing light bulb. IMPORTANT INSTRUCTIONS FOR CLEANING YOUR RANGE • Clean the range regularly to keep the self-cleaning cycle only the parts of the oven listed in this owner's guide. Before self-cleaning the oven, remove all utensils stored in the oven. - Electrolux EI30GS55LW | Complete Owner's Guide (English) - Page 8
8 Feature Overview Your Slide-in Range Porcelain Grates Deep Drawn Cooktop touch glass control panel large metal handle curved glass oven door Warmer OVEN door window glass POWER BURNER 14 000 BTU regular BURNER 9 500 BTU SIMMER burner 5 000 BTU POWER BURNER 16 000 BTU - Electrolux EI30GS55LW | Complete Owner's Guide (English) - Page 9
Feature Overview 9 Your Slide-in Range Oven Door Latch Oven vent Oven Rack Support slideable Oven racks Convection Fan Oven Light Oven Rack support brackets BROILER PAN BROILER PAN Grid Convection Roasting rack - Electrolux EI30GS55LW | Complete Owner's Guide (English) - Page 10
two brackets on each side of the oven interior, as shown below. To remove the oven rack support for a self-clean cycle, pull up the support to disengage them from the brackets. If the rack supports are not removed, the self-clean cycle won't start. Oven Rack Positions This oven is equipped with - Electrolux EI30GS55LW | Complete Owner's Guide (English) - Page 11
Sliding Oven Racks To replace the oven racks, follow the instructions above in reverse order. TOWARD FRONT OF OVEN TOWARD back OF OVEN 1st Bracket 2nd Bracket Oven Rack Oven Rack Slider Oven Rack Support Removing Non-Sliding Oven Rack Simply pull the rack and slightly tilt - Electrolux EI30GS55LW | Complete Owner's Guide (English) - Page 12
12 Feature Overview Oven Control pad functions 1 Light Pad- Used to turn the oven light on and off. 2 Bake Pad- Used to enter the normal baking mode temperature. 3 Broil Pad- Used to select the variable broil mode. 4 Convection Bake Pad- Used to select the convection baking mode. 5 Convection Roast - Electrolux EI30GS55LW | Complete Owner's Guide (English) - Page 13
Feature Overview 13 Oven Control pad functions (Continued) 19 Upper Oven Pad- Used to activate the upper oven for cooking operation. 20 Warmer Oven Pad - Used to activate the lower warmer oven. 21 User Preference Pad- Used to bring the user preference menu in the display. 22 Timer on-off Pads- Used - Electrolux EI30GS55LW | Complete Owner's Guide (English) - Page 14
14 Getting Started Setting clock at power up When the unit is first plugged in, or when the power supply to the range has been interrupted, the timer in the display will flash with "12:00". The clock cannot be set when the oven is on. If an invalid time of day is entered, the control will triple - Electrolux EI30GS55LW | Complete Owner's Guide (English) - Page 15
Getting Started 15 Control Lock The Control Lock feature automatically locks the upper oven door and the control panel. The Control Lock is only allowed when the oven is turned OFF (not active). DOOR LOCK will flash in the display for 20 seconds or until the door has finished locking. Once the door - Electrolux EI30GS55LW | Complete Owner's Guide (English) - Page 16
burner on to determine if it will light. If the burner does not light, contact a Service Center. Do not service the sealed burner yourself. Proper burner adjustments The color of the flame is the key to if flame is yellow-orange. To clean burner, see instructions under General Care & Cleaning. - Electrolux EI30GS55LW | Complete Owner's Guide (English) - Page 17
unit. Note: Always use a utensil for its intended purpose. Follow manufacturer's instructions. Some utensils were not made to be used in the oven or on the lower one to complete the process. Use the chart below as a guide for determining proper flame size for various types of cooking. The size and - Electrolux EI30GS55LW | Complete Owner's Guide (English) - Page 18
control knobs do not have to be set at a particular mark. Use the guides and adjust the flame as needed. DO NOT cook with the Surface Control knob In the event of an electrical power outage, the surface burners can be lit manually. To light a surface burner, hold a lit match to the burner head, - Electrolux EI30GS55LW | Complete Owner's Guide (English) - Page 19
Surface Cooking 19 using the griddle The griddle is intended for direct food cooking and can be used on both sides. Do not use pans or other cookware on the griddle. Doing so could damage the finish. With the grate in position over the burner, set the griddle on top of the grate positioning the - Electrolux EI30GS55LW | Complete Owner's Guide (English) - Page 20
20 Setting the Warmer Oven Warmer oven operation To Operate the Warmer Oven The purpose of the warmer oven is to keep hot cooked foods at serving temperature. Always start with hot food. It is not recommended to heat cold food in the warmer drawer. All food placed in the warmer oven should be - Electrolux EI30GS55LW | Complete Owner's Guide (English) - Page 21
of 425°F: 1. Select oven by pressing UPPER OVEN . UPPER OVEN + - 2. Press the HI hi or LO lo pads to get to the desired temperature. Baking Problems Refer to the Baking Problems Table in the Solutions to Common Problems section of this manual. - Electrolux EI30GS55LW | Complete Owner's Guide (English) - Page 22
22 Cooking Modes cook time Cook Time allows the oven to be set to cook for a set length of time and shut off automatically. The time remaining will always be shown in the timer section of the display. The oven will shut off and will beep when the countdown is finished. This feature can be used - Electrolux EI30GS55LW | Complete Owner's Guide (English) - Page 23
Cooking Modes 23 broiling This mode is best for meats, fish and poultry up to 1" thick. Broiling is a method of cooking tender cuts of meat by direct heat under the broil burner of the oven. The high heat cooks quickly and gives a rich, brown outer appearance. The oven can be programmed to broil at - Electrolux EI30GS55LW | Complete Owner's Guide (English) - Page 24
you can easily reduce the temperature using the Convection Convert feature. Please see Convection Convert section on next page for further instruction on temperature conversion. • Use tested recipes with times adjusted for convection baking when using this mode. With single rack convection baking - Electrolux EI30GS55LW | Complete Owner's Guide (English) - Page 25
Cooking Modes 25 convection convert The Convection Convert pad is used to automatically convert a standard baking recipe for convection baking. When set properly, this feature is designed to display the actual converted (reduced) temperature in the display. Convection Convert may ONLY be used with - Electrolux EI30GS55LW | Complete Owner's Guide (English) - Page 26
26 Cooking Modes Roasting Rack Grid Broiler Pan Figure 1 Convection roasting This mode is best for cooking tender cuts of beef, lamb, pork and poultry. Use this mode when cooking speed is desired. The Convection Roasting gently browns the exterior and seals in the juices. Convection roasting uses - Electrolux EI30GS55LW | Complete Owner's Guide (English) - Page 27
content. Keep Warm Tips for Warmer Oven: • Follow recommendations for lower oven cooking modes in the Setting Warmer Oven section of this manual. To set a Keep Warm Temperature of 170°F: 1. Arrange interior oven racks (for upper oven only). 2. Select oven by pressing UPPER OVEN UPPER - Electrolux EI30GS55LW | Complete Owner's Guide (English) - Page 28
28 Cooking Modes slow cook This mode may be used to cook foods more slowly, at lower oven temperatures and provide cooking results much the same way as a Slow Cooker or Crock-Pot. The Slow Cook feature is ideal for roasting beef, pork & poultry. Slow Cooking meats may result in the exterior of - Electrolux EI30GS55LW | Complete Owner's Guide (English) - Page 29
Cooking Modes 29 dehydrating This mode dries foods with heat from the convection element. The heat is circulated throughout the oven by the convection fan. Dehydrating is used to dry and/or preserve foods such as fruits, meats, vegetables and herbs. This mode holds an optimum low temperature while - Electrolux EI30GS55LW | Complete Owner's Guide (English) - Page 30
30 Cooking Modes bread proofing Proofing bread prepares the dough for baking by activating the yeast. This feature is ideal for proofing, or rising bread dough. The oven can be programmed for Bread Proofing at any temperature between 85°F to 100°F with a default temperature of 100°F. Bread - Electrolux EI30GS55LW | Complete Owner's Guide (English) - Page 31
Electronic Control Settings 31 user preferences The User Preferences menu includes all user defined options. This feature enables you to control the various options of the electronic controls. This menu features the Time of Day, Celsius or Fahrenheit display mode, Continuous Bake or 12 Hour Energy - Electrolux EI30GS55LW | Complete Owner's Guide (English) - Page 32
32 Electronic Control Settings user preferences (continued) Setting clock display - on or off The oven control can be programmed to display the time of day or not. The oven has been preset at the factory to display the time of day. Changing clock display between ON and OFF: 1. Press USER PREF - Electrolux EI30GS55LW | Complete Owner's Guide (English) - Page 33
Electronic Control Settings 33 user preferences (continued) Setting Temperature Display - Fahrenheit or Celsius The oven control can be programmed to display temperatures in Fahrenheit or Celsius. The oven has been preset at the factory to display in Fahrenheit. To change display from Fahrenheit - Electrolux EI30GS55LW | Complete Owner's Guide (English) - Page 34
34 Oven Controls MY favorite The Favorites settings allows you to save your most frequently used or most complex cooking sequences. This feature will save the cooking mode, the target temperature and the cooktime (if any). The oven can recall up to three cooking sequences from its internal memory, - Electrolux EI30GS55LW | Complete Owner's Guide (English) - Page 35
oven control for a COOK TIME do so at this time. If not, skip this step and continue to step 5. Refer to their section for complete instructions. Remember the oven will shut down after using COOK TIME and therefore may only be used once during the Sabbath/Jewish Holidays. 5. Press START . 6. The - Electrolux EI30GS55LW | Complete Owner's Guide (English) - Page 36
36 Oven Controls sabbath feature (continued) Note: You may change the oven temperature once baking has started. Press UPPER OVEN , UPPER OVEN BAKE , the numeric key pads for the temperature you want (example for 425°F press 4 , 2 , 5 ) and then press START TWICE (for Jewish Holidays only). - Electrolux EI30GS55LW | Complete Owner's Guide (English) - Page 37
• Wear rubber gloves when cleaning any exterior parts of the oven manually. During the self-cleaning cycle, the outside of the wall oven can items can not withstand high cleaning temperatures. 4. Oven racks and oven rack supports must be Do Hand Clean Door Area outside of the Door Gasket removed. - Electrolux EI30GS55LW | Complete Owner's Guide (English) - Page 38
for a Self-Cleaning cycle: 1. Remove the oven racks, the racks supports and press UPPER OVEN . UPPER OVEN lite 2. Press clean med for . To set the controls for a delayed Self-Cleaning cycle: 1. Follow the instructions above. 2. Press END TIME . The time of day numbers will blink in - Electrolux EI30GS55LW | Complete Owner's Guide (English) - Page 39
heating. Stainless Steel, Chrome Decorative Trim, Oven Racks, Oven Racks Support Clean with hot, soapy water and a dishcloth. Rinse with clean during heating and cannot be removed. Oven Racks Oven racks and oven rack supports must be removed from the oven during the self-clean cycle for cleaning - Electrolux EI30GS55LW | Complete Owner's Guide (English) - Page 40
& Care Manual. To remove and replace oven door 1. Open the door to the fully opened position. 2. Pull up the lock located on each hinge support toward front HINGE SLOT - Door removed from the appliance Special Door care instructions Most oven doors contain glass that can break. Read the following - Electrolux EI30GS55LW | Complete Owner's Guide (English) - Page 41
the oven light switch located on the control panel. The lamp is covered with a glass shield. The glass shield can be remove to be cleaned manually or to change the oven light. THIS GLASS SHIELD MUST BE IN PLACE WHENEVER THE OVEN IS IN USE. To replace the light bulb: CAUTION - Electrolux EI30GS55LW | Complete Owner's Guide (English) - Page 42
to clean the cooktop whenever the cooktop or burner heads are still hot. ● To avoid possible burns DO NOT attempt any of the following cleaning instructions provided before turning OFF all of the surface burners and allow them to cool. ● To avoid possible burns DO NOT attempt to operate the surface - Electrolux EI30GS55LW | Complete Owner's Guide (English) - Page 43
and afterwards wipe using a damp cloth. For stubborn soils located in the slots, use a small-gauge wire or needle to clean. Should you experience ignition problems it may be that an ignition port hole is partially blocked with soil (see figs 1 & 2). With the burner head in place, use a small wire - Electrolux EI30GS55LW | Complete Owner's Guide (English) - Page 44
appliance. Baking Problems Cookies and biscuits burn on the bottom. Cakes too dark on top or bottom. Baking Problems and Solutions the center of the oven rack. If the water level is uneven, refer to the installation instructions for leveling the range. • Be sure to allow 2" to 4" (5.1 cm to 10 - Electrolux EI30GS55LW | Complete Owner's Guide (English) - Page 45
Solutions to Common Problems 45 Important Before calling for service, review this list. It may save you both time and expense. • Make sure you have removed the oven racks and the oven rack supports from the oven. • Controls not set properly. Follow instructions under "Using the Self-Clean Feature". - Electrolux EI30GS55LW | Complete Owner's Guide (English) - Page 46
to Common Problems Oven models only). Burners can be lit manually. See Setting Surface Controls in this Use and Care Guide. Burner flame only lights half way operate until flame is full. Dry the burners thoroughly following instructions in the General Cleaning section. FOOD NOT HEATING EVENLY • - Electrolux EI30GS55LW | Complete Owner's Guide (English) - Page 47
appliance is installed, used, and maintained in accordance with the provided instructions. In addition, the glass cooktop or radiant surface element of warranty. Obligations for service and parts under this warranty must be performed by Electrolux or an authorized service company. Product features - Electrolux EI30GS55LW | Complete Owner's Guide (English) - Page 48
-
 1
1 -
 2
2 -
 3
3 -
 4
4 -
 5
5 -
 6
6 -
 7
7 -
8
-
9
-
10
-
11
-
12
-
13
-
14
-
15
-
16
-
17
-
18
-
19
-
20
-
21
-
22
-
23
-
24
-
25
-
26
-
27
-
28
-
29
-
30
-
31
-
32
-
33
-
34
-
35
-
36
-
37
-
38
-
39
-
40
-
41
-
42
-
43
-
44
-
45
-
46
-
47
-
48
 |
 |

318 203 890 (1001) Rev. A
Use & Care Guide
Gas Slide-In Range