Electrolux RH42PC60GS Complete Owner's Guide (English)
Electrolux RH42PC60GS Manual
 |
UPC - 012505559761
View all Electrolux RH42PC60GS manuals
Add to My Manuals
Save this manual to your list of manuals |
Electrolux RH42PC60GS manual content summary:
- Electrolux RH42PC60GS | Complete Owner's Guide (English) - Page 1
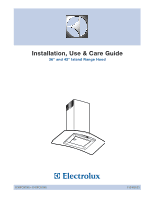
Installation, Use & Care Guide 36" and 42" Island Range Hood Guia de Instalación, Uso y Cuidado 36" y 42" Campana extractora Guide d'installation, utilisation et d'entretien 36" et 42" Hotte aspirante EI36PC60GS + EI42PC60GS 316488523 - Electrolux RH42PC60GS | Complete Owner's Guide (English) - Page 2
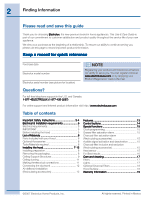
. Questions? For toll-free telephone support in the U.S. and Canada: 1-877-4ELECTROLUX (1-877-435-3287) For online support and Internet product information visit http://www.electroluxusa.com Table of contents Important Safety Instructions 3-4 Electrical & Installation requirements 5 Electrical - Electrolux RH42PC60GS | Complete Owner's Guide (English) - Page 3
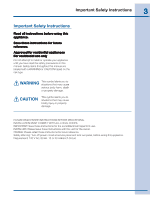
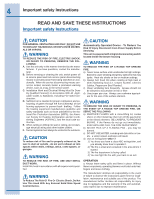
LOCAL CODES. IMPORTANT: Save these Instructions for the Local Electrical Inspector's use. INSTALLER: Please leave these Instructions with this unit for the owner. OWNER: Please retain these instructions for future reference. Safety Warning: Turn off power circuit at service panel and lock out panel - Electrolux RH42PC60GS | Complete Owner's Guide (English) - Page 4
Supply Before Servicing. This unit is equpeed with integral disconnecting switch located inside the blower housing TO REDUCE THE RISK OF A RANGE TOP REDUCE THE RISK OF FIRE, USE ONLY METAL DUCT WORK. Install this hood in accordance with all requirements specified. To Reduce The Risk Of Fire Or Electric - Electrolux RH42PC60GS | Complete Owner's Guide (English) - Page 5
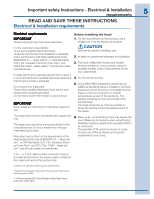
Save Installation Instructions for electrical inspector's use. The range hood must be connected with copper wire only. The range hood Ducted Ventilation Systems greater than specified CFM of air movement. The specified CFM varies from locale to locale. Consult your HVAC professional for specific - Electrolux RH42PC60GS | Complete Owner's Guide (English) - Page 6
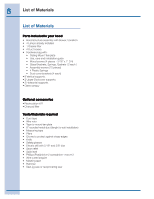
6 List of Materials List of Materials Parts included in your hood • Hood structure assembly with blower, transition. • 4 Lamps already installed. • 1 Grease filter • 4 Duct covers. • Hardware bag with: • Ceiling Mount Template • Use, care and installation guide • Wood screws (4 pieces - 3/16" x 1" - Electrolux RH42PC60GS | Complete Owner's Guide (English) - Page 7
hood must not be installed over any professional cooktop / range. • Do not use flex ducting. • COLD WEATHER installations should have an additional backdraft damper installed to minimize backward cold air flow and a nonmetallic thermal break to minimize conduction of outside temperatures as part - Electrolux RH42PC60GS | Complete Owner's Guide (English) - Page 8
before final framing and wall finishing. This will help to accurately locate the duct work and electrical service. • Installation will be easier if the vent hood is installed before the cook-top and countertop are installed. Ductwork and wiring locations: • Determine the exact location of the vent - Electrolux RH42PC60GS | Complete Owner's Guide (English) - Page 9
. IMPORTANT Framing must be capable of supporting 150lbs. EXAMPLE A 10-1/16" Install cross-framing symmetrically over duct/cooktop centerline 16" joist spacing 7 1/16" 8" duct 2x4 cross framing Align duct to center Front of cooktop of hood Top view–ceiling joists parallel to front of - Electrolux RH42PC60GS | Complete Owner's Guide (English) - Page 10
the vertical duct cover supports using 4 screws. Place each spring using a screw by side. Place upper duct covers sliding through until spring sounds “click”. Then verify Instal the grease filter and turn power on at service panel. Check operation of the hood. IMPORTANT: If the hood doesn't switch - Electrolux RH42PC60GS | Complete Owner's Guide (English) - Page 11
11 Installing the hood Ceiling ducting • Use the template previously installed to prepare a 8-½" hole in the ceiling for ductwork. Failure to do so can result in death or electrical shock. • Remove junction box cover and knockout on the top left side. 8 1/2" Knockout Junction box cover 4 12/16 - Electrolux RH42PC60GS | Complete Owner's Guide (English) - Page 12
of the air deflector to the bottom of the hood outlet, as shown. Duct tape over seam Air deflector installation (Recirculating accessories) • Assemble the air deflector with the duct cover bracket with 4 assembly screws provided as shown. • Cut the duct at the measured size. • Uninstall the air - Electrolux RH42PC60GS | Complete Owner's Guide (English) - Page 13
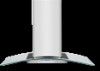
Features 1. Blower and light controls 2. Lamp housings 3. Grease filter Handle 4. Grease filter 5. Canopy 6. Duct covers 7. Louver holes (Only for Recirculating version) 7 6 13 Features 1 54 32 - Electrolux RH42PC60GS | Complete Owner's Guide (English) - Page 14
, it can be cancelled by pressing the timer button again. 3. Display • Shows the hood settings. 4. " " Button. Speed Decrease / OFF • This button is used to beep will sound. IMPORTANT: If the hood doesn't switch ON, before calling for service, check if the internal General ON/ OFF Pushb-utton Switch - Electrolux RH42PC60GS | Complete Owner's Guide (English) - Page 15
is active. When this icon is shown in the display, the grease filters installed are required to be washed. • To reset the grease filter saturation alarm the user must press the " " button for 5 seconds, after this action the icon "Grease filter" is not displayed, and the hood has the normal display - Electrolux RH42PC60GS | Complete Owner's Guide (English) - Page 16
Open a window or inside door slightly. • Clean the filters and the wall behind the filters frequently. • The blower should be turned on for a few . • Drafts across the range or cooktop will cause the escape of heat, smoke, moisture, grease and cooking odors from the hood. Such drafts should be - Electrolux RH42PC60GS | Complete Owner's Guide (English) - Page 17
or solvents. Always unplug or disconnect the appliance from the power supply before servicing. Be sure the entire hood (including the filters and light bulbs) has cooled and grease has solidified before attempting to clean any part of the appliance. NOTE: Turn off the lights and fan. Allow the - Electrolux RH42PC60GS | Complete Owner's Guide (English) - Page 18
filter (mounting instructions included with charcoal filters kit). The charcoal filters should be replaced every 4-6 months (depending on hood usage). NOTE: DO NOT rinse, or put charcoal filters in an automatic dishwasher. NOTE: Charcoal filters cleaning, place all parts in their proper positions - Electrolux RH42PC60GS | Complete Owner's Guide (English) - Page 19
other rights that vary from state to state. Service under this warranty must be obtained by contacting Electrolux Home Products. This warranty only applies in the 50 states of the U.S.A., Puerto Rico and Canada. Product features or specifications as described or illustrated are subject to change
-
 1
1 -
 2
2 -
 3
3 -
 4
4 -
 5
5 -
 6
6 -
 7
7 -
8
-
9
-
10
-
11
-
12
-
13
-
14
-
15
-
16
-
17
-
18
-
19
 |
 |
Installation, Use & Care Guide
36” and 42” Island Range Hood
Guia de Instalación, Uso y Cuidado
36” y 42” Campana extractora
Guide d’installation, utilisation et d’entretien
36” et 42” Hotte aspirante
EI36PC60GS + EI42PC60GS
316488523