Epson C276001 Product Information Guide
Epson C276001 - FX 980 B/W Dot-matrix Printer Manual
 |
View all Epson C276001 manuals
Add to My Manuals
Save this manual to your list of manuals |
Epson C276001 manual content summary:
- Epson C276001 | Product Information Guide - Page 1
EPSON FX-980 paper guide cover printer cover rear edge guides paper guide base paper release lever front paper guide (closed) control panel knob paper thickness lever serial interface ribbon cartridge shield plate parallel interface tractor paper tension unit front paper guide (open) - Epson C276001 | Product Information Guide - Page 2
Printer Specifications Mechanical Printing method Emulation Printing speed Printing direction Line spacing Printable columns 9-pin impact dot matrix EPSON standard bidirectional, 8-bit parallel interface with IEEE 1284 nibble mode support, 1 EIA-232D serial interface, and 1 optional interface slot - Epson C276001 | Product Information Guide - Page 3
fonts EPSON Draft 10, 12, 15 cpi EPSON Roman 10, 12, 15 cpi, proportional EPSON Sans 24.3 lb (11 kg) Black ribbon cartridge (S015091) Ribbon life 7.5 million characters (Draft Check the label on the back of the printer for the printer voltage. Environmental Operation Storage Temperature 41 to 95 - Epson C276001 | Product Information Guide - Page 4
EPSON FX-980 Binding Line glue at the top of form (both front and top entry) Single side line glue (front entry only) Envelopes: top (101 to 558 mm) Backing sheet thickness 0.0028 to 0.0035 inch (0.07 to 0.09 mm) Total thickness 0.0063 to 0.0075 inch (0.16 to 0.19 mm) 4 - EPSON FX-980 4/99 - Epson C276001 | Product Information Guide - Page 5
Printable Area Single sheets, envelopes, and postcards A B A Roll paper printable area printable B area EPSON FX-980 A B printable area B A A A The minimum top and bottom margins (above and below the perforation) are 0.17 inch (4 mm). B The minimum left and right margins - Epson C276001 | Product Information Guide - Page 6
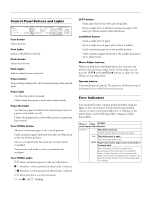
fix the problem. State of Beep Problem panel lights pattern Solution n Pause - The printer is paused. Press the Pause button to resume printing. ••• The printer cover is open. Close the paper guide cover. the Pause button to turn off the Pause light, if necessary. 6 - EPSON FX-980 4/99 - Epson C276001 | Product Information Guide - Page 7
not available. Status Monitor The EPSON Status Monitor 2 utility comes with your printer but is available only for use with Windows 95 or 98. It allows you to monitor your printer's status, alerts you when printer errors occur, and provides troubleshooting instructions. Paper Positions Top-of-Form - Epson C276001 | Product Information Guide - Page 8
EPSON FX- a push tractor, you can also load single sheets from the paper guide without removing the continuous paper from the tractor. There are two push labels. When loading paper in the bottom slot, be sure to use a printer stand with an opening large enough for the paper to feed through it - Epson C276001 | Product Information Guide - Page 9
paper with labels onto the rear push and pull tractor, the labels may come off their backing sheet inside the printer and cause a paper jam. Because thick multipart forms require a straight paper path, load them in the front sheet multipart forms bound at the side of the form. 4/99 EPSON FX-980 - 9 - Epson C276001 | Product Information Guide - Page 10
EPSON FX-980 Paper Release Lever Positions You can load continuous paper in the printer from various paper sources, combination. Pull tractor position For loading continuous paper from the tractor on top of the printer in the pull position. When the tractor is in the pull position, you can load - Epson C276001 | Product Information Guide - Page 11
EPSON FX-980 Paper Handling Loading Multipart Forms You can use Do not load damaged, curled, or wrinkled continuous paper with labels. Do not leave labels loaded in the printer between jobs; they may curl around the platen and jam when you resume printing. Removing continuous paper with - Epson C276001 | Product Information Guide - Page 12
1. Make sure the printer is turned off. Open the front paper guide by pulling the tab at the center of the guide. Then remove the guide by grasping both sides and pulling it straight out of the printer. Check that the the front push tractor as described in the next section. 12 - EPSON FX-980 4/99 - Epson C276001 | Product Information Guide - Page 13
is open. 10. Turn on the printer. You may need to check andchange the printer driver settings. When the printer receives data, it automatically loads the paper and starts printing. The printed pages are fed over the paper guide toward the back of the printer. After you finish printing, follow the - Epson C276001 | Product Information Guide - Page 14
EPSON FX-980 Removing a printed document from the front push tractor To remove feature. See "Adjusting the tearoff position" on page 22. 3. Close the paper guide cover. When you send a print job to the printer, paper automatically feeds to the top-of-form position and printing begins. 4. To remove - Epson C276001 | Product Information Guide - Page 15
EPSON FX-980 To load paper onto the rear push tractor, follow these steps: 1. Make sure the printer is turned off. Open the paper guide cover (Œ) and remove the paper guide (). 4. Slide the left sprocket to the left margin of the paper using the scale on the printer paper support midway between - Epson C276001 | Product Information Guide - Page 16
is open. 10. Turn on the printer. You may need to check and change the printer driver settings. When the printer receives data, it automatically loads the paper and starts printing. The printed pages are fed over the paper guide toward the back of the printer. After you finish printing, follow the - Epson C276001 | Product Information Guide - Page 17
tractor, follow these steps: 1. Make sure the printer is turned off, and the printer cover is removed. Also check that the tractor is installed in the pull position. 2. Slide the edge guides to the middle of the paper guide. Lift the center section of the paper guide up and lay it flat. 3. Set the - Epson C276001 | Product Information Guide - Page 18
not lock it. Move the paper support midway between the two sprockets. 7. Make guide with the continuous paper positioned, and then close it. If you use the rear slot, replace the paper guide base and make sure the edge guides are together in the middle of the paper guide base. edge guides 18 - EPSON - Epson C276001 | Product Information Guide - Page 19
be reduced. 12. Attach the printer cover and close the paper guide cover. Always close the printer cover before printing. The printer does not print when the cover is open. 13. You may need to check and change the printer driver settings. When the printer receives data, it automatically loads the - Epson C276001 | Product Information Guide - Page 20
driver settings. When the printer receives data, it automatically loads the paper and starts printing. As shown below, the printed pages are fed over the paper guide toward the back of the printer. 5. Replace the paper guide base and the printer cover. Then close the paper guide cover. front - Epson C276001 | Product Information Guide - Page 21
EPSON paper path. 3. Load single sheets in the top or front paper guide. Switching to printing on continuous paper To switch between printing on single , adjust the top-of-form position in your software. 1. Make sure the printer is turned on. If necessary, load paper as described earlier. If you load - Epson C276001 | Product Information Guide - Page 22
can use the tear-off feature manually by pressing the Tear Off/Bin the default setting mode. For instructions, see "Changing Default Settings" on guide cover. 3. Hold down the Pause button for about 3 seconds. The Pause light begins flashing and the printer enters the micro adjust mode. 22 - EPSON - Epson C276001 | Product Information Guide - Page 23
and printing begins. 4. Grasp the used ribbon cartridge and pull it up and out of the printer. Properly dispose of the used ribbon cartridge. Replacing the Ribbon Cartridge Your printer uses an EPSON black ribbon cartridge S015091. If you just used the printer, the print head may be hot; let it - Epson C276001 | Product Information Guide - Page 24
the print head from side to side to make sure it moves smoothly. 11. Replace the printer cover. 7. Gently press down on the cartridge until both ends click into place. 8. Lift the cartridge ribbon guide (Œ) and insert it firmly over the metal pins behind the print head (). Make sure the ribbon - Epson C276001 | Product Information Guide - Page 25
through your application software or printer driver, you may need to change a default setting from the printer's control panel using the default setting mode. The table below lists the default settings (in bold) and options you can select in this mode. For instructions on changing the default - Epson C276001 | Product Information Guide - Page 26
the Load/Eject button to eject the printed page. Then turn off the printer. If the self test results are satisfactory, the printer is working properly and the problem probably results from your printer driver settings, application settings, computer, or interface cable. (Be sure to use a shielded - Epson C276001 | Product Information Guide - Page 27
to remove the ribbon cartridge. If you have just used the printer, the print head may printer's original box. Related Documentation 4010001 4010002 4010003 TM-FX980 PL-FX980 EPSON FX-980 Quick Reference Guide EPSON FX-980 User's Guide EPSON FX-980 Unpacking sheet EPSON FX-980 Service Manual EPSON
-
 1
1 -
 2
2 -
 3
3 -
 4
4 -
 5
5 -
 6
6 -
 7
7 -
8
-
9
-
10
-
11
-
12
-
13
-
14
-
15
-
16
-
17
-
18
-
19
-
20
-
21
-
22
-
23
-
24
-
25
-
26
-
27
 |
 |

EPSON FX-980
4/99
EPSON FX-980
- 1
User Replaceable Parts
Options
Paper Handling Options
High-capacity cut-sheet feeder (C806841)
Feeds up to 150 sheets of paper, 25 plain bond envelopes, or 30
postcards into the printer without reloading. You can also load a
stack of single-sheet multipart forms up to 0.59 inch (15 mm)
thick in this feeder.
Second bin cut-sheet feeder (C806851)
Connects to the high-capacity cut-sheet feeder to create a
double-bin cut-sheet feeder. You can load up to 50 sheets of
ordinary single-sheet paper in the second-bin cut-sheet feeder.
Pull tractor (C800331)
Improves continuous paper handling and reduces the chance of
paper jams. You can also use this tractor as a front push tractor.
Using a pull tractor in combination with a push tractor is
especially useful for printing on continuous preprinted forms,
multipart forms, labels, and for printing high-quality graphics.
Roll paper holder (#8310)
Allows you to use your printer with 8.5-inch roll paper like that
used with telex machines.
knob
paper guide
cover
paper guide
base
front paper
guide (closed)
rear edge
guides
printer cover
control panel
paper
release
lever
tractor
ribbon
cartridge
shield
plate
serial interface
parallel
interface
paper
tension unit
paper thickness lever
front edge guides
front paper guide
(open)
User Replaceable Part
Parts Price List Name
Part Number
Bottom cover
Bottom cover
1044121
Connector cover
Upper connector cover
1037223
Connector cover screws (2)
C.B.S-tite screw
1002674
Front edge guides
Front edge guides
1044192
Front paper guide
Front cover
1044120
Knob
Knob
1039462
Logo plate
Logo plate
1046472
Paper guide cover
Rear printer cover
1044112
Paper separator
Paper separator
1025296
Paper tension unit
Paper eject assembly
1044165
Paper thickness lever cap
Lever cap
1039412
Printer cover
Printer cover assembly
1044166
Rear edge guides
Rear edge guides
1044169
Rear push tractor
Rear tractor assembly
1044168
Ribbon cartridge
Ribbon cartridge
S015091
Tractor (pull or front push)
Front tractor assembly
1044167