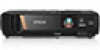
Epson EX9200 Pro User Manual
Epson EX9200 Pro Manual
 |
View all Epson EX9200 Pro manuals
Add to My Manuals
Save this manual to your list of manuals |
Epson EX9200 Pro manual content summary:
- Epson EX9200 Pro | User Manual - Page 1
EX3240/EX5240/EX5250 Pro/ EX7240 Pro/EX9200 Pro/VS240/ VS340/VS345 User's Guide - Epson EX9200 Pro | User Manual - Page 2
- Epson EX9200 Pro | User Manual - Page 3
Contents EX3240/EX5240/EX5250 Pro/EX7240 Pro/EX9200 Pro/VS240/VS340/VS345 User's Guide 9 Introduction to Your Projector ...10 Projector Features...10 Product Box Contents...11 Additional Components ...13 Optional Equipment and Replacement Parts 14 Warranty and Registration Information 15 - Epson EX9200 Pro | User Manual - Page 4
59 Selecting Wireless Network Settings Manually 61 Wireless LAN Menu Settings ...64 Selecting Wireless Network Settings in Windows 65 Selecting Wireless Network Settings in OS X 65 Setting Up Wireless Network Security 65 Wireless Security Menu Settings 66 Setting Up Projector Network E-Mail - Epson EX9200 Pro | User Manual - Page 5
Operation ...88 Using the Remote Control as a Wireless Mouse 89 Using the Remote Control as a Buttons 99 Projecting a PC Free Presentation 100 Supported PC Free File Types ...100 Starting a PC 103 PC Free Display Options ...105 Adjusting Projector Features ...107 Shutting Off the Picture and - Epson EX9200 Pro | User Manual - Page 6
Saving a User's Logo Image to Display 113 Locking the Projector's Buttons 116 Unlocking the Projector's Buttons 116 Installing a Security Cable ...117 Projector Identification System for Multiple Projector Control 117 Setting the Projector ID...118 Setting the Remote Control ID...118 Matching - Epson EX9200 Pro | User Manual - Page 7
Filter...153 Projector Lamp Maintenance...156 Replacing the Lamp ...156 Resetting the Lamp Timer...160 Replacing the Remote Control Batteries 161 Transporting the Projector...163 Solving Problems ...164 Projection Problem Tips ...164 Projector Light Status ...165 Using the Projector Help Displays - Epson EX9200 Pro | User Manual - Page 8
...187 Projector Environmental Specifications 188 Projector Safety and Approvals Specifications 188 Supported Video Display Formats...188 USB Display System Requirements 192 Notices ...194 Recycling...194 Important Safety Information ...194 Important Safety Instructions...195 Restriction - Epson EX9200 Pro | User Manual - Page 9
EX3240/EX5240/EX5250 Pro/EX7240 Pro/EX9200 Pro/VS240/VS340/VS345 User's Guide Welcome to the EX3240/EX5240/EX5250 Pro/EX7240 Pro/EX9200 Pro/VS240/VS340/VS345 User's Guide. 9 - Epson EX9200 Pro | User Manual - Page 10
: Native resolution of 1280 × 800 pixels (WXGA) • EX9200 Pro: Native resolution of 1920 × 1080 pixels (WUXGA) Flexible connectivity • Plug-and-play 3-in-1 USB projection, audio, and mouse control for instant setup • Built-in wireless LAN for projection, monitoring, and control via remote network - Epson EX9200 Pro | User Manual - Page 11
(EX3240/EX5240/VS240/VS340/VS345 require the optional wireless LAN module) • PC Free photo slide shows via connected USB memory devices or Epson document camera • Two HDMI ports for multiple high-definition AV devices, including MHL support (EX9200 Pro) • HDMI/MHL port for computer or video device - Epson EX9200 Pro | User Manual - Page 12
box included all of these parts: 1 Projector 2 Remote control 3 Remote control batteries (two AA alkaline) 4 Power cord 5 VGA computer cable 6 USB cable 7 Carrying case (EX3240/EX5240/EX5250 Pro/EX7240 Pro/EX9200 Pro) 8 Wireless LAN module (EX5250 Pro) 9 French control panel stickers (included for - Epson EX9200 Pro | User Manual - Page 13
Mac computers (2009 and earlier) may not support audio through the HDMI port. • To receive an HDMI signal via MHL, you need an MHL-compatible device, an MHL cable, or an HDMI cable and an MHL adapter compatible with your device (EX7240 Pro/EX9200 Pro). Devices with an integrated MHL connector may - Epson EX9200 Pro | User Manual - Page 14
Epson replacement lamp (ELPLP88) Replacement air filter (ELPAF32) Wireless LAN module (ELPAP10) Quick wireless connection USB key (ELPAP09) Epson DC-06 document camera Epson DC-11 document camera Epson DC-12 document camera Epson DC-20 document camera Universal projector ceiling mount Accolade - Epson EX9200 Pro | User Manual - Page 15
problems. • epson.com/support (U.S) or epson.ca/support (Canada) View FAQs (frequently asked questions) and e-mail your questions to Epson technical support 24 hours a day. • For detailed instructions on using your projector in a network environment, see the EasyMP Network Projection Operation Guide - Epson EX9200 Pro | User Manual - Page 16
• For detailed instructions on using your projector to hold interactive meetings in a network environment, see the EasyMP Multi PC Projection Operation Guide. • If you still need help after checking this manual and the sources listed above, you can use the Epson PrivateLine Support service to get - Epson EX9200 Pro | User Manual - Page 17
Projector Parts - Front/Top EX5240/EX5250 Pro/EX7240 Pro/EX9200 Pro/VS340/VS345 17 - Epson EX9200 Pro | User Manual - Page 18
EX3240/VS240 1 Exhaust vent 2 A/V Mute slide lever 3 Foot release lever 4 A/V Mute slide (lens cover) 5 Front adjustable foot 6 Lens 7 Remote receiver 8 Horizontal keystone slider 9 Air filter and intake vent 10 Air filter cover 11 Security lock slot 12 Control panel 18 - Epson EX9200 Pro | User Manual - Page 19
(EX5240/EX5250 Pro/EX7240 Pro/EX9200 Pro/VS340/VS345) 15 Lamp cover Parent topic: Projector Part Locations Projector Parts - Rear EX3240/EX5240/EX5250 Pro/EX7240 Pro/VS240/VS340/VS345 1 AC input port 2 Wireless LAN module cover screw (EX3240/EX5240/EX5250 Pro/VS240/VS340/VS345) 3 Audio ports 4 Video - Epson EX9200 Pro | User Manual - Page 20
11 USB-A/document camera/wireless LAN module port EX9200 Pro 1 AC input port 2 Audio ports 3 Video port 4 Remote receiver 5 Speaker 6 HDMI1 and HDMI2/MHL ports 7 Computer port 8 S-Video port 9 USB-B port 10 USB-A/document camera port Parent topic: Projector Part Locations 20 - Epson EX9200 Pro | User Manual - Page 21
Projector Parts - Base 1 Mounting bracket holes 2 Security cable attachment point 3 Rear adjustable feet 4 Front adjustable foot Parent topic: Projector Part Locations 21 - Epson EX9200 Pro | User Manual - Page 22
Projector Parts - Control Panel EX5240/EX5250 Pro/EX7240 Pro/EX9200 Pro/VS340/VS345 1 Source Search button (searches for connected sources) 2 Enter button (selects options) 3 Vertical keystone adjustment buttons (adjust screen shape) and arrow buttons 4 Esc button ( - Epson EX9200 Pro | User Manual - Page 23
5 W (Wide)/T (Tele) buttons (adjust projected image size), horizontal keystone adjustment buttons (adjust screen shape), and arrow buttons 6 Menu button (accesses projector menu system) 7 Home button (accesses source selection, projector help information, and other features) 8 Power button and light - Epson EX9200 Pro | User Manual - Page 24
Projector Parts - Remote Control 1 Power button 2 Computer button (cycles through connected computer sources) 3 Video button (cycles through connected video sources) 4 Numeric buttons (enter numbers) 24 - Epson EX9200 Pro | User Manual - Page 25
(cancels/exits functions and controls wireless mouse functions) 21 ID button (selects projector and remote control ID numbers) 22 Color Mode button (selects display modes) 23 MHL Menu button (displays settings or performs functions for the MHL device) (EX7240 Pro/EX9200 Pro) 24 LAN button (switches - Epson EX9200 Pro | User Manual - Page 26
Connections Installing Batteries in the Remote Control Opening the Lens Cover Projector Placement You can place the projector on almost any flat surface to project an image. You can also install the projector in a ceiling mount if you want to use it in a fixed location. Keep these considerations - Epson EX9200 Pro | User Manual - Page 27
Rear Front Ceiling Rear Ceiling Wherever you set up the projector, make sure to position it squarely in front of the center of the screen, not at an angle, if possible. If you project from the ceiling or from the rear, be sure to select the correct Projection option in the projector's menu system. - Epson EX9200 Pro | User Manual - Page 28
may have been rounded up or down.) You can also use the projector Throw Distance Calculator at epson.com/support (U.S.) or epson.ca/support (Canada). EX3240/VS240 4:3 Aspect Ratio Image or Screen Screen or image size Projection distance (1) Wide to Tele 50 inches (127 cm) 58 to 79 inches - Epson EX9200 Pro | User Manual - Page 29
EX5240/VS340 4:3 Aspect Ratio Image or Screen Screen or image size Projection distance (1) Wide to Tele 50 inches (127 cm) 59 to 71 inches 215 inches (454 to 546 cm) EX5250 Pro 4:3 Aspect Ratio Image or Screen Screen or image size Projection distance (1) Wide to Tele 50 inches (127 cm - Epson EX9200 Pro | User Manual - Page 30
to 133 inches (281 to 338 cm) 150 inches (381 cm) 167 to 200 inches (424 to 509 cm) EX9200 Pro 16:10 Aspect Ratio Image or Screen Screen or image size Projection distance (1) Wide to Tele 50 inches (127 cm) 58 to 71 inches (148 to 180 cm) 30 Offset from lens - Epson EX9200 Pro | User Manual - Page 31
Screen or image size Projection distance (1) Wide to Tele 80 inches audio input cables, if necessary. • For slide shows without a video source or computer, you can connect USB devices (such as a flash drive or camera) or an optional Epson document camera. Caution: If you will use the projector - Epson EX9200 Pro | User Manual - Page 32
Parent topic: Setting Up the Projector Related references Projector Setup Settings - Extended Menu Connecting to Computer Sources Follow the instructions in these sections to connect a computer to the projector. Connecting to a Computer for USB Video and Audio Connecting to a Computer for VGA Video - Epson EX9200 Pro | User Manual - Page 33
on your screen. Select USB Display Installer and follow the on-screen instructions to install the Epson USB Display software. Follow any on-screen instructions. You need to install this software only the first time you connect the projector to the computer. Note: If you are using Windows XP and you - Epson EX9200 Pro | User Manual - Page 34
the VGA computer cable to your computer's monitor port. 3. Connect the other end to a Computer port on the projector. EX3240/EX5240/EX5250 Pro/EX7240 Pro/VS240/VS340/VS345 EX9200 Pro 4. Tighten the screws on the VGA connector. Parent topic: Connecting to Computer Sources Related tasks Connecting to - Epson EX9200 Pro | User Manual - Page 35
earlier) may not support audio through the HDMI port. 1. Connect the HDMI cable to your computer's HDMI output port. 2. Connect the other end to the projector's HDMI port. EX3240/EX5240/EX5250 Pro/EX7240 Pro/VS240/VS340/VS345 EX9200 Pro Note: The projector converts the digital audio signal sent from - Epson EX9200 Pro | User Manual - Page 36
the USB cable to your projector's USB-B port. EX3240/EX5240/EX5250 Pro/EX7240 Pro/VS240/VS340/VS345 EX9200 Pro 2. Connect the other end to as a Wireless Mouse Connecting to a Computer for Sound If your computer presentation includes sound and you did not connect it using the projector's USB-B - Epson EX9200 Pro | User Manual - Page 37
the other end to the projector's Audio ports. EX3240/EX5240/EX5250 Pro/EX7240 Pro/VS240/VS340/VS345 EX9200 Pro Parent topic: Connecting to Computer Sources Connecting to Video Sources Follow the instructions in these sections to connect video devices to the projector. Connecting to an HDMI Video - Epson EX9200 Pro | User Manual - Page 38
cable to your video source's HDMI output port. 2. Connect the other end to the projector's HDMI port. EX3240/EX5240/EX5250 Pro/EX7240 Pro/VS240/VS340/VS345 EX9200 Pro Note: The projector converts the digital audio signal sent from your video source into a mono analog signal for the internal speaker - Epson EX9200 Pro | User Manual - Page 39
other end of the cable to the projector's HDMI /MHL port. Note: The projector converts the digital audio signal sent from your video source into to a Computer port on the projector. EX3240/EX5240/EX5250 Pro/EX7240 Pro/VS240/VS340/VS345 EX9200 Pro 3. Tighten the screws on the VGA connector. 39 - Epson EX9200 Pro | User Manual - Page 40
source has an S-Video port, you can connect it to the projector using an optional S-Video cable. 1. Connect the S-Video cable to your video source's S-Video output port. 2. Connect the other end to the projector's S-Video port. EX3240/EX5240/EX5250 Pro/EX7240 Pro/VS240/VS340/VS345 EX9200 Pro 40 - Epson EX9200 Pro | User Manual - Page 41
cable with the yellow connector to your video source's yellow video output port. 2. Connect the other end to the projector's Video port. EX3240/EX5240/EX5250 Pro/EX7240 Pro/VS240/VS340/VS345 EX9200 Pro Parent topic: Connecting to Video Sources Related tasks Connecting to a Video Source for Sound 41 - Epson EX9200 Pro | User Manual - Page 42
2. Connect the other end of the cable to the projector's Audio port or ports. EX3240/EX5240/EX5250 Pro/EX7240 Pro/VS240/VS340/VS345 EX9200 Pro Parent topic: Connecting to Video Sources Connecting to External USB Devices Follow the instructions in these sections to connect external USB devices to the - Epson EX9200 Pro | User Manual - Page 43
by connecting any of these devices to your projector: • USB flash drive • Digital camera or Note: Digital cameras or smartphones must be USB-mounted devices, not TWAIN-compliant devices, and must (not all USB Mass Storage Class devices are supported) • Formatted in FAT or FAT32 • Self-powered - Epson EX9200 Pro | User Manual - Page 44
2. Connect the USB cable (or USB flash drive or USB memory card reader) to the projector's USB-A port. EX3240/EX5240/EX5250 Pro/EX7240 Pro/VS240/VS340/VS345 EX9200 Pro Note: Do not connect a USB hub or a USB cable longer than 10 feet (3 m), or the device may not operate correctly. 3. Connect the - Epson EX9200 Pro | User Manual - Page 45
USB Device or Camera From the Projector When you finish presenting with a connected USB camera manual for details. • For the Epson DC-12 document camera, connect it to the projector's HDMI the document camera manual for details. • For the Epson DC-20 document camera, connect it to the projector's HDMI, - Epson EX9200 Pro | User Manual - Page 46
EX9200 Pro Note: For additional features supported by software, connect your document camera to your computer instead of the projector. See the document camera manual for details. Parent topic: Projector Connections Related references Optional Equipment and Replacement Parts Installing Batteries in - Epson EX9200 Pro | User Manual - Page 47
1. Remove the battery cover. 2. Insert the batteries with the + and - ends facing as shown. 47 - Epson EX9200 Pro | User Manual - Page 48
3. Replace the battery cover and press it down until it clicks into place. Parent topic: Setting Up the Projector Related references Remote Control Specifications Opening the Lens Cover Note: Your product may look different from the illustrations in this guide, but the instructions are the same. 48 - Epson EX9200 Pro | User Manual - Page 49
To open the projector's lens cover, slide the A/V Mute slide lever until it clicks into the open position. Parent topic: Setting Up the Projector 49 - Epson EX9200 Pro | User Manual - Page 50
the latest software and documentation from the Epson web site. Go to epson.com/support (U.S.) or epson.ca/support (Canada) and select your projector. Use the following software and documentation to set up, control, and monitor wireless projection: • EasyMP Network Projection software sets up - Epson EX9200 Pro | User Manual - Page 51
Selecting Wireless Network Settings Manually Selecting Wireless Network Settings in Windows Selecting Wireless Network Settings in OS X Setting Up Wireless Network Security Parent topic: Using the Projector on a Network Related references Product Box Contents Optional Equipment and Replacement Parts - Epson EX9200 Pro | User Manual - Page 52
4. Select the Network menu and press Enter. 5. Select Network Configuration and press Enter. 6. Select the Basic menu and press Enter. 7. Select Projector Name and press Enter. 52 - Epson EX9200 Pro | User Manual - Page 53
the on-screen instructions to save your settings and exit the menus. 13. In the list of wireless networks on your laptop or computer, select your projector's name. Note: This is the Projector Name you entered in the projector's Basic menu. 14. Start the EasyMP Network Projection software on your - Epson EX9200 Pro | User Manual - Page 54
Wireless Network Settings Manually Selecting Wireless Network Settings in Windows Selecting Wireless Network Settings in OS X Connecting Directly to a Smartphone or Tablet You can display a QR code on the screen and use it to connect a single smartphone or tablet to your projector with the Epson - Epson EX9200 Pro | User Manual - Page 55
4. Select the Network menu and press Enter. 5. Select Network Configuration and press Enter. 6. Select the Wireless LAN menu and press Enter. 7. Select Connection Mode and press Enter. 8. Select Quick and press Enter, then press Enter again. 55 - Epson EX9200 Pro | User Manual - Page 56
your projector. Visit epson.com/projectorapp (U.S.) or epson.ca/projectorapp (Canada) for information on controlling your projector with the Epson iProjection app. Parent topic: Wireless Network Projection Related tasks Installing the Wireless LAN Module Selecting Wireless Network Settings Manually - Epson EX9200 Pro | User Manual - Page 57
Installing the Wireless LAN Module To use the projector over a wireless network, install the Epson 802.11b/g/n wireless LAN module in the projector. Do not install any other type of wireless module. Note: Your product may look different from the illustrations in this guide, but the instructions are - Epson EX9200 Pro | User Manual - Page 58
1. Remove the wireless LAN module cover screw. 2. Insert the wireless LAN module into the USB-A port. 58 - Epson EX9200 Pro | User Manual - Page 59
is not included with your projector and is optional. Note: Make sure the wireless LAN module is installed, if applicable. The wireless LAN module is not included with all models. Note: Your product may look different from the illustrations in this guide, but the instructions are the same. 1. Turn on - Epson EX9200 Pro | User Manual - Page 60
like this: 3. Verify that an SSID and IP address are displayed, then remove the wireless LAN module from the projector. 4. Insert the Quick Wireless Connection USB key into the same port used for the wireless LAN module. You see a projected message that the network information update is complete - Epson EX9200 Pro | User Manual - Page 61
the on-screen instructions to install the Quick Wireless Connection driver. Note Replacement Parts Selecting Wireless Network Settings Manually Before you can project from your wireless network, you must select the network settings for the projector using its menu system. 1. Turn on the projector - Epson EX9200 Pro | User Manual - Page 62
3. Select the Network menu and press Enter. 4. Make sure the Wireless Mode option is set to Wireless LAN On. 5. Select Network Configuration and press Enter. 6. Select the Basic menu and press Enter. 62 - Epson EX9200 Pro | User Manual - Page 63
displays a random keyword that you must enter from a computer using the EasyMP Network Projection software or an iOS or Android device using iProjection. • Display LAN Info lets you select how the projector displays network information. You can select an option to display a QR code that lets you - Epson EX9200 Pro | User Manual - Page 64
LAN system the projector is connecting to - Lets you search for available wireless network access points in Advanced connection mode DHCP IP Address Subnet Mask Gateway Address In Advanced connection mode, select DHCP if your network assigns addresses automatically, or manually enter the - Epson EX9200 Pro | User Manual - Page 65
network standby screen Parent topic: Selecting Wireless Network Settings Manually Selecting Wireless Network Settings in Windows Before connecting to the projector, select the correct wireless network on your computer. 1. To access your wireless utility software, access the Desktop and double-click - Epson EX9200 Pro | User Manual - Page 66
not supported. 6. When you finish selecting settings, select Complete and follow the on-screen instructions to save your settings and exit the menus. Wireless Security Menu Settings Parent topic: Wireless Network Projection Related tasks Selecting Wireless Network Settings Manually Wireless Security - Epson EX9200 Pro | User Manual - Page 67
; passphrases are case-sensitive Parent topic: Setting Up Wireless Network Security Setting Up Projector Network E-Mail Alerts You can set up the projector to send you an e-mail alert over the network if there is a problem with the projector. 1. Press the Menu button. 2. Select the Network menu - Epson EX9200 Pro | User Manual - Page 68
mail address can be up to 32 alphanumeric characters long. 9. When you finish selecting settings, select Complete and follow the on-screen instructions to save your settings and exit the menus. Note: If a critical problem causes a projector to shut down, you may not receive an e-mail alert. Network - Epson EX9200 Pro | User Manual - Page 69
Simple Network Management Protocol) software on network computers so they can monitor projectors. If your network uses this software, you can set up the projector for SNMP monitoring. 1. settings, select Complete and follow the on-screen instructions to save your settings and exit the menus. 69 - Epson EX9200 Pro | User Manual - Page 70
. This lets you access the projector remotely. Note: The web setup and control features support Microsoft Internet Explorer 8.0 or later Web Control screen. 4. To select projector menu settings, select the name of the menu and follow the on-screen instructions. 5. To control projection remotely, - Epson EX9200 Pro | User Manual - Page 71
the network source 9 Selects the USB Display or USB device source 10 Volume button controls 11 Closed Caption control 6. Select the icon corresponding to the projector function you want to control. Parent topic: Using the - Epson EX9200 Pro | User Manual - Page 72
Related references Projector Setup Settings - ECO Menu 72 - Epson EX9200 Pro | User Manual - Page 73
Projecting a PC Free Presentation Turning On the Projector Turn on the computer or video equipment you want to use before you turn on the projector so it can display the image source. Note: Your product may look different from the illustrations in this guide, but the instructions are the same. 73 - Epson EX9200 Pro | User Manual - Page 74
is warmed up, the Status light stops flashing and turns blue. Warning: Never look into the projector lens when the lamp is on. This can damage your eyes and is especially dangerous for children. If you do not see a projected image right away, try the following: • - Epson EX9200 Pro | User Manual - Page 75
it so you can see the computer display during shutdown. Note: Turn off this product when not in use to prolong the life of the projector. Lamp life will vary depending upon mode selected, environmental conditions, and usage. Brightness decreases over time. Note: When using the A/V Mute feature, the - Epson EX9200 Pro | User Manual - Page 76
: With Epson's Instant Off technology, there is no cool-down period so you can pack up the projector for transport right away (if necessary). Caution: Do not turn the projector on immediately after turning it off. Turning the projector on and off frequently may shorten the life of the lamp. 3. To - Epson EX9200 Pro | User Manual - Page 77
4. Close the projector's lens cover. Parent topic: Using Basic Projector Features Selecting the Language for the Projector Menus If you want to view the projector's menus and messages in another language, you can change the Language setting. 1. Turn on the projector. 2. Press the Menu button. 77 - Epson EX9200 Pro | User Manual - Page 78
a table or other flat surface, and the image is too high or low, you can adjust the image height using the projector's adjustable feet. Note: Your product may look different from the illustrations in this guide, but the instructions are the same. 1. Turn on the projector and display an image. 78 - Epson EX9200 Pro | User Manual - Page 79
2. To adjust the front foot, pull up on the foot release lever and lift the front of the projector. The foot extends from the projector. 3. Release the lever to lock the foot. 4. If the image is tilted, rotate the rear feet to adjust their height. If the projected image is - Epson EX9200 Pro | User Manual - Page 80
to correct the image shape. Note: Your product may look different from the illustrations in this guide, but the instructions are the same. 1. Turn on the projector and display an image. Note: You can display a pattern to aid in adjusting the projected image using the Settings menu. Note: You - Epson EX9200 Pro | User Manual - Page 81
's position to correct the image shape. If this isn't possible, use the keystone correction buttons on the projector to correct the image shape. 1. Turn on the projector and display an image. Note: You can display a pattern to aid in adjusting the projected image using the Settings menu. Note - Epson EX9200 Pro | User Manual - Page 82
2. Press one of these keystone buttons on the control panel to display the Keystone adjustment screen. 3. Press a keystone button on the projector's control panel to adjust the image shape. 82 - Epson EX9200 Pro | User Manual - Page 83
EX5240/EX5250 Pro/EX7240 Pro/EX9200 Pro/VS340/VS345 EX3240/VS240 After correction, your image is slightly smaller. Note: If the projector is installed out of reach, you can also correct the image shape with the remote control using the Keystone settings in the projector menus. Parent topic: Image - Epson EX9200 Pro | User Manual - Page 84
's position to correct the image shape. If this isn't possible, use the Quick Corner setting to correct the image shape. 1. Turn on the projector and display an image. Note: You can display a pattern to aid in adjusting the projected image using the Settings menu. Note: You can also display - Epson EX9200 Pro | User Manual - Page 85
. 5. Select the Quick Corner setting and press Enter. Then press Enter again. You see the Quick Corner adjustment screen: 6. Use the arrow buttons on the projector or the remote control to select the corner of the image you want to adjust. Then press Enter. 85 - Epson EX9200 Pro | User Manual - Page 86
Feature Settings - Settings Menu Resizing the Image You can resize the image using the projector's zoom ring or the Wide and Tele buttons, depending on the projector model. Note: You can display a pattern to aid in adjusting the projected image using the Settings menu. Note: You can also display - Epson EX9200 Pro | User Manual - Page 87
EX5240/EX5250 Pro/EX7240 Pro/EX9200 Pro/VS340/VS345 Parent topic: Using Basic Projector Features Focusing the Image Using the Focus Ring 1. Turn on the projector and display an image. Note: You can display a pattern to aid in adjusting the projected image using the Settings menu. Note: You can also - Epson EX9200 Pro | User Manual - Page 88
EX5240/EX5250 Pro/EX7240 Pro/EX9200 Pro/VS340/VS345 Parent topic: Using Basic Projector Features Related references Projector Feature Settings - Settings Menu Remote Control Operation The remote control lets you control the projector from almost anywhere in the room. You can point it at the screen, - Epson EX9200 Pro | User Manual - Page 89
as a Pointer Parent topic: Using Basic Projector Features Related tasks Replacing the Remote Control Batteries Using the Remote Control as a Wireless Mouse You can use the projector's remote control as a wireless mouse so you can control projection at a distance from the computer. 1. Connect the - Epson EX9200 Pro | User Manual - Page 90
topic: Remote Control Operation Related tasks Connecting to a Computer for USB Mouse Control Using the Remote Control as a Pointer You can use the projector's remote control as a pointer to help you call out important information on the screen. The default pointer shape is an arrow, but you can - Epson EX9200 Pro | User Manual - Page 91
Esc to clear the pointer from the screen. Parent topic: Remote Control Operation Related references Projector Feature Settings - Settings Menu Selecting an Image Source If you connected multiple image sources to the projector, such as a computer and DVD player, you may want to switch from one image - Epson EX9200 Pro | User Manual - Page 92
3. Do one of the following: • Press the Source Search button on the projector or remote control until you see the image from the source you want. • Press the button for the source you want on the remote control. - Epson EX9200 Pro | User Manual - Page 93
2 Video, HDMI, and MHL sources (EX7240 Pro/EX9200 Pro) 3 USB port sources (computer display and external devices) 4 Network source Parent topic: Using Basic Projector Features Projection Modes Depending on how you positioned the projector, you may need to change the projection mode so your images - Epson EX9200 Pro | User Manual - Page 94
the Menus You can change the projection mode to flip the image over top-to-bottom and/or left-to-right using the projector menus. 1. Turn on the projector and display an image. 2. Press the Menu button. 3. Select the Extended menu and press Enter. 4. Select the Projection setting and press Enter - Epson EX9200 Pro | User Manual - Page 95
Signal Settings - Signal Menu Changing the Image Aspect Ratio You can change the aspect ratio of the displayed image to resize it. 1. Turn on the projector and switch to the image source you want to use. 2. Press the Aspect button on the remote control. The shape and size of the displayed - Epson EX9200 Pro | User Manual - Page 96
the image. Displays images using the full projection area at 4:3 aspect ratio. Converts the aspect ratio of the image to 16:9. EX7240 Pro/EX9200 Pro/VS345 Aspect ratio setting Auto Normal 16:9 Zoom Full Native Description Automatically sets the aspect ratio according to the input signal. Displays - Epson EX9200 Pro | User Manual - Page 97
Related references Image Quality Settings - Image Menu Changing the Color Mode You can change the projector's Color Mode using the remote control to optimize the image for your viewing environment. 1. Turn on the projector and switch to the image source you want to use. 2. If you are projecting from - Epson EX9200 Pro | User Manual - Page 98
Available Color Modes You can set the projector to use these Color Modes, depending on the input source optimize the image based on the brightness of the content you project. 1. Turn on the projector and switch to the image source you want to use. 2. Press the Menu button. 3. Select the Image - Epson EX9200 Pro | User Manual - Page 99
Note: You can set Auto Iris for each Color Mode that supports the feature. You cannot change the Auto Iris setting when you are audio. You can also use the volume buttons on the projector's control panel.(EX5240/EX5250 Pro/EX7240 Pro/EX9200 Pro/VS340/VS345) The volume buttons control the projector - Epson EX9200 Pro | User Manual - Page 100
a USB Device or Camera to the Projector Supported PC Free File Types You can project these types of files using the projector's PC Free feature. Note: For best results, place your files on media that is formatted in FAT16/32. If you have trouble projecting from media formatted for non-Windows - Epson EX9200 Pro | User Manual - Page 101
not above 1280 × 800 Make sure the file is not: • Saved with an audio codec other than linear PCM or ADPCM • Above 1280 × 720 resolution • Larger than PC Free Slide Show After connecting a USB device or digital camera to the projector, you can switch to the USB input source and start your slide show. - Epson EX9200 Pro | User Manual - Page 102
The PC Free screen appears. 2. Do the following as necessary to locate your files: • If you need to display files inside a subfolder on your device, press the arrow buttons to highlight the folder and press the Enter button. • To move back up a folder level on your device, highlight Back to Top and - Epson EX9200 Pro | User Manual - Page 103
or right arrow button. 5. To stop the display, follow the on-screen instructions or press the Esc button. Parent topic: Projecting a PC Free Presentation Related USB Device or Camera to the Projector Disconnecting a USB Device or Camera From the Projector Starting a PC Free Movie Presentation After - Epson EX9200 Pro | User Manual - Page 104
The PC Free screen appears. 2. Do the following as necessary to locate your files: • If you need to display files inside a subfolder on your device, press the arrow buttons to highlight the folder and press the Enter button. • To move back up a folder level on your device, highlight Back to Top and - Epson EX9200 Pro | User Manual - Page 105
PC Free Display Options You can select these display options when using the projector's PC Free feature. Setting Display Order Sort Order Continuous Play Screen Switching Time Options Name Order Date Order In Ascending In Descending On Off No 1 - Epson EX9200 Pro | User Manual - Page 106
Setting Effect Options Wipe Dissolve Random Parent topic: Projecting a PC Free Presentation Description Transitions between images with a wipe effect Transitions between images with a dissolve effect Transitions between images using a random variety of effects 106 - Epson EX9200 Pro | User Manual - Page 107
Follow the instructions in these sections to use your projector's feature adjustments. Shutting Off the Picture and Sound Temporarily Stopping Video Action Temporarily Zooming Into and Out of Images Projector Security Features Projector Identification System for Multiple Projector Control Projecting - Epson EX9200 Pro | User Manual - Page 108
button on the remote control to stop the video action. 2. To restart the video action in progress, press Freeze again. Parent topic: Adjusting Projector Features Zooming Into and Out of Images You can draw attention to parts of a presentation by zooming into a portion of the image and enlarging - Epson EX9200 Pro | User Manual - Page 109
the E-Zoom - button as necessary. • To return to the original image size, press Esc. Parent topic: Adjusting Projector Features Projector Security Features You can secure your projector to deter theft or prevent unintended use by setting up the following security features: • Password security to - Epson EX9200 Pro | User Manual - Page 110
Password Security Types You can set up these types of password security using one shared password: • Power On Protection password prevents anyone from using the projector without first entering a password. • User's Logo Protection password prevents anyone from changing the custom screen the - Epson EX9200 Pro | User Manual - Page 111
4. Press and hold down the Num button on the remote control and use the numeric buttons to set a four-digit password. The password displays as **** as you enter it. Then you see the confirmation prompt. 5. Enter the password again. You see the message "Password accepted." 6. Press Esc to return to - Epson EX9200 Pro | User Manual - Page 112
menu, hold down the Freeze button on the remote control for about five seconds or until the menu appears. 1. To prevent unauthorized use of the projector, select Power On Protection, press Enter, select On, press Enter again, and press Esc. 2. To prevent changes to the User's Logo screen or related - Epson EX9200 Pro | User Manual - Page 113
. • If you enter an incorrect password several times in succession, the projector displays a request code and a message to contact Epson Support. Do not attempt to enter the password again. When you contact Epson Support, provide the displayed request code and proof of ownership for assistance in - Epson EX9200 Pro | User Manual - Page 114
2. Press the Menu button, select the Extended menu, and press Enter. 3. Select the User's Logo setting and press Enter. You see a prompt asking if you want to use the displayed image as a user's logo. 4. Select Yes and press Enter. You see a selection box overlaying your image. 5. Use the arrow - Epson EX9200 Pro | User Manual - Page 115
screen: • To display it whenever there is no input signal, select Display Background and set it to Logo. • To display it whenever you turn the projector on, select Startup Screen and set it to On. • To display it whenever you press the A/V Mute button, select A/V Mute and set it to Logo - Epson EX9200 Pro | User Manual - Page 116
Enter. 3. Select the Control Panel Lock setting and press Enter. 4. Select one of these lock types and press Enter: • To lock all of the projector's buttons, select Full Lock. • To lock all buttons except the power button, select Partial Lock. You see a confirmation prompt. 5. Select Yes and press - Epson EX9200 Pro | User Manual - Page 117
security cable attachment point when mounting the projector on a wall or ceiling. Parent topic: Projector Security Features Related references Projector Parts - Front/Top Optional Equipment and Replacement Parts Projector Identification System for Multiple Projector Control You can operate multiple - Epson EX9200 Pro | User Manual - Page 118
set to zero by default so it can operate any compatible projector. If you want to set the remote control to operate only a particular projector, you need to set the remote control's ID to match the projector's ID. 1. Turn on the projector you want the remote control to operate with exclusively. 118 - Epson EX9200 Pro | User Manual - Page 119
. Note: You must set the remote control ID to match the projector ID each time you turn on the projector you have set it to control. Parent topic: Projector Identification System for Multiple Projector Control Matching Multiple-Projector Display Quality You can match the display quality of multiple - Epson EX9200 Pro | User Manual - Page 120
after adjustments. If brightness and tint differences become more noticeable over time, repeat the adjustments. Parent topic: Projector Identification System for Multiple Projector Control Projecting Two Images Simultaneously You can use the split screen feature to simultaneously project two images - Epson EX9200 Pro | User Manual - Page 121
1. Press the Split button on the remote control. The currently selected input source moves to the left side of the screen. 2. Press the Menu button. You see this screen: 3. To select an input source for the other image, select the Source setting, press Enter, select the input source, select Execute, - Epson EX9200 Pro | User Manual - Page 122
of the same model. Note: Any saved User's Logo setting on the projector will transfer to the other projector. Caution: If the copy process fails due to a power failure, communication error, or for any other reason, Epson will not be responsible for any repair costs incurred. The following settings - Epson EX9200 Pro | User Manual - Page 123
-A port. Note: Connect the flash drive directly to the projector. Do not use a hub. 3. Press and hold the Esc button on the control panel or remote control as you connect the power cord to the projector's power inlet. 4. When the power, Status, Lamp, and Temp lights turn on, release the Esc button - Epson EX9200 Pro | User Manual - Page 124
The lights flash to indicate that settings are transferring to the flash drive. When the lights stop flashing, the power light turns blue and the projector enters standby mode. Caution: Do not unplug the power cord or remove the flash drive while the lights are flashing. This could damage the - Epson EX9200 Pro | User Manual - Page 125
panel or remote control as you connect the power cord to the projector's power inlet. 4. When the power, Lamp, and Temp lights turn on, release the Menu button. The lights flash to indicate that settings are transferring to the projector. When the lights stop flashing, the power light turns blue and - Epson EX9200 Pro | User Manual - Page 126
• OS X 10.5.8 • OS X 10.6.x • OS X 10.7.x • OS X 10.8.x • OS X 10.9.x • OS X 10.10.x 1. Turn off the projector and unplug the power cord from the projector's power inlet. 2. Connect a USB cable to your projector's USB-B port. 3. Connect the other end to any available USB port on your computer. 126 - Epson EX9200 Pro | User Manual - Page 127
the Esc button on the control panel or remote control as you connect the power cord to the projector's power inlet. 5. When the power, Status, Lamp, and Temp lights turn on, release the Esc button. The projector shows up as a removable disk on your computer. 6. Open the removable disk and copy the - Epson EX9200 Pro | User Manual - Page 128
after you transfer settings to it. Otherwise, you may have to repeat your adjustments. 1. Turn off the projector and unplug the power cord from the projector's power inlet. 2. Connect a USB cable to your projector's USB-B port. 3. Connect the other end to any available USB port on your computer. 128 - Epson EX9200 Pro | User Manual - Page 129
Menu button on the control panel or remote control as you connect the power cord to the projector's power inlet. 5. When the power, Status, Lamp, and Temp lights turn on, release the Menu button. The projector shows up as a removable disk on your computer. 6. Copy the pjconfdata.bin file from your - Epson EX9200 Pro | User Manual - Page 130
Parent topic: Copying Menu Settings Between Projectors 130 - Epson EX9200 Pro | User Manual - Page 131
Settings Follow the instructions in these sections to access the projector menu system and change projector settings. Using the Projector's Menus Image Quality Settings - Image Menu Input Signal Settings - Signal Menu Projector Feature Settings - Settings Menu Projector Setup Settings - Extended - Epson EX9200 Pro | User Manual - Page 132
1. Press the Menu button on the control panel or remote control. You see the menu screen displaying the Image menu settings. 132 - Epson EX9200 Pro | User Manual - Page 133
2. Press the up or down arrow button to move through the menus listed on the left. The settings for each menu are displayed on the right. Note: The available settings depend on the current input source. 3. To change settings in the displayed menu, press Enter. 4. Press the up or down arrow button to - Epson EX9200 Pro | User Manual - Page 134
Setting Color Mode Options See the list of available Color Modes Brightness Varying levels available Contrast Varying levels available Color Saturation Varying levels available Tint Varying levels available Sharpness Varying levels available Color Temp. (color temperature) Color Temp. - Epson EX9200 Pro | User Manual - Page 135
for fast-moving images Note: The Brightness setting does not affect lamp brightness. To change the lamp brightness mode, use the Power Consumption setting. Note: The Noise Reduction Adjusting the Menu Settings Related references Available Color Modes Projector Setup Settings - ECO Menu 135 - Epson EX9200 Pro | User Manual - Page 136
Input Signal Settings - Signal Menu Normally the projector detects and optimizes the input signal settings automatically. If you need to customize the settings, you can use the Signal menu. The available settings depend - Epson EX9200 Pro | User Manual - Page 137
Setting Sync. Position Auto Setup Overscan Advanced settings Setting HDMI Video Range Video Signal Options Varying levels available Up, down, left, right On Off Auto Off 4% 8% Options Auto Normal Expanded Auto Various video standards 137 Description Adjusts signal to eliminate fuzziness or - Epson EX9200 Pro | User Manual - Page 138
video inputs Parent topic: Adjusting the Menu Settings Related references Available Image Aspect Ratios Projector Feature Settings - Settings Menu Options on the Settings menu let you customize various projector features. The available settings depend on the currently selected input source. 138 - Epson EX9200 Pro | User Manual - Page 139
Corner Screen Size Source Swap Screens Audio Source Display the QR Code Varying and vertically) H/V Keystone: lets you manually correct horizontal and vertical sides, or the volume of the projector's speaker system Controls projector button locking to secure the projector Full Lock: locks all - Epson EX9200 Pro | User Manual - Page 140
Setting Remote Receiver User Button Test Pattern Options Front/Rear Front Rear Off Power Consumption Info Deinterlacing Closed Caption Test Pattern Resolution Display the QR Code - Parent topic: Adjusting the Menu Settings Related tasks Correcting Image Shape with the Horizontal Keystone Slider - Epson EX9200 Pro | User Manual - Page 141
Auto Disp. Custom Function 1 Custom Function 2 Description Select various options for the projector's Home screen Home Screen Auto Disp.: controls whether the Home Screen displays automatically when the projector is turned on Custom Function 1/Custom Function 2: lets you customize the options - Epson EX9200 Pro | User Manual - Page 142
Rear/Ceiling Description Selects various display options Messages: controls whether messages are displayed on the screen Display Background: selects the screen color or logo to display when no signal is received Startup Screen: controls whether a special screen appears when the projector starts - Epson EX9200 Pro | User Manual - Page 143
altitudes above 4921 feet (1500 m) Startup Source Search: automatically detects the image signal being input when the projector is turned on Auto Power On: automatically turns on the projector when it receives an image signal (available only when Standby Mode is set to Communication On) Selects the - Epson EX9200 Pro | User Manual - Page 144
. Setting Wireless Mode Net. Info - Wireless LAN Options Wireless LAN On Off Connection mode Wireless LAN Sys. Antenna level Projector Name SSID DHCP IP Address Subnet Mask Gateway Address MAC Address Region Code 144 Description Turns on wireless LAN support Displays wireless network status - Epson EX9200 Pro | User Manual - Page 145
Displays a QR code for connecting with iOS or Android devices using the Epson iProjection app Configures your network settings Parent topic: Adjusting the Menu Settings Related tasks Selecting Wireless Network Settings Manually Projector Setup Settings - ECO Menu Settings on the ECO menu let you - Epson EX9200 Pro | User Manual - Page 146
Menu Settings 146 Description Selects the brightness mode of the projector lamp Normal: sets maximum lamp brightness ECO: reduces lamp brightness and fan noise, and saves power and lamp life When Power Consumption is set to Normal, the lamp brightness is adjusted based on the projected image; you - Epson EX9200 Pro | User Manual - Page 147
any hours until you have used the lamp for at least 10 hours. Information item Lamp Hours Description Displays the number of hours (H) the lamp has been used in Normal and ECO Power Consumption modes; if the information is displayed in yellow, obtain a genuine Epson replacement lamp soon 147 - Epson EX9200 Pro | User Manual - Page 148
number Displays the Event ID number corresponding to a specific projector problem; see the list of Event ID codes Event ID Code List Parent topic: Adjusting the Menu Settings Related references Optional Equipment and Replacement Parts Projector Lamp Specifications Event ID Code List If the Event ID - Epson EX9200 Pro | User Manual - Page 149
computer, access point, and projector to the same SSID. The WPA/WPA2 authentication type does not match. Make sure the wireless network security settings are projector. If that does not solve the problem, contact Epson for help. Parent topic: Projector Information Display - Info Menu Projector - Epson EX9200 Pro | User Manual - Page 150
You can also reset the projector's lamp usage timer to zero when you replace the lamp using the Reset Lamp Hours option. You cannot reset the following settings using the Reset All option: • Input Signal • User's Logo • Language • Network menu items • Lamp Hours • Password Parent topic: Adjusting - Epson EX9200 Pro | User Manual - Page 151
due to blocked ventilation. The only parts you should replace are the lamp, air filter, and remote control batteries. If any other part needs replacing, contact Epson or an authorized Epson servicer. Warning: Before cleaning any part of the projector, turn it off and unplug the power cord. Never - Epson EX9200 Pro | User Manual - Page 152
not use a lens cleaner that contains flammable gas. The high heat generated by the projector lamp may cause a fire. Caution: Do not use glass cleaner or any harsh materials projector. Your Epson projector is designed with an easily accessible, user-replaceable filter to protect your projector and - Epson EX9200 Pro | User Manual - Page 153
. Caution: Do not use canned air. The gases may leave a flammable residue or push dust and debris into the projector's optics or other sensitive areas. 3. If dust is difficult to remove or the air filter is damaged, replace the air filter. Parent topic: Air Filter and Vent Maintenance Related tasks - Epson EX9200 Pro | User Manual - Page 154
You can replace the air filter while the projector is mounted to the ceiling or placed on a table. 1. Turn off the projector and unplug the power cord. 2. Carefully open the air filter cover. 154 - Epson EX9200 Pro | User Manual - Page 155
3. Pull the air filter out of the projector. Note: Air filters contain ABS resin and polyurethane foam. Dispose of used air filters according to local regulations. 4. Place the new air filter in the projector as shown and push gently until it clicks into place. 155 - Epson EX9200 Pro | User Manual - Page 156
Projector Light Status Replacing the Lamp Before you replace the lamp, let the projector cool down for at least one hour so the lamp will not be hot. Warning: Let the lamp fully cool before replacing it to avoid injury. You can replace the lamp while the projector is mounted to the ceiling - Epson EX9200 Pro | User Manual - Page 157
with the replacement lamp to loosen the screw securing the lamp cover. Warning: If the lamp is broken, glass fragments may be loose inside the lamp chamber. Be careful removing any broken glass to avoid injury. If the projector is installed on the ceiling, stand to the side of the lamp cover and - Epson EX9200 Pro | User Manual - Page 158
5. Loosen the screws securing the lamp to the projector. The screws do not come all the way out. 6. Grasp the raised section of the lamp and gently pull the lamp out of the projector. Note: The lamp(s) in this product contain mercury. Please consult your state and local regulations regarding - Epson EX9200 Pro | User Manual - Page 159
7. Gently insert the new lamp into the projector. If it does not fit easily, make sure it is facing the right way. Caution: Do not touch any glass on the lamp assembly to avoid premature lamp failure. 8. Push in the lamp firmly and tighten the screws to secure it. 159 - Epson EX9200 Pro | User Manual - Page 160
to keep track of the new lamp's usage. Parent topic: Projector Lamp Maintenance Related tasks Resetting the Lamp Timer Resetting the Lamp Timer You must reset the lamp timer after replacing the projector's lamp to clear the lamp replacement message and to keep track of lamp usage correctly. Note: Do - Epson EX9200 Pro | User Manual - Page 161
press Enter. 6. Press Menu or Esc to exit the menus. Parent topic: Projector Lamp Maintenance Related tasks Replacing the Lamp Replacing the Remote Control Batteries The remote control uses two AA manganese or alkaline batteries. Replace the batteries as soon as they run out. Caution: Use only the - Epson EX9200 Pro | User Manual - Page 162
1. Remove the battery cover as shown. 2. Remove the old batteries. Warning: If the battery fluid has leaked, wipe it away with a soft cloth and avoid getting the fluid on your hands. If it gets on your hands, wash them immediately to avoid injury. 3. Insert the batteries with the + and - ends facing - Epson EX9200 Pro | User Manual - Page 163
Replace projector. • Use a carrying case to hand-carry the projector. • When transporting the projector a long distance projector for repairs, place it in its original packing materials, if possible, or use equivalent materials with cushioning around the projector. Mark the box "Fragile." Note: Epson - Epson EX9200 Pro | User Manual - Page 164
display information about common problems, if the projector is operating. • The solutions in this manual can help you solve many problems. If none of these solutions help, you can contact Epson for technical support. Parent topic: Solving Problems Related references Projector Light Status Where to - Epson EX9200 Pro | User Manual - Page 165
Status The lights on the projector indicate the projector status and let you know when a problem occurs. Check the status and color of the lights and look for a solution in the table here. 1 Power light 2 Status light 3 Wireless LAN light (EX9200 Pro) 4 Lamp light 5 Temp (temperature) light Power - Epson EX9200 Pro | User Manual - Page 166
below: • Make sure that the vents and air filter are not clogged with dust or obstructed by nearby objects. • Clean or replace the air filter. • If operating the projector at high altitude, turn on High Altitude Mode. • If the problem persists, unplug the projector and contact Epson for help. 166 - Epson EX9200 Pro | User Manual - Page 167
If the problem persists, unplug the projector and contact Epson for help. Replace the lamp soon to avoid damage. Do not continue using the projector. A fan or sensor has a problem. Turn the projector off, unplug it, and contact Epson for help. Internal projector error. Turn the projector off, unplug - Epson EX9200 Pro | User Manual - Page 168
the Air Filter and Vents Replacing the Air Filter Replacing the Lamp Using the Projector Help Displays You can display information to help you solve common problems using the projector's Help system. 1. Turn on the projector. 2. Press the Home button on the projector or the remote control. 3. Use - Epson EX9200 Pro | User Manual - Page 169
Also see if your connected computer is in sleep mode or displaying a blank screen saver. • Press the Menu button. If the projector menu is able to display, there may be a problem with the connected video source, cable connection, or port. • Check the settings on the Signal menu to make sure they are - Epson EX9200 Pro | User Manual - Page 170
Display software has installed correctly. Install it manually if software. You can download the latest version from the Epson web site. Go to epson.com/support (U.S.) or epson.ca/support (Canada) and select your projector. Parent topic: Solving Image or Sound Problems Related references Projector - Epson EX9200 Pro | User Manual - Page 171
Sound Problems Related concepts Projector Connections Displaying projector, check the Windows Display utility to make sure the external monitor port is enabled and extended desktop mode is disabled. (See your computer or Windows manual for instructions Supported" Message Appears If the "Not Supported - Epson EX9200 Pro | User Manual - Page 172
the projector's limits. (See your computer manual for details.) • Check the resolution assigned to your presentation files to see if they are created for a different resolution than you are projecting in. (See your software help for details.) Parent topic: Solving Image or Sound Problems Related - Epson EX9200 Pro | User Manual - Page 173
problem remains, display a uniformly patterned image on the screen and manually adjust the Tracking and Sync settings. • If you adjusted the image shape using the projector in the Epson USB Display Settings program on your computer. Parent topic: Solving Image or Sound Problems Related references - Epson EX9200 Pro | User Manual - Page 174
on the screen and manually adjust the Tracking and Sync settings. • If you are projecting from a computer, use a lower resolution or try to match the projector's native resolution. Parent topic: Solving Image or Sound Problems Related references Projection Distance Image Quality Settings - Image - Epson EX9200 Pro | User Manual - Page 175
. • If the image has been progressively darkening, you may need to replace the projector lamp soon. Parent topic: Solving Image or Sound Problems Related concepts Projector Lamp Maintenance Related references Projection Distance Available Color Modes Image Quality Settings - Image Menu Input Signal - Epson EX9200 Pro | User Manual - Page 176
are using the USB Display function, turn on the Output audio from the projector setting in the Epson USB Display Settings program on your computer. • If you are using a Mac and you do not hear sound from an HDMI source, make sure your Mac supports audio through the HDMI port. If not, you need to - Epson EX9200 Pro | User Manual - Page 177
the cord and contact Epson. Parent topic: Solving Projector or Remote Control Operation Problems Related references Projector Feature Settings - Settings Menu Projector Light Status Where to Get Help Related tasks Unlocking the Projector's Buttons Replacing the Remote Control Batteries Solutions - Epson EX9200 Pro | User Manual - Page 178
, you can order another one from Epson. Parent topic: Solving Projector or Remote Control Operation Problems Related references Remote Control Operation Optional Equipment and Replacement Parts Related tasks Replacing the Remote Control Batteries Solutions to Password Problems If you cannot enter or - Epson EX9200 Pro | User Manual - Page 179
or in the network software. • Set the Standby Mode setting to Communication On so the network software can monitor the projector in standby mode. Parent topic: Solving Network Problems Related references Projector Setup Settings - ECO Menu Related tasks Setting Up Projector Network E-Mail Alerts 179 - Epson EX9200 Pro | User Manual - Page 180
support services, use the following support options. Internet Support Visit Epson's support website at epson.com/support (U.S.) or epson.ca/support (Canada) for solutions to common problems with your projector. You can download utilities and documentation, get FAQs and troubleshooting advice - Epson EX9200 Pro | User Manual - Page 181
Supported Video Display Formats USB Display System Requirements General Projector Specifications Type of display Resolution Poly-silicon TFT active matrix EX3240/VS240: 800 × 600 pixels (SVGA) EX5240/EX5250 Pro/VS340: 1024 × 768 pixels (XGA) EX7240 Pro/VS345: 1280 × 800 pixels (WXGA) EX9200 Pro - Epson EX9200 Pro | User Manual - Page 182
/VS345: F=1.58 to 1.72 Focal length: 16.9 to 20.28 mm EX3240/VS240: F=1.44 Focal length: 16.7 mm EX9200 Pro: F=1.50 to 1.71 Focal length: 20.42 to 24.50 mm EX5250 Pro: F=1.6 to 1.74 Focal length: 18.4 to 22.08 mm Up to 1 billion colors VS340: Normal Power Consumption mode: White light - Epson EX9200 Pro | User Manual - Page 183
. Color light output measured in accordance with IDMS 15.4; white light output measured in accordance with ISO 21118. EX3240/EX5240/EX7240 Pro/EX9200 Pro: Normal Power Consumption mode: White light output 3200 lumens (ISO 21118 standard) Color light output 3200 lumens ECO Power Consumption mode - Epson EX9200 Pro | User Manual - Page 184
(8.9 m) EX5240/EX7240 Pro/VS340/VS345: 35.4 inches (0.9 m) to 425.2 inches (10.8 m) EX3240/VS240: 34.6 inches (0.88 m) to 411.0 inches (10.44 m) EX9200 Pro: 34.3 inches (0.87 m) to 432.3 inches (10.98 m) EX5250 Pro: 33.1 inches (0.84 m) to 410.2 inches (10.42 m) Front, rear, ceiling-mounted 184 - Epson EX9200 Pro | User Manual - Page 185
control, or firmware update USB Type A port compatibility EX3240/EX5240/EX5250 Pro/EX9200 Pro/VS240/VS340/VS345: One USB 1.1 and 2.0 compliant port for USB device or Epson document camera input, wireless LAN, or firmware update EX7240 Pro: One USB 1.1 and 2.0 compliant port for USB device or - Epson EX9200 Pro | User Manual - Page 186
in use to prolong the life of the projector. Lamp life will vary depending upon mode selected, Projector Dimension Specifications Height (excluding feet) Width Depth 3.0 inches (77 mm) 11.7 inches (297 mm) EX3240/EX5240/EX5250 Pro/EX7240 Pro/VS240/VS340/VS345: 9.2 inches (234 mm) EX9200 Pro - Epson EX9200 Pro | User Manual - Page 187
Weight EX3240/EX5240/EX5250 Pro/EX7240 Pro/VS240/VS340/VS345: 5.3 lb (2.4 kg) EX9200 Pro: 5.7 lb (2.6 kg) Parent topic: Technical Specifications Projector Electrical Specifications Rated frequency Power supply Power consumption (100 to 120 V) Power consumption (220 to 240 V) 50/60 Hz 100 to 240 - Epson EX9200 Pro | User Manual - Page 188
projector includes Epson's SizeWise chip that supports other computer display resolutions, so your image will be resized to fit automatically. Your computer's monitor port or video card refresh rate (vertical frequency) must be compatible with the projector. (See your computer or video card manual - Epson EX9200 Pro | User Manual - Page 189
Display format Refresh rate (in Hz) Computer signals (analog RGB) VGA 60/72/75/85 SVGA 60/72/75/85 XGA 60/70/75/85 WXGA 60 60 60/75 WXGA+ 60 SXGA 70/75 60 60 SXGA+ 60 Composite video TV (NTSC) 60 TV (SECAM) 50 TV (PAL) 50/60 Component video SDTV (480i) 60 SDTV (576i) - Epson EX9200 Pro | User Manual - Page 190
(1080p) Refresh rate (in Hz) 60 60 60 60 60 60 60 60 50 50/60 50/60 24/30/50/60 EX5240/EX5250 Pro/EX7240 Pro/EX9200 Pro/VS340/VS345 Display format Refresh rate (in Hz) Computer signals (analog RGB) VGA 60/72/75/85 SVGA 60/72/75/85 XGA 60/70 - Epson EX9200 Pro | User Manual - Page 191
Display format SXGA SXGA+ WSXGA+1 UXGA WUXGA 2 Composite video TV (NTSC) TV (SECAM) TV (PAL) Component video SDTV (480i) SDTV (576i) SDTV (480p) SDTV (576p) HDTV (720p) HDTV (1080i) HDMI input signals - Epson EX9200 Pro | User Manual - Page 192
1080 1920 × 1080 1 Wide resolution only for EX7240 Pro/EX9200 Pro/VS345 2 EX9200 Pro only 3 EX7240 Pro/EX9200 Pro only Parent topic: Technical Specifications USB Display System Requirements Your computer system must meet the system requirements here to use the projector's USB Display software. 192 - Epson EX9200 Pro | User Manual - Page 193
Windows XP Professional, Home Edition, and Tablet PC Edition (32-bit); except for Service Pack 1 OS X 10.5.8 (32-bit); OS X 10.6.x, 10.7.x, 10.8.x, 64-bit); Home Basic and Starter (32bit) Windows 8.x, Windows 8 Enterprise and Pro (32- and 64-bit) USB 1.1 and above (USB 2.0 recommended) Mobile - Epson EX9200 Pro | User Manual - Page 194
User's Guide, do not attempt to service this product yourself. Refer all servicing to qualified service personnel. Warning: The projector and its accessories come packaged in plastic bags. Keep plastic bags away from small children to avoid any risk of suffocation. Caution: When you replace the lamp - Epson EX9200 Pro | User Manual - Page 195
do not use oils or lubricants. This may cause the projector case to crack and the projector to fall from its ceiling mount. This could cause serious injury to anyone under the mount and could damage the projector. • Do not use the projector near water, sources of heat, high-voltage electrical wires - Epson EX9200 Pro | User Manual - Page 196
. Refer all repairs to qualified service personnel. • Unplug the projector from the wall outlet and refer servicing to qualified service personnel under the following conditions: if it does not operate normally when you follow the operating instructions, or exhibits a distinct change in performance - Epson EX9200 Pro | User Manual - Page 197
your eyes or mouth. If you do inhale gases or gases come in contact with your eyes or mouth, seek medical advice immediately. • If the projector is mounted overhead and the lamp breaks, be careful to prevent pieces of glass from falling into your eyes or mouth when you open the - Epson EX9200 Pro | User Manual - Page 198
related to direct medical care, please make your own judgment on this product's suitability after a full evaluation. Parent topic: Important Safety Instructions FCC Compliance Statement For United States Users This equipment has been tested and found to comply with the limits for a Class B digital - Epson EX9200 Pro | User Manual - Page 199
of same model of this projector product. If you desire to receive the source code of the GPL Programs, contact Epson. These GPL Programs are GENERAL PUBLIC LICENSE Version 2, June 1991 Copyright (C) 1989, 1991 Free Software Foundation, Inc., 51 Franklin Street, Fifth Floor, Boston, MA 02110-1301 - Epson EX9200 Pro | User Manual - Page 200
it to your programs, too. When we speak of free software, we are referring to freedom, not price. Our General Public Licenses are designed to make sure that you have the freedom to distribute copies of free software (and charge for this service if you wish), that you receive source code or can get - Epson EX9200 Pro | User Manual - Page 201
Activities other than copying, distribution and modification are not covered by this License; they are outside its scope. The act of running the Program is not restricted, and the output from the Program is covered only if its contents constitute a work based on the Program (independent of having - Epson EX9200 Pro | User Manual - Page 202
the complete corresponding machine-readable source code, which must be distributed under the terms of Sections 1 and 2 above on a medium customarily used for software interchange; or, b) Accompany it with a written offer, valid for at least three years, to give any third party, for a charge no more - Epson EX9200 Pro | User Manual - Page 203
as if written in the body of this License. 9. The Free Software Foundation may publish revised and/or new versions of the General Public License spirit to the present version, but may differ in detail to address new problems or concerns. Each version is given a distinguishing version number. If the - Epson EX9200 Pro | User Manual - Page 204
software which is copyrighted by the Free Software Foundation, write to the Free Software Foundation; we sometimes make exceptions for this. Our decision will be guided THE PROGRAM PROVE DEFECTIVE, YOU ASSUME THE COST OF ALL NECESSARY SERVICING, REPAIR OR CORRECTION. 12. IN NO EVENT UNLESS REQUIRED - Epson EX9200 Pro | User Manual - Page 205
Public License instead of this License. GNU LGPL This projector product includes the open source software programs which apply the GNU Lesser General Public License Version model of this projector product. If you desire to receive the source code of the LGPL Programs, please contact Epson. These LGPL - Epson EX9200 Pro | User Manual - Page 206
on the explanations below. When we speak of free software, we are referring to freedom of use, not price. Our General Public Licenses are designed to make sure that you have the freedom to distribute copies of free software (and charge for this service if you wish); that you receive source code or - Epson EX9200 Pro | User Manual - Page 207
that what they have is not the original version, so that the original author's reputation will not be affected by problems that might be introduced by others. Finally, software patents pose a constant threat to the existence of any free program. We wish to make sure that a company cannot effectively - Epson EX9200 Pro | User Manual - Page 208
under the terms of this Lesser General Public License (also called "this License"). Each licensee is addressed as "you". A "library" means a collection of software functions and/or data prepared so as to be conveniently linked with application programs (which use some of those functions and data) to - Epson EX9200 Pro | User Manual - Page 209
modifications or work under the terms of Section 1 above, provided that you also meet all of these conditions: a) The modified work must itself be a software library. b) You must cause the files modified to carry prominent notices stating that you changed the files and the date of any change. c) You - Epson EX9200 Pro | User Manual - Page 210
corresponding machine-readable source code, which must be distributed under the terms of Sections 1 and 2 above on a medium customarily used for software interchange. If distribution of object code is made by offering access to copy from a designated place, then offering equivalent access to copy - Epson EX9200 Pro | User Manual - Page 211
during execution displays copyright notices, you must include the copyright notice for the Library among them, as well as a reference directing the user to the copy of this License. Also, you must do one of these things: a) Accompany the work with the complete corresponding machine-readable source - Epson EX9200 Pro | User Manual - Page 212
in reliance on consistent application of that system; it is up to the author/donor to decide if he or she is willing to distribute software through any other system and a licensee cannot impose that choice. This section is intended to make thoroughly clear what is believed to be a consequence of - Epson EX9200 Pro | User Manual - Page 213
differ in detail to address new problems or concerns. Each version is software which is copyrighted by the Free Software Foundation, write to the Free Software Foundation; we sometimes make exceptions for this. Our decision will be guided THE COST OF ALL NECESSARY SERVICING, REPAIR OR CORRECTION. 16. - Epson EX9200 Pro | User Manual - Page 214
Hacker. , 1 April 1990 Ty Coon, President of Vice That's all there is to it! libjpeg This projector product includes the open source software program "libjpeg" which applies the terms and conditions provided by owner of the copyright to the "libjpeg". The "libjpeg" are WITHOUT - Epson EX9200 Pro | User Manual - Page 215
of the copyright to the "libjpeg" are as follows. Copyright (C) 1994-1997, Thomas G. Lane. This file is part of the Independent JPEG Group's software. For conditions of distribution and use, see the accompanying README file. This distribution contains the sixth public release of the Independent JPEG - Epson EX9200 Pro | User Manual - Page 216
Another support script, install-sh, is copyright by M.I.T. but is also freely distributable. It appears that the arithmetic coding option of the JPEG spec is sm) is a Service Mark property of CompuServe Incorporated." libpng This projector product includes the open source software program "libpng" - Epson EX9200 Pro | User Manual - Page 217
List of libpng programs • libpng-1.2.49 License terms of conditions of each program which are provided by owner of the copyright to the "libpng" are as follows. This copy of the libpng notices is provided for your convenience. In case of any discrepancy between this copy and the notices in the file - Epson EX9200 Pro | User Manual - Page 218
. The Contributing Authors and Group 42, Inc. specifically permit, without fee, and encourage the use of this source code as a component to supporting the PNG file format in commercial products. If you use this source code in a product, acknowledgment is not required but would be appreciated - Epson EX9200 Pro | User Manual - Page 219
certification mark of the Open Source Initiative. Glenn Randers-Pehrson glennrp at users.sourceforge.net March 29, 2012 zlib This projector product includes the open source software program "zlib" which applies the terms and conditions provided by owner of the copyright to the "zlib". The "zlib" are - Epson EX9200 Pro | User Manual - Page 220
sources, we would appreciate that you include in the file ChangeLog history information documenting your changes. Apache-2.0 This projector product includes the open source software program which applies the terms and conditions provided by owner of the copyright to the "Apache-2.0". The "Apache - Epson EX9200 Pro | User Manual - Page 221
permissions granted by this License. "Source" form shall mean the preferred form for making modifications, including but not limited to software source code, documentation source, and configuration files. "Object" form shall mean any form resulting from mechanical transformation or translation of - Epson EX9200 Pro | User Manual - Page 222
you may have executed with Licensor regarding such Contributions. 6. Trademarks. This License does not grant permission to use the trade names, trademarks, service marks, or product names of the Licensor, except as required for reasonable and customary use in describing the origin of the Work and - Epson EX9200 Pro | User Manual - Page 223
and charge a fee for, acceptance of support, warranty, indemnity, or other liability , with the fields enclosed by brackets "[]" replaced with your own identifying information. (Don't required by applicable law or agreed to in writing, software distributed under the License is distributed on an "AS - Epson EX9200 Pro | User Manual - Page 224
(c) 1998-2008, Brian Gladman, Worcester, UK. All rights reserved. LICENSE TERMS The redistribution and use of this software (with or without changes) is allowed and/or fitness for purpose. newlib This projector product includes the open source software program "newlib" which applies the terms and - Epson EX9200 Pro | User Manual - Page 225
to endorse or promote products derived from this software without specific prior written permission. THIS SOFTWARE IS PROVIDED BY THE COPYRIGHT HOLDERS AND (INCLUDING, BUT NOT LIMITED TO, PROCUREMENT OF SUBSTITUTE GOODS OR SERVICES; LOSS OF USE, DATA, OR PROFITS; OR BUSINESS INTERRUPTION) - Epson EX9200 Pro | User Manual - Page 226
granted, provided that this entire notice is included in all copies of any software which is or includes a copy or modification of this software and in all copies of the supporting documentation for such software. THIS SOFTWARE IS BEING PROVIDED "AS IS", WITHOUT ANY EXPRESS OR IMPLIED WARRANTY. IN - Epson EX9200 Pro | User Manual - Page 227
So that all may benefit from your experience, please report any problems or suggestions about this software to the 29K Technical Support Center at 800-29-29-AMD (800-292-9263) in the USA, or 080089-1131 in the UK, or 0031-11-1129 in Japan, toll free. The direct dial number is 512-462 - Epson EX9200 Pro | User Manual - Page 228
DAMAGES (INCLUDING, BUT NOT LIMITED TO, PROCUREMENT OF SUBSTITUTE GOODS OR SERVICES; LOSS OF USE, DATA, OR PROFITS; OR BUSINESS INTERRUPTION) HOWEVER NO WARRANTY OF ANY KIND, EXPRESS OR IMPLIED, WITH REGARD TO THIS SOFTWARE. IN NO EVENT SHALL SUPERH BE LIABLE FOR INDIRECT, SPECIAL, INCIDENTAL OR - Epson EX9200 Pro | User Manual - Page 229
benefit from your experience, please report any problems or suggestions about this software to the SuperH Support Center via e-mail at [email protected]. (INCLUDING, BUT NOT LIMITED TO, PROCUREMENT OF SUBSTITUTE GOODS OR SERVICES; LOSS OF USE, DATA, OR PROFITS; OR BUSINESS INTERRUPTION) - Epson EX9200 Pro | User Manual - Page 230
in the documentation and/or other materials provided with the distribution. THIS SOFTWARE IS PROVIDED BY THE AUTHOR AND CONTRIBUTORS "AS IS" AND ANY DAMAGES (INCLUDING, BUT NOT LIMITED TO, PROCUREMENT OF SUBSTITUTE GOODS OR SERVICES; LOSS OF USE, DATA, OR PROFITS; OR BUSINESS INTERRUPTION) HOWEVER - Epson EX9200 Pro | User Manual - Page 231
(INCLUDING, BUT NOT LIMITED TO, PROCUREMENT OF SUBSTITUTE GOODS OR SERVICES; LOSS OF USE, DATA, OR PROFITS; OR BUSINESS INTERRUPTION) any software which is or includes a copy or modification of this software and in all copies of the supporting documentation for such software. THIS SOFTWARE IS - Epson EX9200 Pro | User Manual - Page 232
in the documentation and/or other materials provided with the distribution. THIS SOFTWARE IS PROVIDED BY THE AUTHOR AND CONTRIBUTORS "AS IS" AND ANY DAMAGES (INCLUDING, BUT NOT LIMITED TO, PROCUREMENT OF SUBSTITUTE GOODS OR SERVICES; LOSS OF USE, DATA, OR PROFITS; OR BUSINESS INTERRUPTION) HOWEVER - Epson EX9200 Pro | User Manual - Page 233
that both the copyright notice and this permission notice appear in supporting documentation. In addition, Intel grants this permission provided that used in advertising or publicity pertaining to distribution of the software or the documentation without specific, written prior permission. Intel - Epson EX9200 Pro | User Manual - Page 234
DAMAGES (INCLUDING, BUT NOT LIMITED TO, PROCUREMENT OF SUBSTITUTE GOODS OR SERVICES; LOSS OF USE, DATA, OR PROFITS; OR BUSINESS INTERRUPTION) HOWEVER NEGLIGENCE OR OTHERWISE) ARISING IN ANY WAY OUT OF THE USE OF THIS SOFTWARE, EVEN IF ADVISED OF THE POSSIBILITY OF SUCH DAMAGE. (27) Konstantin - Epson EX9200 Pro | User Manual - Page 235
in the documentation and/or other materials provided with the distribution. THIS SOFTWARE IS PROVIDED BY THE AUTHOR AND CONTRIBUTORS "AS IS" AND ANY DAMAGES (INCLUDING, BUT NOT LIMITED TO, PROCUREMENT OF SUBSTITUTE GOODS OR SERVICES; LOSS OF USE, DATA, OR PROFITS; OR BUSINESS INTERRUPTION) HOWEVER - Epson EX9200 Pro | User Manual - Page 236
in the documentation and/or other materials provided with the distribution. THIS SOFTWARE IS PROVIDED BY THE AUTHOR AND CONTRIBUTORS "AS IS" AND ANY DAMAGES (INCLUDING, BUT NOT LIMITED TO, PROCUREMENT OF SUBSTITUTE GOODS OR SERVICES; LOSS OF USE, DATA, OR PROFITS; OR BUSINESS INTERRUPTION) HOWEVER - Epson EX9200 Pro | User Manual - Page 237
(INCLUDING, BUT NOT LIMITED TO, PROCUREMENT OF SUBSTITUTE GOODS OR SERVICES; LOSS OF USE, DATA, OR PROFITS; OR BUSINESS INTERRUPTION) HOWEVER (INCLUDING NEGLIGENCE OR OTHERWISE) ARISING IN ANY WAY OUT OF THE USE OF THIS SOFTWARE, EVEN IF ADVISED OF THE POSSIBILITY OF SUCH DAMAGE. (35) - ARM Ltd - Epson EX9200 Pro | User Manual - Page 238
DAMAGES (INCLUDING, BUT NOT LIMITED TO, PROCUREMENT OF SUBSTITUTE GOODS OR SERVICES; LOSS OF USE, DATA, OR PROFITS; OR BUSINESS INTERRUPTION) HOWEVER NEGLIGENCE OR OTHERWISE) ARISING IN ANY WAY OUT OF THE USE OF THIS SOFTWARE, EVEN IF ADVISED OF THE POSSIBILITY OF SUCH DAMAGE. (36) - CodeSourcery - Epson EX9200 Pro | User Manual - Page 239
(INCLUDING, BUT NOT LIMITED TO, PROCUREMENT OF SUBSTITUTE GOODS OR SERVICES; LOSS OF USE, DATA, OR PROFITS; OR BUSINESS INTERRUPTION) HOWEVER OF THIS SOFTWARE, EVEN IF ADVISED OF THE POSSIBILITY OF SUCH DAMAGE. */ MIT License This projector product includes the open source software program which - Epson EX9200 Pro | User Manual - Page 240
OF CONTRACT, TORT OR OTHERWISE, ARISING FROM, OUT OF OR IN CONNECTION WITH THE SOFTWARE OR THE USE OR OTHER DEALINGS IN THE SOFTWARE. TOPPERS/JSP This projector product includes the open source software program "TOPPERS/JSP" which applies the terms and conditions provided by owner of the copyright - Epson EX9200 Pro | User Manual - Page 241
guarantee shall be inserted in documentation accompanying redistribution (user's manual, etc.). (b) The TOPPERS Project shall be notified owing that is to be applied to software made public hereafter. TINET This projector product includes the open source software program "TINET" which applies the - Epson EX9200 Pro | User Manual - Page 242
LIMITED TO, PROCUREMENT OF SUBSTITUTE GOODS OR SERVICES; LOSS OF USE, DATA, OR PROFITS; software, library form, etc., the above copyright display, these terms of utilization, and the following stipulation of no guarantee shall be inserted in documentation accompanying redistribution (user's manual - Epson EX9200 Pro | User Manual - Page 243
in documentation accompanying redistribution (user's manual, etc.). (4) The above this software. WPA Supplicant This projector product includes the open source software program which please see CONTRIBUTIONS file for more instructions. License ----------This software may be distributed, used, and - Epson EX9200 Pro | User Manual - Page 244
(INCLUDING, BUT NOT LIMITED TO, PROCUREMENT OF SUBSTITUTE GOODS OR SERVICES; LOSS OF USE, DATA, OR PROFITS; OR BUSINESS INTERRUPTION) HOWEVER USE OF THIS SOFTWARE, EVEN IF ADVISED OF THE POSSIBILITY OF SUCH DAMAGE. lighttpd This projector product includes the open source software program "lighttpd - Epson EX9200 Pro | User Manual - Page 245
TO, PROCUREMENT OF SUBSTITUTE GOODS OR SERVICES; LOSS OF USE, DATA, OR SOFTWARE, EVEN IF ADVISED OF THE POSSIBILITY OF SUCH DAMAGE PCRE This projector product includes the open source software ----------- PCRE is a library of functions to support regular expressions whose syntax and semantics are as - Epson EX9200 Pro | User Manual - Page 246
Email local part: ph10 Email domain: cam.ac.uk University of Cambridge Computing Service, Cambridge, England. Copyright (c) 1997-2012 University of Cambridge All rights reserved. PCRE JUST-IN-TIME COMPILATION SUPPORT ----------Written by: Zoltan Herczeg Email local part: hzmester Emain domain: - Epson EX9200 Pro | User Manual - Page 247
(INCLUDING, BUT NOT LIMITED TO, PROCUREMENT OF SUBSTITUTE GOODS OR SERVICES; LOSS OF USE, DATA, OR PROFITS; OR BUSINESS INTERRUPTION) HOWEVER USE OF THIS SOFTWARE, EVEN IF ADVISED OF THE POSSIBILITY OF SUCH DAMAGE. End FastCGI This projector product includes the open source software program "FastCGI - Epson EX9200 Pro | User Manual - Page 248
ANY DAMAGES ARISING FROM OR RELATING TO THIS SOFTWARE OR THE DOCUMENTATION, INCLUDING, WITHOUT LIMITATION, EPSON Exceed Your Vision is a registered logomark of Seiko Epson Corporation. Accolade® and PrivateLine® are registered trademarks; and Epson StoreSM and Extra CareSM are service marks of Epson - Epson EX9200 Pro | User Manual - Page 249
or alterations to this product, or (excluding the U.S.) failure to strictly comply with Seiko Epson Corporation's operating and maintenance instructions. Seiko Epson Corporation shall not be liable for any damages or problems arising from the use of any options or any consumable products other than
-
 1
1 -
 2
2 -
 3
3 -
 4
4 -
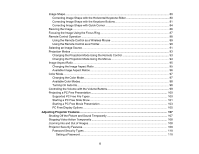 5
5 -
 6
6 -
 7
7 -
8
-
9
-
10
-
11
-
12
-
13
-
14
-
15
-
16
-
17
-
18
-
19
-
20
-
21
-
22
-
23
-
24
-
25
-
26
-
27
-
28
-
29
-
30
-
31
-
32
-
33
-
34
-
35
-
36
-
37
-
38
-
39
-
40
-
41
-
42
-
43
-
44
-
45
-
46
-
47
-
48
-
49
-
50
-
51
-
52
-
53
-
54
-
55
-
56
-
57
-
58
-
59
-
60
-
61
-
62
-
63
-
64
-
65
-
66
-
67
-
68
-
69
-
70
-
71
-
72
-
73
-
74
-
75
-
76
-
77
-
78
-
79
-
80
-
81
-
82
-
83
-
84
-
85
-
86
-
87
-
88
-
89
-
90
-
91
-
92
-
93
-
94
-
95
-
96
-
97
-
98
-
99
-
100
-
101
-
102
-
103
-
104
-
105
-
106
-
107
-
108
-
109
-
110
-
111
-
112
-
113
-
114
-
115
-
116
-
117
-
118
-
119
-
120
-
121
-
122
-
123
-
124
-
125
-
126
-
127
-
128
-
129
-
130
-
131
-
132
-
133
-
134
-
135
-
136
-
137
-
138
-
139
-
140
-
141
-
142
-
143
-
144
-
145
-
146
-
147
-
148
-
149
-
150
-
151
-
152
-
153
-
154
-
155
-
156
-
157
-
158
-
159
-
160
-
161
-
162
-
163
-
164
-
165
-
166
-
167
-
168
-
169
-
170
-
171
-
172
-
173
-
174
-
175
-
176
-
177
-
178
-
179
-
180
-
181
-
182
-
183
-
184
-
185
-
186
-
187
-
188
-
189
-
190
-
191
-
192
-
193
-
194
-
195
-
196
-
197
-
198
-
199
-
200
-
201
-
202
-
203
-
204
-
205
-
206
-
207
-
208
-
209
-
210
-
211
-
212
-
213
-
214
-
215
-
216
-
217
-
218
-
219
-
220
-
221
-
222
-
223
-
224
-
225
-
226
-
227
-
228
-
229
-
230
-
231
-
232
-
233
-
234
-
235
-
236
-
237
-
238
-
239
-
240
-
241
-
242
-
243
-
244
-
245
-
246
-
247
-
248
-
249
 |
 |

EX3240/EX5240/EX5250 Pro/
EX7240 Pro/EX9200 Pro/VS240/
VS340/VS345 User's Guide