Epson PowerLite Cinema 550 User's Guide
Epson PowerLite Cinema 550 Manual
 |
View all Epson PowerLite Cinema 550 manuals
Add to My Manuals
Save this manual to your list of manuals |
Epson PowerLite Cinema 550 manual content summary:
- Epson PowerLite Cinema 550 | User's Guide - Page 1
Epson® PowerLite® Cinema 550 Home Theater Projector User's Guide - Epson PowerLite Cinema 550 | User's Guide - Page 2
Your Vision is a trademark of Seiko Epson Corporation. PrivateLine and PowerLite are registered trademarks, AccuCinema is a trademark, and Epson Extra Care, Epson Connection, and Epson Store are service marks of Epson America, Inc. HDMI, the HDMI logo, and High-Definition Multimedia Interface are - Epson PowerLite Cinema 550 | User's Guide - Page 3
Contents Introduction Projector Parts Projector Control Panel Remote Control Button Map Optional Accessories Registration and Warranty Using This Manual Setting Up the Projector Choosing a Location Installing the Projector Connecting the Cables Making Other Connections Installing Batteries in the - Epson PowerLite Cinema 550 | User's Guide - Page 4
Setup Options 45 Maintenance 47 Cleaning the Lens 47 Cleaning the Projector Case 48 Cleaning and Replacing the Air Filter 48 Replacing the Lamp 50 Resetting the Lamp Usage Timer 52 Checking the Projector Status 53 Storing the Projector 53 Transporting the Projector 54 4 Contents - Epson PowerLite Cinema 550 | User's Guide - Page 5
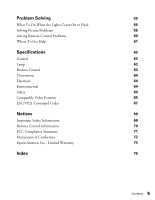
Solving What To Do When the Lights Come On or Flash Solving Picture Problems Solving Remote Control Problems Where To Get Help Specifications General Lamp Remote Control Dimensions Electrical Environmental Safety Compatible Video Formats ESC/VP21 Command Codes Notices Important Safety Information - Epson PowerLite Cinema 550 | User's Guide - Page 6
6 Contents - Epson PowerLite Cinema 550 | User's Guide - Page 7
Introduction The Epson® PowerLite® Cinema 550 projector lets you enjoy theater-quality images in the relaxing environment of your own home. Designed especially for home cinema use, it offers these outstanding features: ■ Native 720P (1280 × 720) resolution, 3000:1 dynamic contrast ratio, and up to - Epson PowerLite Cinema 550 | User's Guide - Page 8
Projector Parts Control panel Horizontal lens shift dial Vertical lens shift dial Zoom ring Focus ring Ventilation slots Adjustable foot Infrared receiver Lens cover D4/SCART port (used mainly in Japan) Input A port (component) Trigger out port Input B port (RGB) HDMI port Video port - Epson PowerLite Cinema 550 | User's Guide - Page 9
Mounting bracket connections Lamp cover Air filter Projector Control Panel Power light Power button Source button Switches the video input source Menu button Displays the menus Menu navigation buttons Esc button Exits the current menu item Aspect - Epson PowerLite Cinema 550 | User's Guide - Page 10
Button Map Operation light Lights when you send remote control commands On and Off buttons Memory button Recalls custom picture settings Menu button Displays the projector's menus Menu navigation buttons Source buttons Switch between equipment connected to the projector Gamma button Adjusts - Epson PowerLite Cinema 550 | User's Guide - Page 11
Epson PowerLite Cinema 550 comes with a basic two-year carry-in warranty. For details, see page 73. In addition, for customers who register their projector, Epson offers free Extra CareSM Home Service. In the unlikely event of an equipment failure, you won't have to wait for your unit to be repaired - Epson PowerLite Cinema 550 | User's Guide - Page 12
to view FAQs (Frequently Asked Questions) or product information and e-mail your questions to Epson support. If you need more help, you can use the Epson PrivateLine® Support service. Call (800) 637-7661 and enter the PIN on the PrivateLine support card that came with your projector. 12 Introduction - Epson PowerLite Cinema 550 | User's Guide - Page 13
Setting Up the Projector Follow the instructions in this section to choose a location for the projector, connect the cables, and display an image. Choosing a Location You can install the projector for various viewing setups, as shown below. Center Side Ceiling Setting Up the Projector 13 - Epson PowerLite Cinema 550 | User's Guide - Page 14
than at the center of the screen), then use the horizontal lens shift dial to center the image on the screen. Do not place the projector too far to the left or right, or your image won't be rectangular. Horizontal lens shift dial Vertical lens shift dial Caution: Do not try - Epson PowerLite Cinema 550 | User's Guide - Page 15
guide for projector in.) 20 to 29.8 feet 200 in. (173 × 98 in.) 24.5 to 36.5 feet 200 in. (161 × 118 in.) Epson website at http://support.epson.com. Also keep these considerations in mind: ■ Make sure there is plenty of space for ventilation around and under the projector. Do not set the projector - Epson PowerLite Cinema 550 | User's Guide - Page 16
size of your screen (maximum diagonal image size). Use the table on page 15 as a guide to locating the projector. Note the following dimensions: ■ Distance from the center of the lens to the mounting bracket holes: 2.32 inches (59 mm), 0.34 inch (8.6 mm) maximum vertical lens shift ■ Distance from - Epson PowerLite Cinema 550 | User's Guide - Page 17
will need the optional projector mount designed for the projector. See page 11 for ordering information. Follow the instructions included with the mount to install the projector, which weighs 11.5 pounds. The wall or ceiling where you install it must be capable of supporting a weight of 58 pounds - Epson PowerLite Cinema 550 | User's Guide - Page 18
Connecting the Cables You can connect the projector to any type of video equipment, such as a VCR, DVD using any of the commercially available cables shown below: Port name HDMI Video equipment connection* Computer connection* Use an HDMI cable: Input A Use a component video cable - (with RCA - Epson PowerLite Cinema 550 | User's Guide - Page 19
results, connect your video equipment to the HDMI (High-Definition Multimedia Interface) port, if possible. If your equipment doesn't support HDMI, connect it to one of the you plan to use the projector. ■ Plug the power cable into the projector and a grounded electrical outlet. Setting Up the - Epson PowerLite Cinema 550 | User's Guide - Page 20
are within 30 feet of the projector with the remote aimed within a 30° angle from the infrared receivers. When you suspect the batteries are weak, take the remote control to a darkened room and press the illumination button. If the buttons do not glow red, replace the batteries. 20 Setting Up the - Epson PowerLite Cinema 550 | User's Guide - Page 21
1. If this is your first time using the projector, remove the protective lens pad. 2. Remove the lens cap. 3. Turn on any connected equipment you plan to use. 4. Turn on the power switch on the back of the projector. Power switch 5. Press the On button on the remote control, or press the Power - Epson PowerLite Cinema 550 | User's Guide - Page 22
the Power button on the projector twice. 3. Let the projector cool down for about 30 seconds. 4. When the Ppower light stops flashing and stays on, turn off the projector's power switch on the back. It is now safe to unplug the projector, if necessary. Caution: Turn the projector off when not in use - Epson PowerLite Cinema 550 | User's Guide - Page 23
) or YPbPr (for component video with an HDTV signal), or select Auto so the projector can automatically detect the Input A source type. Then press the Select button. Note: If an image does not appear, check the troubleshooting tips on page 57. To temporarily turn off the image and darken the screen - Epson PowerLite Cinema 550 | User's Guide - Page 24
horizontal and vertical lens shift dials to adjust its position. Caution: Do not try to move the lens by hand, or you may damage the projector. Always use the lens shift dials to change the lens position. Horizontal lens shift dial Vertical lens shift dial Adjustable foot Note: You can display - Epson PowerLite Cinema 550 | User's Guide - Page 25
Making Basic Adjustments Follow the instructions in this chapter to make basic adjustments to the image dial to center the image. To perform keystone correction, press the u or d button on the projector, or access the menu system as follows: 1. Press the Menu button on the remote control. 2. - Epson PowerLite Cinema 550 | User's Guide - Page 26
image (or aspect ratio) for certain image types by pressing the Aspect button on the remote control. If your video source is connected to the HDMI, S-Video, or Video port-or the Input A port when it is outputting 525i or 525p signals-select Auto to automatically display your image in the - Epson PowerLite Cinema 550 | User's Guide - Page 27
only the right and left sides of the image; the central part is unchanged. (You cannot select Wide when you're using image is recorded in Squeeze Mode, is smaller than 1280 × 720 pixels, and you want to display it at its original pixel projector resizes the picture when you choose an Aspect setting, - Epson PowerLite Cinema 550 | User's Guide - Page 28
contrast, and color, letting you quickly optimize the projected image for various lighting environments. You can also select a different color mode for each input Color Mode setting, the built-in Epson Cinema Filter automatically increases the contrast and naturalizes projected skin tones. 28 - Epson PowerLite Cinema 550 | User's Guide - Page 29
You can fine-tune these and other color and image quality settings using the projector's menu system (see page 35). You can also save combinations of picture settings increase the red tint. ■ S. Tone adjusts the color of projected skin tones. The Epson Cinema Filter automatically optimizes this - Epson PowerLite Cinema 550 | User's Guide - Page 30
or a displayed graph. Lower values will increase the contrast of dark areas, but tend to blur the bright areas. Higher values will darken the light areas. 1. Press the Gamma button. You see the following displayed on the screen: 2. Do one of the following: ■ Select one of the numeric correction - Epson PowerLite Cinema 550 | User's Guide - Page 31
the Settings menu, then open the Operation menu. 3. Choose from these options: Menu button ■ Child Lock to disable the PPower button on the projector's control panel unless it is pressed for about 3 seconds. (You can use the PPower Menu navigation buttons button to turn it off, however.) Since - Epson PowerLite Cinema 550 | User's Guide - Page 32
32 Making Basic Adjustments - Epson PowerLite Cinema 550 | User's Guide - Page 33
change the menu language and control how the menus display (see page 34). 1. To display the full menu, press the Menu button on the projector or remote control. You see a display like this one (the actual display depends on the connected equipment): Main menu options Settings available for the - Epson PowerLite Cinema 550 | User's Guide - Page 34
To display the line menu, press the Select button. You see a display like this at the bottom of the image: Press the u or d button to highlight an option, then press the Select button to select it. Press the Menu button to exit the line menu. You can access the following settings through the line - Epson PowerLite Cinema 550 | User's Guide - Page 35
quality settings are saved independently for each input source (Video, S-Video, HDMI, Input A, Input B) and color mode. After you finish adjusting the settings. The Brightness setting controls how much light is produced by the projector, and the Contrast setting adjusts the difference between - Epson PowerLite Cinema 550 | User's Guide - Page 36
darkest parts of the image. ■ Auto Iris Picture Æ Auto Iris When this setting is on, the amount of light produced by the lamp is equipment's specifications to be sure of the correct setting. ■ EPSON Super White Image Æ Advanced Æ EPSON Super White Note: This setting can be used only when the - Epson PowerLite Cinema 550 | User's Guide - Page 37
projector using an HDMI/DVI cable, set the level of the projector to match that of the video equipment. When this setting is turned on, the projector disregards the EPSON The projector uses 3D DigiScan HD Circuitry Processing for video-sourced images. For film-sourced images, the projector uses - Epson PowerLite Cinema 550 | User's Guide - Page 38
Tint Shifts the color balance between magenta and green. ■ Abs. Color Temp. Picture Æ Color Adjustment Æ Abs. Color Temp. Shifts the color balance between red and blue, making the image appear warmer or cooler. You can also access this setting by pressing the ColorTemp. button on the remote control - Epson PowerLite Cinema 550 | User's Guide - Page 39
of the image. You can adjust the offset and gain for each signal color (red, green, and blue). Use Offset to adjust darker shades and Gain for the lightest tend to blur the bright areas. Higher values will darken the light areas. You can also access this setting by pressing the Gamma button - Epson PowerLite Cinema 550 | User's Guide - Page 40
described above, you can adjust the Tracking and Sync settings for analog RGB computer images. Normally, these settings are adjusted automatically by the projector. If you notice that the image is blurry or contains dark vertical bands, you may need to adjust the settings yourself. ■ Auto Setup - Epson PowerLite Cinema 550 | User's Guide - Page 41
the Memory feature. This lets you easily recall them, and switch from one group of settings to another. If necessary, you can use the projector's reset options to restore its factory-default settings. You can clear all the settings, or just the settings in a specific menu. Creating Memory Settings - Epson PowerLite Cinema 550 | User's Guide - Page 42
shows how to reset the Picture menu settings: Open the Picture menu . . . . . . and select Reset You can also reset the lamp usage timer or restore all the projector settings to their original values. Follow these steps: 1. Press the Menu button on the remote control. 2. Open the Reset menu. 3. Do - Epson PowerLite Cinema 550 | User's Guide - Page 43
Customizing Projector Features Use the settings in this section to adjust the image (see page 65). Select Larger to view both the hidden and visible parts of the image. Normal displays images at the standard size. For HDMI signals, select Auto for normal operation. Select Smaller to show a slightly - Epson PowerLite Cinema 550 | User's Guide - Page 44
or when you press the Blank button to temporarily stop projection. To capture the image, first set the projector to display the image you want to use. Then select User's Logo and follow the instructions on the screen. When done, change the Display Background setting to Logo, as described on page 44 - Epson PowerLite Cinema 550 | User's Guide - Page 45
match the type of equipment connected to the Input A port. For component video, select Auto to let the projector automatically interpret the signal; or select YCbCr or YPbPr to manually select your video equipment's signal. ■ Trigger Out Settings Æ Operation Æ Trigger Out Turn on this setting if you - Epson PowerLite Cinema 550 | User's Guide - Page 46
time conserves power and extends the life of the lamp. To turn the projector back on, press the On button on the remote control, or press the Æ Operation Æ Operation Lock Lets you disable all the buttons on the projector's control panel to prevent the image from being accidentally changed once it is - Epson PowerLite Cinema 550 | User's Guide - Page 47
the power cord. Never open any cover on the projector, except the lamp and filter covers. Dangerous electrical voltages in the projector can injure you severely. Do not try to service this product yourself, except as specifically explained in this User's Guide. The only parts you should replace are - Epson PowerLite Cinema 550 | User's Guide - Page 48
paintbrush). If the dirt is difficult to remove or the filter is broken, replace it. Purchase air filter part number V13H134A09 from an authorized Epson reseller. To find the nearest reseller, please call 800-GO-EPSON (800-463-7766). To purchase online, visit www.epsonstore.com (U.S. sales only). In - Epson PowerLite Cinema 550 | User's Guide - Page 49
6. If you need to replace the filter, release the tab and lift up the cover 7. Remove the old filter and replace it with a new one. 8. To replace the cover, insert the tabs and press down until the cover clicks into place. Maintenance 49 - Epson PowerLite Cinema 550 | User's Guide - Page 50
. Warning light ■ The projector's warning light flashes red at half-second intervals. ■ The message Replace the lamp appears on the screen when you start projecting. Note: Lamp life results will vary depending on mode selected, environmental conditions, and usage. Purchase lamp part number - Epson PowerLite Cinema 550 | User's Guide - Page 51
cover and lift off the cover. 6. Loosen the two screws securing the lamp (they don't come all the way out). 7. Grasp the lamp as shown and pull it straight out. Warning: The lamp(s) in this product contain mercury. Please consult your state and local regulations regarding disposal or recycling. Do - Epson PowerLite Cinema 550 | User's Guide - Page 52
the glass could result in premature lamp failure. 9. Replace the lamp cover. (The projector won't work if the lamp cover is open or loose.) 10. Reset the lamp usage timer, as described below. Resetting the Lamp Usage Timer After replacing the lamp, plug the projector back in, turn on the power - Epson PowerLite Cinema 550 | User's Guide - Page 53
use the Info menu to view information about the current display settings and how long the projection lamp has been in use. To access the Info menu: 1. Press the Menu button on the projector or remote control. 2. Use the menu navigation buttons to open the Info menu. The following information appears - Epson PowerLite Cinema 550 | User's Guide - Page 54
Transporting the Projector Note: Epson shall not be liable for any damages incurred during transportation. The projector contains many glass and precision parts. When shipping the projector for repairs, use the original packaging material if possible. If you do not have the original packaging, use - Epson PowerLite Cinema 550 | User's Guide - Page 55
the power cord back in and turn on the projector. If this doesn't solve the problem, check the status lights on top of the projector. Power light Warning light Light state P power light does not come on P power light is orange P power light is flashing green P power light is flashing orange and - Epson PowerLite Cinema 550 | User's Guide - Page 56
intervals warning light is flashing red at one-second intervals Cause and solution High-speed cooling is in progress. If the projector gets too hot again, projection stops automatically. Make sure there is plenty of space around and under the projector for ventilation. Clean or replace the air - Epson PowerLite Cinema 550 | User's Guide - Page 57
light is green, not flashing, and the lens cover is off. ■ The projector may be in standby (or sleep) mode. If the P power light is orange, press the Power button to turn the projector enabled. See your computer manual or online help for on both your projector screen and LCD screen, click - Epson PowerLite Cinema 550 | User's Guide - Page 58
resolution from the Resolution box. (Allow a few seconds for the projector to sync up.) Click here Drag one monitor icon on top of . Change the Projection setting in the Settings menu (see page 45). Only part of the picture is displayed, or the picture is distorted. ■ Press the Problem Solving - Epson PowerLite Cinema 550 | User's Guide - Page 59
the projector on the projector's control panel. Note: You won't have as you place the projector level (not angled your computer and projector screen, try turning off your laptop's LCD display (see by condensation. If you've just moved the projector from a cold environment, wait a couple of minutes - Epson PowerLite Cinema 550 | User's Guide - Page 60
looks dark, you may need to replace the lamp. Check the lamp usage timer to see how long the lamp has been in use (see page 53). Replace the lamp if it's close to the end of its service life (see page 50). Solving Remote Control Problems The projector doesn't respond to remote control commands - Epson PowerLite Cinema 550 | User's Guide - Page 61
(Epson PowerLite Cinema 550) ■ Product serial number (located on the bottom of the projector) ■ Computer configuration, if you're connected to a computer ■ Description of the problem You can purchase genuine Epson accessories from an Epson authorized reseller. To find the nearest reseller, call 800 - Epson PowerLite Cinema 550 | User's Guide - Page 62
62 Problem Solving - Epson PowerLite Cinema 550 | User's Guide - Page 63
× 720 pixels, 720p 1400 ANSI lumens maximum 3000:1 30 to 300 inches 2.9 to 44.8 feet (0.88 to 13.65 m) at 16:9 3.5 to 54.8 feet (1.07 to 16.71 m) at 4:3 1:1.5 16:9 or 4:3 32 dB (Dynamic color mode) 26 dB (Theatre Black color mode) Vertical: -15 to +15° Lamp Type Power consumption Lamp life Part - Epson PowerLite Cinema 550 | User's Guide - Page 64
120 VAC, 2.7 A 200 to 240 VAC, 1.2 A Operating: 245 W (100 to 120V), 240 W (200 to 240 V) Standby: 4 W (100 to 120V), 5 W (200 to 240 V) Environmental Canada FCC Part 15B Class B (DoC) UL60950 Third Edition ICES-003 Class B CSA C22.2 No. 60950 Pixelworks™ ICs are used in this projector. 64 - Epson PowerLite Cinema 550 | User's Guide - Page 65
video-which it accepts through the Video, S-Video, and Input A ports, respectively. The projector also supports digital video (SDTV, HDTV) and various monitor display formats. Digital video is accepted by the HDMI port and the Input A port (in component video format). The Input B port accepts - Epson PowerLite Cinema 550 | User's Guide - Page 66
720 1280 × 720 1280 × 720 1280 × 720 - - - - Through 640 × 480 640 × 480 800 × 600 - - - 640 × 480 832 × 624 - 640 × 480 640 × 480 768 × 576 768 × 576 1280 × 720 - Squeeze Through 853 × 480 853 × 480 1066 × 600 - - - 853 × 480 1109 × 624 - 853 × 480 853 × 480 1024 × 576 1024 × 576 - - * HDMI - Epson PowerLite Cinema 550 | User's Guide - Page 67
complete ESC/VP 21 Communication Manual for home theater projectors from the Epson website at http://support.epson.com. Following are some of the available codes: Item Power ON/OFF A/V Mute ON/OFF A/V Mute selection Source change Terminal Input A Input B Input 3 (HDMI) Video Input 5 ON OFF ON - Epson PowerLite Cinema 550 | User's Guide - Page 68
Item Color Mode Aspect ratio sRGB Theatre Living Room Natural Dynamic Theatre Black 1 Theatre Black 2 Auto Normal Squeeze Zoom Through Squeeze Through Wide Command CMODE 01 CMODE 05 CMODE 06 CMODE 07 CMODE 08 CMODE 09 CMODE 0A ASPECT 00 ASPECT 20 ASPECT 21 ASPECT 22 ASPECT 23 ASPECT 24 ASPECT 25 - Epson PowerLite Cinema 550 | User's Guide - Page 69
safety instructions when setting up and using the projector: ■ Never look into the projector lens when the lamp is turned on; the bright light projector. ■ Unplug the projector from the wall outlet and refer servicing to qualified service personnel under the following conditions: when the power cord - Epson PowerLite Cinema 550 | User's Guide - Page 70
put in the trash. ■ Allow the lamp to cool for one hour before replacing it. ■ Unplug the projector during lightning storms or when not in control and the IR receiver on the projector. ■ Ambient light is too bright. ■ Certain types of fluorescent lighting are used. ■ Other equipment that emits - Epson PowerLite Cinema 550 | User's Guide - Page 71
If you experience problems, try the following: ■ The remote control's batteries may be low on power; replace them. ■ Dim the ambient lighting and/or turn off any fluorescent lights. ■ Close any window coverings and/or move the projector out of direct sunlight. ■ Turn off other equipment that emits - Epson PowerLite Cinema 550 | User's Guide - Page 72
Epson America, Inc. 3840 Kilroy Airport Way MS 3-13 Long Beach, CA 90806-2469 Telephone: (562) 290-5254 Declare under sole responsibility that the product identified herein, complies with 47CFR Part : Type of Product: Model: Marketing Name: Epson Projector EMP-TW550 PowerLite Cinema 550 72 Notices - Epson PowerLite Cinema 550 | User's Guide - Page 73
Epson Will Do To Correct Problems: Should your Epson projector require service during the warranty period, Epson will, at its option, exchange or repair the projector without charge for parts or labor. If Epson authorizes an exchange for the defective unit, Epson will ship a replacement projector - Epson PowerLite Cinema 550 | User's Guide - Page 74
REMEDY ABOVE FAILS, EPSON'S ENTIRE LIABILITY SHALL BE LIMITED TO A REFUND OF THE PRICE PAID FOR THE EPSON PRODUCT COVERED BY THIS which vary from jurisdiction to jurisdiction. To locate the Authorized Epson Servicer nearest you, call the Epson ConnectionSM at (800) 637-7661 + PIN or (562) 276-4394 in - Epson PowerLite Cinema 550 | User's Guide - Page 75
Air filter cleaning and replacing, 48 to 49 projector, 9 D Declaration of Conformity, 72 Direct Power On, 45 Display Background setting, 44 Documentation, 12 DVI-Video Level setting, 37 E Electrical requirements, 64 Epson accessories, 11, 61 Home Service, 11 PrivateLine Support, 61 technical support - Epson PowerLite Cinema 550 | User's Guide - Page 76
Keystone correction, 14, 25, 45, 59 L Lamp checking usage timer, 53 life, 63 ordering, 11, 50 replacing, 50 to 52 resetting usage timer, 52 safety instructions, 69 to 70 specifications, 63 Language setting, 34 Lens shift dials, 24 Lens, cleaning, 47 Lights, projector, 55 to 56 Line menu, 10, 34, 38 - Epson PowerLite Cinema 550 | User's Guide - Page 77
, 20 buttons, 10 lighting up buttons, 20 problems, 60, 70 to 71 Replacing lamp, 50 to 52 Resetting lamp usage timer, 42, 52 projector settings, 42 Resolution compatible formats, 65 to 66 projector, 53, 63 RGB settings, 39 RGBCMY settings, 39 S Safety approvals, 64 Safety instructions, 69 to 70 Setup - Epson PowerLite Cinema 550 | User's Guide - Page 78
screen, selecting, 44 Static, 59 Storing projector, 53 Support, 12, 61 Sync (Synchronization) setting, 40 T Technical support, 12, 61 Through setting, 27 Tint, 38 Tracking, 40 Transporting projector, 54 Trigger Out setting, 45 Trigger port, 20 Turning on and off projector, 21 to 22, 56 U User's Logo
-
 1
1 -
 2
2 -
 3
3 -
 4
4 -
 5
5 -
 6
6 -
 7
7 -
8
-
9
-
10
-
11
-
12
-
13
-
14
-
15
-
16
-
17
-
18
-
19
-
20
-
21
-
22
-
23
-
24
-
25
-
26
-
27
-
28
-
29
-
30
-
31
-
32
-
33
-
34
-
35
-
36
-
37
-
38
-
39
-
40
-
41
-
42
-
43
-
44
-
45
-
46
-
47
-
48
-
49
-
50
-
51
-
52
-
53
-
54
-
55
-
56
-
57
-
58
-
59
-
60
-
61
-
62
-
63
-
64
-
65
-
66
-
67
-
68
-
69
-
70
-
71
-
72
-
73
-
74
-
75
-
76
-
77
-
78
 |
 |

Epson
®
PowerLite
®
Cinema 550
Home Theater Projector
User’s Guide