Epson Stylus COLOR 740 Special Edition Quick Start
Epson Stylus COLOR 740 Special Edition Manual
 |
View all Epson Stylus COLOR 740 Special Edition manuals
Add to My Manuals
Save this manual to your list of manuals |
Epson Stylus COLOR 740 Special Edition manual content summary:
- Epson Stylus COLOR 740 Special Edition | Quick Start - Page 1
check the System Requirements and follow all the Safety Instructions in your Printer Basics book. Note: If you need help as you set up your printer, see "Problems? Need Help?" in the Printer Basics book. 2 Put on the Paper Support Insert the paper support into the slots at the back of the printer - Epson Stylus COLOR 740 Special Edition | Quick Start - Page 2
, unless the printer hasn't moved or made any noise for more than 5 minutes. 4 Load Paper 1. Open the output tray extensions. Slide the left edge guide right until it is a little wider than your paper. 6. Place the ink cartridges in their holders with the labels facing up and toward the back - Epson Stylus COLOR 740 Special Edition | Quick Start - Page 3
fasten it with the wire clips. 3. Follow the instructions in the USB Software Installation Guide to install the USB port software along with your printer EarthLink Network® TotalAccess™ s your electronic EPSON Stylus COLOR 740 Manual Note: The creative and Internet software is not available with - Epson Stylus COLOR 740 Special Edition | Quick Start - Page 4
USB Software Installation Guide for instructions on installing the USB port and printer software. For network configuration instructions, see the follow the on-screen instructions. Once you've viewed the manual, you can copy it to your hard disk using the Copy Printer Manual to Hard Drive option. - Epson Stylus COLOR 740 Special Edition | Quick Start - Page 5
, point to Programs, Adobe, PhotoDeluxe 2.0, and then click Run Guided Printing Exercise. For details, see your Printer Basics book. When instructions for both Windows and Macintosh applications, basic printer maintenance and troubleshooting information, and instructions on viewing electronic manuals
-
 1
1 -
 2
2 -
 3
3 -
 4
4 -
 5
5
 |
 |

2
Put on the Paper Support
Insert the paper support into the slots at the back of the
printer’s sheet feeder.
3
Install the Ink Cartridges
1.
Plug the printer’s power cord into a grounded outlet.
Caution:
Don’t use an outlet that can be turned off by
a wall switch or timer, or one on the same
circuit as a large appliance. This may disrupt
the power, which can erase the printer’s
memory or damage its power supply.
2.
Remove the ink cartridges from their packages. Then
remove only the yellow part of the tape seal on top,
as shown.
Don’t pull off the blue portion or remove
the clear seal on the bottom of the cartridge.
Caution:
Use the ink cartridges packed with your
printer the first time you install them or your
printer won’t charge ink properly. You must
remove the yellow tape seal from the
cartridge or you will permanently damage it.
Don’t try to remove the clear seal from the
bottom of the cartridge; ink will leak out.
Open to continue
▼
1
Set up the printer
1
Set up the printer
1
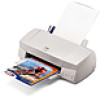
Unpack the Printer
Remove any tape and packing material from the printer as
described on the
Unpacking Sheet
in the printer box.
Make sure you’ve got a cable to connect the printer to your
computer and these items:
Place the printer near your computer and an available
grounded outlet, but avoid areas:
■
with high temperature or humidity
■
in direct sunlight or dusty conditions
■
near sources of heat or electromagnetic interference,
such as a cordless telephone base unit
Also be sure to check the System Requirements and follow
all the Safety Instructions in your
Printer Basics
book.
Note:
If you need help as you set up your printer, see
“Problems? Need Help?” in the
Printer Basics
book.
color ink cartridge
printer
paper support
printer software
CD-ROM
black ink cartridge
Printer
Basics
book
EPSON
®
media pack
color cartridge
black cartridge