Epson SureColor S60600 Quick Reference Guide
Epson SureColor S60600 Manual
 |
View all Epson SureColor S60600 manuals
Add to My Manuals
Save this manual to your list of manuals |
Epson SureColor S60600 manual content summary:
- Epson SureColor S60600 | Quick Reference Guide - Page 1
Removing media 25 Maintaining the printer 27 Precautions 27 When to perform maintenance 28 Cleaning platen heater and media edge plates 28 Print head maintenance 29 Checking ink status 31 Ink cartridge part numbers 31 Shaking ink cartridges 32 Replacing ink cartridges 32 Disposing of waste - Epson SureColor S60600 | Quick Reference Guide - Page 2
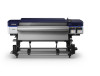
Printer parts Printer parts Note: Unless otherwise indicated, the illustrations in this manual show the SureColor® S40600, but the instructions levers Roll supports Waste ink tank Right roll core holder * Included with the SC-S60600 and optional for the SC-S40600/SC-S80600. Ink cartridges - Epson SureColor S60600 | Quick Reference Guide - Page 3
Inside Media edge plate Platen heater Inside | 3 Nozzle caps (one set for the SC-S40600) Pressure rollers Cutter groove Flushing pad Fabric wiper unit Back Pre-heater Roll supports Drive switch Left roll holder Lift levers Handle Right roll holder - Epson SureColor S60600 | Quick Reference Guide - Page 4
hot; be careful to avoid burns. Heavy media rolls may require two people for loading and removing. 1. Press the P power button to turn on the printer, if necessary, and wait until you see Load media displayed on the LCD screen. 2. Open the front cover and raise the media loading lever. 3. Grasp - Epson SureColor S60600 | Quick Reference Guide - Page 5
Loading media | 5 4. At the back of the printer, loosen the knob for the right roll holder and slide the roll holder outward. 5. Rotate the handle on the roll holder counterclockwise until it stops. 6. Slide the left roll holder to the media core size being loaded. - Epson SureColor S60600 | Quick Reference Guide - Page 6
; otherwise, the roll holder may move during printing and cause the media to feed incorrectly. 8. Place the media you want to load on the roll supports. Note: Load the roll based on the printable side. Printable side out Printable side in - Epson SureColor S60600 | Quick Reference Guide - Page 7
roll media into the left roll holder. Note: If the outer diameter of the roll media is less than 5.5 inches (140 mm), you need to manually lift the roll media to insert it into the roll holder. - Epson SureColor S60600 | Quick Reference Guide - Page 8
8 | Loading media 11. Raise the right lift lever. 12. Push the right roll holder into the roll media. - Epson SureColor S60600 | Quick Reference Guide - Page 9
Loading media | 9 Note: Make sure the roll holder is inserted into the roll core all the way by pushing in the roll holder twice. Otherwise, media may not feed correctly and cause banding in your printouts. 13. Fully tighten the knob on the roll holder. - Epson SureColor S60600 | Quick Reference Guide - Page 10
10 | Loading media 14. Rotate the handle until part A (shaded area) in the illustration below is fully inserted into the roll core. Caution: To avoid damaging the roll holder, do not continue turning the handle after part A is fully inserted. 15. Insert your media approximately 12 inches (30 cm) - Epson SureColor S60600 | Quick Reference Guide - Page 11
Loading media | 11 16. Move to the front of the printer, grasp the media as shown, and raise the media loading lever. 17. Use one hand to pull the center of the media straight out until it is aligned with the bottom edge of the label on the after heater. - Epson SureColor S60600 | Quick Reference Guide - Page 12
12 | Loading media Note: Do not use two hands to pull the media as this can cause the media to be skewed. 18. Lower the media loading lever to hold the media in place. 19. Lightly tap both ends of the media and check if there is a difference in tension between the left and right sides. If there is a - Epson SureColor S60600 | Quick Reference Guide - Page 13
Loading media | 13 20. Slide the media edge plates against the media. Adjust the position so that the edges of the media are aligned with the center of the round holes in the plates. Caution: To avoid damaging the print head, do not use the media edge plates with media that is more than 0.02 inch - Epson SureColor S60600 | Quick Reference Guide - Page 14
Supported papers One of the key elements for achieving professional quality prints is selecting paper that is specifically optimized for your printer. Epson test samples of media in the printer before purchasing large quantities or printing large jobs. If you use non-Epson paper or other media, you - Epson SureColor S60600 | Quick Reference Guide - Page 15
Print start position | 15 Print start position You can adjust the starting position of the print area in your printouts. Right print start position The right print start position is dependent upon the Media Size Check setting. If Media Size Check is turned on, the print start position is - Epson SureColor S60600 | Quick Reference Guide - Page 16
The top print start position is approximately 3.6 inches (92 mm) inside the printer from the cutter groove. 3.6 inches (92 mm) Using the auto take-up caught in the media feeding unit or the auto take-up reel unit while the printer is operating. 1. Press the d button to feed the media down to the - Epson SureColor S60600 | Quick Reference Guide - Page 17
Using the auto take-up reel unit | 17 2. Loosen the core holder knobs and slide the core holders apart. Center the roll supports between the roll holders. 3. Align the right roll core holder with the right edge of the media and tighten the knob. - Epson SureColor S60600 | Quick Reference Guide - Page 18
18 | Using the auto take-up reel unit 4. Insert the roll core into the right holder. Note: Use a roll core that is wider than the width of the media. This allows the media to be taken up without protruding from the core. 5. Push the holder until part A (shaded area) in the illustration below is - Epson SureColor S60600 | Quick Reference Guide - Page 19
Using the auto take-up reel unit | 19 6. Trim the left and right corners of the media, leaving a straight section at the center about 4 to 8 inches (10 to 20 cm) wide. 10 in. (25 cm) 4-8 in. (10-20 cm) 10 in. (25 cm) 7. Cut a strip about 27.6 inches (70 cm) in length from the included paper tape - Epson SureColor S60600 | Quick Reference Guide - Page 20
20 | Using the auto take-up reel unit 8. Pull the other end of the tape straight down and attach it to the roll core using adhesive tape as shown. To take-in with the printable side facing out To take-in with the printable side facing in Note: Make sure the tape is taut; otherwise the media may - Epson SureColor S60600 | Quick Reference Guide - Page 21
Using the auto take-up reel unit | 21 9. If you are taking-up with the printable side facing outside, flip the Auto switch down. If you are taking-up with the printable side facing inside, flip the Auto switch up. Flip switch down Flip switch up 10. Lower the tension bar until it lightly touches - Epson SureColor S60600 | Quick Reference Guide - Page 22
22 | Selecting media settings Selecting media settings After you have finished loading your media, follow the instructions on the control panel to select your media settings. Use the following buttons to make your selections. When you are finished selecting your settings, you - Epson SureColor S60600 | Quick Reference Guide - Page 23
cut your fingers or hands with the cutter or other blades. 1. Press the M button. 2. Select Feed To Cut Position and press the OK button. The printer feeds the media to the cutting position (cutter groove). Note: If you have printed the amount of media remaining, press the u button to rewind the - Epson SureColor S60600 | Quick Reference Guide - Page 24
24 | Cutting media 3. If you are using the auto take-up reel, raise the tension bar. 4. Using a razor blade or other cutting tool, cut off your print along the cutter groove. WARNING: Do not place your fingers in the path of the cutting tool to avoid injuring yourself. - Epson SureColor S60600 | Quick Reference Guide - Page 25
5. Set the Auto switch to off. Then take up the cut media completely using the Manual switch. Removing media WARNING: The heaters and media holding plates may be hot; be careful carefully remove the roll core holder from the roll. Make sure to support the end of the roll so that it does not drop. - Epson SureColor S60600 | Quick Reference Guide - Page 26
26 | Removing media 2. Lower the roll onto the support. 3. Loosen the right roll core holder knob and carefully remove the roll core holder from the roll. Make sure to support the end of the roll so that it does not drop. 4. Lower the roll onto the support. - Epson SureColor S60600 | Quick Reference Guide - Page 27
, flush them immediately with water. If you continue to experience eye problems after a thorough washing, consult a doctor. • If fluid gets into gargle thoroughly after you replace the waste ink bottle or use the ink cleaner. • Remove media from the printer before performing maintenance. • Do not - Epson SureColor S60600 | Quick Reference Guide - Page 28
Instructions Clean the platen heater and media edge Daily plates see below Remove and shake ink this maintenance is needed User's Guide Replace ink cartridge When you see a message use ink cleaner to clean inside the printer; otherwise, you may damage the printer. 1. Make sure the printer is - Epson SureColor S60600 | Quick Reference Guide - Page 29
in water, wring it out thoroughly, and use it to remove lint, dust, and ink from the platen heater. Make sure to clean inside the grooves on the platen as well Cleaning the print head 1. Make sure there the printer is turned on and in a ready state. 2. Press the # button. You see the Maintenance - Epson SureColor S60600 | Quick Reference Guide - Page 30
Head Maintenance Perform Auto Head Maintenance if your printouts show ink drops or if your nozzles are clogged even after cleaning this feature too frequently could damage the print head. 1. Make sure there the printer is turned on and in a ready state. 2. Press the # button. You Guide for details. - Epson SureColor S60600 | Quick Reference Guide - Page 31
T890B00 Note: Epson recommends the use of genuine Epson ink cartridges. Epson cannot guarantee the quality or reliability of non-genuine ink. The use of non-genuine ink may cause damage that is not covered by Epson's warranties, and under certain circumstances, may cause erratic printer behavior. - Epson SureColor S60600 | Quick Reference Guide - Page 32
, or into your mouth, see page 27 for instructions. Replacing ink cartridges Before you begin, make sure you read the important safety instructions on page 27 and have your replacement cartridges handy. Caution: Leave your old cartridges in the printer until you are ready to replace them to prevent - Epson SureColor S60600 | Quick Reference Guide - Page 33
cartridge that needs replacing. 3. Insert a finger into the depression on top of the ink cartridge and pull the cartridge straight out. Caution: Be careful handling the ink cartridge as there may be ink around the ink supply port. 4. Unpack the new cartridge and shake it about 15 times in 5 seconds - Epson SureColor S60600 | Quick Reference Guide - Page 34
for additional information. Do not take the used cartridge apart or try to refill it. Disposing of waste ink When Prepare empty waste ink bottle is displayed on the LCD screen, the waste ink bottle beneath the printer is nearly full and will need to be replaced soon. Make sure you have a new waste - Epson SureColor S60600 | Quick Reference Guide - Page 35
Disposing of waste ink | 35 Caution: Do not remove the waste ink bottle while the printer is performing the following operations unless you are instructed to do so on the LCD screen: printing, head cleaning, head washing, ink refresh, pre-storage maintenance. Before you begin, make sure you read the - Epson SureColor S60600 | Quick Reference Guide - Page 36
), you may need to submit a Safety Data Sheet (SDS). You can download one for your printer from the Epson support website. • Cleaning stick • Clean-room wiper • Ink cleaner • Waste ink • Waste ink bottle • Wiper unit • Flushing pad • Air filter • Media that has been printed on Ordering supplies - Epson SureColor S60600 | Quick Reference Guide - Page 37
you experience difficulty with the toll-free line, call (562) 276-1305. Visit Epson's support website at www.epson.com/support (U.S.) or www.epson.ca/support (Canada) and select your product for solutions to common problems. You can download drivers, firmware, and documentation, view FAQs, or e-mail - Epson SureColor S60600 | Quick Reference Guide - Page 38
- Epson SureColor S60600 | Quick Reference Guide - Page 39
- Epson SureColor S60600 | Quick Reference Guide - Page 40
EPSON and SureColor are registered trademarks, and EPSON Exceed Your Vision is a registered logomark of Seiko Epson Corporation. Epson Preferred is a service mark of Epson America, Inc. General Notice: Other product names used herein are for identification purposes only and may be trademarks of
-
 1
1 -
 2
2 -
 3
3 -
 4
4 -
 5
5 -
 6
6 -
 7
7 -
8
-
9
-
10
-
11
-
12
-
13
-
14
-
15
-
16
-
17
-
18
-
19
-
20
-
21
-
22
-
23
-
24
-
25
-
26
-
27
-
28
-
29
-
30
-
31
-
32
-
33
-
34
-
35
-
36
-
37
-
38
-
39
-
40
 |
 |

Contents
Printer parts
. . . . . . . . . . . . . . . . . . . . . . . . . . . . . . . . . . . . . . . . . . . . . . . . . . . . . . . . . . . . . . . . . . . . . 2
Front
. . . . . . . . . . . . . . . . . . . . . . . . . . . . . . . . . . . . . . . . . . . . . . . . . . . . . . . . . . . . . . . . . . . . . . . 2
Inside . . . . . . . . . . . . . . . . . . . . . . . . . . . . . . . . . . . . . . . . . . . . . . . . . . . . . . . . . . . . . . . . . . . . . . . 3
Back . . . . . . . . . . . . . . . . . . . . . . . . . . . . . . . . . . . . . . . . . . . . . . . . . . . . . . . . . . . . . . . . . . . . . . . . 3
Loading media
. . . . . . . . . . . . . . . . . . . . . . . . . . . . . . . . . . . . . . . . . . . . . . . . . . . . . . . . . . . . . . . . . . . 4
Supported papers
. . . . . . . . . . . . . . . . . . . . . . . . . . . . . . . . . . . . . . . . . . . . . . . . . . . . . . . . . . . . . 14
Print start position . . . . . . . . . . . . . . . . . . . . . . . . . . . . . . . . . . . . . . . . . . . . . . . . . . . . . . . . . . . . 15
Using the auto take-up reel unit
. . . . . . . . . . . . . . . . . . . . . . . . . . . . . . . . . . . . . . . . . . . . . . . . . . . . . 16
Selecting media settings
. . . . . . . . . . . . . . . . . . . . . . . . . . . . . . . . . . . . . . . . . . . . . . . . . . . . . . . . . . . 22
Removing the take-up roll
. . . . . . . . . . . . . . . . . . . . . . . . . . . . . . . . . . . . . . . . . . . . . . . . . . . . . . . . . 22
Printing the amount of media remaining
. . . . . . . . . . . . . . . . . . . . . . . . . . . . . . . . . . . . . . . . . . . 22
Cutting media
. . . . . . . . . . . . . . . . . . . . . . . . . . . . . . . . . . . . . . . . . . . . . . . . . . . . . . . . . . . . . . . 23
Removing media
. . . . . . . . . . . . . . . . . . . . . . . . . . . . . . . . . . . . . . . . . . . . . . . . . . . . . . . . . . . . . 25
Maintaining the printer
. . . . . . . . . . . . . . . . . . . . . . . . . . . . . . . . . . . . . . . . . . . . . . . . . . . . . . . . . . . 27
Precautions . . . . . . . . . . . . . . . . . . . . . . . . . . . . . . . . . . . . . . . . . . . . . . . . . . . . . . . . . . . . . . . . . . 27
When to perform maintenance . . . . . . . . . . . . . . . . . . . . . . . . . . . . . . . . . . . . . . . . . . . . . . . . . . . 28
Cleaning platen heater and media edge plates . . . . . . . . . . . . . . . . . . . . . . . . . . . . . . . . . . . . . . . . 28
Print head maintenance
. . . . . . . . . . . . . . . . . . . . . . . . . . . . . . . . . . . . . . . . . . . . . . . . . . . . . . . . 29
Checking ink status
. . . . . . . . . . . . . . . . . . . . . . . . . . . . . . . . . . . . . . . . . . . . . . . . . . . . . . . . . . . 31
Ink cartridge part numbers . . . . . . . . . . . . . . . . . . . . . . . . . . . . . . . . . . . . . . . . . . . . . . . . . . . . . . 31
Shaking ink cartridges
. . . . . . . . . . . . . . . . . . . . . . . . . . . . . . . . . . . . . . . . . . . . . . . . . . . . . . . . . 32
Replacing ink cartridges . . . . . . . . . . . . . . . . . . . . . . . . . . . . . . . . . . . . . . . . . . . . . . . . . . . . . . . . 32
Disposing of waste ink . . . . . . . . . . . . . . . . . . . . . . . . . . . . . . . . . . . . . . . . . . . . . . . . . . . . . . . . . 34
Disposing of used consumables
. . . . . . . . . . . . . . . . . . . . . . . . . . . . . . . . . . . . . . . . . . . . . . . . . . 36
Ordering supplies and optional accessories
. . . . . . . . . . . . . . . . . . . . . . . . . . . . . . . . . . . . . . . . . . . . . 36
Where to get help . . . . . . . . . . . . . . . . . . . . . . . . . . . . . . . . . . . . . . . . . . . . . . . . . . . . . . . . . . . . . . . . 37