Epson TM-P20 Users Manual
Epson TM-P20 Manual
 |
View all Epson TM-P20 manuals
Add to My Manuals
Save this manual to your list of manuals |
Epson TM-P20 manual content summary:
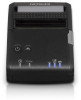
- Epson TM-P20 | Users Manual - Page 1
User's Manual Before Use 2 Part Names and Functions 7 Setup 10 Basic Operation 16 Setting/Replacing the Roll Paper 19 Cleaning the Products 20 Troubleshooting 22 Specifications 23 Consumable Products and Options 24 Appendix 25 M00081305EN - Epson TM-P20 | Users Manual - Page 2
software, refer to Technical Reference Guide. Safety Precautions The symbols shown below are used in this manual in order to ensure safety or other problem occurs, immediately shut down the product and remove the battery from the product. Then, contact your dealer or a Seiko Epson service center for - Epson TM-P20 | Users Manual - Page 3
so may cause injury. Also, it may cause malfunction of the printer. ❏ Do not install the product in a location exposed to or injury. Follow the instructions in this manual to install them properly. such as near a microwave oven. In that case, taking measures such as changing the installation - Epson TM-P20 | Users Manual - Page 4
offline, reconnection may not be possible. In such case, remove the cause of offline and reconnect it. Cautions on the Battery This printer operates only with the battery installed. Read the manual supplied with the battery carefully before using the battery. !WARNING: For this product, use only the - Epson TM-P20 | Users Manual - Page 5
WARNING: ❏ Do not charge any device other than the TM-P20 printer or the OT-BY20 battery. Doing so may cause heat, explosion, fire, leaks, a fault or other problem occurs, immediately shut down the product and unplug the product. Then, contact your dealer or a Seiko Epson service center for advice. ❏ - Epson TM-P20 | Users Manual - Page 6
English Caution Label The caution label on the product indicates the following precaution. !KCAUTION: Do not touch the thermal head during printing or immediately after printing. After printing, the thermal head can be very hot. !CAUTION: Take care not to injure your fingers on the manual cutter. 6 - Epson TM-P20 | Users Manual - Page 7
Printer Front Side 1 4 3 2 1 Manual Cutter Use this cutter to cut the paper. (U "Cutting the Roll Paper" on page 18) 2 Cover Open Button Press this button to open the roll paper cover. (U "Opening the Roll Paper to Technical Reference Guide. 4 Roll Paper Cover Open this cover to set/replace roll - Epson TM-P20 | Users Manual - Page 8
this button to feed paper. 3 (Power) LED Lights when the printer is powered on. 4 Error LED Lights/Flashes when an error occurs. (U "Error LED is on" on page 22, "Error LED is flashing" on page 22) 5 (Battery) LED Lights/Flashes according to the battery level. Battery LED Error LED Charge - Epson TM-P20 | Users Manual - Page 9
. Printing is not available. Replace/charge the battery. 1 2 3 1 Belt Clip Use this clip to hang the printer on your waist belt or other place. (U "Carrying" on page 12) 2 Battery Holder Set the battery in this holder. (U "Setting the Battery" on page 13) 3 USB Connector For connecting a USB - Epson TM-P20 | Users Manual - Page 10
English Setup Installing the Printer Install/use the printer as shown below. Installing on a Flat Surface To install the printer on a flat surface, remove the belt clip on the rear of the printer. Removing the belt clip - Epson TM-P20 | Users Manual - Page 11
set in the single charger, let out the levers on the single charger and then set the printer. With the levers out, the single charger can be securely fastened to the printer. Lever Let out the levers on the single charger by following the steps below. 1. Remove the two screws on the - Epson TM-P20 | Users Manual - Page 12
English 3. Attach the removed screws to the screw holes on the rear of the single charger. Screw Hole Carrying To carry the printer with you, securely attach the belt clip on the rear of the printer to your waist belt. 12 - Epson TM-P20 | Users Manual - Page 13
steps below. 1. Turn the belt clip on the rear of the printer. 2. Set the battery in the battery holder. Insert the battery, with its tabs fitted into the printer's grooves, until it clicks firmly into place in the holder. 3. Restore the belt clip on the rear of the printer to the original position - Epson TM-P20 | Users Manual - Page 14
to the bottom. 3. Fully insert the power plug securely into the grounded outlet. 4. Set the label side of the AC adapter facing down. Charging the Printer Charge the printer by following the steps below. 1. Set the printer in the single charger. Push down the - Epson TM-P20 | Users Manual - Page 15
starts and the Charge LED on the single charger turns on. !CAUTION: Charge the printer at an ambient temperature between 10 and 30°C {50 and 86°F}. 3. When charging is complete, the Charge LED on the single charger turns off. Press the Release button and remove the printer. Release Button 15 - Epson TM-P20 | Users Manual - Page 16
English Basic Operation Turning On/Off Turning On Press Power button. Power LED lights up and the power turns on. Turning Off Hold down Power button for 2 seconds or more. Power LED turns off and the power turns off. 16 - Epson TM-P20 | Users Manual - Page 17
Roll Paper Cover Opening the Roll Paper Cover Press the cover open button to open the roll paper cover. !CAUTION: Do not open the roll paper cover during printing. Doing so may cause injury. Also, it may cause malfunction of the printer. Closing the Roll Paper Cover Push the entire roll paper cover - Epson TM-P20 | Users Manual - Page 18
English Cutting the Roll Paper Pull the paper in the direction of the arrow to cut the paper with the manual cutter. 18 - Epson TM-P20 | Users Manual - Page 19
!CAUTION: Be sure to use the specified roll paper. Do not use roll paper with paper glued to the core. 1. Open the roll paper cover. (U "Opening the Roll Paper Cover" on page 17) 2. Remove the used roll paper core if there is one. 3. Insert the roll paper in the proper direction. QNotes: If the roll - Epson TM-P20 | Users Manual - Page 20
may transform or damage the plastic or rubber parts. Cleaning the Printer Interior To maintain the printing quality, clean the thermal head, platen roller, and paper sensor by following the steps below. Epson recommends cleaning the parts periodically (generally every 3 months). !KCAUTION: ❏ After - Epson TM-P20 | Users Manual - Page 21
or single charger. Power off the printer and pull the single charger's AC cable from the outlet. Then, wipe off dirt with a dry cloth or cotton swab. Epson recommends cleaning the parts periodically (generally every 3 months). !KCAUTION: ❏ After charging, the charge terminals can be very hot. Be - Epson TM-P20 | Users Manual - Page 22
LED is flashing ❏ Check that no paper is jammed. Remove jammed paper, if any. ❏ Printing is paused when the thermal head or battery is hot but is automatically resumed when it cools. ❏ In other cases, power off the printer, wait for 10 seconds, and then power on the printer again. The single charger - Epson TM-P20 | Users Manual - Page 23
Approx. 221 g {0.48 lb} Bluetooth model Approx. 212 g {0.46 lb} *1: This is the continuous operating time under Epson operation conditions. The time may vary depending on the environment using the printer. *2: Including the battery. Excluding roll paper and the belt clip. Single charger (OT-SC20 - Epson TM-P20 | Users Manual - Page 24
, go to the following web site: www.epson.com/support/ For customers in other countries, go to the following web site: www.epson.com/ Battery (OT-BY20) Battery specialized for this printer. Single charger (OT-SC20) Single charger specialized for this printer. With this charger, you can charge one - Epson TM-P20 | Users Manual - Page 25
Downloading Drivers, Utilities, and Manuals Printer drivers, utilities, and manuals can be downloaded from one of the following URLs: For customers in North America, go to the following web site: www.epson.com/support/ For customers in other countries, go to the following web site: www.epson-biz - Epson TM-P20 | Users Manual - Page 26
every precaution has been taken in the preparation of this manual, Seiko Epson Corporation assumes no responsibility for errors or omissions. (4) Seiko Epson Corporation's operating and maintenance instructions. (6) Seiko Epson Corporation shall not be liable for any damages or problems arising from
-
 1
1 -
 2
2 -
 3
3 -
 4
4 -
 5
5 -
 6
6 -
 7
7 -
8
-
9
-
10
-
11
-
12
-
13
-
14
-
15
-
16
-
17
-
18
-
19
-
20
-
21
-
22
-
23
-
24
-
25
-
26
 |
 |

User's Manual
Before Use . . . . . . . . . . . . . . . . . . . . . . . . . . . . . . . . . . . . . . . . . . 2
Part Names and Functions . . . . . . . . . . . . . . . . . . . . . . . . . . . 7
Setup . . . . . . . . . . . . . . . . . . . . . . . . . . . . . . . . . . . . . . . . . . . . . .10
Basic Operation . . . . . . . . . . . . . . . . . . . . . . . . . . . . . . . . . . . .16
Setting/Replacing the Roll Paper . . . . . . . . . . . . . . . . . . . . 19
Cleaning the Products . . . . . . . . . . . . . . . . . . . . . . . . . . . . . . 20
Troubleshooting. . . . . . . . . . . . . . . . . . . . . . . . . . . . . . . . . . . . 22
Specifications . . . . . . . . . . . . . . . . . . . . . . . . . . . . . . . . . . . . . .23
Consumable Products and Options . . . . . . . . . . . . . . . . .24
Appendix . . . . . . . . . . . . . . . . . . . . . . . . . . . . . . . . . . . . . . . . . .25
M00081305EN