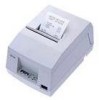
Epson U325PD User Manual
Epson U325PD - TM B/W Dot-matrix Printer Manual
 |
View all Epson U325PD manuals
Add to My Manuals
Save this manual to your list of manuals |
Epson U325PD manual content summary:
- Epson U325PD | User Manual - Page 1
TM-U325D/U325PD User's Manual 400665704 - Epson U325PD | User Manual - Page 2
25 1 6 2 31 1 13 1 6 2 31 Parallel interface connector Control panel RECEIPT FEED RELEASE OUT VALIDATION ERROR POWER EPSON/U325 Printer - File: PRNTR_8.e W. Swanlund REV> 14Octobe 3 2 5 CUT 4 2 SET 13 6 CLOSE THE PRINTER COVER CAUTION/ VORSICHT: Print head cover and print head - Epson U325PD | User Manual - Page 3
alterations to this product, or (excluding the U.S.) failure to strictly comply with Seiko Epson Corporation's operating and maintenance instructions. Seiko Epson Corporation shall not be liable against any damages or problems arising from the use of any options or any consumable products other than - Epson U325PD | User Manual - Page 4
Name: TM-U325D/TM-U325PD Model Name: M133A The following standards are applied only to the printers that are so labeled. (EMC is tested using Seiko Epson's AC radio frequency energy and, if not installed and used in accordance with the instruction manual, may cause harmful interference to radio - Epson U325PD | User Manual - Page 5
About This Manual Setting Up and Using ❏ Chapter 1 contains information on unpacking the printer, setting it up, attaching the paper roll near-end sensor, and setting the DIP switches. ❏ Chapter 2 contains information on using the printer. ❏ Chapter 3 contains troubleshooting information. Reference - Epson U325PD | User Manual - Page 6
Introduction Features The TM-U325D and TM-U325PD are high-quality POS printers that can print a multiple-line validation and on receipt paper (paper roll). The printer has the following features: ❏ Easily changeable interface specifications for serial or parallel by exchanging the interface board. ❏ - Epson U325PD | User Manual - Page 7
The illustration below shows the items included for the standard specification printer. EPSON FEED RELEASEERROORURTECPEOIPWTVEARLIDATION Printer Power supply *1 Ribbon cassette Paper roll Manual Spacers for the paper roll near-end sensor 2 pcs Power switch cover (*1) The power cord - Epson U325PD | User Manual - Page 8
sensor may not detect the remaining paper correctly. If a paper roll easily becomes loose because of the quality of the paper or other factors, incorrect detection of the paper end may result. 1. Make sure that the power supply is disconnected from the printer. 2. Two spacers are included. See the - Epson U325PD | User Manual - Page 9
Power supply Drawer kick-out Grounding screws Notes: There is a caution label beside the drawer kick-out connector. Depending on the interface installed, the interface connector on your printer may look different from the one illustrated. Before connecting any of the cables, make sure that both the - Epson U325PD | User Manual - Page 10
end of the cable to the connector on your computer. Connecting the Drawer WARNING: Use a drawer that matches the printer specification. Using an improper drawer may damage the drawer as well as the printer. CAUTION: Do not connect a telephone line to the drawer kick-out connector; otherwise the - Epson U325PD | User Manual - Page 11
können. Das Kabel der Lade an die Schnappsteckerbuchse unten am Drucker neben dem Netßzanschluß anschließen. Grounding the Printer You need a ground wire to ground your printer. Make sure that the wire meets the specifications below. Thickness of wire: AWG 18 or equivalent Diameter of terminal - Epson U325PD | User Manual - Page 12
/ VORSICHT: When connecting or disconnecting the power supply from the printer, make sure that the power supply is not plugged into an electrical outlet; otherwise you may damage the power supply or the printer. If the power supply's rated voltage and your outlet's voltage do not match - Epson U325PD | User Manual - Page 13
's power cord from the outlet and then grasp the connector firmly at the arrow mark and pull it straight out. Installing the Ribbon Cassette Use the EPSON ERC-38 ribbon cassette for your printer. Note the label inside the printer cover that can assist you in installing the ribbon. Setting Up the - Epson U325PD | User Manual - Page 14
2. Open the printer cover. 3. Turn the ribbon cassette's knob in the direction of the arrow, to take up any slack in the ribbon. 4. Insert the ribbon in the position shown in the illustration below and push the ribbon cassette until it clicks. Note: Make sure that the ribbon is installed between the - Epson U325PD | User Manual - Page 15
slack in the ribbon. EPSON FEED RELEASE ERROR OUTRECEIPT POWERVALIDATION Installing the Paper Roll Notes: Be sure to use a paper roll that meets the specifications. Do not use paper rolls that have the paper glued to the core because the printer cannot detect the paper end correctly. However - Epson U325PD | User Manual - Page 16
scissors, cut the leading edge of the paper roll as shown below. 2. Turn on the printer and open the printer cover. 3. Insert the paper roll. EPSON FEED RELEASE ERROR OUTRECEIPT POWERVALIDATION Note: Be sure to note the correct direction that the paper comes off the roll as shown below. 1-10 - Epson U325PD | User Manual - Page 17
both edges of the paper and insert it straight into the paper slot. The printer feeds the paper automatically. EPSON FEED RELEASE ERROR OUTRECEIPT POWERVALIDATION 5. Tear off the paper; then close the cover. Note: Before closing the cover, make sure that the paper from the paper roll is not - Epson U325PD | User Manual - Page 18
. Note: Be sure to install the ribbon cassette and the paper roll before you run the self test. 1. To perform the self test, hold down the FEED button while you turn on the printer with the power switch. 2. The printer prints the current printer settings and then the RECEIPT OUT light flashes to - Epson U325PD | User Manual - Page 19
mode. Note: If you want to pause the self test manually, press the FEED button. Press the FEED button again to continue the self test. Setting the DIP Switches Einstellen der DIP-Schalter CAUTION / VORSICHT: Turn off the printer while removing the DIP switch cover to prevent an electrical short - Epson U325PD | User Manual - Page 20
, befinden sich in der ersten Gruppe, Schalter, die mit 2 beginnen, in der zweiten Gruppe. Serial Interface (TM-U325D) These are the settings for printers equipped with a serial interface. DIP Switch Set 1 Switch Function 1-1 Data reception error 1-2 Receive buffer capacity 1-3 Handshaking - Epson U325PD | User Manual - Page 21
or receive buffer full - 40CPL/33CPL - Fixed to Off Disabled Disabled Notes: Changes in DIP switch settings (excluding switches 2-7 and 2-8) are recognized only when the printer power is turned on or when the printer is reset by using the interface. If the DIP switch setting is changed after the - Epson U325PD | User Manual - Page 22
Parallel Interface (TM-U325PD) These are the settings for printers equipped with a parallel interface. DIP Switch Set 1 Switch Function 1-1 Auto line feed 1-2 Receive buffer capacity 1-3~1-8 Not defined ON Enabled 45 bytes - OFF Disabled 4K bytes - - Epson U325PD | User Manual - Page 23
unplug the power supply cord from the outlet immediately; otherwise the printer may be damaged. Wenn ein Unfall auftritt und die Netzschalterabdeckung aufgesetzt ist beiden kleinen Öffnungen in der Abdeckung einführen. EPSON FEED RELEASEERROORURTECPEOIPWTVEARLIDATION Setting Up the Printer 1-17 - Epson U325PD | User Manual - Page 24
Option) Two sets of tape are included as an option to fasten your printer to a countertop or other surface. Follow the steps below: 1. Clean the countertop or other surface where the printer will be installed. 2. Peel the green backing paper off of one side of each of the two sets of tapes and affix - Epson U325PD | User Manual - Page 25
panel. The indicator lights help you monitor the printer's status. RECEIPT FEED RELEASE OUT VALIDATION ERROR POWER Switch The power switch on the front of the printer turns the printer on and off. Buttons FEED Press the FEED button once to advance the paper roll one line. You can also hold down - Epson U325PD | User Manual - Page 26
Indicator lights The control panel lights provide information on printer conditions. POWER (Green) The POWER light is on when the printer power is on. RECEIPT OUT (Red) This light is on when the paper roll is at the end or near the end. This light flashes in the following cases. When it flashes, - Epson U325PD | User Manual - Page 27
, turn the printer off, check for jammed paper, and remove the paper by following the instructions on page 3-3, if necessary. Then turn the printer back on. If the printer still does not work, unplug the power supply cord from the outlet immediately, and contact a qualified service person. CAUTION - Epson U325PD | User Manual - Page 28
. 2. When the VALIDATION light flashes, insert the validation paper into the validation paper inlet using the right edge of the validation paper inlet as a guide. (Follow steps ➀ and ➁ in the illustration.) 2 1 EPSON 3. Make sure you insert the validation paper into the inlet as far as it will go - Epson U325PD | User Manual - Page 29
30 seconds). If there is no paper jam and the print head is not overheated, turn off the printer and turn it back on after about 10 seconds. If the printer still does not work, unplug the power supply cord from the outlet immediately. Then contact a qualified service person. Troubleshooting 3-1 - Epson U325PD | User Manual - Page 30
using the self test. If the printer still does not print, contact your dealer or a qualified service person. The printer sounds like it is printing, but nothing is printed. The ribbon cassette may not be installed properly. See the instructions in Chapter 1. The ribbon may be worn out. Replace the - Epson U325PD | User Manual - Page 31
in den Drucker fassen. 1. Open the printer cover. 2. Pull up the paper and cut the paper at the dotted line shown in the illustration below. Cut here EPSON FEED RELEASE ERROR OUTRECEIPT POWERVALIDATION 3. Remove the paper roll from the printer. 4. Remove the ribbon cassette. Troubleshooting 3-3 - Epson U325PD | User Manual - Page 32
OUTRECEIPT POWERVALIDATION 7. Remove all the jammed paper. Note: Do not pull the jammed paper in the opposite direction of paper feeding. 8. Replace the print head cover and secure it with the screw. 9. Replace the ribbon cassette and paper roll; then close the printer cover. 3-4 Troubleshooting - Epson U325PD | User Manual - Page 33
printer. This can be useful in finding software problems. When you turn on the hex dump function, the printer prints all commands and other data in hexadecimal format along with a guide to the printer. The printer prints all the the printing finishes, turn off the printer or reset it to turn off the - Epson U325PD | User Manual - Page 34
3-6 Troubleshooting - Epson U325PD | User Manual - Page 35
data transmission time and processing time) [cpi: characters per 25.4 mm (characters per inch)] Note: When printing exceeds the allowable print duty cycle, the printer automatically stops printing. In this case, the printing speed described above is not guaranteed. Reference Information 4-1 - Epson U325PD | User Manual - Page 36
Character Specifications Number of characters Alphanumeric characters: 95 Extended graphics: 128 × 8 pages, International characters: 32 Character structure: 7 × 9 (the total number of dots for each horizontal line: 400 in half dot units) 9 × 9 (the total number of dots for each horizontal line: - Epson U325PD | User Manual - Page 37
be set in units of 0.176 mm {1/144 inch} by commands. Approx. 105.918 mm {4.17 inches}/ second (25 lines/second) (continuous feeding) Normal paper (single-ply) Size: Width 76 mm ± 0.5 mm {3.0" ± 0.02"} Maximum 83 mm {3.27"} outside dia: Thickness: 0.06 to 0.085 mm {.0024 to .0033"} Mass: 52 - Epson U325PD | User Manual - Page 38
0020 to .0031"} (Total thickness should be 0.2 mm or less and each sheet should be 0.05 to 0.08 mm.) Recommend MITSUBISHI PAPER -ed paper: MILLS, LTD. Non-carbon paper (blue color) Top and middle sheets: N40Hi (thickness: 0.06 mm, mass: 47.2 g/m2 ) Bottom sheet: N60 (thickness: 0.08 mm, mass: 68 - Epson U325PD | User Manual - Page 39
mm × 182 mm (maximum) {5.31" × 2.76" to 7.17" × 7.17"} (maximum 9 lines at 4.23 mm {.17"} pitch) 0.09 mm to 0.12 mm {.0035" to .0047"} Backing paper: 0.07 mm to 0.12 mm {.0028" to .0047"} Copy and 0.04 mm to 0.07 mm original {.0016" to .0028 - Epson U325PD | User Manual - Page 40
without curls, folds, warps, or wrinkles, especially at the paper edge. Otherwise, the paper may become ink stained or the ribbon may get caught in the printer mechanism. ❏ Choose validation paper carefully when glue is on the edge, since paper feeding and insertion are affected by gluing conditions - Epson U325PD | User Manual - Page 41
areas shown below must not be used. Otherwise, the paper cannot be detected by the paper sensor. Translucent paper must not be used. : Holes are prohibited in this area. Inserting direction 7mm (.28") 11mm (.43") Power Supply The supported power supply is AC Adapter, C. Reference Information 4-7 - Epson U325PD | User Manual - Page 42
Life: MTBF: MCBF: Print head life: Validation switching operation life: 20,000,000 lines ❏ End of Life is defined as the point at which the printer reaches the beginning of the Wearout Period. 180,000 hours ❏ Failure is defined as Random Failure occurring at the time of the Random Failure Period - Epson U325PD | User Manual - Page 43
humidity. Refer to the figure below.) Storage -10 to 50 ° C {14 to 122° F} (except for paper, and a ribbon) Humidity Operating 10 to 90% RH Storage 10 to 90% RH (except for paper and a ribbon) Relative humidity Operating environment range 90 34 ° C, 90% 80 60 40 ° C, 65% 40 50 ° C, 35 - Epson U325PD | User Manual - Page 44
Character Code Tables SP in a table represents space. Page 0 (PC437: U.S.A., Standard Europe) (International character set: U.S.A) FS 4-10 Reference Information - Epson U325PD | User Manual - Page 45
Page 1 (Katakana) Reference Information 4-11 - Epson U325PD | User Manual - Page 46
Page 2 (PC850: Multilingual) 4-12 Reference Information - Epson U325PD | User Manual - Page 47
Page 3 (PC860: Portuguese) Reference Information 4-13 - Epson U325PD | User Manual - Page 48
Page 4 (PC863: Canadian-French) 4-14 Reference Information - Epson U325PD | User Manual - Page 49
Page 5 (PC865: Nordic) Reference Information 4-15 - Epson U325PD | User Manual - Page 50
Page 254 (Space Page) 4-16 Reference Information - Epson U325PD | User Manual - Page 51
Page 255 (Space Page) Reference Information 4-17 - Epson U325PD | User Manual - Page 52
International character set ASCII code (hexadecimal) Country Hex 23 24 40 5B 5C 5D 5E 60 7B 7C 7D 7E U.S.A. Dec 35 36 64 91 92 93 94 96 123 124 125 126 # $ @[ \] ^` { ¦} ~ France Germany U.K. Denmark I £ $ @[ \] ^` { ¦} ~ # $ @ÆØÅ ^ ` æø å ~ Sweden Italy Spain - Epson U325PD | User Manual - Page 53
- Epson U325PD | User Manual - Page 54
WEEE (Waste Electrical and Electronic Equipment) Directive This information only applies to customers in the European Union, according to Directive 2002/96/EC OF THE EUROPEAN PARLIAMENT AND OF THE COUNCIL OF 27 January 2003 on waste electrical and electronic equipment (WEEE) and legislation - Epson U325PD | User Manual - Page 55
bbi szeméttõl elkülönítve helyezze el, és biztosítsa, hogy azt környezetbarát módon újrahasznosítsák. A rendelkezésére álló begyûjtõ létesítményekrõl kérjük tájékozódjon a megfelelõ helyi állami szerveknél vagy a viszonteladónál, ahol a terméket vásárolta. Polski Symbol przekreślonego kosza znajduj - Epson U325PD | User Manual - Page 56
Printed in China 1996.12
-
 1
1 -
 2
2 -
 3
3 -
 4
4 -
 5
5 -
 6
6 -
 7
7 -
8
-
9
-
10
-
11
-
12
-
13
-
14
-
15
-
16
-
17
-
18
-
19
-
20
-
21
-
22
-
23
-
24
-
25
-
26
-
27
-
28
-
29
-
30
-
31
-
32
-
33
-
34
-
35
-
36
-
37
-
38
-
39
-
40
-
41
-
42
-
43
-
44
-
45
-
46
-
47
-
48
-
49
-
50
-
51
-
52
-
53
-
54
-
55
-
56
 |
 |

TM-U325D/U325PD
User’s Manual
400665704