Frigidaire FHTE103WA2 Installation Instructions
Frigidaire FHTE103WA2 Manual
 |
View all Frigidaire FHTE103WA2 manuals
Add to My Manuals
Save this manual to your list of manuals |
Frigidaire FHTE103WA2 manual content summary:
- Frigidaire FHTE103WA2 | Installation Instructions - Page 1
Instructions READ BEFORE INSTALLING UNIT For Through-the-Wall Air Conditioners INSTALLATION WARNINGS AND CAUTION Carefully read the installation manual inspect location where air conditioner will be installed. Be sure it will support the weight of the unit over an extended period of time. Handle - Frigidaire FHTE103WA2 | Installation Instructions - Page 2
Installation Instructions Common Wall-Sleeve Dimensions 1. Identify the wall-sleeve brand for your installation, from the chart below. GE/Hotpoint/Amana 15 5 8" Fedders/Emerson/Friedrich (WSE)* 16 7 8" - Frigidaire FHTE103WA2 | Installation Instructions - Page 3
IMPORTANT This units increased performance characteristics is the result of having two rear intakes. It is very important that these installation instructions are followed so your unit can operate at maximum efficiency. If there is an existing sleeve and rear grille, it should be replaced - Frigidaire FHTE103WA2 | Installation Instructions - Page 4
Installation Instructions Grille Removal Important: Single intake grilles must be removed when used with dual intake Through-the-wall Units. Warning: When removing grilles, protect from falling - Frigidaire FHTE103WA2 | Installation Instructions - Page 5
grillet supplied with the unit, be attached directly to the unit before inserting the unit into the sleeve. (See section on Direct Unit Mounting for instructions how to attache the grille) Unit Mounted Grilles In some cases it may be possible to remove a non-Frigidaire grille and attach the dual - Frigidaire FHTE103WA2 | Installation Instructions - Page 6
Installation Instructions Direct Unit Mounting In cases where the dual intake grille cannot be mounted directly to the sleeve it is desirable to attach the grille to - Frigidaire FHTE103WA2 | Installation Instructions - Page 7
. 7. Gently slide unit into sleeve. 5 4 Ground Wire Installation 1. Install screw end of ground wire into inside of sleeve according to preparation instructions. 2. Before sliding unit all the way back remove second screw from left side of unit. 3. Remove plastic washer from screw. 4. Screw the - Frigidaire FHTE103WA2 | Installation Instructions - Page 8
Installation Instructions Non-Frigidaire Dual Intake Grille In cases where the existing sleeve is a non-Frigidaire sleeve but is installed with a dual intake grille. The existing grille - Frigidaire FHTE103WA2 | Installation Instructions - Page 9
Subsitute Grille Installation Instructions Important: Single intake grilles must be removed when used with used with dual intake Through-the-wall Units. Installation of a standard size Through-the-Wall - Frigidaire FHTE103WA2 | Installation Instructions - Page 10
Trim Kit Installation Instructions 1. Install the 1" x 1" x 84" long stuffer seal between the wall sleeve and the unit. A flat-bladed screwdriver or putty knife is recommended. 2. Assemble the trim frame - Frigidaire FHTE103WA2 | Installation Instructions - Page 11
daños al equipo debido a su peso y a los bordes afilados que puedan quedar expuestos: Los aparatos de aire acondicionado detallados en este manual suponen un peligro por su excesivo peso. Es necesaria la intervención de dos o más personas para mover e instalar el equipo. Utilice guantes protectores - Frigidaire FHTE103WA2 | Installation Instructions - Page 12
Instrucciones de montaje Dimensiones comunes de nicho para montaje en la pared 1. Identificar la marca de la funda de pared para su instalación, según la tabla de abajo. Marca Frigidaire White-Westinghouse Carrier (52 Series) GE/Hotpoint/Amana Whirlpool Fedders/Emerson/Friedrich (WSE)* Sears/ - Frigidaire FHTE103WA2 | Installation Instructions - Page 13
Instrucciones de montaje IMPORTANTE Las mejores características de rendimiento de esta unidad es el resultado de que tiene dos tomas traseras. Es muy importante que estas instrucciones de instalación se sigan para que su unidad pueda funcionar con la máxima eficiencia. Si hay funda y rejilla - Frigidaire FHTE103WA2 | Installation Instructions - Page 14
Instrucciones de montaje Remoción de la rejilla Importante: Las rejillas de toma individuales se deben eliminar cuando se utilizan con unidades de pared de doble toma. Advertencia: Al retirar las rejillas, asegurar la protección contra caídas con una atadura. Esto se puede hacer con una cuerda o por - Frigidaire FHTE103WA2 | Installation Instructions - Page 15
Instrucciones de montaje Opciones de instalación alternativas Rejillas no direccionales Instalación de una unidad a través de la pared en una funda que utiliza una rejilla de flujo de aire no direccional, tal como rejilla de diamante expandida o una rejilla arquitectónica Se recomienda que la - Frigidaire FHTE103WA2 | Installation Instructions - Page 16
Instrucciones de montaje Montaje Directo de Unidad En los casos en que la rejilla de toma doble no se puede montar directamente a la funda, es deseable unir la rejilla a la parte trasera del aire acondicionado a través de la pared de los orificios pre-perforados en la unidad. 1. Colocar las 2 juntas - Frigidaire FHTE103WA2 | Installation Instructions - Page 17
Instrucciones de montaje Unión de la rejilla a la funda En los casos en que la rejilla de toma doble se pueda colocar dentro de la funda y la brida de la rejilla se superponga a la brida de la funda, puede ser posible la conexión directa. Instalación de la rejilla 1. Remoción de la rejilla existente - Frigidaire FHTE103WA2 | Installation Instructions - Page 18
Instrucciones de montaje Rejilla de toma doble no Frigidaire En los casos en que la funda existente es una funda no Frigidaire, pero está instalada con una rejilla de doble toma. La rejilla existente se puede dejar en su lugar. Asegurarse de que las persianas exteriores de 3 ½" a 4 ½" están en á - Frigidaire FHTE103WA2 | Installation Instructions - Page 19
Instrucciones de montaje Rejilla de sustitución Importante: Las rejillas de toma individuales se deben eliminar cuando se utilizan con unidades de pared de doble toma. Instalación de un tamaño estándar Las unidades de pared colocadas en mangas más antiguas y mayores pueden dejar brechas indeseables - Frigidaire FHTE103WA2 | Installation Instructions - Page 20
Instrucciones de montaje Instrucciones de instalación del juego de ajuste 1. Instalar el sello taponeador de 1" x 1" x 84" de largo entre la funda de la pared y la unidad. Se recomienda un destornillador de hoja plana o una espátula para masilla. 2. Monte el marco de ajuste insertando las piezas - Frigidaire FHTE103WA2 | Installation Instructions - Page 21
climatiseur selon ces instructions d'installations pour obtenir la meilleure performance. Conservez ces instructions d'installation pour coniques (17" de long) 2 10 Cadre d'habillage (pieds latéraux) 2 2 Blocs de Centrage/Support ( 4 1 2" x 31 2 " x 11 2 " ) 4 11 Cadre d'habillage (pieds sup - Frigidaire FHTE103WA2 | Installation Instructions - Page 22
Instructions d'installation Dimensions du support mural 1. Identifier la marque du support mural pour l'installation dans le tableau ci-dessous. Marque Hauteur Dimensions du support mural Largeur Profondeur Frigidaire 15 1h4 po 25 1h2 po 16 po, 17 1h2 po ou 22 po White-Westinghouse 15 - Frigidaire FHTE103WA2 | Installation Instructions - Page 23
ée de cet appareil sont le résultat de deux entrées d'admission. Il est très important de suivre toutes ces instructions pour que l'appareil fonctionne à son efficacité maximale. Si un support et une grille arrière existent, les remplacer avec ceux expédiés avec l'appareil dans le kit d'accessoires - Frigidaire FHTE103WA2 | Installation Instructions - Page 24
Instructions d'installation Retrait de la grille Important: Les grilles d'admission uniques doivent être enlevées lorsqu'elles sont utilisées avec une admission double d' corde avec une main, enlever les vis de fixation et la grille peut être enlevée de l'intérieur par le devant du support. 4 - Frigidaire FHTE103WA2 | Installation Instructions - Page 25
d'admission double fournie avec l'appareil soit attachée directement sur l'appareil avec d'insérer l'appareil dans le support. (Voir la section sur l'installation directe de l'appareil pour des instructions sur la façon de fixer la grille.) Grilles d'appareil installées Dans certains cas, il peut - Frigidaire FHTE103WA2 | Installation Instructions - Page 26
Instructions d'installation Installation directe de l'appareil Dans les cas où la grille d'admission double ne peut être installée directement sur le support, il est préférable de l'attacher à l'arrière du climatiseur à encastrer dans les trous prépercés de l'appareil. 1. Installer 2 joints (1 po x - Frigidaire FHTE103WA2 | Installation Instructions - Page 27
. Installation du fil de mise à la terre 1. Installer l'extrémité à vis du fil de mise à la terre à l'intérieur du support selon les instructions de mise en œuvre. 2. Avant de glisser l'appareil complètement, retirer la seconde vis du côté gauche de l'appareil. 3. Retirer la rondelle en plastique - Frigidaire FHTE103WA2 | Installation Instructions - Page 28
Instructions d'installation Grille d'admission double de marque non frigidaire Dans les cas où le support existant n'est pas de marque Voir Fig. 2.) Joint Fig. 2 Joint Insérer l'appareil avec les joints dans le support en le poussant complètement vers l'arrière en s'assurant que le joint s'appuie - Frigidaire FHTE103WA2 | Installation Instructions - Page 29
Instructions d'installation Grille de substitution Important : Les grilles d'admission uniques doivent être enlevées lorsqu'elles sont utilisées avec une admission double d'appareil à encastrer dans le mur. Installation d'une dimension standard Un appareil à encastrer installé sur des supports plus - Frigidaire FHTE103WA2 | Installation Instructions - Page 30
Instructions d'installation Instruction d'installation du kit de garniture 1. Installer le long joint d'étanchéité de 1 po x 1 po x 84 po entre le support mural et l'appareil. Il est recommandé d'utiliser un tournevis à lame plate ou un couteau à mastiquer. 2. Assembler le cadre de garniture en insé - Frigidaire FHTE103WA2 | Installation Instructions - Page 31
- Frigidaire FHTE103WA2 | Installation Instructions - Page 32
-
 1
1 -
 2
2 -
 3
3 -
 4
4 -
 5
5 -
 6
6 -
 7
7 -
8
-
9
-
10
-
11
-
12
-
13
-
14
-
15
-
16
-
17
-
18
-
19
-
20
-
21
-
22
-
23
-
24
-
25
-
26
-
27
-
28
-
29
-
30
-
31
-
32
 |
 |

Hardware
2
2
3
Tapered Spacer (17” Long)
4
4
1
2
3
4
5
1
6
2
3
7
8
.
y
t
Q
.
o
N
2
9
Centering/Support Blocks (
”
)
4
”
x 3
”
x 1
1
2
1
2
1
2
Plastic Divider (
)
1/8
”
x 4
”
x 14
”
1
2
1
2
Stuffer Seal (
)
1
”
x 1
”
x 84
”
1
2
Seal (
)
1
”
x 1
”
x 25
”
1
2
Seal (
)
1
”
x 1
”
x 14
”
1
2
Seal (
)
1
”
x 3/8
”
x 25
”
Seal(
)
1
”
x 3/8
”
x 14
”
Seal (
)
1
”
x 3/4
”
x 14
”
2
Hardware
2
1
1
Ground Wire (green)
2
13
10
11
12
14
Grounding Screw
1
5
1
1
6
1
17
.
y
t
Q
.
o
N
4
18
Trim Frame (top & bottom legs)
Grille (plastic)
Grille Aluminum
Nuts (plastic)
Screw w/washer
4
Trim Frame (side legs)
Tooth washer for grounding screw
2
READ BEFORE INSTALLING UNIT
For Through-the-Wall Air Conditioners
1
Installation Instructions
NOTE: DO NOT USE ANY SCREWS OTHER THAN THOSE SPECIFIED HERE
Do This First (for existing sleeve)
You may not need all parts in the kit. Discard unused parts.
Items in Kit
16120300A29375
INSTALLATION WARNINGS AND CAUTION
Carefully read the installation manual before beginning. Follow each step as shown.
Observe all local, state, and national electrical codes and by qualified, licensed, authorized personnel only.
Pay attention to danger and safety notices.
To avoid risk of personal injury, property damage, or product damage due to the weight of this device and sharp edges that
may be exposed.
Air conditioners covered in this manual pose an excessive weight hazard. Two or more people are needed to move and
install the unit. Wear protective gloves whenever lifting or carrying the unit. AVOID the sharp metal fins of front and rear coils.
To prevent injury or strain, use proper lifting and carrying techniques when moving unit.
Carefully inspect location where air conditioner will be installed. Be sure it will support the weight of the unit over an extended
period of time.
Handle air conditioner with care.
Make sure air conditioner does not fall during installation.
20" min
(510 mm)
20" min
(510 mm)
6.3" min (160 mm)
Outdoor side
Indoor side
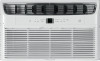
Note that the air conditioner dimensions are: 24" wide,14"
high, and 19" deep (without front). Install air conditioner
according to these installation instructions to achieve the best
performance. Save these installation instructions for future
reference.
There should be enough
The appliance with electric heater shall have at least 1 meter
space to the combustible materials.
clearance around the unit as shown
in the right figure.