Ganz Security CMC-25-HD Manual
Ganz Security CMC-25-HD Manual
 |
View all Ganz Security CMC-25-HD manuals
Add to My Manuals
Save this manual to your list of manuals |
Ganz Security CMC-25-HD manual content summary:
- Ganz Security CMC-25-HD | Manual - Page 1
the safeguards and precautions found on page 2 of this manual. Unpacking Unpack carefully. This is electromechanical equipment and should Service If the unit ever needs repair service, the customer should contact CBC America LLC. for a return materials authorization (RMA) and shipping instructions - Ganz Security CMC-25-HD | Manual - Page 2
service personnel under the following conditions: a. When the power supply cord or plug is damaged. b. If liquid has been spilled or objects have fallen into the unit. c. If the unit has been exposed to rain or water. d. If the unit does not operate normally by following the operating instructions - Ganz Security CMC-25-HD | Manual - Page 3
small Phillips head screwdriver (PH0 or smaller). 8. Refer to the camera manual provided to adjust camera settings by accessing the OSD menu. 9. The ", then PRESS c. DOWN twice to highlight "Exit (Save)", then PRESS Troubleshooting - Video Format If using a standard definition (SD) DVR or monitor - Ganz Security CMC-25-HD | Manual - Page 4
Top mounting holes Top conduit Side conduit Side mounting holes holes (x2) holes (x2) Figure 1 CMC-25-HD Exploded View Figure 3 CMC-25-HD Exploded View (4 images below/right) Figure 2 - Replace Window (Optional) 4.65" (118 mm) 4.65" (118 mm) 4.65" (118 mm) Page 4 of 4
-
 1
1 -
 2
2 -
 3
3 -
 4
4
 |
 |

Page
1
of
4
INSTALLATION MANUAL
–
CMC Series AHD Corner Mount Cameras
WARNING:
Before beginning installation of this product, carefully review the safeguards and precautions found on page 2 of this manual.
Unpacking
Unpack carefully.
This is electromechanical equipment
and should be handled with care.
If an item appears to
have been damaged in shipment, replace it properly in
its carton and notify the shipper.
If any items are
missing, notify CBC America LLC.
The shipping carton is
the safest container in which the unit may be
transported.
Save it for possible future use.
Service
If the unit ever needs repair service, the customer should
contact CBC America LLC. for a return materials
authorization (RMA) and shipping instructions.
Care and Maintenance
Perform routine maintenance to keep the unit dust free.
Clean the viewing window as needed with a damp, soft
cloth.
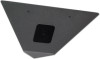
Model Designation
CMC-25-HD
Corner Mount Camera; AHD, Black
Faceplate, 2.5mm Wide Angle Lens, Clear
and Tinted Viewing Window, 12VDC
Description
This camera can be mounted in any 90-degree corner at
any height desired.
The unit includes four conduit
knockout holes to accommodate many installation
locations.
The camera bracket can be adjusted to
achieve the desired viewing angle.
IMPORTANT NOTES
–
CAMERA RESOLUTION:
**These cameras are factory defaulted to Standard
Definition NTSC/CVBS output.**
**The video output can be set to one of several High
Definition formats (AHD / TVI / CVI) by following the
directions on page 3**
Hardware Kit
2 x #10 Screws
2 x Plastic Drywall Anchors
1 x L-Arm Wrench, Torx Tamper Proof T-10
Tools Required
Small adjustable wrench
Small Phillips head screwdriver (PH0 or smaller)
1/4” Drill Bit
5/32” Drill Bit
Certification
Installation should be performed by a licensed
professional and conform to the National Electrical Code
(NEC) and any applicable local codes.
Installation
1.
The camera can be mounted securely in any 90-
degree corner at any height desired.
Before
mounting the camera, determine the approximate
position and location required.
Select the appropriate
fasteners for the type of mounting surface.
Also
consider the cable entry path for power and video
cables to the camera’s location.
2.
The camera provides four (4) mounting holes, two (2)
on the top, and two (2) on the sides.
It is
recommended to use, at minimum, either the two top
or the two side mounting points.
Two (2) #10
fasteners with drywall anchors are provided in the
hardware kit.
For other mounting surfaces, verify the
fastener type used will provide the strength required
for the installation.
3.
The camera provides four (4) conduit knockouts, two
(2) on the top and two (2) on the sides.
After the
cable path is determined, select the appropriate
knockout to use.
Remove the camera faceplate by
removing the two visible screws (front of camera).
With the faceplate off, carefully remove the selected
knockout for cable entry into the camera.
4.
Hold the camera in the desired mounting position.
Mark the location of at least the two top holes or the
two side holes.
Mark the location of the cable entry
knockout.
If the camera is not mounting against the
ceiling, it is recommended to use a level to position
the camera before marking the hole locations.
5.
After hole locations are marked, drill appropriately
sized holes for the cable type and connectors being
used.
Drill appropriate size holes for the fasteners
selected depending on the type of mounting surface.
If using the fasteners provided, drill a 1/4" hole for
the drywall anchors and tap them lightly into place.
If
no anchor is required, drill 5/32” holes for the
fasteners.
**** Instructions Continue on Page 3 *********
CBC AMERICA LLC
2000 Corporate Park Dr., Cary, NC 27518
Tel: +1 (919) 230-8700
www.ganzsecurity.com