Ganz Security ZN-NH11VNE Quick User Guide
Ganz Security ZN-NH11VNE Manual
 |
View all Ganz Security ZN-NH11VNE manuals
Add to My Manuals
Save this manual to your list of manuals |
Ganz Security ZN-NH11VNE manual content summary:
- Ganz Security ZN-NH11VNE | Quick User Guide - Page 1
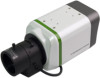
ZN-Y11VP(N)E/ZN-NH11VP(N)E/ZN-NHW11VP(N)E Quick User Guide This manual has been designed to guide you through basic settings of your IP devices, such as installation and configuration for using them. Step1. Connect cables to IP device Connect each cable - Ganz Security ZN-NH11VNE | Quick User Guide - Page 2
EC11 Ver1.2 2 - Ganz Security ZN-NH11VNE | Quick User Guide - Page 3
and enter the IP address of the device. 3. Click Continue to this website (not recommended) as below. (The explanation and captured images at this manual are mainly on the basis of Internet Explorer 7.0) 4. Click pop‐up blocked and install the ActiveX control as below. You need to install the - Ganz Security ZN-NH11VNE | Quick User Guide - Page 4
5. Wait for a few seconds while the web page loads. The live video is displayed as below. 6. If the live video is not displayed and "Can not Create XMLDOMDocument Install MSXML4.0" message is shown as below, please download and Install from the link below. http://www.microsoft.com/downloads/details. - Ganz Security ZN-NH11VNE | Quick User Guide - Page 5
, select Obtain an IP address via DHCP. To learn how to set up the web page for advanced configuration, refer to the Web Page User's Manual, which is available on the SDK at the following path. {SDK root}\DOC\ EC11 Ver1.2 5 - Ganz Security ZN-NH11VNE | Quick User Guide - Page 6
Reset button after 5 seconds. 4. Wait for the system to reboot. More Information To learn more about using other features of your devices, refer to the manual, which is available on the SDK at the following path. {SDK root}\DOC\ EC11 Ver1.2 6
-
 1
1 -
 2
2 -
 3
3 -
 4
4 -
 5
5 -
 6
6
 |
 |

EC11 Ver1.2
1
ZN-Y11VP(N)E/ZN-NH11VP(N)E/ZN-NHW11VP(N)E
Quick User Guide
This manual has been designed to guide you through basic settings of your IP devices, such as installation and
configuration for using them.
Step1. Connect cables to IP device
Connect each cable to the device. To see the correct positions of all connectors, refer to the following image
below.
Step2. Set up network environment
The default IP address of your IP device is 192.168.XXX.XXX. You can find the available IP address from the
MAC address of your device. Please make sure the device and your PC are on the same network segment
before running the installation. If the network segment was different between your PC and the device, change
your PC’s settings as below.
IP address
:
192.168.xxx.xxx
Subnet mask:
255.255.0.0
LAN
DC 12V
Power Adaptor Connector (DC 12V)
Set Screw
(For IRIS LENS)
Make sure the polarity is correct. Incorrect
connection may cause malfunction or
damage to the IP device.
Caution
!
RED
+
‐
+
‐
CW
* Models herein and their
appearance are subject to change
without any prior notice.
ETHERNET
Micro SD
RESET
LOOP OUT
RS-485
DO
DI
AUDIO
-+
C1
C1
Out In
RESET Button
CCW