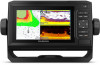
Garmin ECHOMAP UHD 65cv Owners Manual
Garmin ECHOMAP UHD 65cv Manual
 |
View all Garmin ECHOMAP UHD 65cv manuals
Add to My Manuals
Save this manual to your list of manuals |
Garmin ECHOMAP UHD 65cv manual content summary:
- Garmin ECHOMAP UHD 65cv | Owners Manual - Page 1
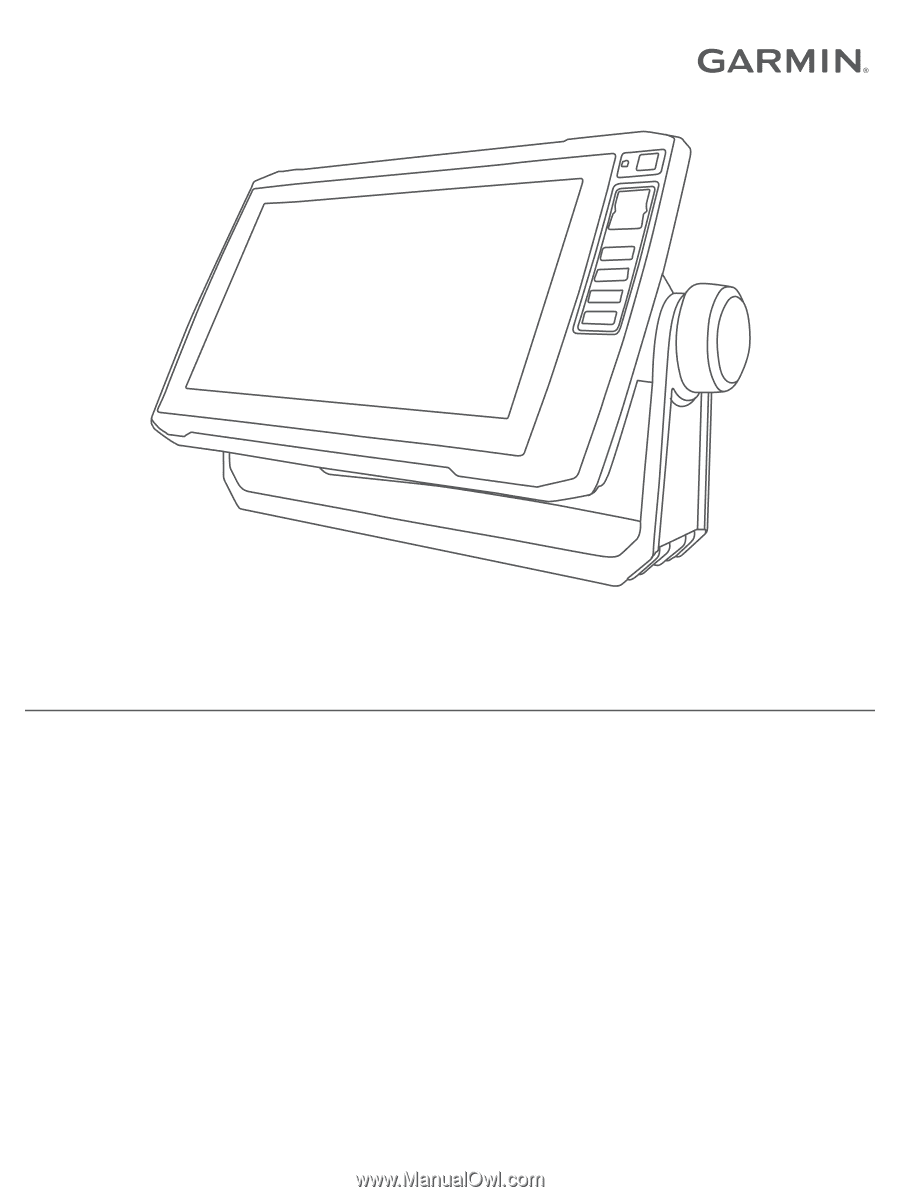
ECHOMAP™ UHD Owner's Manual - Garmin ECHOMAP UHD 65cv | Owners Manual - Page 2
of this manual without obligation to notify any person or organization of such changes or improvements. Go to www.garmin.com for ECHOMAP™, FUSION-Link™, Garmin ClearVü™, Garmin Connect™, Garmin Express™, Garmin Quickdraw™, GXM™, HomePort™, LiveScope™, OneChart™, and Panoptix™ are trademarks of Garmin - Garmin ECHOMAP UHD 65cv | Owners Manual - Page 3
Table of Contents Introduction 1 ECHOMAP UHD 60 Front View 1 Device Keys 1 ECHOMAP UHD 70/90 Front View 1 Device Keys 1 Assigning a Shortcut Key 1 Tips and Shortcuts 1 Downloading the Manuals from the Web 1 Garmin Support Center 1 Inserting Memory Cards 1 Acquiring GPS Satellite Signals 2 - Garmin ECHOMAP UHD 65cv | Owners Manual - Page 4
23 Traditional, Garmin ClearVü, and SideVü Sonar Setup 23 Setting the Zoom Level on the Sonar Screen 24 Setting the Scroll Speed 24 Adjusting the Range of the Depth or Width Scale 24 Sonar Appearance Settings 24 Sonar Alarms 24 Advanced Sonar Settings 24 Transducer Installation Settings 25 - Garmin ECHOMAP UHD 65cv | Owners Manual - Page 5
Radio ID 34 Activating a SiriusXM Subscription 34 Customizing the Channel Guide 34 Saving a SiriusXM Channel to the Presets List 34 Unlocking Factory Settings 38 Sharing and Managing User Data 39 Connecting to a Garmin Device to Share User Data 39 User Data Sharing Cable Wiring Diagram - Garmin ECHOMAP UHD 65cv | Owners Manual - Page 6
- Garmin ECHOMAP UHD 65cv | Owners Manual - Page 7
standby mode, when available. Downloading the Manuals from the Web You can get the latest owner's manual and translations of manuals from the Garmin® website. 1 Go to garmin.com/manuals/ECHOMAPUHD. 2 Download the manual. Garmin Support Center Go to support.garmin.com for help and information, such - Garmin ECHOMAP UHD 65cv | Owners Manual - Page 8
over on the chart. For more information about GPS, go to garmin.com/aboutGPS. For help acquiring satellite signals, see (My device will name for the page, and select Done. Creating a New Combination Page with the ECHOMAP UHD 60 You can create a custom combination page to suit your needs. 1 Select - Garmin ECHOMAP UHD 65cv | Owners Manual - Page 9
data limits or charges from your Internet service provider apply. Contact your Internet service provider for more information about data limits or charges. The installation process can take several minutes. 1 Connect the mobile device to the ECHOMAP UHD device (Getting Started with the ActiveCaptain - Garmin ECHOMAP UHD 65cv | Owners Manual - Page 10
to garmin.com /express. NOTICE Chart updates may require the app to download large files. Regular data limits or charges from your internet service provider apply. Contact your internet service provider for more information about data limits or charges. 1 Connect the mobile device to the ECHOMAP UHD - Garmin ECHOMAP UHD 65cv | Owners Manual - Page 11
• To use Auto Guidance, select Auto Guidance. 4 Review the course indicated by the magenta line. NOTE: When current, celestial, chart notes, or local services, about a location or an object on the be in your path. NOTE: Not all models support all charts. Optional premium charts, such as BlueChart® - Garmin ECHOMAP UHD 65cv | Owners Manual - Page 12
information. The information reported for each vessel includes the Maritime Mobile Service Identity (MMSI), location, GPS speed, GPS heading, time that , and time to the nearest approach. Some chartplotter models also support Blue Force Tracking. Vessels being tracked with Blue Force Tracking are - Garmin ECHOMAP UHD 65cv | Owners Manual - Page 13
Symbol Description Target is activated. The target appears larger on the chart. A green line attached to the target indicates the heading of the target. The MMSI, speed, and direction of the vessel appear beneath the target, if the details setting has been set to Show. If the AIS transmission from - Garmin ECHOMAP UHD 65cv | Owners Manual - Page 14
. Select Review > Go that are not supported by your installed charts or your User Data Layer Settings, page 9). Quickdraw Contours: Turns on bottom contour drawing, and allows you to create fishing map labels (Garmin Service Points: Shows locations for marine services. 8 Charts and 3D Chart Views - Garmin ECHOMAP UHD 65cv | Owners Manual - Page 15
The Manual option calculates the laylines using manually entered , enter a lower number. User Data Layer Settings You can show user data, such as waypoints, contain some settings that are not supported by your installed charts or your present location. Garmin LakeVü™ and premium supplemental charts have multiple - Garmin ECHOMAP UHD 65cv | Owners Manual - Page 16
™ website to access the Garmin Quickdraw Community (Connecting to the Garmin Quickdraw Community with Garmin Connect, page 11). Connecting to the Garmin Quickdraw Community with ActiveCaptain 1 From your mobile device, open the ActiveCaptain app and connect to the ECHOMAP UHD device (Getting Started - Garmin ECHOMAP UHD 65cv | Owners Manual - Page 17
ECHOMAP UHD device, your contour maps are transferred to the community automatically. Connecting to the Garmin Quickdraw Community with Garmin Connect 1 Go to connect.garmin ft.) for the a Recording Offset value. User Display Offset: Sets differences in contour depths installed at each steering - Garmin ECHOMAP UHD 65cv | Owners Manual - Page 18
a compatible Garmin autopilot connected do I make the device guide me to a location while you have premium maps that support Auto Guidance and are in routes, saved tracks, and marine services destinations by name. 1 Select Nav boat to the course. WARNING Review the path for obstacles before - Garmin ECHOMAP UHD 65cv | Owners Manual - Page 19
, select Route To. • To use Auto Guidance, select Auto Guidance. 5 Review the course indicated by the magenta line. NOTE: When using Auto Guidance, 3 Select Delete. Deleting All Waypoints Select Nav Info > Manage Data > Clear User Data > Waypoints > All. Routes A route is a path from one location - Garmin ECHOMAP UHD 65cv | Owners Manual - Page 20
magenta line (direct course). Deleting a Saved Route 1 Select Nav Info > Routes. 2 Select a route. 3 Select Review > Delete. Deleting All Saved Routes Select Nav Info > Manage Data > Clear User Data > Routes. Auto Guidance WARNING The Auto Guidance feature is based on electronic chart information - Garmin ECHOMAP UHD 65cv | Owners Manual - Page 21
, and select Next. 4 Select an option: • To view a hazard and adjust the path near a hazard, select Hazard Review. • To adjust the path, select Adjust Path, and follow the onscreen instructions. • To delete the path, select Delete. • To save the path, select Done. Adjusting an Auto Guidance Path - Garmin ECHOMAP UHD 65cv | Owners Manual - Page 22
view. Showing Tracks 1 From a chart, select MENU > Layers > User Data > Tracks. 2 Select the tracks to display. A trailing line on point used when the track was created, select Backward. 5 Review the course indicated by the colored line. 6 Follow the instructions. 16 Navigation with a Chartplotter - Garmin ECHOMAP UHD 65cv | Owners Manual - Page 23
Info > Boundaries. 2 Select a boundary. 3 Select Edit Boundary > Delete. Deleting All Saved Waypoints, Routes, and Tracks Select Nav Info > Manage Data > Clear User Data > All > OK. Sailing Features Setting the Vessel Type You can select your boat type to configure the chartplotter settings and to - Garmin ECHOMAP UHD 65cv | Owners Manual - Page 24
. The Manual option calculates the laylines using manually entered windward offset to compensate the water depth reading for the transducer installation location. This allows you to view the depth advanced autopilot configuration, see the installation instructions included with your autopilot. 1 From - Garmin ECHOMAP UHD 65cv | Owners Manual - Page 25
hold, you must have a wind sensor installed. 1 Engage wind hold (Engaging Wind Hold not prevent you from manually performing a gybe using New Combination Page with the ECHOMAP UHD 70/90, page 2). Stopping transducer. For information about compatible transducers, go to garmin.com/transducers. Garmin - Garmin ECHOMAP UHD 65cv | Owners Manual - Page 26
this as a search tool to find structures and fish. Panoptix Sonar Views NOTE: Not all models support Panoptix transducers. To receive Panoptix sonar, you need a compatible chartplotter and a compatible transducer. The Panoptix sonar views allow you to see all around the boat in real time. You can - Garmin ECHOMAP UHD 65cv | Owners Manual - Page 27
ü sonar decreases as your speed rises above 8 knots. To see the FrontVü sonar view, you must install and connect a compatible transducer, such as a PS21 transducer. You may need to update the transducer software. Panoptix LiveScope™ Sonar View This sonar view shows a live view of what is in front of - Garmin ECHOMAP UHD 65cv | Owners Manual - Page 28
have a 200/50 kHz, dual-frequency transducer, select Dual Frequency (200/50 kHz). 1 On the ECHOMAP UHD 60 models, you can press and to move the zoom area up and down. 22 Calibrating the Compass Before you can calibrate the compass, the transducer must be installed on the shaft far enough away from - Garmin ECHOMAP UHD 65cv | Owners Manual - Page 29
from another ECHOMAP UHD device and Garmin ClearVü transducer mounted or decrease the gain or brightness manually, select Up or Down. • Sonar Display NOTE: Not all models support sonar recording. 1 Insert a memory sonar recordings, you must download and install the HomePort™ application and record - Garmin ECHOMAP UHD 65cv | Owners Manual - Page 30
the depth range of the magnified area manually, select Manual > , select View Up or View aspect ratio and appear less distorted. When viewing Garmin ClearVü or SideVü sonar views or searching apply to all models and transducers. From a sonar view, screen. Correcting installation issues that cause - Garmin ECHOMAP UHD 65cv | Owners Manual - Page 31
to the device. Flip Left/Right: Changes the orientation of the SideVü sonar view when the transducer is installed backward. Flipped: Sets the orientation of the Panoptix sonar view when the transducer is installed with the cables pointing toward the port side of the boat. Beam Width: Sets the width - Garmin ECHOMAP UHD 65cv | Owners Manual - Page 32
, you can select the Points option and manually set the range to a shallower value. Color Key: Shows a legend of the depths the colors represent. Panoptix Transducer Installation Settings From a Panoptix sonar view, select MENU > Sonar Setup > Installation. Install Depth: Sets the depth below the - Garmin ECHOMAP UHD 65cv | Owners Manual - Page 33
forward view Panoptix transducers, you can enter a bow offset to compensate the forward distance readings for the transducer installation location. This manual steering and several modes of automaticsteering functions and patterns. When the compatible chartplotter is connected to a compatible Garmin - Garmin ECHOMAP UHD 65cv | Owners Manual - Page 34
using the remote, see the Reactor autopilot remote control instructions at garmin.com Pairing a Reactor Autopilot Remote Control With a rotating propeller. Always disconnect the motor from the battery before cleaning or servicing the propeller to avoid injury. You are responsible for the safe and - Garmin ECHOMAP UHD 65cv | Owners Manual - Page 35
the chartplotter, select Settings > Communications > Wireless Devices > Garmin Trolling Motor. 5 On the trolling motor display panel, press Calibrate > Compass Cal.. 3 Follow the on-screen instructions. Setting the Bow Offset Based on the installation angle, the trolling motor may not align with the - Garmin ECHOMAP UHD 65cv | Owners Manual - Page 36
list, the chartplotter must be connected to a VHF radio that supports DSC. Select Nav Info > Other Vessels > DSC List. List > Add Contact. 2 Enter the Maritime Mobile Service Identity (MMSI) of the vessel. 3 Enter When you connect the chartplotter to a Garmin VHF radio, you can use the chartplotter - Garmin ECHOMAP UHD 65cv | Owners Manual - Page 37
Garmin VHF radio, complete the call. Gauges and Graphs The gauges and graphs provide various information about the engine and environment. To view the information, a compatible transducer data. See the installation instructions for details. Select the gauges, you must manually select the number of - Garmin ECHOMAP UHD 65cv | Owners Manual - Page 38
purchasing and configuring a digital switching system, contact your Garmin dealer. Adding and Editing a Digital Switching Page You 3 Select an option: • To view information for a different date, select Change Date > Manual, and enter a date. • To view information for today, select Change Date > Use - Garmin ECHOMAP UHD 65cv | Owners Manual - Page 39
select MENU > Source. NOTE: The source menu appears only for devices that support multiple media sources. 2 Select a source. Playing Music Browsing for Music 1 a broadcasting station. For instructions on connecting an AM/FM antenna, see the stereo installation instructions. To listen to SiriusXM® - Garmin ECHOMAP UHD 65cv | Owners Manual - Page 40
properly. 1 From the media screen, select MENU > Installation > Tuner Region. 2 Select the region you are and receiving the SiriusXM signal. 5 If the service is not activated within the hour, go to the categories of channels that appear in the channel guide. Select an option: • If the media device - Garmin ECHOMAP UHD 65cv | Owners Manual - Page 41
passcode value is reset to 0000. 1 From the media menu, select Installation > Factory Defaults. 2 Select Yes. Clearing All Locked Channels on a download the software update onto a USB flash drive. Software updates and instructions are available on your device product page. 2 Insert the USB flash - Garmin ECHOMAP UHD 65cv | Owners Manual - Page 42
map information (if applicable), the software version for an optional Garmin radar (if applicable), and the unit ID number. You may can enter a keel offset to compensate the water depth reading for the transducer installation location. This allows you to view the depth of the water below the - Garmin ECHOMAP UHD 65cv | Owners Manual - Page 43
the chartplotter installation instructions. The approved NMEA 0183 sentences for the chartplotter are GPAPB, GPBOD, GPBWC, GPGGA, GPGLL, GPGSA, GPGSV, GPRMB, GPRMC, GPRTE, GPVTG, GPWPL, GPXTE, and Garmin proprietary sentences PGRME, PGRMM, and PGRMZ. This chartplotter also includes support for the - Garmin ECHOMAP UHD 65cv | Owners Manual - Page 44
the Wireless Channel You can change the wireless channel if you have trouble finding or connecting to a device, or if you experience interference. Sets an alarm to sound when the GPS location accuracy falls outside the user-defined value. Setting the Fuel Alarm Before you can set a fuel level - Garmin ECHOMAP UHD 65cv | Owners Manual - Page 45
user data using a memory card. You must have a memory card installed in the device. This device supports the ECHOMAP UHD 60 device to a compatible Garmin device to share user data, User Data Sharing Cable (010-12234-06), and connect the devices following the instructions included with the cable (User - Garmin ECHOMAP UHD 65cv | Owners Manual - Page 46
Remove the memory card. 4 Insert the memory card into your computer. 5 On your computer, go to garmin.com/express. 6 Follow the on-screen instructions to download, install, and open the Garmin Express application. 7 Select > Add a Device. 8 While the application searches, select Sign In next to Have - Garmin ECHOMAP UHD 65cv | Owners Manual - Page 47
instructions. 4 Wait several minutes while the software update process completes. 5 When prompted, leave the memory card in place and restart the chartplotter manually troubleshoot installed. Refer to the label on the cable or the installation instructions , contact Garmin product support. Changing the - Garmin ECHOMAP UHD 65cv | Owners Manual - Page 48
. If you have manually entered a waypoint using up to 30 min. For more information, go to www.garmin.com /waterrating. Temperature range From -15° to 55°C ( (1.7 lb.) 11.5 cm (4.5 in.) 15 W, 9 W with a GT-52 transducer 0.8 A 1.25 A 2.4 GHz @ 18.5 dBm nominal 9-Inch Models Specification Dimensions - Garmin ECHOMAP UHD 65cv | Owners Manual - Page 49
ground speed GPWPL WPL: Waypoint location GPXTE XTE: Cross track error PGRME E: Estimated error PGRMM M: Map datum PGRMZ Z: Altitude SDDBT DBT: Depth below transducer SDDPT DPT: Depth SDMTW MTW: Water temperature SDVHW VHW: Water speed and heading Receive Sentence DPT DBT MTW VHW WPL DSC DSE HDG - Garmin ECHOMAP UHD 65cv | Owners Manual - Page 50
deleting all user data 17 user data 40 G Garmin ClearVü 19 Garmin Marine Network 37 Garmin product support. See product support gauges installing 1 slot 1 MOB, device 8 music player 33, 34. See media player N navaids 5 naviads 7 navigation alarms 38 navigation chart 4, 6, 12 ATONs 7 marine service - Garmin ECHOMAP UHD 65cv | Owners Manual - Page 51
21 gain 23 Garmin ClearVü 19 zoom 24 support. See product support suspended targets transducer 19, 22, 25, 26 trip gauges 31 trolling motor 28, 29 bow offset 29 compass 29 troubleshooting 41, 42 U unit ID 36 units of measure 38 updates, software 40, 41 updating charts 3 software 3 user - Garmin ECHOMAP UHD 65cv | Owners Manual - Page 52
support.garmin.com June 2020 TA-2018/154 TA-2018/209 TA-2018/183 GUID-0D15DF1D-FE0A-4101-9423-8240088D45C2 v2
-
 1
1 -
 2
2 -
 3
3 -
 4
4 -
 5
5 -
 6
6 -
 7
7 -
8
-
9
-
10
-
11
-
12
-
13
-
14
-
15
-
16
-
17
-
18
-
19
-
20
-
21
-
22
-
23
-
24
-
25
-
26
-
27
-
28
-
29
-
30
-
31
-
32
-
33
-
34
-
35
-
36
-
37
-
38
-
39
-
40
-
41
-
42
-
43
-
44
-
45
-
46
-
47
-
48
-
49
-
50
-
51
-
52
 |
 |
ECHOMAP
™
UHD
Owner’s Manual