Garmin Quest 2 Owner's Manual
Garmin Quest 2 Manual
 |
UPC - 753759049263
View all Garmin Quest 2 manuals
Add to My Manuals
Save this manual to your list of manuals |
Garmin Quest 2 manual content summary:
- Garmin Quest 2 | Owner's Manual - Page 1
Quest® and Quest® 2 pocket-sized navigator owner's manual - Garmin Quest 2 | Owner's Manual - Page 2
notify any person or organization of such changes or improvements. Visit the Garmin Web site (www.garmin.com) for current updates and supplemental information concerning the use and operation of this and other Garmin products. Garmin®, AutoLocate®, Quest®, and TracBack® are registered trademarks of - Garmin Quest 2 | Owner's Manual - Page 3
performance of Garmin GPS and full-featured mapping to create an unsurpassed mobile navigation system. About This Manual This manual covers instructions for the Quest and the Quest 2. To get the most out of your new navigation system, go through this Owner's Manual and learn the operating procedures - Garmin Quest 2 | Owner's Manual - Page 4
Saved Locations 18 Finding My Locations 18 Setting Your Home Location 19 Changing Your Home Location 19 Using TracBack 20 Following Your Track with the Compass Page 21 Planning and Modifying Routes 22 Planning a Route 22 Saving a Route 23 Deleting a Saved Route 23 ii Quest Owner's Manual - Garmin Quest 2 | Owner's Manual - Page 5
When Finding Places 48 Specifications 49 Changing the Fuse 49 Product and Regulatory Information 50 Product Registration 50 Contact Garmin 50 Software License Agreement 50 FCC Compliance 51 Declaration of Conformity 51 RSS-310 51 Limited Warranty 52 Index 53 Quest Owner's Manual iii - Garmin Quest 2 | Owner's Manual - Page 6
to all available navigation sources, including information from street signs, visual sightings, and maps. For safety, always resolve any discrepancies or questions before continuing navigation. The Quest contains a non-user-replaceable, rechargeable lithiumion battery. The battery may present a risk - Garmin Quest 2 | Owner's Manual - Page 7
aircraft navigation. The Global Positioning System (GPS) is operated by the United States government, which is solely responsible for its accuracy and maintenance. The government's system is subject to changes which could affect the accuracy and performance of all GPS equipment, including the Quest - Garmin Quest 2 | Owner's Manual - Page 8
it by pressing the Power key and the IN key at the same time. The unit turns off. The unit will operate normally when you turn it on again. Recycling Your Quest The California Electronic Waste Recycling Act of 2003 requires recycling. See www.erecycle.org for more information. Quest Owner's Manual - Garmin Quest 2 | Owner's Manual - Page 9
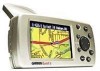
OVERVIEW UNIT OVERVIEW > INTRODUCING THE QUEST Flip-up GPS antenna (Position the antenna parallel to the surface of the road.) Power Key USB connector External antenna connector Front View 256-Color high-resolution TFT display Keypad Back View Power/Speaker connector Quest Owner's Manual 1 - Garmin Quest 2 | Owner's Manual - Page 10
has map data loaded already; you do not need to load additional data on the Quest 2. Step 1: Flip up the antenna and snap your Quest into the vehicle suction mount. Plug the cable end of the 12-Volt adapter into your vehicle's cigarette lighter. See page 4 if you need additional instructions. Turn - Garmin Quest 2 | Owner's Manual - Page 11
5: To create a route to this restaurant, highlight the Route To button located at the bottom of the page (in Step 4) and then press OK. Your Quest calculates the route and then provides directions. Highlight Route To to create a route to this restaurant. Then press the OK key - Garmin Quest 2 | Owner's Manual - Page 12
for installing the unit that allows routing of the power cord and does not interfere with vehicle operation. Refer to the warnings on pages iv-v. If you are NOT using a remote antenna, be certain to select a location where the Quest's flip-up antenna has a relatively unobstructed view of the sky. For - Garmin Quest 2 | Owner's Manual - Page 13
and does not interfere with the driver's view of the road or obstruct any controls in the vehicle. WARNING: The mounting disk affixes to your dashboard suction cup mount on top of the disk. 4. Flip the lever down (toward the disk) to secure the suction cup mount to the disk. Quest Owner's Manual 5 - Garmin Quest 2 | Owner's Manual - Page 14
and press the OK key. The GPS function is disabled. To turn on satellite reception: 1. Press the Page key to open the Map page. 2. Press the MENU key. 3. Highlight Acquire Satellites and press OK. The GPS function is enabled and your Quest begins to acquire satellites. 6 Quest Owner's Manual - Garmin Quest 2 | Owner's Manual - Page 15
Power-press and hold to turn the Quest Quest's "voice" to repeat the next turn or current destination when you are navigating Map page. To save your current location in My Locations, press and hold OK. Rocker pad-press to move the highlight and move map pointer any direction. Quest Owner's Manual - Garmin Quest 2 | Owner's Manual - Page 16
On-screen Keyboard The up arrow changes the capital letters to lower case changing the name of a saved location. The on-screen keyboard is used in a variety of places throughout the Quest keys are backspace and forwardspace keys. The up arrow changes the capital letters to lower case and the numbers - Garmin Quest 2 | Owner's Manual - Page 17
Find Menu on your Quest to locate and create a route to a city, street, park, restaurant, or hotel. You can even use the Find Menu to see rest areas you are approaching on the highway. Find Menu Press down on the Rocker pad to see more Find categories. BASIC OPERATION > FINDING PLACES AND ROUTING - Garmin Quest 2 | Owner's Manual - Page 18
OPERATION on the map. Open the Map page and pan the map to the location. Press the options appear that are near the map pointer. See page 29 for information about panning the map. Finding Places Near this Place see where this item is located on the map, select Show Map. For step-by-step directions from the - Garmin Quest 2 | Owner's Manual - Page 19
and street using the on-screen keyboard. For intersections, you only need to enter street names. 5. A list of addresses or intersections appears. Highlight the place you are looking for, and press OK. 6. To create a route to this address, highlight Route To and press OK. Quest Owner's Manual 11 - Garmin Quest 2 | Owner's Manual - Page 20
BASIC OPERATION > you want to stop at an exit that has a particular type of service, such as a gas station or rest area, you can narrow the OK. An information page for that exit appears. If the exit contains services, these businesses appear on the exit's information page. Highlight the business - Garmin Quest 2 | Owner's Manual - Page 21
Your Quest stores the 50 most recent places you have found and viewed. The most recently-reviewed item restaurants are stored in your Recent Finds list. BASIC OPERATION > FINDING PLACES AND ROUTING TO THEM Deleting Recently-Found Map page, your find database, or My Locations. Quest Owner's Manual 13 - Garmin Quest 2 | Owner's Manual - Page 22
OPERATION > FINDING PLACES AND ROUTING TO THEM Planning a Trip If you are planning a trip and would like to find vacation spots ahead of time, consider using the "chain find" method described below. You can also follow these instructions find entertainment, services, and a variety Quest Owner's Manual - Garmin Quest 2 | Owner's Manual - Page 23
OK. Quest Owner's Manual BASIC OPERATION > MY LOCATIONS Where Am I? You will never be lost with your Quest! Use the Where Am I? feature to find out where you are and save your location. This is particularly useful if you are traveling off road or any place where street signs or navigational markers - Garmin Quest 2 | Owner's Manual - Page 24
field and press OK. 3. Use the on-screen keyboard to enter the position coordinates and press OK when finished. 4. To change other information, highlight the appropriate field and press OK. After entering your changes, highlight the on-screen OK button and press the OK key. 16 Quest Owner's Manual - Garmin Quest 2 | Owner's Manual - Page 25
want to edit and press OK. 3. Highlight the item you want to change and press OK. 4. Use the on-screen keyboard to enter new information. the saved "Vacation" locations by pushing a few buttons. BASIC OPERATION > MY LOCATIONS To create a saved location category: 1. Press Quest Owner's Manual 17 - Garmin Quest 2 | Owner's Manual - Page 26
BASIC OPERATION > MY LOCATIONS Deleting Saved Locations You can delete saved locations when they are no longer needed. To delete a saved location: 1. Press the location and press OK to open the information page. 5. Highlight Route To and press OK to go to this location. 18 Quest Owner's Manual - Garmin Quest 2 | Owner's Manual - Page 27
example, if you are traveling in a new city or down an unknown street and you want to easily find your way home, simply press and hold the FIND key. Your Quest automatically redirects you to your Home location. BASIC OPERATION > SETTING YOUR HOME LOCATION To route Home: Press and hold the FIND key - Garmin Quest 2 | Owner's Manual - Page 28
a turn-byturn route to the selected end point. Follow the route just as you would follow any route. If you selected to follow the track, you can use the Map page and the Compass page to guide you along the path. See the next page for more information about the Compass page. 20 Quest Owner's Manual - Garmin Quest 2 | Owner's Manual - Page 29
Quest traces your path to the destination. You can use the Map page and Compass page to navigate turn toward the arrow until it points up, then continue in that direction. NOTE: You must be moving for the compass to update and display your heading accurately. You can change Quest Owner's Manual 21 - Garmin Quest 2 | Owner's Manual - Page 30
915 Elm, the Quest enters this address as the Current Location. Find Menu-search for a starting or ending location using the Find Menu. Use Map-find a point on the Map page. When the Map page appears, use the Rocker pad to move the map pointer to the location and press OK. 22 Quest Owner's Manual - Garmin Quest 2 | Owner's Manual - Page 31
saved routes appears. Quest Owner's Manual BASIC OPERATION > PLANNING AND MODIFYING ROUTES 3. Highlight the name of the route and press OK. An information page for your selected route appears. 4. To activate the route, highlight Navigate and press OK. 5. If you want to change the route by adding - Garmin Quest 2 | Owner's Manual - Page 32
detour to avoid a roadblock or construction. After you select a detour distance, your Quest calculates a new route and provides you with new driving instructions. The detour is saved until you stop the current navigation or until you turn off the unit. To set a detour: 1. Press MENU, highlight Route - Garmin Quest 2 | Owner's Manual - Page 33
down one spot. 5. Continue arranging the points as necessary. BASIC OPERATION > PLANNING AND MODIFYING ROUTES To optimize the route: 1. Press page 38 for more information on route preferences. If you change your route preference, recalculate the route based upon the new Quest Owner's Manual 25 - Garmin Quest 2 | Owner's Manual - Page 34
BASIC OPERATION > PLANNING AND MODIFYING map pointer to the end of the road you want to avoid and press OK. Avoidances Page 26 7. A map of the avoided road appears. Press OK. The Avoidances page, shown to the left, lists the avoided road with a default name (the street names). Quest Owner's Manual - Garmin Quest 2 | Owner's Manual - Page 35
Rocker pad to move the map pointer to the far corner change the name of an avoidance, select the A and use the on-screen keyboard to create a new name. Select the clock to choose the date that you want the avoidance to expire. Select the red to permanently delete the avoidance. Quest Owner's Manual - Garmin Quest 2 | Owner's Manual - Page 36
map indicates the status of the Quest's GPS receiver. When you turn on your Quest, the text bar indicates that the Quest is attempting to locate satellites. After the Quest locates satellites and establishes a "fix" on your location, the text bar reads "Ready to Navigate 28 Quest Owner's Manual - Garmin Quest 2 | Owner's Manual - Page 37
or map item. If several items are grouped closely together, zoom in closer for a better view. 2. Press OK to view more information about the point. The information and on-screen buttons vary depending on the type of item selected. Position icon Map pointer Distance bar Quest Owner's Manual 29 - Garmin Quest 2 | Owner's Manual - Page 38
zoom range or above. To change the map orientation settings, see page 34. Data Fields The Map page displays data fields on the right-hand column of the page. Information in these fields changes depending on whether you are navigating a route or just traveling with the Quest turned on. Data fields also - Garmin Quest 2 | Owner's Manual - Page 39
the Next Turn page and return to the previous page, press the Page key. If you want to see the Next Turn page again, press the Speak key, and it reappears. You also can hear the announcement. The Next Turn page is only available when you are navigating to a destination. Quest Owner's Manual 31 - Garmin Quest 2 | Owner's Manual - Page 40
page is only available when you are navigating to a destination. Direction of turn Cumulative distance to this turn from your current location Total distance to the destination from your current location Current Route Page Upcoming driving instructions Final destination 32 Quest Owner's Manual - Garmin Quest 2 | Owner's Manual - Page 41
certain to reset the trip information (data) before beginning a trip. If you make frequent stops, leave the Quest powered on in order you want to reset the data. 3. Highlight Yes and press OK. The data is reset. Quest Owner's Manual USING THE MAIN PAGES > TRIP INFORMATION PAGE To change the data fi - Garmin Quest 2 | Owner's Manual - Page 42
North at the top. Track Up rotates the map so your current direction of travel is at the top of the page. See page 30 for more information. Road Lock-when On, the Quest places the position icon on the nearest road. Select Off when you are not traveling on roads. 34 Quest Owner's Manual - Garmin Quest 2 | Owner's Manual - Page 43
Map Setup, and press OK. 2. Open the tab on which you want to restore the settings. 3. Press MENU. 4. To restore the settings on the open tab, highlight Restore Map Settings and press OK. 5. To restore all map setup settings, highlight Restore All Map Settings and press OK. Quest Owner's Manual - Garmin Quest 2 | Owner's Manual - Page 44
Quest on battery power. Backlight Intensity-specifies how strong the backlight appears. Operating the backlight at a higher percentage (intensity) uses up the battery power you would like to customize and press OK. 3. Highlight Change and press OK. A color grid appears. 4. Use the Quest Owner's Manual - Garmin Quest 2 | Owner's Manual - Page 45
You can customize various system setup features on your Quest. Press MENU two times, highlight System Setup, and press OK. GPS Mode-sets GPS to Normal, WAAS, Battery Saver (which periodically turns off the GPS receiver to save battery power), or GPS Off. See "Understanding GPS" beginning on page 42 - Garmin Quest 2 | Owner's Manual - Page 46
how the Quest recalculates the route when you depart from its original instructions. • used for calculating your route. If you change your route preference, recalculate the route based This is useful when you are traveling outside of map areas, or where no roads exist. 38 Quest Owner's Manual - Garmin Quest 2 | Owner's Manual - Page 47
map datums. Quest Owner's Manual CUSTOMIZING YOUR QUEST> CUSTOMIZING THE UNITS AND TIME SETTINGS To restore these settings, press the MENU key, highlight Restore Settings, and press OK. Changing the offset is positive (+). Daylight Savings-allows you to turn on (Yes), off (No), or set to Automatic - Garmin Quest 2 | Owner's Manual - Page 48
CUSTOMIZING YOUR QUEST > CHANGING THE TRACK SETUP Changing the Track Setup As you travel the Quest automatically records your being recorded. Wrap When Full-select On to allow new track points to replace the oldest track points once the log is full. If set to Off, press OK. 40 Quest Owner's Manual - Garmin Quest 2 | Owner's Manual - Page 49
OK to close the window. Default Welcome Page Software updates for your Quest can be found periodically at our Customized Welcome Page Web site at www.garmin.com. To use the default Welcome page again, repeat the above process and clear the text you entered previously. Quest Owner's Manual 41 - Garmin Quest 2 | Owner's Manual - Page 50
Settings page, highlight GPS Info and press OK. GPS satellites are positioned throughout the sky. As soon as you turn on your Quest, it attempts to acquire satellite signals. The sky view area on the GPS Information page displays which satellites are currently in your area. 42 Quest Owner's Manual - Garmin Quest 2 | Owner's Manual - Page 51
to Track Up, press MENU while on the GPS Info page. Then select Skyview Track Up. Press MENU again and then select Skyview When the Sky View is North Up to change the orientation back to shown in North Up, the North Up. red circle indicates your direction of travel. Quest Owner's Manual 43 - Garmin Quest 2 | Owner's Manual - Page 52
in AutoLocate mode and begin searching the sky for satellites. • Select Use Map to select your location on a map page. Pan and zoom the map and use the map pointer to find your approximate location. Then press OK. These options appear when you press MENU from the GPS Info page. Quest Owner's Manual - Garmin Quest 2 | Owner's Manual - Page 53
turn or maneuver. (Appears only on the Compass page.) Odometer-running total of distance traveled. Unlike the Trip Odometer, the odometer cannot be reset. Off Course-distance left or right you are from the original course (path of travel). (Appears only on the Compass page.) Quest Owner's Manual - Garmin Quest 2 | Owner's Manual - Page 54
APPENDIX > DATA FIELDS Power (Battery)-battery power status. Speed-current speed, displayed in miles or kilometers per hour. (Not available on the Trip Information page.) Speed-Maximum-maximum speed recorded since the Trip Computer was last reset. Speed-Moving Average-average speed of travel in - Garmin Quest 2 | Owner's Manual - Page 55
50). NOTE: When you transfer additional maps to your Quest, the existing maps you previously downloaded are automatically deleted. Therefore, you must transfer them again at the same time through the MapSource software that is on your computer. See the MapSource Owner's Manual for more information - Garmin Quest 2 | Owner's Manual - Page 56
key, highlight Select Map, and press OK. A list of your installed maps that contain searchable cities or places appears. 3. Highlight the map family you want to use for the search and press OK. The Quest then returns a list of cities or places only from this map family. 48 Quest Owner's Manual - Garmin Quest 2 | Owner's Manual - Page 57
m/s steady state Quest Owner's Manual APPENDIX > SPECIFICATIONS Dynamics: Performs to specifications to 6 g's Interface: USB 1.1 device Data Storage: Indefinite; no memory battery required Map Storage: Internal Quest: Available storage for uploaded maps Quest 2: Full map coverage Power Specifications - Garmin Quest 2 | Owner's Manual - Page 58
the back of the unit behind the antenna) in case your Quest is lost, stolen, or needs service. Keep your original sales receipt in a safe place or attach a photocopy inside the manual. Serial Number Contact Garmin If you should encounter any difficulty while using your GPS unit, or if you have any - Garmin Quest 2 | Owner's Manual - Page 59
for help. The Quest does not contain any user-serviceable parts. Repairs should only be made by an authorized Garmin service center. Unauthorized repairs or modifications could result in permanent damage to the equipment, and void your warranty and your authority to operate this device under - Garmin Quest 2 | Owner's Manual - Page 60
to repair or replace the unit or software or offer a full refund of the purchase price at its sole discretion. SUCH REMEDY SHALL BE YOUR SOLE AND EXCLUSIVE REMEDY FOR ANY BREACH OF WARRANTY. To obtain warranty service, contact your local Garmin authorized dealer or call Garmin Product Support for - Garmin Quest 2 | Owner's Manual - Page 61
Icons 33 Battery Saver 37 Battery Temperature Warning vi Bearing Pointer 21 Best Route 38 Brightness of the Screen 36 C Calculate Routes for 38 Categories 17 City, Finding 12 Quest Owner's Manual City Tab 35 Cleaning, Storing vi Clear Track 40 Color Mode 35, 36 Compass Page 21 Contact Garmin 50 - Garmin Quest 2 | Owner's Manual - Page 62
Reception 44 Postal Code 11 Power Key 7 Q Quest 2 37, 47 Quickest Calculation 38 R Recalculating Routes 24 Recent Finds 13 Record Interval 40 Register Your Quest 50 Reset vi Resetting Trip Data, Max Speed 33 Reset the Quest vi Restore Settings Display 36 54 Map Setup 35 System Setup 37, 38, 39, 40 - Garmin Quest 2 | Owner's Manual - Page 63
- Garmin Quest 2 | Owner's Manual - Page 64
For the latest free software updates (excluding map data) throughout the life of your Garmin products, visit the Garmin Web site at www.garmin.com. © Copyright 2006 Garmin Ltd. or its subsidiaries Garmin International, Inc. 1200 East 151st Street, Olathe, Kansas 66062, U.S.A. Garmin (Europe) Ltd.
-
 1
1 -
 2
2 -
 3
3 -
 4
4 -
 5
5 -
 6
6 -
 7
7 -
8
-
9
-
10
-
11
-
12
-
13
-
14
-
15
-
16
-
17
-
18
-
19
-
20
-
21
-
22
-
23
-
24
-
25
-
26
-
27
-
28
-
29
-
30
-
31
-
32
-
33
-
34
-
35
-
36
-
37
-
38
-
39
-
40
-
41
-
42
-
43
-
44
-
45
-
46
-
47
-
48
-
49
-
50
-
51
-
52
-
53
-
54
-
55
-
56
-
57
-
58
-
59
-
60
-
61
-
62
-
63
-
64
 |
 |

Quest
®
and Quest
®
2
pocket-sized navigator
owner’s manual