Garmin echo 550c Installation Instructions
Garmin echo 550c Manual
 |
View all Garmin echo 550c manuals
Add to My Manuals
Save this manual to your list of manuals |
Garmin echo 550c manual content summary:
- Garmin echo 550c | Installation Instructions - Page 1
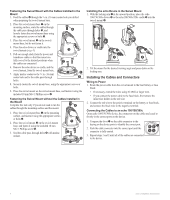
transducer on your boat, you can use it with your echo device by installing an adapter cable (sold separately). About the echo Mount The echo device can be mounted using the included swivel-mount bracket (page 3), or it can be mounted flush with the dashboard using the appropriate flush-mount kit - Garmin echo 550c | Installation Instructions - Page 2
to the transom. 13. Repeat steps 10-12 using the other cable clamp. 14. Route the transducer cable to the echo device. • If you are routing the cable using a pass-through hole, feed it through the hole you drilled in step 8, and install the cable-entry cover ➍ (page 2). • If you are not routing the - Garmin echo 550c | Installation Instructions - Page 3
drill bit for the hardware, drill the three pilot holes. 7. If you plan to run the power and transducer cables from under the mounting surface, use a 5/8 in. (16 mm) drill bit to drill a hole through the mounting surface at the location you marked in step 5. echo Installation Instructions 3 - Garmin echo 550c | Installation Instructions - Page 4
➋ or the echo 200/500c/550c cradle ➌ into the swivel mount ➍. ➋ ➌ ➊ ➊ ➍ ➍ 2. Tilt the mount for the desired viewing angle and press down on the locking arm. Installing the Cables and Connectors Wiring to Power 1. Route the power cable from the swivel mount to the boat battery or fuse block - Garmin echo 550c | Installation Instructions - Page 5
of the boat and put the transducer at risk of striking underwater objects. Test the transom mount transducer installation in open water free of obstacles. Pay attention to your surroundings as you test the transducer. 1. With the boat in the water, turn on the echo device. 2. Drive the boat at - Garmin echo 550c | Installation Instructions - Page 6
/ AGC/3AG - 3.0 A 200/300c/500c/550c Rated Current echo 100/150/ 1 A 200/300c/500c/550c Transmit echo 100 Power (RMS/ echo 150 peak to peak) echo 200/300c 100 W/800 W 200 W/1,600 W 300 W/2,400 W echo 500c/550c 500 W/4,000 W Freshwater Depth* echo 100 echo 150 600 ft. (183 m) 1,300 ft
-
 1
1 -
 2
2 -
 3
3 -
 4
4 -
 5
5 -
 6
6
 |
 |
echo
™
Installation Instructions
WARNINg
See the
Important Safety and Product Information
guide in the product box
for product warnings and other important information.
CAUTION
Always wear safety goggles, ear protection, and a dust mask when drilling,
cutting, or sanding.
Follow these instructions to properly install the all of the components
provided with your echo 100/150/200/300c/500c /550c.
Contact garmin
Contact Garmin Product Support if you have any questions while using your
echo. In the USA, go to
www.garmin.com/support
, or contact Garmin USA
by phone at (913) 397.8200 or (800) 800.1020.
In the UK, contact Garmin (Europe) Ltd. by phone at 0808 2380000.
In Europe, go to
www.garmin.com/support
and click
Contact Support
for
in-country support information, or contact Garmin (Europe) Ltd. by phone at
+44 (0) 870.8501241.
Tools Needed
•
Drill and drill bits
•
3
/
8
in. wrench or socket
•
Masking tape
•
Number 2 Phillips screwdriver
•
Marine sealant
•
Hardware for the swivel mount (bolts or screws) (
page 3
)
Installation Preparation
Before permanently installing any part of your echo, plan the installation by
determining the location of the various components. Verify that the cables are
long enough to connect the components to each other and to power.
About the Transducer
The transducer is the component of your echo that transmits sound waves
through the water and receives them to relay the information to your echo
device. With the supplied hardware, you can install the included transducer
on the transom of your boat (
page 1
) or on your trolling motor (
page 3
).
If you already have an existing Garmin 6-pin dual-beam transducer on your
boat, you can use it with your echo device by installing an adapter cable (sold
separately).
About the echo Mount
The echo device can be mounted using the included swivel-mount bracket
(
page 3
), or it can be mounted flush with the dashboard using the appropriate
flush-mount kit (sold separately).
When planning a mounting location, choose a location that you can see as
you operate your vessel, provides easy access to the keys on the echo, and is
the appropriate distance from a compass (
page 6
).
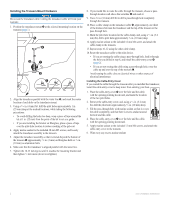
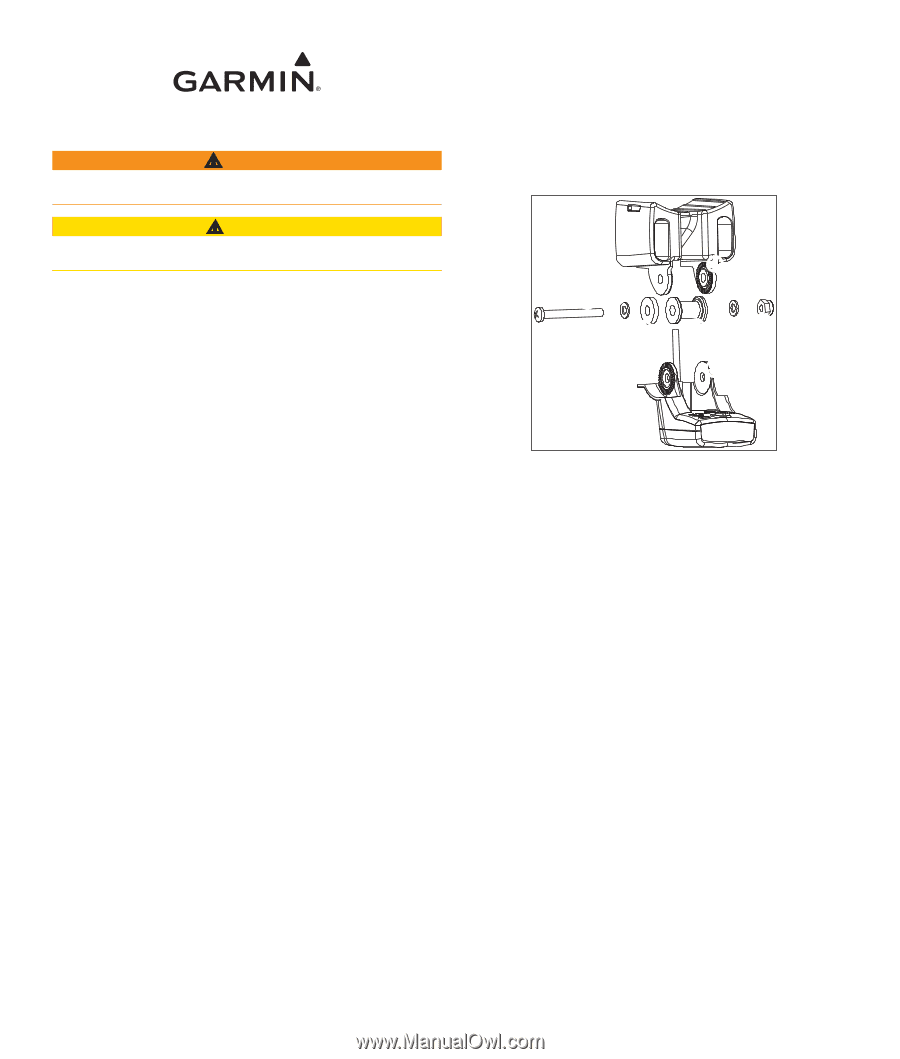
AssemblinG the Transducer
1. Insert the rubber washer
➊
and the plastic spacer
➋
into the transducer
➌
at the same time.
Do not add any lubrication to the rubber washer.
➊
➋
➍
➎
➏
➐
➌
2.
Pull the cable back and slide the transducer into the mounting bracket
➍
.
3. Place a 5 mm flat washer
➎
on the 10-32 x 1.75 in. screw
➏
and insert
the screw through the mounting bracket, transducer, spacer, and rubber
washer.
4. Place a 5 mm flat washer on the exposed end of the 10-32 x 1.75 in.
screw, and fasten it with the 10-32 lock nut
➐
.
Do not tighten the 10-32 lock nut. You will adjust the transducer and
tighten the nut after you install the transducer on the boat.
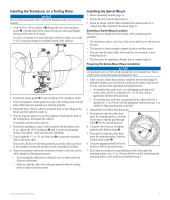
InstallinG the Transducer on a Transom
SelectinG a Transom-mount Location
Select a transom-mount location while considering these guidelines for
optimal performance.
•
Mount the transducer as close to the center of the boat as possible.
•
Do not mount the transducer behind strakes, struts, fittings, water
intake or discharge ports, or anything that creates air bubbles or
causes the water to become turbulent.
The transducer must be in clean (non-turbulent) water for optimal
performance.
•
Do not mount the transducer in the path of the propeller on single-
drive boats.
The transducer can cause cavitation that can degrade the performance
of the boat and damage the propeller.
•
On twin-drive boats, mount the transducer between the drives, if
possible.
•
Do not mount the transducer in a location where it might be jarred
when launching, hauling, or storing.
February, 2011
190-01312-02 Rev. B
Printed in Taiwan