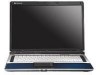
Gateway M-6866 8513065 - Gateway Notebook Hardware Reference R1
Gateway M-6866 - Pacific - Core 2 Duo GHz Manual
 |
UPC - 827103150735
View all Gateway M-6866 manuals
Add to My Manuals
Save this manual to your list of manuals |
Gateway M-6866 manual content summary:
- Gateway M-6866 | 8513065 - Gateway Notebook Hardware Reference R1 - Page 1
NOTEBOOK REFERENCEGUIDE ® - Gateway M-6866 | 8513065 - Gateway Notebook Hardware Reference R1 - Page 2
- Gateway M-6866 | 8513065 - Gateway Notebook Hardware Reference R1 - Page 3
and comfortably 18 Reducing eye strain 18 Setting up your computer desk and chair 19 Sitting at your notebook 19 Avoiding discomfort and injury from repetitive strain . . 19 Connecting the AC adapter 20 Protecting from power source problems 21 Connecting to a broadband modem or network 22 - Gateway M-6866 | 8513065 - Gateway Notebook Hardware Reference R1 - Page 4
IEEE 802.11 wireless network radio 51 Bluetooth radio 53 Chapter 4: Using Drives and Accessories . . . . 55 Using the DVD drive 56 Identifying drive types 56 Using a DVD drive 57 Using the memory card reader 59 Memory card types 59 Inserting a memory card 60 Using a memory card 60 Removing - Gateway M-6866 | 8513065 - Gateway Notebook Hardware Reference R1 - Page 5
the exterior 89 Cleaning the keyboard 89 Cleaning the notebook screen 89 Maintaining the battery 90 Storing batteries 90 Cleaning CDs or DVDs 91 Recovering your system 91 Recovering pre-installed software and drivers 92 Using Microsoft System Restore 99 Recovering your system to its - Gateway M-6866 | 8513065 - Gateway Notebook Hardware Reference R1 - Page 6
steps 116 Troubleshooting 117 Audio 117 Battery 117 CD drives 117 Diskette drive (external 117 Display 118 DVD drives 119 Ethernet 121 Express Cards 121 File management 121 Fingerprint reader 122 Hard drive 122 Internet 123 Keyboard 124 Media Center 125 Memory 128 Memory card reader - Gateway M-6866 | 8513065 - Gateway Notebook Hardware Reference R1 - Page 7
www.gateway.com Appendix A: Legal Information 143 Index 153 v - Gateway M-6866 | 8513065 - Gateway Notebook Hardware Reference R1 - Page 8
Contents vi - Gateway M-6866 | 8513065 - Gateway Notebook Hardware Reference R1 - Page 9
CHAPTER1 About This Reference • About this guide • Accessing your online User Guide • Gateway contact information • Microsoft Certificate of Authenticity • For more information 1 - Gateway M-6866 | 8513065 - Gateway Notebook Hardware Reference R1 - Page 10
information and maintenance instructions that are specific to your model of Gateway notebook. For all other notebook information, see your online User Guide. Accessing your online User Guide In addition to this guide, your online User Guide has been included on your hard drive. Your User Guide is an - Gateway M-6866 | 8513065 - Gateway Notebook Hardware Reference R1 - Page 11
on the bottom of your notebook includes the product key code for your operating system. For more information For more information about your notebook, visit Gateway's Support page at www.gateway.com or the Web address shown on your notebook's label. The Support page also has links to additional - Gateway M-6866 | 8513065 - Gateway Notebook Hardware Reference R1 - Page 12
CHAPTER 1: About This Reference 4 - Gateway M-6866 | 8513065 - Gateway Notebook Hardware Reference R1 - Page 13
CHAPTER2 Checking Out Your Notebook • Front • Left • Right • Back • Bottom • Keyboard area • LCD panel 5 - Gateway M-6866 | 8513065 - Gateway Notebook Hardware Reference R1 - Page 14
when speakers or headphones are plugged into this jack. Plug a microphone into this jack. Power indicator Battery charge indicator ■ LED on - Notebook is on. ■ LED blinking - Notebook is in Sleep or Hybrid Sleep mode. ■ LED off - Notebook is off. ■ LED blue - Battery is fully charged. ■ LED purple - Gateway M-6866 | 8513065 - Gateway Notebook Hardware Reference R1 - Page 15
Ethernet jack www.gateway.com Memory card reader HDMI out jack (optional) USB ports Ventilation fan Wireless network switch Express Card slot Component Ethernet jack Memory card reader HDMI out jack (optional) USB ports Icon HDMI Description Plug an Ethernet network cable into this jack - Gateway M-6866 | 8513065 - Gateway Notebook Hardware Reference R1 - Page 16
CHAPTER 2: Checking Out Your Notebook Component Icon Ventilation fan Express Card slot Wireless network switch Description Helps cool internal components. Warning: Do not work with the notebook resting on your lap. If the air vents are blocked, the notebook may become hot enough to harm your - Gateway M-6866 | 8513065 - Gateway Notebook Hardware Reference R1 - Page 17
Right www.gateway.com Component DVD drive USB port DVD drive Icon Description USB port Insert CDs or DVDs into this drive. For more information, see "Using the DVD drive" on page 56. To determine the type of drive in your notebook, examine the drive tray's plastic cover and compare the logo to - Gateway M-6866 | 8513065 - Gateway Notebook Hardware Reference R1 - Page 18
Secure your notebook to an object by connecting a Kensington cable lock to this slot. Monitor port Power connector Plug an analog VGA monitor or projector into this port. For more information, see "Viewing the display on a projector, monitor, or television" on page 63. Plug the AC adapter cable - Gateway M-6866 | 8513065 - Gateway Notebook Hardware Reference R1 - Page 19
www.gateway.com Battery Battery lock Memory bay Hard drive bay Customer care label Component Icon Description Battery latch Slide to release the battery. For more information, see "Changing batteries" on page 71. Battery Provides power when the notebook is not plugged into AC power. Battery - Gateway M-6866 | 8513065 - Gateway Notebook Hardware Reference R1 - Page 20
Out Your Notebook Keyboard area Keyboard area for select models Speaker Multimedia panel (optional) Speaker Power button Keyboard Status indicators Fingerprint reader Touchpad (optional) Component Icon Description Keyboard Provides all the features of a full-sized, computer keyboard. For - Gateway M-6866 | 8513065 - Gateway Notebook Hardware Reference R1 - Page 21
www.gateway.com Component Touchpad drive is in use or when a button has been pressed that affects how the keyboard is used. For more information, see "Using the status indicators" on page 27. Keyboard area for select models Speaker Multimedia panel (optional) Speaker Power button Keyboard - Gateway M-6866 | 8513065 - Gateway Notebook Hardware Reference R1 - Page 22
2: Checking Out Your Notebook Component Icon Description Keyboard Provides all the features of a full-sized, computer keyboard. For more information, see "Using the keyboard" on page 29. Power button Press to turn the power on or off. You can also configure the power button for Sleep/Resume - Gateway M-6866 | 8513065 - Gateway Notebook Hardware Reference R1 - Page 23
LCD panel www.gateway.com Microphone (optional) Webcam (optional) Webcam status indicator (optional) Component Microphone (optional) Webcam (optional) Webcam status indicator (optional) Icon Description Use to talk through when - Gateway M-6866 | 8513065 - Gateway Notebook Hardware Reference R1 - Page 24
CHAPTER 2: Checking Out Your Notebook 16 - Gateway M-6866 | 8513065 - Gateway Notebook Hardware Reference R1 - Page 25
comfortably • Connecting the AC adapter • Connecting to a broadband modem or network • Connecting the optional dial-up modem • Starting your notebook • Turning off your notebook • Restarting (rebooting) your notebook • Using the status indicators • Using the keyboard • Using the optional fingerprint - Gateway M-6866 | 8513065 - Gateway Notebook Hardware Reference R1 - Page 26
the computer desk and screen so you can avoid glare on your screen and light shining directly into your eyes. Reduce glare by installing shades or curtains on windows, and by installing a glare screen filter. • Use soft, indirect lighting in your work area. Do not use your notebook in a dark - Gateway M-6866 | 8513065 - Gateway Notebook Hardware Reference R1 - Page 27
your computer desk. • Adjust the height of the computer desk so your hands and arms are positioned parallel to the floor when you use the keyboard and chair so it supports the lower curve of your spine. You can use a pillow or cushion to provide extra back support. Sitting at your notebook • Avoid - Gateway M-6866 | 8513065 - Gateway Notebook Hardware Reference R1 - Page 28
-serviceable parts inside. The AC adapter has dangerous voltages that can cause serious injury or death. Contact Gateway about returning defective AC adapters. Caution Make sure that you use the AC adapter that came with your notebook or one of the same type purchased from Gateway. Replace the power - Gateway M-6866 | 8513065 - Gateway Notebook Hardware Reference R1 - Page 29
www.gateway.com 2 Connect the AC adapter to your notebook's power connector. 3 Plug the power cord into a wall outlet. The battery charge indicator turns on (see "Front" on page 6 for the location of the battery charge indicator). If the battery charge indicator does not turn on, complete the - Gateway M-6866 | 8513065 - Gateway Notebook Hardware Reference R1 - Page 30
Warning High voltages can enter your notebook through both the power cord and the modem connection. To protect your notebook and avoid electrical shock, use a surge protector. If you have a telephone modem, use a surge protector that has a modem jack. If you have a cable modem, use a surge protector - Gateway M-6866 | 8513065 - Gateway Notebook Hardware Reference R1 - Page 31
line cord for your dialup modem connection. To connect the optional modem: 1 Insert one end of the modem cable into the modem jack on your notebook. 2 Insert the other end of the modem cable into a telephone wall jack. Important The modem will not work with digital or PBX telephone lines. 23 - Gateway M-6866 | 8513065 - Gateway Notebook Hardware Reference R1 - Page 32
To start your notebook: 1 Lift the LCD panel. 2 Press the power button located above the keyboard. Tip For more information about changing the power button mode, see "Changing advanced settings" on page 78. 3 If you are starting your notebook for the first time, follow the on-screen instructions to - Gateway M-6866 | 8513065 - Gateway Notebook Hardware Reference R1 - Page 33
each device for its setup instructions. 5 To open the main menu, click (Start). From that menu, you can run programs and search for files. For more information on using Windows, see "Using Windows" and "Customizing Windows" in your online User Guide. Waking up your notebook When you have not used - Gateway M-6866 | 8513065 - Gateway Notebook Hardware Reference R1 - Page 34
some reason you cannot use the Shut Down option in Windows to turn off your notebook, press and hold the power button for about five seconds, then release it. Restarting (rebooting) your notebook If your notebook does not respond to keyboard, touchpad, or mouse input, you may have to close programs - Gateway M-6866 | 8513065 - Gateway Notebook Hardware Reference R1 - Page 35
to press FN+F1 to toggle the status indicators on. Status indicators inform you when a drive is being used or when a button has been pressed that affects how the keyboard is used. The status indicators are located below the touchpad. Wireless network Hard drive Caps lock DVD drive Num lock 27 - Gateway M-6866 | 8513065 - Gateway Notebook Hardware Reference R1 - Page 36
CHAPTER 3: Setting Up and Getting Started Indicator Wireless network Caps lock Num lock DVD drive Hard drive Icon Description ■ LED on - Optional wireless IEEE 802.11 radio is turned on. ■ LED off - Optional wireless IEEE 802.11 radio is turned off. ■ LED on - Caps lock is turned on. A ■ LED off - Gateway M-6866 | 8513065 - Gateway Notebook Hardware Reference R1 - Page 37
www.gateway.com Using the keyboard Your notebook features a full-size keyboard that functions the same as a desktop computer keyboard. Many of the keys have been assigned alternate functions, including shortcut keys for Windows, function keys for specific system operations, and the Num Lock keys for - Gateway M-6866 | 8513065 - Gateway Notebook Hardware Reference R1 - Page 38
key to open the Windows Start menu. This key can also be used in combination with other keys to open utilities like F (Search utility), R (Run utility), and E (Computer window). Application key Press this key for quick access to shortcut menus and help assistants in Windows. Arrow keys Press - Gateway M-6866 | 8513065 - Gateway Notebook Hardware Reference R1 - Page 39
. Important: The wireless network switch must be in the ON position for this button to work. For more information, see "Left" on page 7. Enter Sleep mode or Hybrid Sleep mode. Press the power button to leave Sleep mode. For more information, see "Changing notebook power settings" on page - Gateway M-6866 | 8513065 - Gateway Notebook Hardware Reference R1 - Page 40
in dim lighting situations. Press a third time to return the display to the normal brightness setting. Important: Using this feature will affect battery performance. Play or pause the CD or DVD. Stop playing the CD or DVD. Skip back one CD track or DVD chapter. Skip ahead one CD track or - Gateway M-6866 | 8513065 - Gateway Notebook Hardware Reference R1 - Page 41
www.gateway.com Press and hold To... FN, then press this system key... Increase the brightness of the display. more information, see "Adjusting the volume" on page 49. Mute the sound. Press the key combination again to restore the sound. For more information, see "Adjusting the volume" on page 49. 33 - Gateway M-6866 | 8513065 - Gateway Notebook Hardware Reference R1 - Page 42
Up and Getting Started Using the optional fingerprint reader Your notebook may include a fingerprint reader that provides enhanced security and convenience. The fingerprint reader is located between the left and right touchpad buttons. Features include: • Secure logon to Windows and fast user - Gateway M-6866 | 8513065 - Gateway Notebook Hardware Reference R1 - Page 43
The Finish screen opens. 3 Select one of the following options, then click Next. • Enrollment to the biometric device-Select this option to save your fingerprint to memory in the fingerprint reader. Use this option to prevent unauthorized use of your notebook even if the hard drive has been removed - Gateway M-6866 | 8513065 - Gateway Notebook Hardware Reference R1 - Page 44
CHAPTER 3: Setting Up and Getting Started 4 If you want to run the TouchStrip Tutorial, leave the Run interactive tutorial check box selected, then click Next. The TouchStrip Tutorial runs. After you have completed the tutorial, the Enrollment screen appears. -ORIf you do not want to run the - Gateway M-6866 | 8513065 - Gateway Notebook Hardware Reference R1 - Page 45
Next. The Advanced Security screen appears. 8 Type a password in the Backup password box, type the same password in the Retype password box, then click Next. 9 Click Finish. Using the Fingerprint Control Center The Fingerprint Control Center lets the administrator of the notebook control how the - Gateway M-6866 | 8513065 - Gateway Notebook Hardware Reference R1 - Page 46
Started To use the Fingerprint Control Center: 1 Click (Start), All Programs, Protector Suite QL, then click Control Center. The Fingerprint Control Center opens. 2 If you are logged into the notebook The password bank also works with many computer programs that require entering a username and - Gateway M-6866 | 8513065 - Gateway Notebook Hardware Reference R1 - Page 47
www.gateway.com 3 Swipe your already enrolled finger over the sensor. The fingerprint reader menu opens. 4 Click Register. 5 fingerprint reader features For more information about the fingerprint reader and how to use its features, click (Start), All Programs, Protector Suite QL, then click Help. 39 - Gateway M-6866 | 8513065 - Gateway Notebook Hardware Reference R1 - Page 48
CHAPTER 3: Setting Up and Getting Started Using the EZ Pad touchpad The EZ Pad™ consists of a touchpad, two buttons, and a scroll zone. Scroll zone Touchpad Left button Right button When you move your finger on the touchpad, the pointer (arrow) on the screen moves in the same direction. You can use - Gateway M-6866 | 8513065 - Gateway Notebook Hardware Reference R1 - Page 49
www.gateway.com You can use the EZ-Pad left and right buttons below the touchpad to select objects. Tip You can attach a mouse to the notebook using a USB port. You do not need to shut down the notebook to connect a USB mouse. Tip For instructions on how to adjust the double-click speed, pointer - Gateway M-6866 | 8513065 - Gateway Notebook Hardware Reference R1 - Page 50
Setting Up and Getting Started To... Do this... Access a shortcut menu or find more information about an object on the screen. Move an object on the screen. Position the pointer (drag) the object to the appropriate part of the screen. Release the button to drop the object where you want it. 42 - Gateway M-6866 | 8513065 - Gateway Notebook Hardware Reference R1 - Page 51
www.gateway.com Using the optional multimedia panel Multimedia panel for select models Windows Hotstart Instant On Audio Capacitive volume control Mute sound Skip ahead Instant On Video Play/Pause Skip back Stop Button Description Windows Hotstart-Turns on the notebook (if turned off) and - Gateway M-6866 | 8513065 - Gateway Notebook Hardware Reference R1 - Page 52
Started Button Description Mutes the sound. Press again to restore Windows Vista Home Premium or Windows Vista Ultimate) or Windows Media Player (Windows Vista Home Basic). Instant on Video-Opens Media Center (Windows Vista Home Premium or Windows Vista Ultimate) or the DVD player program (Windows - Gateway M-6866 | 8513065 - Gateway Notebook Hardware Reference R1 - Page 53
gateway.com Button Description Skips ahead one CD track or DVD chapter. Mutes the sound. Press again to restore - or hold your finger on the -. Tip: ■ You can start swiping at any point on the strip. ■ The duration of the Internet chat programs to add video and audio to your chat session. In - Gateway M-6866 | 8513065 - Gateway Notebook Hardware Reference R1 - Page 54
Turns on the camera and opens the preview screen. Adds a decoration or border to your picture. Modifies properties such as zoom, backlight compensation, brightness, and contrast. Selects the position of the toolbar or modifies the picture, video, or audio settings. Opens online help. Important If - Gateway M-6866 | 8513065 - Gateway Notebook Hardware Reference R1 - Page 55
www.gateway.com 2 Click (Start camera). The Camera Assistant opens. 3 Click one of the following: Button Icon Snapshot Video recording Description Take a picture of what is currently in the preview screen. Create a video recording. Audio recording Create an audio recording. Functions - Gateway M-6866 | 8513065 - Gateway Notebook Hardware Reference R1 - Page 56
that service. Adjusting the brightness To adjust screen brightness: • Use the increase brightness and decrease brightness keys on the keyboard. For more information, see "System key combinations" on page 31. -ORClick (Start), All Programs, Accessories, then click Windows Mobility Center. The Windows - Gateway M-6866 | 8513065 - Gateway Notebook Hardware Reference R1 - Page 57
keyboard. For more information, see "System key combinations" on page 31. -ORUse the mute button and capacitive volume control on the optional multimedia panel. For more information, see "Using the optional multimedia panel" on page 43. -ORClick (Start), All Programs, Accessories, then click Windows - Gateway M-6866 | 8513065 - Gateway Notebook Hardware Reference R1 - Page 58
3: Setting Up and Getting Started 3 To mute the volume, click (Mute). To restore volume, click it again. 4 To adjust device volume levels, click Mixer. The Volume Mixer dialog box opens, where you can click and drag sliders for individual devices. Tip Adjust the Windows Sounds slider to change - Gateway M-6866 | 8513065 - Gateway Notebook Hardware Reference R1 - Page 59
to using or turning on the wireless device. IEEE 802.11 wireless network radio Your notebook has an IEEE 802.11 radio for accessing the Internet through a wireless access point or communicating with other computers on a wireless Ethernet network. To turn the wireless IEEE 802.11 radio on: 1 Enable - Gateway M-6866 | 8513065 - Gateway Notebook Hardware Reference R1 - Page 60
Start), All Programs, Accessories, then click Windows Mobility Center. When the Windows Mobility Center window opens, click Turn wireless off. Tip For more information about using your notebook on a wireless network, see "Wireless Ethernet Networking" in your online User Guide Disabling the wireless - Gateway M-6866 | 8513065 - Gateway Notebook Hardware Reference R1 - Page 61
• Press FN + F6. Tip For more information about using your notebook on a Bluetooth Personal Area Network, see "Bluetooth Networking" in your online User Guide Help For more information about Bluetooth, click Start, then click Help and Support. Type the keyword Bluetooth in the Search Help box, then - Gateway M-6866 | 8513065 - Gateway Notebook Hardware Reference R1 - Page 62
CHAPTER 3: Setting Up and Getting Started Disabling the Bluetooth radio You should disable the Bluetooth radio while traveling by airplane to prevent it from being accidently turned on while in flight. To disable the Bluetooth radio: • Slide the wireless network switch to the OFF position to disable - Gateway M-6866 | 8513065 - Gateway Notebook Hardware Reference R1 - Page 63
CHAPTER4 Using Drives and Accessories • Using the DVD drive • Using the memory card reader • Adding and removing an Express Card • Installing a printer or other peripheral device • Viewing the display on a projector, monitor, or television 55 - Gateway M-6866 | 8513065 - Gateway Notebook Hardware Reference R1 - Page 64
Drives and Accessories Using the DVD drive You can use your notebook to enjoy a wide variety of multimedia features. Identifying drive types Your Gateway notebook may contain one of the following drive types. Look on the front of the drive for one or more of the following logos: If your drive - Gateway M-6866 | 8513065 - Gateway Notebook Hardware Reference R1 - Page 65
play is facing up. Tip For information about cleaning a CD or DVD, see "Cleaning CDs or DVDs" on page 91. Using a tray-load DVD drive [ Manual eject hole Eject button To insert a CD or DVD: 1 Press the eject button on the DVD drive. After the tray opens slightly, pull the disc tray completely open - Gateway M-6866 | 8513065 - Gateway Notebook Hardware Reference R1 - Page 66
using this method. If you do not want to turn on your notebook, manually eject the disc by inserting an opened paper clip into the manual eject hole. Using a slot-load DVD drive [ Eject button Manual eject hole To insert a CD or DVD: 1 Place the disc in the slot with the label facing up. 2 Gently - Gateway M-6866 | 8513065 - Gateway Notebook Hardware Reference R1 - Page 67
www.gateway.com To remove a CD or DVD: • Press the eject button on the DVD drive. The drive mechanism pushes the CD or DVD out of the notebook. Tip Your notebook must be turned on to remove CDs and DVDs using this method. If you do not want to turn on your notebook, manually eject the disc by - Gateway M-6866 | 8513065 - Gateway Notebook Hardware Reference R1 - Page 68
Drives and Accessories Inserting a memory card To insert a memory card: • Insert the memory card into the memory card slot with the label facing up and the arrow on the label pointing towards the notebook. Using a memory card To access a file on a memory card: 1 Click (Start), then click Computer - Gateway M-6866 | 8513065 - Gateway Notebook Hardware Reference R1 - Page 69
www.gateway.com Adding and removing an Express Card Your notebook has an Express Card slot. This slot accepts one Type 54 Express Card. You do not need to restart your notebook when changing most cards because your notebook supports hot-swapping. Hot-swapping means that you can insert an Express - Gateway M-6866 | 8513065 - Gateway Notebook Hardware Reference R1 - Page 70
. Connecting a USB device Your notebook has USB ports for connecting devices such as a diskette drive, flash drive, printer, scanner, camera, keyboard, or mouse. Important USB devices may have special installation instructions. See your USB device's installation guide. Important For more information - Gateway M-6866 | 8513065 - Gateway Notebook Hardware Reference R1 - Page 71
an external monitor, projector, or television to your monitor (VGA) or optional HDMI port. Your notebook supports simultaneous LCD and external display. Simultaneous display lets you control a presentation from your notebook at the same time as you face your audience. To use a projector, monitor, or - Gateway M-6866 | 8513065 - Gateway Notebook Hardware Reference R1 - Page 72
Drives and Accessories 3 Plug the other end of the VGA cable into the monitor port on your notebook. -ORPlug the other end of the HDMI cable into the optional HDMI port on your notebook. 4 Turn on your notebook. 5 Plug the projector's, monitor's, or television's power cord into an AC power source - Gateway M-6866 | 8513065 - Gateway Notebook Hardware Reference R1 - Page 73
display as an extension of your notebook desktop, you should adjust the display properties. To adjust the display properties on a projector, monitor, or television: 1 Click (Start), All Programs, Accessories, then click Windows Mobility Center. The Windows Mobility Center window opens. Tip For more - Gateway M-6866 | 8513065 - Gateway Notebook Hardware Reference R1 - Page 74
You can configure your notebook so the settings are correct each time you give a presentation. To use a projector, monitor, or television for a presentation: 1 Click (Start), All Programs, Accessories, then click Windows Mobility Center. The Windows Mobility Center window opens. Tip For more - Gateway M-6866 | 8513065 - Gateway Notebook Hardware Reference R1 - Page 75
Settings dialog box opens. 3 Adjust properties such as Turn off screen saver and Set the volume to if necessary. 4 Click OK. 5 Click Turn on to turn on the presentation settings. When you are finished giving the presentation, click Turn off to return to your standard notebook settings. 67 - Gateway M-6866 | 8513065 - Gateway Notebook Hardware Reference R1 - Page 76
CHAPTER 4: Using Drives and Accessories 68 - Gateway M-6866 | 8513065 - Gateway Notebook Hardware Reference R1 - Page 77
CHAPTER5 Managing Power • Monitoring the battery charge • Recharging the battery • Recalibrating the battery • Extending battery life • Changing notebook power settings 69 - Gateway M-6866 | 8513065 - Gateway Notebook Hardware Reference R1 - Page 78
" on page 6. Tip For more information about recalibrating the battery, see "Recalibrating the battery" on page 72. Recharging the battery The battery recharges while it is installed and your notebook is connected to AC power. While the battery recharges, the battery charge indicator turns on. 70 - Gateway M-6866 | 8513065 - Gateway Notebook Hardware Reference R1 - Page 79
If your notebook is connected to AC power you can change the battery while the notebook is turned on. If your notebook it is not plugged into an AC outlet, you must turn the notebook off while changing the battery. To replace the battery: 1 If your notebook is on and is connected to AC power, go to - Gateway M-6866 | 8513065 - Gateway Notebook Hardware Reference R1 - Page 80
does not have this utility in BIOS, use the non-BIOS procedure. To recalibrate the battery using BIOS: 1 Connect the AC adapter, then turn on your notebook. 2 As soon as your notebook starts and you see a startup screen, press F2. The BIOS Setup utility opens. 3 Open the Advanced menu. 4 Highlight - Gateway M-6866 | 8513065 - Gateway Notebook Hardware Reference R1 - Page 81
than one complete discharge, and recharging a partially charged lithium-ion battery does not cause harm because there is no memory. Conserving battery power To conserve power while using the battery to power your notebook: • Turn off wireless networking and Bluetooth. • Dim the display as low as is - Gateway M-6866 | 8513065 - Gateway Notebook Hardware Reference R1 - Page 82
outlet, or an automobile cigarette lighter, use an airplane/ automobile power adapter or power inverter. Save the battery for times when you cannot use a power adapter. • To find AC power outlets in airports, look for them next to support pillars, in large areas such as boarding gates, and under - Gateway M-6866 | 8513065 - Gateway Notebook Hardware Reference R1 - Page 83
www.gateway.com Changing power modes You can use the following power modes to lengthen the life of your notebook's battery: • Sleep - while your notebook is in Sleep mode, it switches to a low power state where devices, such as the display and drives, turn off. • Hibernate - (also called save to - Gateway M-6866 | 8513065 - Gateway Notebook Hardware Reference R1 - Page 84
When in Hibernate mode, your notebook saves all memory information to the hard drive, then turns the power completely off. If your notebook ...and you want ...then is... to... On Enter Sleep or Press FN+F3. Hybrid Sleep mode On Enter Hibernate Click (Start), click mode the arrow next - Gateway M-6866 | 8513065 - Gateway Notebook Hardware Reference R1 - Page 85
computing power for your program. Your battery may not last as long as you are accustomed to under the other two power plans. To change the power plan: 1 Click (Start), All Programs, Accessories, then click Windows Mobility Center. The Windows Mobility Center window opens. 2 Click (Change power - Gateway M-6866 | 8513065 - Gateway Notebook Hardware Reference R1 - Page 86
change advanced power management settings: 1 Click (Start), All Programs, Accessories, then click Windows Mobility Center. The Windows Mobility Center window opens. 2 Click (Change power settings). The Select a power plan window opens. 3 Click a setting on the left side of the screen that you want - Gateway M-6866 | 8513065 - Gateway Notebook Hardware Reference R1 - Page 87
www.gateway.com 3 Click the + in front of Sleep, then click the + in front of Allow hybrid sleep. 4 Change the values to On for On battery and Plugged in. Help For more information about hybrid sleep, click Start, then click Help and Support. Type the keyword hybrid in the Search Help box, then - Gateway M-6866 | 8513065 - Gateway Notebook Hardware Reference R1 - Page 88
CHAPTER 5: Managing Power 80 - Gateway M-6866 | 8513065 - Gateway Notebook Hardware Reference R1 - Page 89
CHAPTER6 Traveling with Your Notebook • Packing your notebook • Traveling by air • Dial-up modem • Radio frequency wireless connections • Files • Security • Power • Additional tips 81 - Gateway M-6866 | 8513065 - Gateway Notebook Hardware Reference R1 - Page 90
the metal detector. • Turn off you notebook for takeoff and landing. • Turn off all wireless devices while in the aircraft. Dial-up modem • Take a telephone cord to connect the modem to telephone jacks. If you are traveling internationally, take telephone jack adapters or an acoustic handset coupler - Gateway M-6866 | 8513065 - Gateway Notebook Hardware Reference R1 - Page 91
are examples of devices which use wireless to communicate. Tip For more information about turning your wireless device on or off, see "Turning your wireless radio on or off" on page 51. Files • Copy your working files from your desktop computer to your notebook before you travel. • If you need - Gateway M-6866 | 8513065 - Gateway Notebook Hardware Reference R1 - Page 92
must return your notebook to Gateway for service. To create a startup password: 1 Restart your notebook. As soon as you see a startup screen, press F2. The BIOS Setup utility opens. 2 Open the Security menu, highlight Set Supervisor Password, then press ENTER and follow the instructions. You must - Gateway M-6866 | 8513065 - Gateway Notebook Hardware Reference R1 - Page 93
, then press ENTER. 7 When you start your computer, you are prompted to enter the user password you set in step 3. • Review the information in "Protecting your notebook" in your online User Guide. Power • Take your AC power adapter to recharge the battery. If you are traveling internationally, take - Gateway M-6866 | 8513065 - Gateway Notebook Hardware Reference R1 - Page 94
company and credit card company to learn about emergency travel assistance if your notebook is lost or damaged. • Take your recovery discs in case you need to install an additional driver or software. Tip You can create a Drivers and Applications Recovery disc using the Gateway Recovery Center. 86 - Gateway M-6866 | 8513065 - Gateway Notebook Hardware Reference R1 - Page 95
CHAPTER7 Maintaining Your Notebook • Caring for your notebook • Cleaning your notebook • Maintaining the battery • Cleaning CDs or DVDs • Recovering your system 87 - Gateway M-6866 | 8513065 - Gateway Notebook Hardware Reference R1 - Page 96
. • Do not block the ventilation fan slots. If these slots are blocked, your notebook may overheat resulting in unexpected shutdown or permanent damage to the notebook. • When storing your notebook for an extended period of time, unplug AC power and remove the battery after discharging them partway - Gateway M-6866 | 8513065 - Gateway Notebook Hardware Reference R1 - Page 97
www.gateway.com • Cotton swabs • A DVD drive cleaning kit Cleaning the exterior Warning When you shut down your notebook, the power turns off, but some electrical current still flows through your notebook. To avoid possible injury from electrical shock, unplug the power cord, modem cable, and - Gateway M-6866 | 8513065 - Gateway Notebook Hardware Reference R1 - Page 98
lithium-ion battery does not cause any harm because it has no "memory." Batteries with fuel gauges (notebooks) should be battery for longer than three to four weeks, the battery could fully discharge because the battery circuitry itself consumes power. If you have a spare lithium-ion battery, - Gateway M-6866 | 8513065 - Gateway Notebook Hardware Reference R1 - Page 99
want to run on AC power, remove the battery. Cleaning CDs or DVDs Wipe from the center to the edge, not around in a circle, using a product made especially for the purpose. Recovering your system You can solve most notebook problems by following the information in "Troubleshooting" on page 115 or - Gateway M-6866 | 8513065 - Gateway Notebook Hardware Reference R1 - Page 100
, see that product's documentation or support Web site. • If re-installing software or drivers does not help, then the problem may be solved by returning your system to a previous state when everything was working correctly. For instructions, see "Using Microsoft System Restore" on page 99. • If - Gateway M-6866 | 8513065 - Gateway Notebook Hardware Reference R1 - Page 101
software and drivers from your hard drive. However, if you ever re-install Windows from the Windows DVD or install a new hard drive, you need to recover your pre-installed software and drivers using a set of software and driver recovery discs. Because these discs do not come with your notebook, you - Gateway M-6866 | 8513065 - Gateway Notebook Hardware Reference R1 - Page 102
are completed. Important Use a permanent marker to label each disc "Software and Driver Recovery," along with a short description of which notebook the discs are for. If you are recording multiple discs, as you remove each disc from the drive, use the marker to label each disc 1 of x, 2 of x, 3 of - Gateway M-6866 | 8513065 - Gateway Notebook Hardware Reference R1 - Page 103
If you have recently reinstalled Windows or installed a new hard drive, and your Start menu does not contain Gateway Recovery Center as an option, you must recover your software and drivers using software and driver recovery discs you have created. For instructions, see "Recovering pre-installed - Gateway M-6866 | 8513065 - Gateway Notebook Hardware Reference R1 - Page 104
CHAPTER 7: Maintaining Your Notebook 2 To recover software that was pre-installed, click Programs, then click Application recovery. - OR To recover device drivers that were pre-installed, click Hardware, then click Device driver recovery. 3 Click the software or driver you want to recover, then - Gateway M-6866 | 8513065 - Gateway Notebook Hardware Reference R1 - Page 105
using recovery discs: 1 Insert a software and driver recovery disc into the CD or DVD drive. If an AutoPlay dialog box appears, click Run Grc_Vista.exe. If an AutoPlay dialog box does not appear and Gateway Recovery Center does not start, open Computer and run the file Grc_Vista.exe on the disc - Gateway M-6866 | 8513065 - Gateway Notebook Hardware Reference R1 - Page 106
- OR To recover pre-installed device drivers, click Device driver recovery, then click the type of driver you want to recover. 3 Click Next. 4 If the software or driver is not shown on the list and you have a multiple-disc set of recovery discs, close Gateway Recovery Center and try another disc. 98 - Gateway M-6866 | 8513065 - Gateway Notebook Hardware Reference R1 - Page 107
install software or device drivers. You can also create a restore point manually. For instructions, see "Manually creating a restore point" on page 101. Help For more information about using Microsoft System Restore, click Start, then click Help and Support. Type windows system restore in the Search - Gateway M-6866 | 8513065 - Gateway Notebook Hardware Reference R1 - Page 108
Your Notebook 2 On the left side of the window, click Repair Windows using System Restore, then click Next. The Choose a restore point dialog box opens. 3 Click the restore point you want, click Next, then click Finish. A confirmation message box appears. 4 Click Yes. Your system is restored using - Gateway M-6866 | 8513065 - Gateway Notebook Hardware Reference R1 - Page 109
www.gateway.com Manually creating a restore point To manually create a restore point: 1 Click (Start), Control Panel, System and Maintenance, then click Backup and Restore Center. The Backup and Restore Center opens. 2 On the left side of the window, click Create a restore point or change settings, - Gateway M-6866 | 8513065 - Gateway Notebook Hardware Reference R1 - Page 110
up, repeatedly press F8 until the Recovery Options screen opens. If Windows starts to load instead, restart the notebook and try again. 3 Press the arrow keys on your keyboard to select Repair Your Computer, then press ENTER. Gateway System Recovery starts, and the System Recovery Options dialog box - Gateway M-6866 | 8513065 - Gateway Notebook Hardware Reference R1 - Page 111
so). For instructions, see "To create discs for recovering pre-installed software and drivers:" on page 93. 2 Insert the Windows DVD into your notebook's DVD drive, then turn on or restart your notebook. 3 When the prompt "Press any key to boot from CD or DVD" appears, press any key on your keyboard - Gateway M-6866 | 8513065 - Gateway Notebook Hardware Reference R1 - Page 112
keys to select the drive containing the Windows DVD, then press ENTER and follow the on-screen instructions. 5 After Windows is completely re-installed, use the software and driver recovery discs you created to recover your notebook's pre-installed software and device drivers. For instructions, see - Gateway M-6866 | 8513065 - Gateway Notebook Hardware Reference R1 - Page 113
CHAPTER8 Upgrading Your Notebook • Preventing static electricity discharge • Adding or replacing memory modules • Replacing the hard drive kit 105 - Gateway M-6866 | 8513065 - Gateway Notebook Hardware Reference R1 - Page 114
voltages and moving parts, turn off your notebook, unplug the power cord, modem cable, and network cable, and remove the battery before opening the your notebook are extremely sensitive to static electricity, also known as electrostatic discharge (ESD). Before installing or replacing components, - Gateway M-6866 | 8513065 - Gateway Notebook Hardware Reference R1 - Page 115
and any module can be placed in any slot. Memory bay To add or replace memory modules: 1 Follow the guidelines under "Preventing static electricity discharge" on page 106. 2 Turn off your notebook. 3 Disconnect the AC adapter, modem cable, and network cable. 4 Disconnect all peripheral devices - Gateway M-6866 | 8513065 - Gateway Notebook Hardware Reference R1 - Page 116
CHAPTER 8: Upgrading Your Notebook 6 Loosen the memory bay cover screw (this screw cannot be removed). Screw 7 Lift the memory bay cover, then remove it. 108 - Gateway M-6866 | 8513065 - Gateway Notebook Hardware Reference R1 - Page 117
www.gateway.com 8 If you are removing a module, gently press outward on the clip at each end of the memory module until the module tilts upward. Clip Clip 109 - Gateway M-6866 | 8513065 - Gateway Notebook Hardware Reference R1 - Page 118
, make sure that the notch in the module lines up with the tab in the memory bay. 11 Replace the memory bay cover, then tighten the cover screw. 12 Insert the battery, then turn your notebook over. 13 Connect the power adapter, modem cable, and network cable. 14 Reconnect all peripheral devices and - Gateway M-6866 | 8513065 - Gateway Notebook Hardware Reference R1 - Page 119
and drivers" on page 92. 2 Back up any data you want to transfer to the new hard drive. For more information, see "Backing up files" in your online User Guide. 3 Follow the guidelines under "Preventing static electricity discharge" on page 106. 4 Turn off your notebook. 5 Disconnect the AC adapter - Gateway M-6866 | 8513065 - Gateway Notebook Hardware Reference R1 - Page 120
8: Upgrading Your Notebook 7 Turn your notebook over so the bottom is facing up, then remove the battery. For more information, see "Changing batteries" on page 71. 8 Loosen the three hard drive bay cover screws (these screws cannot be removed). Screw Screw Screw 9 Lift the hard drive bay cover - Gateway M-6866 | 8513065 - Gateway Notebook Hardware Reference R1 - Page 121
www.gateway.com 11 Using the plastic tab, slide the old hard drive, then remove it. 12 If your new hard drive already includes the hard drive bracket, go to step 17. -OR- If you need to move the hard drive bracket from your old hard drive to your new hard drive, go to step 13. 13 Remove - Gateway M-6866 | 8513065 - Gateway Notebook Hardware Reference R1 - Page 122
open the DVD drive, insert the Windows DVD, close the DVD drive, then restart your notebook. 22 When the prompt "Press any key to boot from CD or DVD" appears, press any key on your keyboard and follow the on-screen instructions. As part of the process you may be prompted to insert your Drivers and - Gateway M-6866 | 8513065 - Gateway Notebook Hardware Reference R1 - Page 123
CHAPTER9 Troubleshooting • Safety guidelines • First steps • Troubleshooting • Telephone support 115 - Gateway M-6866 | 8513065 - Gateway Notebook Hardware Reference R1 - Page 124
remove the memory bay cover or hard drive bay cover, make sure that you replace the cover, reinstall any screws, then replace the battery before you start your notebook. Help For more information about troubleshooting, click Start, then click Help and Support. Type the keyword troubleshooting in the - Gateway M-6866 | 8513065 - Gateway Notebook Hardware Reference R1 - Page 125
Sound" on page 139. Battery Battery troubleshooting is covered under "Power" on page 137. CD drives CD drive troubleshooting is covered under "DVD drives" on page 119. Diskette drive (external) The diskette drive is not recognized • Shut down and restart your notebook. • Disconnect the USB cable - Gateway M-6866 | 8513065 - Gateway Notebook Hardware Reference R1 - Page 126
Troubleshooting again. For instructions on running Error checking, see "Checking the hard drive for errors" in your online User Guide. You see drive. If the indicator stays on, try restarting your notebook. Display The screen is too dark • Adjust the brightness using the system keys or Windows - Gateway M-6866 | 8513065 - Gateway Notebook Hardware Reference R1 - Page 127
numerous or dense on your display, contact Gateway Customer Care to identify whether a repair or replacement is justified based on the number of pixels affected. The display is blank • Adjust the brightness using the system keys or Windows Mobility Center. For more information about adjusting - Gateway M-6866 | 8513065 - Gateway Notebook Hardware Reference R1 - Page 128
using powered speakers, make sure that they are plugged in and turned on. • Clean the disc. For more information, see "Cleaning CDs or DVDs" on page 91. • Your notebook may be experiencing some temporary memory problems. Shut down and restart your notebook. • Reinstall the audio device drivers. For - Gateway M-6866 | 8513065 - Gateway Notebook Hardware Reference R1 - Page 129
hole. For the location of the manual eject hole, see "Using a tray-load DVD drive" on page 57. Ethernet Ethernet troubleshooting is covered under "Networks (wired)" on page 133. Express Cards You installed an Express Card and now your notebook is having problems • Make sure that you have correctly - Gateway M-6866 | 8513065 - Gateway Notebook Hardware Reference R1 - Page 130
. For instructions on fixing hard drive problems, see "Checking the hard drive for errors" in your online User Guide. The hard drive cannot be accessed, or you see a "General failure reading drive C" error message • If a diskette is in the diskette drive, eject it and restart your notebook. 122 - Gateway M-6866 | 8513065 - Gateway Notebook Hardware Reference R1 - Page 131
more information about troubleshooting Internet connections, click Start, then click Help and Support. Type the keyword troubleshooting connections in the Search Help box, then press ENTER. You see an "Unable to locate host" message and are unable to browse the Internet • This problem can occur when - Gateway M-6866 | 8513065 - Gateway Notebook Hardware Reference R1 - Page 132
service • The condition of the Internet computers to which you connect and the number of users accessing those computers • The complexity of graphics and multimedia on Web pages • Having multiple Web browsers open, performing multiple downloads, and having multiple programs open on your notebook - Gateway M-6866 | 8513065 - Gateway Notebook Hardware Reference R1 - Page 133
Vista Ultimate versions. To view Media Center troubleshooting information that is not covered in this section, go to the Gateway support Web Site at www.gateway.com. Help For more information about Windows Media Center, click Start, then click Help and Support. Type the phrase Media Center in the - Gateway M-6866 | 8513065 - Gateway Notebook Hardware Reference R1 - Page 134
, a set of headphones or external powered speakers, or connect your notebook to a stereo system to hear sound. • Quality of video cables-Poor quality or the incorrect type of video cables can cause problems and affect the video quality. Gateway recommends using high-quality video cables that can be - Gateway M-6866 | 8513065 - Gateway Notebook Hardware Reference R1 - Page 135
larger display device. • Age of the TV-Newer TVs usually have more advanced features, produce a better quality picture, and support higher screen resolutions. The video display will likely be better on a newer model TV. • Type of TV (interlaced or progressive scan) Many CRT (tube) TVs use interlaced - Gateway M-6866 | 8513065 - Gateway Notebook Hardware Reference R1 - Page 136
on-screen instructions. Help For more information about troubleshooting memory errors, click Start, then click Help and Support. Type the keyword memory error in the Search Help box, then press ENTER. You see a "Not enough memory" error message • Close all programs, then restart your notebook. 128 - Gateway M-6866 | 8513065 - Gateway Notebook Hardware Reference R1 - Page 137
www.gateway.com Memory card reader Drive letter for the memory card slot does not appear in the My Computer window • Reboot your notebook. Modem (cable or DSL) The modem does not connect • Make sure that the modem cable is plugged into the Ethernet network jack and not the optional modem jack. For - Gateway M-6866 | 8513065 - Gateway Notebook Hardware Reference R1 - Page 138
and all screws in the wall or telephone wall jack are secure. You can also call your telephone service and have the telephone line checked for noise or low line levels. • Try another telephone line (either a different telephone number in your house or a telephone line at a different location - Gateway M-6866 | 8513065 - Gateway Notebook Hardware Reference R1 - Page 139
www.gateway.com You cannot connect to the Internet • The ISP may be having technical difficulties. Contact your ISP for technical support. • See if the modem works with a different communications program. The problem may be with just one program. • Review the troubleshooting information under " - Gateway M-6866 | 8513065 - Gateway Notebook Hardware Reference R1 - Page 140
is available, a white screen appears with no data, or if you get an error such as port already open or the modem has failed to respond, the modem did not pass diagnostics. Help For more information about modem troubleshooting, click Start, then click Help and Support. Type the keyword modem - Gateway M-6866 | 8513065 - Gateway Notebook Hardware Reference R1 - Page 141
troubleshooting, click Start, then click Help and Support. Type the keyword network troubleshooting in the Search Help box, then press ENTER. You cannot see the other computers on your wired Ethernet network • Make sure that your Ethernet cable is plugged into the Ethernet jack on your notebook - Gateway M-6866 | 8513065 - Gateway Notebook Hardware Reference R1 - Page 142
is unique. Contact your company computer department or network administrator for help. Internet Explorer is unable to access the Internet • Reset the power on your cable or DSL modem and your access point. This reestablishes communication between your Internet Service Provider and your modem and - Gateway M-6866 | 8513065 - Gateway Notebook Hardware Reference R1 - Page 143
(Start), right-click Network, then click Properties. The Network and Sharing Center window opens. 2 Click View status for the network connection. The Wireless Network Connection Status dialog box opens. The meter shows the signal strength for wireless networking on your computer if other computers - Gateway M-6866 | 8513065 - Gateway Notebook Hardware Reference R1 - Page 144
computer try to auto-detect the network. Your wireless network is listed as a preferred network, but it has an "x" on it • An x means your preferred network is not currently available or you are not currently in range to connect. Internet Explorer is unable to access the Internet • Reset the power - Gateway M-6866 | 8513065 - Gateway Notebook Hardware Reference R1 - Page 145
return your notebook for repair. Call Gateway Customer Care for instructions. Power Your notebook is not working on AC power • Make sure that your AC power adapter is connected correctly to your notebook. For instructions on connecting the AC power adapter, see "Connecting the AC adapter" on page - Gateway M-6866 | 8513065 - Gateway Notebook Hardware Reference R1 - Page 146
. The Control Panel window opens. 2 Click Hardware and Sound. 3 Click Printers. 4 Right-click the name of the printer you want to be the default printer, then click Set as Default Printer. • Reinstall the printer driver. See the guide that came with your printer for instructions on installing the - Gateway M-6866 | 8513065 - Gateway Notebook Hardware Reference R1 - Page 147
click Start, then click Help and Support. Type the keyword sound troubleshooting in the Search Help box, then press ENTER. You are not getting sound from the built-in speakers • Make sure that headphones are not plugged into the headphone jack. • Make sure that the volume control on your notebook is - Gateway M-6866 | 8513065 - Gateway Notebook Hardware Reference R1 - Page 148
that the video cable is connected correctly. Telephone support Before calling Gateway Customer Care If you have a technical problem with your notebook, follow these recommendations before contacting Gateway Customer Care: • Make sure that your notebook is connected correctly to a grounded AC outlet - Gateway M-6866 | 8513065 - Gateway Notebook Hardware Reference R1 - Page 149
attempt to troubleshoot your notebook problem if: • Power cords or plugs are damaged • Liquid has been spilled into your notebook • Your notebook was dropped • The case was damaged Instead, unplug your notebook and contact a qualified computer technician. • Have your customer ID, serial number, and - Gateway M-6866 | 8513065 - Gateway Notebook Hardware Reference R1 - Page 150
CHAPTER 9: Troubleshooting 142 - Gateway M-6866 | 8513065 - Gateway Notebook Hardware Reference R1 - Page 151
APPENDIXA Legal Information • Important safety information • Regulatory compliance statements • Environmental information • Notices 143 - Gateway M-6866 | 8513065 - Gateway Notebook Hardware Reference R1 - Page 152
cord for your dialup modem connection. Your Gateway notebook is designed and tested to meet the battery is replaced incorrectly. Replace the battery with the same or equivalent type recommended by the manufacturer. Dispose of batteries according to the manufacturer's instructions. • When the notebook - Gateway M-6866 | 8513065 - Gateway Notebook Hardware Reference R1 - Page 153
when the operating instructions are followed. • The notebook was dropped or the cabinet is damaged. • The notebook performance changes. Replacement parts and accessories Use only replacement parts and accessories recommended by Gateway. Regulatory compliance statements Wireless guidance Warning - Gateway M-6866 | 8513065 - Gateway Notebook Hardware Reference R1 - Page 154
to use it. Contact Gateway for service. Caution The transmitting device embedded in this notebook may not be used with any antenna other than the one provided with the notebook. Federal Communications Commission (FCC) Intentional emitter per FCC Part 15 Low power, Radio transmitter type devices - Gateway M-6866 | 8513065 - Gateway Notebook Hardware Reference R1 - Page 155
. Caution Recycle or dispose of the used notebook properly according to federal, state and local laws. Responsible party: Gateway, Inc. 7565 Irvine Center Drive Irvine, CA 92618 Phone: 800-846-2000 Product: • SA1 • SA1A • SA6 • SA8 This device complies with Part 15 of the FCC Rules. Operation of - Gateway M-6866 | 8513065 - Gateway Notebook Hardware Reference R1 - Page 156
modular jack which is Part 68-compliant. See installation instructions for details. The Ringer Equivalence Number (REN) is used to determine the number of discontinuance of service may be required. The telephone company may request that you disconnect the equipment until the problem is resolved. - Gateway M-6866 | 8513065 - Gateway Notebook Hardware Reference R1 - Page 157
it. Contact Gateway for service. Caution The transmitting device embedded in this notebook may not be used with any antenna other than provide with the notebook. Caution The 802.11A radio LAN your notebook may have been equipped with operates in the same frequency range as high power radar, which - Gateway M-6866 | 8513065 - Gateway Notebook Hardware Reference R1 - Page 158
single-line individual service may be extended service in some situations. Repairs Any repairs of the power utility, Number (REN) assigned to each terminal device provides an indication of the maximum number the Ringer Equivalence Numbers of all the those specified in this manual may result in - Gateway M-6866 | 8513065 - Gateway Notebook Hardware Reference R1 - Page 159
gateway.com All Gateway systems equipped with CD and DVD drives comply with the appropriate safety standards, including IEC 825. The laser devices in these components are classified as "Class 1 Laser Products" under a US Department of Health and Human Services do your part for the batteries properly - Gateway M-6866 | 8513065 - Gateway Notebook Hardware Reference R1 - Page 160
Windows are trademarks or registered trademarks of Microsoft Corporation. All other product names mentioned herein are used for identification purposes only, and may be the trademarks or registered trademarks of their respective companies. Macrovision statement If your notebook has a DVD drive and - Gateway M-6866 | 8513065 - Gateway Notebook Hardware Reference R1 - Page 161
installing 71 latch 11 life span 90 locating 11 managing power 73 maximizing performance 73 monitoring charge 70 recalibrating 72 recharging 20, 70 release latch 11 replacing 71 storing 90 troubleshooting 137 bays battery 71 hard drive 11 memory 11, 107 BIOS Setup utility 72 Bluetooth system key 32 - Gateway M-6866 | 8513065 - Gateway Notebook Hardware Reference R1 - Page 162
58 manual eject hole 57, 58 CD drive See DVD drive cellular phone memory cards 59 Certificate of Authenticity 3 changing battery 70 cleaning audio CD 91 case 89 CD 91 DVD 91 keyboard 89 LCD panel 89 notebook exterior 88 screen 89 154 clicking 41 closing unresponsive program 26 connecting AC adapter - Gateway M-6866 | 8513065 - Gateway Notebook Hardware Reference R1 - Page 163
User Guide 2 double-clicking 41 dragging 42 drivers recovery discs 93, 97 re-installing 92 drives DVD 56 DVD/CD-RW 9, 56 DVD±RW 9, 56 hard drive 11, 111 HD DVD 56 HD-DVD RW 9 identifying drive types 56 multi-format DVD±RW 9, 56 replacing hard drive 111 status indicators 28 troubleshooting 117 - Gateway M-6866 | 8513065 - Gateway Notebook Hardware Reference R1 - Page 164
41 function keys 30 G Gateway contact information 2 model number 2 serial number 2 Support 3 Gateway Recovery Center re-installing drivers 95 re-installing programs 95 156 re-installing software 95 H hard drive bay 11 indicator 28 installing 111 replacing 111 troubleshooting 122 HDMI (TV) out - Gateway M-6866 | 8513065 - Gateway Notebook Hardware Reference R1 - Page 165
memory card reader memory bay 11 installing 107 removing 107 replacing 107 troubleshooting 128 memory card reader inserting card 60 locating 7 memory cards supported 59 removing card 60 troubleshooting 129 using 59 microphone built-in 15 jack 6 Microsoft Certificate of Authenticity 3 model number - Gateway M-6866 | 8513065 - Gateway Notebook Hardware Reference R1 - Page 166
PCMCIA card See Express Card PDA memory cards 59 peripheral devices 62 Plug and Play devices USB support for 62 pointer identifying 40 moving 41 ports See connections power AC adapter 20, 74 advanced settings 76, 78 alternate sources 74 automobile/airplane adapter 74 battery 70, 71, 72, 73 button 12 - Gateway M-6866 | 8513065 - Gateway Notebook Hardware Reference R1 - Page 167
83 radio frequency wireless connections 83 RAM See memory rebooting notebook 26 recalibrating battery 72 recharging battery 70 recovering defaults 102 drivers 92 programs 92 software 92 system 91 Windows 92 with Gateway Recovery Center 95 with Windows DVD 103 with Windows System Restore 99 recovery - Gateway M-6866 | 8513065 - Gateway Notebook Hardware Reference R1 - Page 168
49 troubleshooting 139 speakers built-in 12, 14 jack 6 SpeedStep technology 76 Start camera button 46 starting notebook 24 programs 41 startup password 84 static electricity 106 status indicator wireless Ethernet 28 status indicators battery charge 6, 70 Caps Lock 28 CD drive 28 disc drive 28 drive - Gateway M-6866 | 8513065 - Gateway Notebook Hardware Reference R1 - Page 169
travel tips 81 troubleshooting audio 139 battery 137 diskette drive 117 display 118 DVD drive 119 Express Cards 121 external monitor 140 faxes 131 files 121 general guidelines 116 hard drive 122 Internet connection 123, 131 keyboard 124 LCD panel 118 Media Center 125 memory 128 memory card reader - Gateway M-6866 | 8513065 - Gateway Notebook Hardware Reference R1 - Page 170
49 system keys 33 troubleshooting 139 W waking up notebook 25 webcam 15, 45 Webcam status indicator 15 Windows key 30 Product Key Code 3 Windows Hotstart 43 Windows Media Player 43, 44 Windows System Restore 92 creating restore point 101 wired Ethernet troubleshooting 133 wireless Ethernet button 31 - Gateway M-6866 | 8513065 - Gateway Notebook Hardware Reference R1 - Page 171
- Gateway M-6866 | 8513065 - Gateway Notebook Hardware Reference R1 - Page 172
MAN AVALON HW REF GDE R1 5/08
-
 1
1 -
 2
2 -
 3
3 -
 4
4 -
 5
5 -
 6
6 -
 7
7 -
8
-
9
-
10
-
11
-
12
-
13
-
14
-
15
-
16
-
17
-
18
-
19
-
20
-
21
-
22
-
23
-
24
-
25
-
26
-
27
-
28
-
29
-
30
-
31
-
32
-
33
-
34
-
35
-
36
-
37
-
38
-
39
-
40
-
41
-
42
-
43
-
44
-
45
-
46
-
47
-
48
-
49
-
50
-
51
-
52
-
53
-
54
-
55
-
56
-
57
-
58
-
59
-
60
-
61
-
62
-
63
-
64
-
65
-
66
-
67
-
68
-
69
-
70
-
71
-
72
-
73
-
74
-
75
-
76
-
77
-
78
-
79
-
80
-
81
-
82
-
83
-
84
-
85
-
86
-
87
-
88
-
89
-
90
-
91
-
92
-
93
-
94
-
95
-
96
-
97
-
98
-
99
-
100
-
101
-
102
-
103
-
104
-
105
-
106
-
107
-
108
-
109
-
110
-
111
-
112
-
113
-
114
-
115
-
116
-
117
-
118
-
119
-
120
-
121
-
122
-
123
-
124
-
125
-
126
-
127
-
128
-
129
-
130
-
131
-
132
-
133
-
134
-
135
-
136
-
137
-
138
-
139
-
140
-
141
-
142
-
143
-
144
-
145
-
146
-
147
-
148
-
149
-
150
-
151
-
152
-
153
-
154
-
155
-
156
-
157
-
158
-
159
-
160
-
161
-
162
-
163
-
164
-
165
-
166
-
167
-
168
-
169
-
170
-
171
-
172
 |
 |

®
NOTEBOOK
REFERENCE
GUIDE