GE DSXH43EFWW Owners Manual
GE DSXH43EFWW - 5.7 cu. Ft. Electric Dryer Manual
 |
UPC - 084691142935
View all GE DSXH43EFWW manuals
Add to My Manuals
Save this manual to your list of manuals |
GE DSXH43EFWW manual content summary:
- GE DSXH43EFWW | Owners Manual - Page 1
Install Your Dryer . . . . . .9, 10 Reversing the Door Swing 20 Stacking Instructions 19, 20 Troubleshooting Tips 21, 22 Consumer Support Consumer Support 26 Warranty for Canadian Customers . . . .25 Warranty for U.S. Customers 24 Owner's Manual & Installation Instructions U.S. Models: DSXH43 - GE DSXH43EFWW | Owners Manual - Page 2
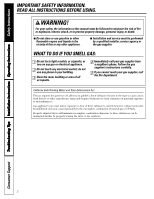
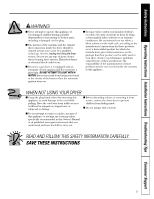
Consumer Support Troubleshooting Tips Installation Instructions Operating Instructions Safety Instructions IMPORTANT SAFETY INFORMATION. READ ALL INSTRUCTIONS BEFORE USING. WARNING! For your safety, the information in this manual must be followed to minimize the risk of fire or explosion, electric - GE DSXH43EFWW | Owners Manual - Page 3
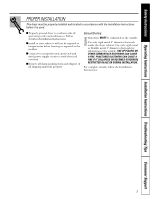
Safety Instructions Operating Instructions Installation Instructions Troubleshooting Tips Consumer Support PROPER INSTALLATION This dryer must be properly installed and located in accordance with the Installation Instructions before it is used. ■ Properly ground dryer to conform with all governing - GE DSXH43EFWW | Owners Manual - Page 4
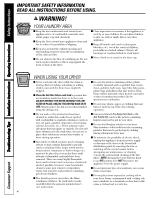
Support Troubleshooting Tips Installation Instructions Operating Instructions Safety Instructions IMPORTANT SAFETY INFORMATION. READ ALL INSTRUCTIONS dryer or in the room. DO NOT OPERATE THE DRYER WITHOUT THE LINT FILTER IN PLACE, UNLESS THE DRYING RACK IS IN USE. Always replace your washer or dryer - GE DSXH43EFWW | Owners Manual - Page 5
from service, remove the dryer door to prevent children from hiding inside. ■ Do not tamper with controls. ■ Do not attempt to repair or replace any part of this appliance or attempt any servicing unless specifically recommended in this Owner's Manual or in published user-repair instructions that - GE DSXH43EFWW | Owners Manual - Page 6
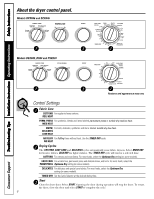
Consumer Support Troubleshooting Tips Installation Instructions Operating Instructions Safety Instructions About the dryer control panel. Models DPXH46 and DCXH46 Models DSXH43, DH43 and PSXH43 Features and appearance may vary. Control Settings Fabric Care COTTONS For regular to heavy cottons. REG. - GE DSXH43EFWW | Owners Manual - Page 7
Safety Instructions Operating Instructions Installation Instructions Troubleshooting Tips Consumer Support About your dryer features. CYCLE SIGNAL OFF LOUD WRINKLE CARE EXTENDED COOL AIR TUMBLE ON OFF Cycle Signal Option (on some models) When the signal is on it will sound just five minutes - GE DSXH43EFWW | Owners Manual - Page 8
Consumer Support Troubleshooting Tips Installation Instructions Operating Instructions Safety Instructions Loading and using the dryer. Always follow the fabric manufacturer's care label when laundering. Sorting and Loading Hints As a general rule, if clothes are sorted properly for the washer, - GE DSXH43EFWW | Owners Manual - Page 9
with local codes and ordinances and the latest edition of the National Electrical Code, ANSI/NFPA 70 or in Canada, exceed 3 feet. CSA C22.1 Canadian Electrical Code Part 1. • The gas service to the dryer must conform with local codes and ordinances or the latest edition of the CALIFORNIA - GE DSXH43EFWW | Owners Manual - Page 10
install cord) (ELECTRIC DRYER) ❑ Pipe thread sealer (GAS DRYER) ❑ UL- washer height. The dryer must be level and rest firmly on all four leveling legs. 8. Connect the power supply. 9. Check the operation of the power supply and venting. 10. Place the Owner's Manual and the Installation Instructions - GE DSXH43EFWW | Owners Manual - Page 11
Canadian Electrical Code Part 1. Electrical Requirements • This dryer must be supplied with 120V, 60-Hz, and connected to a properly grounded branch circuit, protected by a 15- or 20-amp circuit breaker or time-delay fuse. • If the electric supply provided does not meet the above specifications, it - GE DSXH43EFWW | Owners Manual - Page 12
duct to connect the dryer to the home exhaust duct. It must be installed in accordance with the instructions found in "Connecting The Dryer To House Vent" on then UL-listed flexible metal (semi-rigid) ducting can be used (Kit WX08X10077). • Never install flexible metal duct in walls, ceilings, floors - GE DSXH43EFWW | Owners Manual - Page 13
dryer bottom. To change exhaust direction you will need Exhaust Kit Pub. No. 14-A018 and a rigid metal 4″ 90-degree elbow. The kit is available through your GE retailer. Follow the instructions supplied with the kit CORRECT INCORRECT GAS SUPPLY REQUIREMENTS Replace brass connecting pipe that is - GE DSXH43EFWW | Owners Manual - Page 14
operation in a recess or closet installation. 0″ (0 cm) 0″ (0 cm) 3″ (7.6 cm) 3″ (7.6 cm) STACKED INSTALLATION If a stacked washer/dryer installation is desired, you MUST use Stacking Kit WE25X10020. This kit is available through your GE retailer. Closet door 60 sq. in. (387.1 sq. cm) 3 in - GE DSXH43EFWW | Owners Manual - Page 15
Installation Instructions MOBILE HOME INSTALLATION 1. Dryer MUST be exhausted outside (outdoors, not beneath the mobile home) using metal ducting that will not support combustion. Metal ducting must be 4″ (10.16 cm) in diameter with no obstructions. Rigid metal duct is preferred. 2. If the dryer is - GE DSXH43EFWW | Owners Manual - Page 16
FOR ELECTRIC DRYERS WARNING: The following are specific requirements for proper and safe electrical installation of your dryer. Failure to follow these instructions can create electrical shock and/or a fire hazard. This appliance MUST be properly grounded. Electrical shock can result if the dryer is - GE DSXH43EFWW | Owners Manual - Page 17
Installation Instructions 3-WIRE SYSTEM FOR ELECTRIC DRYERS NOT for use in Canada. DO NOT use for Mobile Home Installations. NOT for use on new construction. 1. Remove the screws securing the terminal block access cover and the strain relief mounting bracket located on the back of the dryer upper - GE DSXH43EFWW | Owners Manual - Page 18
happens, turn the timer to OFF and wait 5 minutes before making another attempt to light. 7. If your dryer does not operate, please review the Troubleshooting Tips section in this manual before calling for service. 8. Place these instructions in a location near the dryer for future reference. 18 - GE DSXH43EFWW | Owners Manual - Page 19
risk of electric shock, disconnect this appliance from the power supply before attempting any user maintenance. Turning the controls to the OFF position does not disconnect this appliance from the power supply. • Refer to the washer and dryer installation instructions prior to stacking appliances - GE DSXH43EFWW | Owners Manual - Page 20
(7B). 8. Insert the 2 long screws provided in the kit through the holes in the dryer front panel and install into the front mounting brackets. 9. Install the hole plugs removed in step 5. 10. Refer to the washer and dryer installation instructions for proper installation and function. 11. Save the - GE DSXH43EFWW | Owners Manual - Page 21
Instructions Operating Instructions Installation Instructions Troubleshooting Tips Consumer Support Before you call for service... Troubleshooting Tips Save time and money! Review the charts on the following pages first and you may not need to call for service. Problem Dryer doesn't start Dryer - GE DSXH43EFWW | Owners Manual - Page 22
Consumer Support Troubleshooting Tips Installation Instructions Operating Instructions Safety Instructions Before you call for service... Problem Static occurs Inconsistent drying times Clothes take too long to dry Clothes are wrinkled Clothes shrink Possible Causes What To Do Overdrying • Try - GE DSXH43EFWW | Owners Manual - Page 23
Safety Instructions Operating Instructions Installation Instructions Troubleshooting Tips Consumer Support Notes. 23 - GE DSXH43EFWW | Owners Manual - Page 24
serial number and model number available when calling for service. Staple your receipt here. Proof of the original purchase date is needed to obtain service under the warranty. For The Period Of: One Year From the date of the original purchase GE Will Replace: Any part of the dryer which fails - GE DSXH43EFWW | Owners Manual - Page 25
Instructions Installation Instructions Troubleshooting Tips Consumer Support GE Dryer Warranty. (For customers in Canada) All warranty service provided by our Factory Service Centers, or an authorized Customer Care® technician. For service, call 1.800.561.3344. Please have serial number and model - GE DSXH43EFWW | Owners Manual - Page 26
any day of the year! For greater convenience and faster service, you can now download Owner's Manuals, order parts or even schedule service on-line. In Canada: www.GEAppliances.ca Schedule Service In the U.S.A. GEAppliances.com Expert GE repair service is only one step away from your door. Get on - GE DSXH43EFWW | Owners Manual - Page 27
Spacemaker Sécheuses electromenagersge.ca Mesures de sécurit 2-5 Directives de fonctionnement Tableaux de commande 6 Caractéristiques 7 Utilisation et chargement de la sécheuse 8 Entretien 8 Directives d'installation 9-21 Installations électriques pour sécheuses électrique 17, 18 - GE DSXH43EFWW | Owners Manual - Page 28
Mesures de sécurité Conseils de dépannage Directives d'installation Fonctionnement MESURES DE SÉCURITÉ IMPORTANTES. LISEZ D'ABORD TOUTES LES DIRECTIVES. AVERTISSEMENT! Pour votre sécurité, suivez les directives fournies dans le présent manuel afin de minimiser les risques d'incendie, d'explosion - GE DSXH43EFWW | Owners Manual - Page 29
Mesures de sécurité Fonctionnement Directives d'installation Conseils de dépannage UNE INSTALLATION ADÉQUATE Avant d'utiliser votre sécheuse, assurez-vous qu'elle a été adéquatement installée, conformément aux Directives d'installation. ■ Mettez l'appareil à la terre conformément à tous Conduit - GE DSXH43EFWW | Owners Manual - Page 30
Mesures de sécurité MESURES DE SÉCURITÉ IMPORTANTES. LISEZ D'ABORD TOUTES LES DIRECTIVES. AVERTISSEMENT! Conseils de dépannage Directives d'installation Fonctionnement AUTOUR DE VOTRE SÉCHEUSE ■ Ne laissez pas s'accumuler autour et au-dessous de vos électroménagers des matériaux combustibles, - GE DSXH43EFWW | Owners Manual - Page 31
Mesures de sécurité Fonctionnement Directives d'installation Conseils de dépannage AVERTISSEMENT! ■ Ne faites pas fonctionner l'appareil s'il est endommagé, défectueux, partiellement démonté ou si des pièces sont manquantes ou défectueuses, ou si le cordon d'alimentation ou la fiche sont endommag - GE DSXH43EFWW | Owners Manual - Page 32
Mesures de sécurité Conseils de dépannage Directives d'installation Fonctionnement Les commandes de votre sécheuse. Modèles DPXH46 et DCXH46 Modèles DSXH43, DH43 et PSXH43 Les caractéristiques et l'aspect peuvent varier. Réglage des commandes Entretien des tissus COTTONS (cotons/temp. régulière) - GE DSXH43EFWW | Owners Manual - Page 33
Mesures de sécurité Fonctionnement Directives d'installation Conseils de dépannage Les caractéristiques de la sécheuse. CYCLE SIGNAL OFF LOUD WRINKLE CARE EXTENDED COOL AIR TUMBLE ON OFF Cycle Signal Option (indicateur de fin de programme) (sur certaines modèles) Lorsque le signal est - GE DSXH43EFWW | Owners Manual - Page 34
des taches d'assouplissant. Les feuilles d'assouplissant de tissus Bounce® pour sécheuses ont été approuvées pour toutes les sécheuses GE si elles sont utilisées conformément aux instructions du fabricant. Ne surchargez pas la sécheuse car c'est une perte d'énergie et cela peut provoquer des faux - GE DSXH43EFWW | Owners Manual - Page 35
.ca ou appelez le 1.800.561.3344 AVANT DE COMMENCER : Lire attentivement la totalité de ces instructions. • IMPORTANT - Sauvegardez ces instructions pour utilisation future par l'inspecteur. • IMPORTANT - Respectez tous les codes et réglements applicables. • Note à l'installateur - Assurez - GE DSXH43EFWW | Owners Manual - Page 36
Directives d'installation Matériel et outillage nécessaires ❑ Tournevis Phillips ❑ Pinces réglables (pour régler les pattes de réglage) ❑ Niveau à bulle ❑ Tournevis plat ou droit (peut être nécessité pour assurer le mou dans le cordon d'alimentation) ❑ Ruban adhésif pour gaine de ventilation ❑ - GE DSXH43EFWW | Owners Manual - Page 37
Directives d'installation Bien lire ces directives. Renseignements sur les raccords électriques pour sécheuses électriques AVERTISSEMENT - Pour réduire les risques d'incendie, de chocs électriques ou de blessure : • N'UTILISEZ PAS DE RALLONGE ÉLECTRIQUE AVEC CET APPAREIL. • CET APPAREIL DOIT ÊTRE - GE DSXH43EFWW | Owners Manual - Page 38
Directives d'installation LISTE DE VÉRIFICATION DU SYSTÈME D'ÉVACUATION ÉVENT MURAL • Terminez le conduit de façon à éviter les retours d'air ou l'entrée d'oiseaux ou d'autres animaux. • La terminaison doit présenter une résistance minimale au flux d'air évacué et nécessiter peu ou pas de - GE DSXH43EFWW | Owners Manual - Page 39
métalliques flexibles (souples) qui sont conformes au "Outline for Clothes Dryer Transition Duct, Subject 2158A" doivent être utilisé. • N'installez Kit Pub N° 14A018 et un coude de 90 degrés en métal rigide de 4 po. Vous trouverez cette trousse chez votre détaillant GE. Suivez les instructions - GE DSXH43EFWW | Owners Manual - Page 40
Directives d'installation Exigences relatives à l'alimentation en gaz Remplacez les tuyaux de raccordement en laiton qui ne sont pas enrobés de matière plastique. Du laiton en acier inoxydable ou enrobé de matière plastique DOIT être utilisé. AVERTISSEMENT : N'utilisez jamais de vieux raccords - GE DSXH43EFWW | Owners Manual - Page 41
sirez un modèle encastré*, vous DEVEZ installer un ensemble de feuille de finition, N° Pub. 14-A008. L'ensemble est disponible chez votre détaillant GE. *un revêtement de comptoir sur mesure est requis. Installation dans un renfoncement ou un placard : 1. L'air de cette sécheuse DOIT sortir à l'ext - GE DSXH43EFWW | Owners Manual - Page 42
dimension de la bouche d'évacuation. 4. Les sécheuses à gaz DOIVENT être fixées au plancher à l'aide d'une trousse Mobile Home Installation Kit Pub. N°. 14-D346-33. 5. Veuillez vous référer à la section Liste de vérification du système d'évacuation pour d'autres renseignements importants concernant - GE DSXH43EFWW | Owners Manual - Page 43
la mise à la terre. N'utilisez PAS de rallonge électrique avec cette sécheuse. Les cordons de certaines rallonges ne sont pas conçus pour supporter le courant électrique que cette sécheuse utilise et peuvent fondre, provoquant des chocs électriques et/ou des dangers d'incendie. Installez la sécheuse - GE DSXH43EFWW | Owners Manual - Page 44
(de chaque côté). Resserrez bien les deux vis. AVERTISSEMENT : Ne pliez ou ne pincez pas les fils/conducteurs près des raccords. 6. Fixez à nouveau le support de montage du réducteur de tension à l'arrière de la sécheuse à l'aide des vis fournies. Serrez les vis fort. 7. Resserrez bien les vis - GE DSXH43EFWW | Owners Manual - Page 45
1. Enlevez le bouchon d'expédition de la conduite de gaz à l'arrière de la sécheuse. Conversion au gaz propane : Ne branchez PAS la sécheuse au service du gaz de pétrole liquéfié sans que le robinet du gaz ait été converti. Un ensemble de conversion au gaz de pétrole liquéfié (N° Pub - GE DSXH43EFWW | Owners Manual - Page 46
illustration correspondent aux étapes de l'installation. 1. Enlevez le panneau supérieur de la laveuse en dévissant les 4 vis qui se trouvent dans les deux supports situés à la partie supérieure de l'arrière de la laveuse. Glissez le panneau vers l'avant, soulevez le devant du panneau et enlevez le - GE DSXH43EFWW | Owners Manual - Page 47
installation de la laveuse et de la sécheuse pour une installation et un fonctionnement adéquats. 11. Conservez le panneau supérieur et les supports au cas où vous devriez effectuer une installation côte-à-côte dans le futur. 8. Insérez les 2 vis longues fournies dans l'ensemble à travers les trous - GE DSXH43EFWW | Owners Manual - Page 48
gaz de pétrole liquéfié est vide ou il y a eu interruption du service de gaz naturel (modèles à gaz) •Vérifiez le bon fonctionnement de la bo remplacez le réservoir. La sécheuse devrait produire de la chaleur lorsque le service sera rétabli. Un peu de vibration/bruit est •Installez la sécheuse sur - GE DSXH43EFWW | Owners Manual - Page 49
Mesures de sécurité Fonctionnement Directives d'installation Conseils de dépannage Problème Électricité statique Durées de séchage irrégulières Les vêtements prennent trop de temps à sécher Les vêtements sont froissés Les vêtements rétrécissent Causes possibles Séchage excessif Aucun produit - GE DSXH43EFWW | Owners Manual - Page 50
Notes. 24 Soutien au consommateur Conseils de dépannage Directives d'installation Fonctionnement Mesures de sécurité - GE DSXH43EFWW | Owners Manual - Page 51
Directives d'installation Conseils de dépannage Garantie de votre sécheuse GE. Toutes les réparations sous garantie sont effectuées par nos Centres de réparation ou par nos réparateurs Mabe autorisés. Pour obtenir du service en ligne, veuillez nous visiter au site www.electromenagersge.ca - GE DSXH43EFWW | Owners Manual - Page 52
au site www.electromenagersge.ca 24 heures par jour, tous les jours de l'année. Service de réparations Service de réparations GE est tout près de vous. Pour faire réparer votre électroménager GE, il suffit de nous téléphoner. 1.800.561.3344 Studio de conception réaliste www.electromenagersge
-
 1
1 -
 2
2 -
 3
3 -
 4
4 -
 5
5 -
 6
6 -
 7
7 -
8
-
9
-
10
-
11
-
12
-
13
-
14
-
15
-
16
-
17
-
18
-
19
-
20
-
21
-
22
-
23
-
24
-
25
-
26
-
27
-
28
-
29
-
30
-
31
-
32
-
33
-
34
-
35
-
36
-
37
-
38
-
39
-
40
-
41
-
42
-
43
-
44
-
45
-
46
-
47
-
48
-
49
-
50
-
51
-
52
 |
 |
175D1807P642
49-90380
04-09 JR
GEAppliances.com
Dryers
Safety Instructions
. . . . . . . . . . . . . 2–5
Operating Instructions
Care and Cleaning . . . . . . . . . . . . . . . . . . . . .8
Controls . . . . . . . . . . . . . . . . . . . . . . . . . . . . . .6
Features
. . . . . . . . . . . . . . . . . . . . . . . . . . . . . .7
Loading and Using the Dryer . . . . . . . . . . .8
Installation Instructions
. . . . . . 9–20
Electrical Installation for
Electric Dryer
. . . . . . . . . . . . . . . . . . . . 16, 17
Electrical Requirements . . . . . . . . . . . . . . .11
Exhausting the Dryer
. . . . . . . . . . . . .12, 13
Gas Connection for Gas Dryer . . . . . . . .18
Gas Supply Requirements
. . . . . . . . . . . .13
Location of Your Dryer . . . . . . . . . . . . . . . .14
Mobile Home Installation . . . . . . . . . . . . .15
Preparing to Install Your Dryer . . . . . .9, 10
Reversing the Door Swing
. . . . . . . . . . . .20
Stacking Instructions . . . . . . . . . . . . . .19, 20
Troubleshooting Tips
. . . . . . . . .21, 22
Consumer Support
Consumer Support . . . . . . . . . . . . . . . . . . . 26
Warranty for Canadian Customers . . . .25
Warranty for U.S. Customers . . . . . . . . . 24
Spacemaker
U.S. Models:
DSXH43
DPXH46
DH43
Canada Models:
DCXH46
PSXH43
Owner’s Manual &
Installation Instructions
®
Printed in Mexico