GE GMR02BANBB Use and Care Manual
GE GMR02BANBB - Compact Refrigerator 1.7 CF Manual Defrost Manual
 |
UPC - 084691068525
View all GE GMR02BANBB manuals
Add to My Manuals
Save this manual to your list of manuals |
GE GMR02BANBB manual content summary:
- GE GMR02BANBB | Use and Care Manual - Page 1
Refrigerators ge.com Safety Information 2, 3 Operating Instructions Care and Cleaning 6-8 Control Settings 4 Refrigerator Features 5 Replacing the Light Bulb . . . . .6 Installation Instructions . . .9-11 Troubleshooting Tips . . . .12, 13 Consumer Support Consumer Support . .Back Cover - GE GMR02BANBB | Use and Care Manual - Page 2
Consumer Support Troubleshooting Tips Installation Instructions Operating Instructions Safety Instructions IMPORTANT SAFETY INFORMATION. READ ALL INSTRUCTIONS BEFORE USING. WARNING! Use this appliance only for its intended purpose as described in this Owner's Manual. SAFETY PRECAUTIONS When - GE GMR02BANBB | Use and Care Manual - Page 3
Safety Instructions Operating Instructions Installation Instructions Troubleshooting Tips Consumer Support ge.com USE OF EXTENSION CORDS to have it replaced with a properly grounded 3-prong wall outlet. The refrigerator should always be plugged into its own individual electrical outlet which has - GE GMR02BANBB | Use and Care Manual - Page 4
Consumer Support Troubleshooting Tips Installation Instructions Operating Instructions Safety Instructions About the control on the refrigerator. The control will look like one of the above. Control Settings The temperature control maintains the temperature in the refrigerator. Setting the control - GE GMR02BANBB | Use and Care Manual - Page 5
Safety Instructions Operating Instructions Installation Instructions Troubleshooting Tips Consumer Support About the refrigerator features. ge.com Shelves To remove a shelf, lift up the back slightly and pull forward. Some models have multi-position shelves that can be moved to different levels. - GE GMR02BANBB | Use and Care Manual - Page 6
dry. Other parts of the refrigerator-including door gaskets, fruit and vegetable drawers, and all plastic parts-can be cleaned the same way. Do not wash any plastic refrigerator parts in the dishwasher. Replacing the Light Bulb (on some models) Unplug the refrigerator before replacing a burned-out - GE GMR02BANBB | Use and Care Manual - Page 7
is very thick, it may keep the ice tray compartment door from opening or closing completely. Don't try to force it open or closed; after defrosting, the door will open and close easily. 7 Safety Instructions Operating Instructions Installation Instructions Troubleshooting Tips Consumer Support - GE GMR02BANBB | Use and Care Manual - Page 8
Consumer Support Troubleshooting Tips Installation Instructions Operating Instructions Safety Instructions Care and cleaning of the refrigerator. Defrosting (on manual defrost models only) Defrost whenever frost on the wall of the ice tray compartment becomes 1/4″ thick. Never use a sharp or - GE GMR02BANBB | Use and Care Manual - Page 9
Safety Instructions Operating Instructions Installation Instructions Troubleshooting Tips Consumer Support Preparing to install the refrigerator. ge.com Read these instructions completely and carefully. Refrigerator Location I Do not install the refrigerator where the temperature will go below - GE GMR02BANBB | Use and Care Manual - Page 10
Consumer Support Troubleshooting Tips Installation Instructions Operating Instructions Safety Instructions Preparing to install the refrigerator. Hinge cover Plug buttons or screws Plug button Hinge Spacer Bottom hinge Leveling legs Door Reversal (on some models) 1. Remove the small plug - GE GMR02BANBB | Use and Care Manual - Page 11
. 13. Replace the top plate and screws. 14. Slide the top cover back in place and replace the two screws. 15. Put the plug button in the hole on the right side of the door top cap. 11 Safety Instructions Operating Instructions Installation Instructions Troubleshooting Tips Consumer Support - GE GMR02BANBB | Use and Care Manual - Page 12
Instructions Before you call for service... Troubleshooting Tips Save time and money! Review the chart below first and you may not need to call for service. Problem Refrigerator does not operate Vibration or rattling (slight vibration is normal) Motor operates for long periods or cycles Door - GE GMR02BANBB | Use and Care Manual - Page 13
Instructions Installation Instructions Troubleshooting Tips Consumer Support Troubleshooting Tips ge.com Problem Refrigerator too warm Refrigerator has odor Moisture forms on outside of refrigerator Moisture collects inside (in humid weather, air carries moisture into refrigerator when door - GE GMR02BANBB | Use and Care Manual - Page 14
Consumer Support Troubleshooting Tips Installation Instructions Operating Instructions Safety Instructions Notes. 14 - GE GMR02BANBB | Use and Care Manual - Page 15
Instructions Troubleshooting Tips Consumer Support Refrigerator Warranty. (For customers in the United States) All warranty service provided by our Factory Service Centers, or an authorized Customer Care® technician. To schedule service, on-line, 24 hours a day, visit us at ge.com, or call 800.GE - GE GMR02BANBB | Use and Care Manual - Page 16
normal business hours. Instructions contained in this manual cover procedures to be performed by any user. Other servicing generally should be referred to qualified service personnel. Caution must be exercised, since improper servicing may cause unsafe operation. Contact Us ge.com If you are
-
 1
1 -
 2
2 -
 3
3 -
 4
4 -
 5
5 -
 6
6 -
 7
7 -
8
-
9
-
10
-
11
-
12
-
13
-
14
-
15
-
16
 |
 |

162D9639P009
49-60439
11-05 JR
ge.com
Write the model and serial numbers here:
Model #
__________________________
Serial #
__________________________
Find these numbers on a label inside
the refrigerator on the side wall.
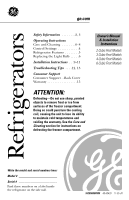
Refrigerators
2 Cubic Foot Models
3 Cubic Foot Models
4 Cubic Foot Models
6 Cubic Foot Models
Owner’s Manual
& Installation
Instructions
Safety Information
. . . . . . . .2, 3
Operating Instructions
Care and Cleaning . . . . . . . .6–8
Control Settings . . . . . . . . . . . .4
Refrigerator Features . . . . . . . .5
Replacing the Light Bulb . . . . .6
Installation Instructions
. . .9–11
Troubleshooting Tips
. . . .12, 13
Consumer Support
Consumer Support . .Back Cover
Warranty . . . . . . . . . . . . . . . . .15
ATTENTION:
Defrosting—Do not use sharp, pointed
objects to remove frost or ice from
surfaces of the freezer compartment.
Doing so could puncture the cooling
coil, causing the unit to lose its ability
to maintain cold temperatures and
voiding the warranty. See the
Care and
Cleaning
section for instructions on
defrosting the freezer compartment.