GE JV936DSS Use and Care Manual
GE JV936DSS Manual
 |
UPC - 084691003007
View all GE JV936DSS manuals
Add to My Manuals
Save this manual to your list of manuals |
GE JV936DSS manual content summary:
- GE JV936DSS | Use and Care Manual - Page 1
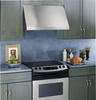
Filters 5 Hood Lights 6 Stainless Steel Surfaces 5 Installation Instructions . . .7-18 Troubleshooting Tips 19 Consumer Support Consumer Support 24 Owner Registration 21, 22 Warranty 23 Owner's Manual and Installation Instructions JV936 JV966 Write the model and serial numbers here: Model - GE JV936DSS | Use and Care Manual - Page 2
Consumer Support Troubleshooting Tips Care and Cleaning Operating Instructions Safety Instructions IMPORTANT SAFETY INFORMATION. READ ALL INSTRUCTIONS BEFORE USING. SAFETY PRECAUTIONS WARNING - TO REDUCE THE RISK OF FIRE, ELECTRIC SHOCK OR INJURY TO PERSONS, OBSERVE THE FOLLOWING: A. Use this - GE JV936DSS | Use and Care Manual - Page 3
electrical wiring and other hidden utilities. D. Ducted fans must always be vented to the outdoors. WARNING - TO REDUCE THE RISK OF FIRE, USE ONLY METAL DUCTWORK. ■ Do not attempt to repair or replace any part of your hood unless it is specifically recommended in this manual. All other servicing - GE JV936DSS | Use and Care Manual - Page 4
Consumer Support Troubleshooting Tips Care and Cleaning Operating Instructions Safety Instructions Using the hood controls. Throughout this manual, features and appearance may vary from your model. FAN Control Turn the FAN speed control to LO, MED LO, MED HI or HI, as needed. Continuous use of the - GE JV936DSS | Use and Care Manual - Page 5
Operating Instructions Care and Cleaning Troubleshooting Tips Consumer Support Care and cleaning of the vent hood. GEAppliances.com Be sure electrical power is off and all surfaces are cool before cleaning or servicing any part of the vent hood. Reusable Metal Grease Filters The hood has - GE JV936DSS | Use and Care Manual - Page 6
Consumer Support Troubleshooting Tips Care and Cleaning Operating Instructions Safety Instructions Care and cleaning of the vent hood. Be sure electrical power is off and all surfaces are cool before cleaning or servicing any part of the vent hood. Receptacle Socket Hood Lights NOTE: The glass - GE JV936DSS | Use and Care Manual - Page 7
Installation Instructions Range Hoods Questions? Call 800.GE.CARES (800.432.2737) or Visit our Website at:GwEwAwpp.GlEiaAnpcpelisa.nccoems.com BEFORE YOU BEGIN Read these instructions completely and carefully. • IMPORTANT - Save these instructions for local inspector's use. • IMPORTANT - Observe - GE JV936DSS | Use and Care Manual - Page 8
Instructions INSTALLATION CLEARANCES These vent hoods are designed to be installed onto a wall. They may be installed beneath a soffit or cabinet. • Install these hoods 24″ Min. to 36″ Max. above the cooking surface. SOFFIT INSTALLATION SOFFIT 24" MIN. 36" MAX. OPTIONAL ACCESSORIES Duct - GE JV936DSS | Use and Care Manual - Page 9
the vent hood with duct cover be on site before final framing and wall finishing. This will also help to accurately locate the ductwork and electrical service. DUCT FITTINGS Follow these guidelines for proper duct sizing in the ducting charts. DUCTING CHART - 30" and 36" Models Equivalent Length - GE JV936DSS | Use and Care Manual - Page 10
Installation Instructions DUCT FITTINGS Use this chart to compute maximum permissible lengths for duct runs to outdoors. Note: Do not exceed maximum permissible equivalent lengths! Maximum duct length: 100 foot for vent hoods. Duct Piece Dimensions 7″ Round, straight 3-1⁄4″ x 12″ straight 7″ 90° - GE JV936DSS | Use and Care Manual - Page 11
Installation Instructions TOOLS AND MATERIALS REQUIRED (NOT SUPPLIED) REMOVE THE PACKAGING • Remove the small box housing the motor. • Lift the hood out of the box. Pencil and tape measure Phillips and Flat blade screwdrivers Duct tape Electric drill with 1/8″ and 3/8″ bits Spirit level - GE JV936DSS | Use and Care Manual - Page 12
Installation Instructions PARTS PROVIDED Locate the hardware accessory box packed with the hood and check contents. 2 Aluminum Grease Filters Screws, wall fasteners, washers Duct Transition with Damper Filter Support DUCT COVER REQUIREMENTS We recommend that the vent hood and decorative duct - GE JV936DSS | Use and Care Manual - Page 13
Instructions DETERMINE HOOD, DUCTWORK AND WIRING LOCATIONS • Keep the wood support piece and its screws for later installation. Do not discard. • Measure desired distance from the bottom of the hood to the cooking surface, 24″ min. to 36″ Max. Refer to the previous page if the accessory duct - GE JV936DSS | Use and Care Manual - Page 14
. Remove Shipping Tape on Damper Duct Transition Top of Hood • Place the transition piece over the hood exhaust. Secure transition to hood with 4 screws provided. • Use duct tape to seal the connection. 15-3/8" Wood Support 24" to 36" Centerline of Installation Space • Drill 1/8 ″ pilot holes - GE JV936DSS | Use and Care Manual - Page 15
Installation Instructions 4 Alternate Mounting Method INSTALL HOOD TO SOFFIT OR BENEATH CABINETS SKIP THIS STEP IF USING WALL MOUNTING METHOD IMPORTANT: Soffit framing must be capable of supporting 100 lbs. When necessary, the hood may be installed so that it is supported by the soffit. • The - GE JV936DSS | Use and Care Manual - Page 16
Installation Instructions 5 INSTALL CEILING BRACKET The ceiling bracket must be installed when the duct cover is used to span 24″ or more height above the hood. The bracket will hold the decorative duct cover in place at the top. Note: The ceiling bracket is not required when using only the 12″ - GE JV936DSS | Use and Care Manual - Page 17
Installation Instructions 7 INSTALL MOTOR • Align duct cover to the bracket with the 2 small Phillips screws provided. 10 INSTALL FILTER SUPPORT • Tip filter support into the rear of the hood. • Insert support tabs into the slots at the rear of the hood. Insert Tabs Into Slots 8 CONNECT ELECTRICAL - GE JV936DSS | Use and Care Manual - Page 18
to align with outside opening. • Pull the filter down into the lower slots at the bottom of the filter support. Junction Box 12 FINALIZE INSTALLATION • Refer to the operating instructions to test all controls. "C" Clip Filters Filter Support • To remove the filters, grasp the handle, push the - GE JV936DSS | Use and Care Manual - Page 19
Safety Instructions Operating Instructions Care and Cleaning Troubleshooting Tips Consumer Support Before you call for service... Troubleshooting Tips Save time and money! Review the chart below first and you may not need to call for service. GEAppliances.com Problem Fan does not operate when the - GE JV936DSS | Use and Care Manual - Page 20
Consumer Support Troubleshooting Tips Care and Cleaning Operating Instructions Safety Instructions Notes. 20 - GE JV936DSS | Use and Care Manual - Page 21
Please place in envelope and mail to: Veuillez mettre dans une enveloppe et envoyez à : OWNERSHIP REGISTRATION P.O. BOX 1780 MISSISSAUGA, ONTARIO L4Y 4G1 (FOR CANADIAN CONSUMERS ONLY) 21 - GE JV936DSS | Use and Care Manual - Page 22
22 - GE JV936DSS | Use and Care Manual - Page 23
Instructions Operating Instructions Care and Cleaning Troubleshooting Tips Consumer Support GE Range Hood Warranty. All warranty service provided by our Factory Service Centers, or an authorized Customer Care® technician. To schedule service on-line, visit us at GEAppliances.com, or call 800.GE - GE JV936DSS | Use and Care Manual - Page 24
during normal business hours. Real Life Design Studio GEAppliances.com GE supports the Universal Design concept-products, services and environments that can be used by people of all ages, sizes and capabilities. We recognize the need to design for a wide range of physical and mental abilities and - GE JV936DSS | Use and Care Manual - Page 25
Commande de la lampe 4 Commande du ventilateur 4 Entretien et nettoyage Filtres à graisses 5 Lampe de la hotte 6 Surfaces en acier inoxydable . . . . .5 Directives d'installation . . .7-18 Dépannage 19 Service à la clientèle Garantie 23 Inscription du propriétaire . . . . . 21, 22 - GE JV936DSS | Use and Care Manual - Page 26
pouvez combattre le feu en faisant dos à une sortie. *Selon le document intitulé «Kitchen Fire Safety Tips» publié par la NFPA. Entretien et nettoyage Dépannage Service à la clientèle 2 - GE JV936DSS | Use and Care Manual - Page 27
à celle de l'élément. C. Lorsque vous coupez ou percez un mur ou un plafond, évitez d'endommager le câblage électrique ou les installations des services publics. D. Les conduits d'évacuation des ventilateurs doivent toujours être acheminés vers l'extérieur. AVERTISSEMENT - POUR RÉDUIRE LES RISQUES - GE JV936DSS | Use and Care Manual - Page 28
(Maximum) pour éclairer la surface de cuisson. Tournez-la à NITE (Veilleuse) pour l'utiliser comme veilleuse en soirée ou pendant la nuit. Entretien et nettoyage Dépannage Service à la clientèle 4 - GE JV936DSS | Use and Care Manual - Page 29
plus près de chez vous, veuillez appeler sans frais au numéro suivant : Centre national de pièces 800.661.1616 www.electromenagersge.ca Dépannage Service à la clientèle 5 - GE JV936DSS | Use and Care Manual - Page 30
pas à l'ampoule neuve avec vos doigts afin de ne pas raccourcir de façon appréciable sa durée de vie utile. Entretien et nettoyage Dépannage Service à la clientèle 6 - GE JV936DSS | Use and Care Manual - Page 31
(18 po) 53,3 cm (21 po) 91,1 cm (35 7/8 po) Les modèles de 91,4 cm (36 po) Exigent une ouverture de 91,4 cm (36 po) de largeur POUR VOTRE SÉCURITÉ : Avant de commencer l'installation, coupez l'alimentation électrique et bloquez le disjoncteur afin d'éviter que le courant ne soit accidentellement - GE JV936DSS | Use and Care Manual - Page 32
de 76,2 cm (30 po) et de 91,4 cm (36 po) de largeur. Commandez le couvre-conduit décoratif en même temps que la hotte. Vous devez avoir tous les accessoires en main lors de l'installation de la hotte. Commandez la pièce : JXCHSS Support de plafond 2 vis 2 rondelles 2 chevilles à bois d'ancrage - GE JV936DSS | Use and Care Manual - Page 33
plafond de 30,4 cm (12 po). Cet ensemble comprend un conduit de transition pour installation entre un conduit circulaire de 17,8 cm (7 po) et un conduit rectangulaire de - Modèles de 76,2 cm (30 po) et de 91,4 cm (36 po) Longueur équivalente en pieds pour conduit circulaire de 17,8 cm (7 po) - GE JV936DSS | Use and Care Manual - Page 34
po). Cet ensemble comprend un conduit de transition pour installation entre un conduit circulaire de 17,8 cm (7 po) cm (3 1/4 po) x 30,4 cm (12 po) de 90° 10,0 m/36 pi Conduit de transition circulaire de 17,8 cm (7 po) à conduit rectangulaire de par le service de l'Ingénierie d'évaluation de GE et - GE JV936DSS | Use and Care Manual - Page 35
Enlevez la petite boîte qui protège le moteur. • Sortez la hotte de la boîte. Hotte Support de fixation en bois Moteur Emballage de pi retiennent le support de fixation en bois à la paroi arrière de la hotte. Mettez de côté le support de fixation en bois et les vis pour les réinstaller plus tard - GE JV936DSS | Use and Care Manual - Page 36
de conduit supérieure à 30,4 cm (12 po), il faut installer le support de plafond pour fixer le couvre-conduit à la partie supérieure. Pour éviter les cm (34 po) 76,2 cm (30 po) 81,3 cm (32 po) 91,4 cm (36 po) max. Plafond de 3,0 m (10 pi) : Installez la hotte à une hauteur d'au moins 81,3 cm - GE JV936DSS | Use and Care Manual - Page 37
du dessus de la hotte 45,7 cm (18 po) Dessous de la hotte Support en bois 39,0 cm (15 3/8 po) Câblage électrique ÉVACUATION À TRAVERS pour un modèle de 91,4 cm (36 po). • Enlevez l'entrée défonçable supérieure ou arrière, selon votre installation. • Installez le serre-câble sur la paroi - GE JV936DSS | Use and Care Manual - Page 38
po) dans les montants verticaux. Fraisez les trous de vis sur le support. 2 INSTALLATION DU CONDUIT DE TRANSITION IMPORTANT : Retirez le ruban gommé qui retient boîte de jonction. De 60,9 cm (24 po) à 91,4 cm (36 po) Ligne centrale de l'emplacement Ouverture Jeu de 6,3 mm (1/4 po) 33,2 cm - GE JV936DSS | Use and Care Manual - Page 39
méthode de montage INSTALLATION DE LA HOTTE SOUS UNE RETOMBÉE DE PLAFOND OU la hotte au mur à l'aide de chevilles d'ancrage pour mur creux. 6,5 cm (2 9/16 po) Modèles de 76,2 cm (30 po) 36,8 cm (14 1/2 po) 36,8 cm (14 1/2 po) 17,9 cm (7 1/16 po) 6,0 cm (2 3/8 po) 27,3 cm (10 3/4 po) 21,4 cm (8 - GE JV936DSS | Use and Care Manual - Page 40
la section de 30,4 cm (12 po) du couvre-conduit. • Installez les deux petites vis dans les côtés du support de conduit. Enlevez les vis. Le taraudage des trous permettra de faciliter l'installation. • Placez l'encoche centrale du support vis-à-vis de la ligne centrale tracée sur le mur et appuyez le - GE JV936DSS | Use and Care Manual - Page 41
• Sortez la section intérieure vers le haut jusqu'au plafond et jusqu'au support de plafond. • Fixez le couvre-conduit au support à l'aide des deux petites vis Phillips fournies. 10 INSTALLATION DU SUPPORT DE FILTRE • Inclinez le support de filtre en l'insérant à l'arrière de la hotte. • Insérez les - GE JV936DSS | Use and Care Manual - Page 42
soit vis-à-vis de l'ouverture extérieure. • Poussez sur le filtre afin qu'il soit inséré dans les fentes inférieures, au bas du support de filtre. Boîte de jonction 12 FIN DE L'INSTALLATION • Reportez-vous aux directives de fonctionnement pour faire l'essai de toutes les commandes. Agrafe Filtres - GE JV936DSS | Use and Care Manual - Page 43
agit d'un branchement à faire sans visibilité, il est facile à effectuer. Consultez les Directives d'installation dans le présent manuel pour connaître l'emplacement du connecteur et la façon de réparateur. Directives de fonctionnement Entretien et nettoyage Dépannage Service à la clientèle 19 - GE JV936DSS | Use and Care Manual - Page 44
Notes. 20 Service à la clientèle Dépannage Entretien et nettoyage Directives de fonctionnement Consignes de sécurité - GE JV936DSS | Use and Care Manual - Page 45
Please place in envelope and mail to: Veuillez mettre dans une enveloppe et envoyez à : OWNERSHIP REGISTRATION P.O. BOX 1780 MISSISSAUGA, ONTARIO L4Y 4G1 (FOR CANADIAN CONSUMERS ONLY) 21 - GE JV936DSS | Use and Care Manual - Page 46
22 - GE JV936DSS | Use and Care Manual - Page 47
cette garantie limitée d'une année, GE fournira aussi, gratuitement, toute main-d'ouvre et service à domicile pour remplacer la pièce défectueuse. Ce qui n'est pas couvert : ■ Les déplacements à domicile pour vous apprendre à utiliser l'appareil. ■ Une installation, une livraison ou une maintenance - GE JV936DSS | Use and Care Manual - Page 48
par Internet au site www.electromenagersge.ca 24 heures par jour, tous les jours de l'année. Service de réparations Service de réparations GE est tout près de vous. Pour faire réparer votre électroménager GE, il suffit de nous téléphoner. 1.800.561.3344 Studio de conception réaliste Sur demande
-
 1
1 -
 2
2 -
 3
3 -
 4
4 -
 5
5 -
 6
6 -
 7
7 -
8
-
9
-
10
-
11
-
12
-
13
-
14
-
15
-
16
-
17
-
18
-
19
-
20
-
21
-
22
-
23
-
24
-
25
-
26
-
27
-
28
-
29
-
30
-
31
-
32
-
33
-
34
-
35
-
36
-
37
-
38
-
39
-
40
-
41
-
42
-
43
-
44
-
45
-
46
-
47
-
48
 |
 |

Range Hoods
Vented
LI1P4H
49-80520-2
06-09 JR
Safety Instructions
. . . . . . . . . 2, 3
Operating Instructions
Fan Control . . . . . . . . . . . . . . . . . .4
Light Control
. . . . . . . . . . . . . . . .4
Care and Cleaning
Grease Filters
. . . . . . . . . . . . . . . .5
Hood Lights
. . . . . . . . . . . . . . . . .6
Stainless Steel Surfaces . . . . . . . . .5
Installation Instructions
. . .7–18
Troubleshooting Tips
. . . . . . . .19
Consumer Support
Consumer Support
. . . . . . . . . . 24
Owner Registration
. . . . . . .21, 22
Warranty . . . . . . . . . . . . . . . . . . . 23
Write the model and serial
numbers here:
Model #
________________
Serial #
________________
You can find them on a label
on the inside of the hood.
JV936
JV966
Owner’s Manual and
Installation Instructions
GEAppliances.com