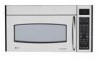
GE JVM1870SK Use and Care Manual
GE JVM1870SK - Spacemaker Microwave Oven Manual
 |
View all GE JVM1870SK manuals
Add to My Manuals
Save this manual to your list of manuals |
GE JVM1870SK manual content summary:
- GE JVM1870SK | Use and Care Manual - Page 1
. . . .14-19 Troubleshooting Tips . . .39 Things That Are Normal With Your Microwave Oven 40 Consumer Support Consumer Support . . . . . .Back Cover Optional Kits 10 Product Registration 41, 42 Warranty 43 Español For a Spanish version of this manual, visit our Website at ge.com. Para consultar - GE JVM1870SK | Use and Care Manual - Page 2
must be intended for household use grounded. Connect only and is UL listed for to a properly grounded installation over electric outlet. See the Grounding and gas ranges. Instructions section on page 8. s This microwave oven is not approved or tested for 2 marine use. Consumer Support - GE JVM1870SK | Use and Care Manual - Page 3
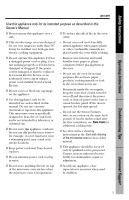
or an authorized service agent using a power cord available from General Electric. s Do not cover or block any openings on the appliance. s Use this appliance only for its intended use as described in this manual. Do not use corrosive chemicals or vapors in this appliance. This microwave oven is - GE JVM1870SK | Use and Care Manual - Page 4
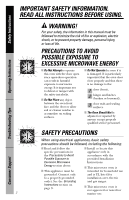
ALL INSTRUCTIONS BEFORE USING. WARNING! ARCING If you see arcing, press the CLEAR/OFF pad and correct the problem. Arcing is the microwave term for sparks in the oven. Arcing is caused by: s Foil not molded to food (upturned edges act like antennas). s The metal shelf not installed correctly - GE JVM1870SK | Use and Care Manual - Page 5
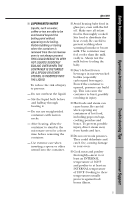
Safety Instructions Operating Instructions ge.com s SUPERHEATED WATER Liquids, such as water, coffee or tea are able to be overheated beyond the boiling point without appearing to be boiling. Visible bubbling or boiling when the container is removed from the microwave oven is not always present. - GE JVM1870SK | Use and Care Manual - Page 6
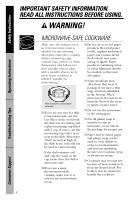
READ ALL INSTRUCTIONS BEFORE USING. WARNING! Operating Instructions Troubleshooting Tips MICROWAVE-SAFE COOKWARE Make sure all cookware used in your microwave oven is suitable for microwaving. Most from the heated food. Pot holders may be needed to handle the cookware. Consumer Support 6 - GE JVM1870SK | Use and Care Manual - Page 7
from hands and face. s Use foil only as directed in this manual. When using foil in the microwave oven, keep the foil at least 1″ away from the sides of the oven. s Plastic cookware - Plastic cookware designed for microwave cooking is very useful, but should be used carefully. Even microwavesafe - GE JVM1870SK | Use and Care Manual - Page 8
is too short, have a qualified electrician or service technician install an outlet near the appliance. For best operation, plug this appliance into its own electrical outlet to prevent flickering of lights, blowing of fuse or tripping of circuit breaker. Troubleshooting Tips Consumer Support 8 - GE JVM1870SK | Use and Care Manual - Page 9
may ignite and spread if the microwave vent fan is operating. To minimize automatic fan operation, use adequate-sized cookware and use high heat on surface units only when necessary. READ AND FOLLOW THIS SAFETY INFORMATION CAREFULLY. SAVE THESE INSTRUCTIONS 9 Troubleshooting Tips Consumer Support - GE JVM1870SK | Use and Care Manual - Page 10
Charcoal Filter Kit (2000 Series models) Filter kits are used when the microwave oven cannot be vented to the outside. Available at extra cost from your GE supplier. See the back cover for ordering by phone or at ge.com. Operating Instructions Troubleshooting Tips Consumer Support 10 - GE JVM1870SK | Use and Care Manual - Page 11
About the features of your microwave oven. ge.com Throughout this manual, features and appearance may vary from your model. Operating Instructions Troubleshooting Tips Features of the Oven Door Handle. Pull to open the door. The door must be securely latched for the microwave to operate. Door - GE JVM1870SK | Use and Care Manual - Page 12
of your microwave oven. You can microwave by time, with the sensor features or with the auto features. Operating Instructions Troubleshooting Tips Cooking Controls Time and Auto Features Press TIME COOK I & II Press once or twice AUTO/TIME DEFROST Press twice CUSTOM (on some models) EXPRESS COOK - GE JVM1870SK | Use and Care Manual - Page 13
Instructions Operating Instructions About changing the power level. ge. 10. 5 Press START. Variable power levels add flexibility to microwave cooking. The power levels on the microwave oven can be compared to the surface units on a range. High butter. Troubleshooting Tips Consumer Support 13 - GE JVM1870SK | Use and Care Manual - Page 14
Safety Instructions Operating Instructions About the time features. TIME COOK 1 2 3 a desired power level 1-10.) 4 Press START. Time Cook I Allows you to microwave for any time up to 99 minutes and 99 seconds. Power level 10 (High) II counts down. Troubleshooting Tips Consumer Support 14 - GE JVM1870SK | Use and Care Manual - Page 15
Safety Instructions Operating Instructions ge.com Cooking Guide for Time Cook I and Time Cook II NOTE: Use power level High (10) unless otherwise . casserole, place 1/2 cup water. 10-oz package 5 to 7 min. In 1-qt. casserole, place 2 tablespoons water. Troubleshooting Tips Consumer Support 15 - GE JVM1870SK | Use and Care Manual - Page 16
the time features. Safety Instructions Operating Instructions Troubleshooting Tips Vegetable Amount Time Comments cup water. Stir after half of time. Pierce with cooking fork. Place in center of the oven. Let stand 5 minutes. Spinach (fresh) (frozen, chopped and leaf) 10 to 16 oz Support - GE JVM1870SK | Use and Care Manual - Page 17
large meats are completely defrosted before cooking. s When defrosted, food should be cool but softened in all areas. If still slightly icy, return to the microwave very briefly, or let it stand a few minutes. Troubleshooting Tips Consumer Support 17 - GE JVM1870SK | Use and Care Manual - Page 18
time features. Safety Instructions Operating Instructions Troubleshooting Tips Defrosting Guide Food Breads, Cakes 7 min. per lb. Place unopened package in oven. Let stand 5 minutes after defrosting. Place unopened package in oven. Microwave just until franks can be separated. Let stand Support - GE JVM1870SK | Use and Care Manual - Page 19
Safety Instructions 1 2 3 EXPRESS COOK EXPRESS COOK EXPRESS COOK 4 5 6 EXPRESS COOK EXPRESS COOK EXPRESS COOK ge.com Express Cook This is a quick way to set cooking time for 1-6 quick way to set 30 seconds of cooking time. Operating Instructions Troubleshooting Tips Consumer Support 19 - GE JVM1870SK | Use and Care Manual - Page 20
. Operating Instructions 1 Press AUTO/TIME DEFROST once for Auto Defrost. 2 Using the Conversion Guide at right oven starts automatically. When the oven signals, turn food over. Troubleshooting Tips Consumer Support 1 Press MELT. 2 Enter number for food type. 3 Press START. Melt (on some models - GE JVM1870SK | Use and Care Manual - Page 21
Safety Instructions Operating Instructions About the sensor features. ge.com Covered Vented Dry off dishes so they don't mislead the sensor. Humidity Sensor What happens when using the Sensor Features: The Sensor Features detect the increasing humidity released during cooking. The oven - GE JVM1870SK | Use and Care Manual - Page 22
(total 30 seconds additional time). To subtract time: After pressing POPCORN, press 1 within the first 30 seconds after the oven starts for 20 seconds less cooking time. Press 1 again to reduce cooking time another 10 seconds (total 30 seconds less time). Troubleshooting Tips Consumer Support 22 - GE JVM1870SK | Use and Care Manual - Page 23
Safety Instructions Operating Instructions ge.com For Place the cup of liquid or covered food in the oven. Press REHEAT once, twice or three times. The oven starts immediately. Press once for a plate of leftovers. or crisp surface after reheating. Troubleshooting Tips Consumer Support 23 - GE JVM1870SK | Use and Care Manual - Page 24
About the sensor features. Safety Instructions Operating Instructions Sensor cooking gives you easy, automatic results with a variety of foods (see the Cooking Guide below). Sensor Cooking (Fish and Chicken Pieces on some models) 1 Place covered food in the oven. Press the food pad. For - GE JVM1870SK | Use and Care Manual - Page 25
Safety Instructions Operating Instructions Other features your model may have. ge.com CUSTOM have food in the oven, the oven will display FOOD IS READY and beep once a minute until you either open the oven door or press CLEAR microwaving, press CLOCK. Troubleshooting Tips Consumer Support 25 - GE JVM1870SK | Use and Care Manual - Page 26
Safety Instructions Operating Instructions Other features your model may have. Delay Start Delay Start allows you to set the microwave to delay cooking up to 24 hours. 1 Press DELAY START. 2 Select the cooking or defrosting feature you wish to delay; then enter the cooking or - GE JVM1870SK | Use and Care Manual - Page 27
control panel to prevent the microwave from being accidentally started or used by children. To lock or unlock the controls, press and hold CLEAR/OFF for about three seconds. When the control panel is locked, CONTROL LOCKED or LOCKED will be displayed. Troubleshooting Tips Consumer Support 27 - GE JVM1870SK | Use and Care Manual - Page 28
off when the internal parts are cool. It may stay on for 30 minutes or more after the cooktop and microwave controls are turned off. Surface Light Press SURFACE LIGHT once for bright light, twice for the night light, or three times to turn the light off. Troubleshooting Tips Consumer Support 28 - GE JVM1870SK | Use and Care Manual - Page 29
Instructions ge.com Operating Instructions Troubleshooting 6 Select AM or PM. 7 Press the OPTIONS pad. To review the nite light settings, press 2 after selecting the Auto Nite 2 to reset the reminder. Display Language (on some models) The language for the scrolling display may be set at Support - GE JVM1870SK | Use and Care Manual - Page 30
Safety Instructions Operating Instructions Other features your model may have. Shelf Food microwaves best when placed on the turntable or on the shelf in the lower position. Only use the shelf when reheating on more than one level. Do not store the shelf inside the oven cavity. How to Use the - GE JVM1870SK | Use and Care Manual - Page 31
(on some models): 1 Turn the turntable off. 2 Double the reheating time. 3 Switch places twice and give the dishes a 1/2 turn during reheating. (Place dense foods, or those that require a longer cook time, on the upper shelf first.) Operating Instructions Troubleshooting Tips Consumer Support 31 - GE JVM1870SK | Use and Care Manual - Page 32
Safety Instructions Operating Instructions Microwave terms. Term Definition Arcing Arcing is the microwave term for sparks in the oven. Arcing is caused by: s the metal shelf being installed incorrectly and touching the microwave walls. s metal or foil touching the side of the oven. s foil - GE JVM1870SK | Use and Care Manual - Page 33
Safety Instructions Operating Instructions Care and cleaning of the microwave oven. ge.com Helpful Hints An occasional thorough wiping with a solution of baking soda and water keeps the inside fresh. NOTE: Be certain the power is off before cleaning any part of this oven. How to Clean the - GE JVM1870SK | Use and Care Manual - Page 34
microwave oven. Safety Instructions Operating Instructions Troubleshooting Tips How to Clean the Outside We recommend against using cleaners with ammonia or alcohol, as they can damage the appearance of the microwave oven model number (eleventh digit on models parts against the microwave. Use only - GE JVM1870SK | Use and Care Manual - Page 35
(for models JVM1850, JNM1851, DVM1850 and EMO4000) or pulling straight out (for models JVM1870, JVM1871, JVM2050 and JVM3670). Replace with the same size and type bulb. 4 Raise the light shield and replace the screw. Connect electrical power to the oven. Troubleshooting Tips Consumer Support 35 - GE JVM1870SK | Use and Care Manual - Page 36
by pulling straight out. Replace with the same size and type bulb, then replace the light socket and cover. 6 Replace the grille and screws. Connect electrical power to the oven. Troubleshooting Tips Consumer Support 36 - GE JVM1870SK | Use and Care Manual - Page 37
Safety Instructions Operating Instructions About the exhaust feature. ge.com Charcoal Filter (on some models) The Vent Fan The vent fan has a metal reusable grease filter. Models that recirculate air back into the room also use a charcoal filter. Reusable Grease Filter (on all models) - GE JVM1870SK | Use and Care Manual - Page 38
install a new filter, remove plastic and other outer wrapping from the new filter. Insert the filter into the top opening of the oven as shown. It will rest at an angle on 2 side support tabs and in front of the right rear tab. Replace the grille and screws. Troubleshooting Tips Consumer Support - GE JVM1870SK | Use and Care Manual - Page 39
Before you call for service... ge.com Troubleshooting Tips Save time and money! Review the charts on the following pages first and you may not need to call for service. Operating Instructions Troubleshooting Tips Problem Possible Causes What To Do Oven will not start A fuse in your - GE JVM1870SK | Use and Care Manual - Page 40
Safety Instructions Operating Instructions Before you call for service... Things That Are Normal With Your Microwave Oven s Moisture on the oven door and walls while cooking. Wipe the moisture off with a paper towel or soft cloth. s Moisture between the oven door panels when cooking certain foods. - GE JVM1870SK | Use and Care Manual - Page 41
• Backed by GE • All brands covered • Unlimited service calls • All parts and labor costs GE and call us in the U.S. toll-free at 800.626.2224 for more information. *All brands covered, up to 20 years old, in the continental U.S. ✂ Cut here Please place in envelope and mail to: General Electric - GE JVM1870SK | Use and Care Manual - Page 42
service. Our service number is 800.GE.CARES (800.432.2737). 3 Read your Owner's Manual carefully. It will help you operate your new appliance properly. Model offers and other important General Electric Company communications from GE Appliances (GEA). Louisville, KY 40225 ge.com s Check here - GE JVM1870SK | Use and Care Manual - Page 43
Operating Instructions GE Microwave Oven Warranty. All warranty service provided by our Factory Service Centers, or an authorized Customer Care® technician. To schedule service, on-line, 24 hours a day, visit us at ge.com, or call 800.GE.CARES (800.432.2737). Please have serial and model numbers - GE JVM1870SK | Use and Care Manual - Page 44
normal business hours. Instructions contained in this manual cover procedures to be performed by any user. Other servicing generally should be referred to qualified service personnel. Caution must be exercised, since improper servicing may cause unsafe operation. Contact Us ge.com If you are - GE JVM1870SK | Use and Care Manual - Page 45
Horno Spacemaker Microondas ge.com Instrucciones de seguridad . . .2-9 Instrucciones de operación Cambio el nivel de Garantía 43 Kits opcionales 10 Soporte al consumidor . . . . . .44 Manual del Propietario JVM1850 JNM1851 JVM1870 JVM1871 JVM2050 JVM3670 DVM1850 EMO4000 Anote aquí los nú - GE JVM1870SK | Use and Care Manual - Page 46
seguridad, la información contenida en este manual debe seguirse para minimizar el riesgo dispositivos de seguridad. I No Sitúe ningún objeto entre la parte frontal del horno y la puerta ni permita que se acumule suciedad : I Lea y obedezca las I Instale o coloque este precauciones específicas en - GE JVM1870SK | Use and Care Manual - Page 47
General Electric (GE Service) o un agente de reparaciones autorizado empleando un cable de corriente que General Electric tiene a su disposición. I No cubra ni bloquee ninguna apertura de este electrodoméstico. I Use este aparato sólo para los fines que se describen en este manual la parte superior - GE JVM1870SK | Use and Care Manual - Page 48
INSTRUCCIONES IMPORTANTES DE SEGURIDAD. LEA PRIMERO TODA LAS INSTRUCCIONES. Seguridad ¡PRECAUCIÓN! Operación Solucionar problemas FORMACIÓN DE ARCO ELÉCTRICO Si ve que se forman arcos eléctricos, presione el botón CLEAR/OFF (borrar/apagado) y resuelva el problema. Arco eléctrico es lo que, en - GE JVM1870SK | Use and Care Manual - Page 49
ge.com Seguridad Operación Solucionar problemas I AGUA SOBRECALENTADA Líquidos, como agua, café, o té se podrían sobrecalentar más allá del punto de ebullición sin dar la apariencia de - GE JVM1870SK | Use and Care Manual - Page 50
INSTRUCCIONES IMPORTANTES DE SEGURIDAD. LEA PRIMERO TODA LAS INSTRUCCIONES. ¡PRECAUCIÓN! Seguridad Operación Solucionar problemas UTENSILIOS DE COCINA PARA MICROONDAS Asegúrese de que todos los utensilios de cocina que use en su horno sean aptos para microondas. Pueden usarse la mayoría de las - GE JVM1870SK | Use and Care Manual - Page 51
Seguridad Operación ge.com I Las bolsas de cocinar que puedan hervir y cualquier bolsa de pl vapor alejado de sus manos y rostro. I Use papel de aluminio sólo de la forma detallada en este manual. Cuando use aluminio dentro de un horno microondas, mantenga el aluminio, al menos, a una pulgada de - GE JVM1870SK | Use and Care Manual - Page 52
Seguridad Operación INSTRUCCIONES IMPORTANTES DE SEGURIDAD. LEA PRIMERO TODA LAS INSTRUCCIONES. ¡PRECAUCIÓN! El uso indebido del enchufe de tierra puede resultar en riesgo de descarga eléctrica. INSTRUCCIONES DE TOMA DE TIERRA Este electrodoméstico debe estar conectado a tierra. Si se produjera - GE JVM1870SK | Use and Care Manual - Page 53
Seguridad Operación ge.com EL VENTILADOR EXTRACTOR El ventilador se pondrá en al cocinar y que se extienda mientras el ventilador del respiradero está en marcha. I Limpie a menudo la parte inferior del microondas. No permita que se acumule grasa en el microondas o en el filtro del ventilador. - GE JVM1870SK | Use and Care Manual - Page 54
2000) Los kits de filtros se usan cuando el horno no puede tener una salida al exterior. Disponibles en su distribuidor GE por un costo adicional. Para pedir, llame a GE o visite nuestro sitio Web, ge.com (consulte la página trasera). Operación Solucionar problemas Soporte al consumidor 10 - GE JVM1870SK | Use and Care Manual - Page 55
Acerca de las funciones de su horno de microondas. ge.com Su modelo puede tener otras características y apariencia que las ilustradas en este manual. Seguridad Operación Solucionar problemas Funciones del horno Mango de la puerta. Tire de ella para abrir la puerta. La puerta debe estar - GE JVM1870SK | Use and Care Manual - Page 56
Acerca de las funciones de su horno de microondas. Usted puede cocinar alimentos en su microondas auxiliándose del tiempo, con los sensores, o con las funciones automáticas. Seguridad Operación Solucionar problemas Controles de cocción Funciones del tiempo y automáticas Presione Entre TIME - GE JVM1870SK | Use and Care Manual - Page 57
Cambio el nivel de potencia. ge.com Seguridad Operación Solucionar problemas Cómo cambiar los nivel de potencia 3-con el ciclo de descongelación. Si la energía del microondas no descansó, la parte externa de los alimentos se cocinará antes de que el centro se haya descongelado. A continuación - GE JVM1870SK | Use and Care Manual - Page 58
Seguridad Operación Acerca de las funciones de tiempo. TIME COOK 1 2 3 EXPRESS COOK EXPRESS COOK EXPRESS COOK 4 5 6 EXPRESS COOK EXPRESS COOK EXPRESS COOK 7 8 9 0 START PAUSE 1 Presione TIME COOK. (cocción por tiempo). 2 Entre el primer tiempo de cocción. 3 Cambie el nivel de - GE JVM1870SK | Use and Care Manual - Page 59
ge.com Seguridad Operación Solucionar problemas Guía de cocción para Cocción por tiempo I y Cocción por tiempo II. NOTA: Use el nivel de potencia máxima (High) (10) a - GE JVM1870SK | Use and Care Manual - Page 60
de agua. De 8 a 11 min.Corte por la mitad y remueva membranas fibrosas. En un plato de hornear oblongo de 2 cuartos, coloque la calabaza con la parte cortada orientada hacia abajo. Cambie posición de 4 minutos. Soporte al consumidor - GE JVM1870SK | Use and Care Manual - Page 61
Seguridad Operación 1 Presione AUTO/TIME DEFROST dos veces. 2 Entre el tiempo de descongelación. 3 Presione START (inicio). ge.com Tiempo de descongelación (TIME DEFROST) Le permite descongelar por los lapsos que usted seleccione. Ver la Guía de Descongelado para los lapsos sugeridos. El - GE JVM1870SK | Use and Care Manual - Page 62
Seguridad Operación Acerca de las funciones de tiempo. Guía de descongelamiento Alimento Tiempo Panes, tortas, pan, panecillos (1 pedazo) 1 min. Panecillos dulces (Aprox. 12 onzas) De 3 a 5 min. Pescados y filete de mariscos, mariscos congelados (1 libra), pedazos pequeños (1 libra) De 6 a - GE JVM1870SK | Use and Care Manual - Page 63
Seguridad 1 2 3 EXPRESS COOK EXPRESS COOK EXPRESS COOK 4 5 6 EXPRESS COOK EXPRESS COOK EXPRESS COOK ge.com Cocción Expresa (EXPRESS COOK) Esta es una forma rápida de ajustar el cocción por tiempo de 1 a 6 minutos. Presione uno de los botones de EXPRESS - GE JVM1870SK | Use and Care Manual - Page 64
Seguridad Acerca de las funciónes automática. 1 Presione AUTO/TIME DEFROST (Descongelación Automática/de Tiempo) una vez para Descongelación Automática. 2 Usando la Guía de Conversión en la tabla de la derecha, entre el peso del alimento. Por ejemplo, presione los botones 1 y 2 para 1,2 libras (1 - GE JVM1870SK | Use and Care Manual - Page 65
Seguridad Operación Acerca de las funciones de sensores. ge.com Cubierto Ventilado Seque los platos para evitar un funcionamiento erróneo de parte de los sensores. Sensor de humedad Qué sucede cuando usa las funciones de sensores: Las funciones de sensores detectan el aumento en la humedad - GE JVM1870SK | Use and Care Manual - Page 66
Seguridad Operación Acerca de las funciones de sensores. POPCORN 1 9 EXPRESS COOK Use solamente con rosetas de maíz para microondas que han sido empaquetadas previamente de 3,0 a 3,5 onzas de peso. NOTA: No use el estante de metal cuando use la función de Popcorn (rosetas de maíz). NOTA: No - GE JVM1870SK | Use and Care Manual - Page 67
Seguridad Operación ge.com Para recalentamiento de servicios individuales de comida cocinada previamente o un plato de sobrante. NOTA: No use el estante de metal cuando use la función - GE JVM1870SK | Use and Care Manual - Page 68
Cocción sensorial. Seguridad Operación Solucionar problemas La cocción sensorial le proporciona resultados fáciles y resultados automáticos con una amplia gama de alimentos (Ver la Guía de Cocción más adelante). NOTA: No use el estante metálico con la Cocción Sensorial. NOTA: No use esta función - GE JVM1870SK | Use and Care Manual - Page 69
Seguridad Operación Otras funciones que su modelo podría tener. ge.com CUSTOM 1 2 3 EXPRESS COOK EXPRESS COOK EXPRESS COOK 4 5 6 EXPRESS COOK EXPRESS COOK EXPRESS COOK 7 8 9 0 Ajuste personal (CUSTOM) El botón CUSTOM le permite guardar sus funciones más - GE JVM1870SK | Use and Care Manual - Page 70
Seguridad Operación Otras funciones que su modelo puede tener. Inicio Retrasado (DELAY START) Esta función le permite usar el microondas para retrasar la cocción hasta 24 horas. 1 Presione DELAY START (inicio retrasado). 2 Seleccione la función de cocción o descongelación que usted desee retrasar, - GE JVM1870SK | Use and Care Manual - Page 71
Seguridad Operación ge.com REMINDER 1 2 3 EXPRESS COOK EXPRESS COOK EXPRESS COOK 4 5 6 EXPRESS COOK EXPRESS COOK EXPRESS COOK 7 8 9 0 CLOCK AM / PM Recordador (REMINDER) La función de recordador puede ser - GE JVM1870SK | Use and Care Manual - Page 72
si siente mucho calor. Si ha encendido el ventilador quizás usted note que no lo puede apagar. El ventilador se apaga automáticamente cuando las partes internas están frías. Puede estar encendido por 30 minutos o más después de que el microondas y la estufa estén apagados. SURFACE LIGHT Luz de - GE JVM1870SK | Use and Care Manual - Page 73
ge.com Seguridad Operación Solucionar problemas OPTIONS 1 2 3 EXPRESS COOK EXPRESS COOK EXPRESS COOK 4 5 6 EXPRESS COOK EXPRESS COOK EXPRESS COOK 7 8 9 0 CLOCK AM / PM Opciones (OPTIONS) Presione el - GE JVM1870SK | Use and Care Manual - Page 74
Seguridad Operación Otras funciones que su modelo puede tener. Cómo usar el estante cuando usted se encuentra cocinando en el microondas I Cerciórese de que el estante está colocado apropiadamente en el microondas para prevenir que el arco dañe el horno. I No use un plato de dorar o broncear en - GE JVM1870SK | Use and Care Manual - Page 75
Seguridad ge.com Cambie de lugares después de transcurrido la mitad del tiempo. Estante y Recalentamiento I Para recalentar en 2 niveles O I Para recalentar 2 platos en los dos niveles inferiores: 1 - GE JVM1870SK | Use and Care Manual - Page 76
se doren demasiado. Al usar el microondas, use pequeñas cintas de papel de aluminio para cubrir partes finas, como las puntas de las alas en las aves, que podrían cocinarse antes que las partes mayores. Tiempo de reposo Cuando cocina en hornos regulares, las comidas como los asados o pasteles se - GE JVM1870SK | Use and Care Manual - Page 77
Operación Cuidado y limpieza del horno. ge.com Consejos prácticos Para mantener el interior fresco pásele un paño con una solución de agua y bicarbonato sódico de cuando en cuando. NOTA: Asegúrese de que esté apagado (en off) antes de limpiar cualquier parte de este horno. Cómo limpiar el - GE JVM1870SK | Use and Care Manual - Page 78
opta por usar un limpiador casero, primero aplique el limpiador directamente en un paño limpio, luego limpie el área sucia. La caja Limpie la parte externa del horno de microondas con un paño humedecido con agua jabonosa. Enjuáguela y luego séquela. Pásele un paño humedecido limpio a la ventana para - GE JVM1870SK | Use and Care Manual - Page 79
de 120 voltios, 40 vatios (WB36X10003), disponible en su suministrador GE. En los modelos JVM1870, JVM1871, JVM2050 y JVM3670, reemplace la geno de 120 voltios, 20 vatios (WB36X10213), disponible en su suministrador GE. 1 Para cambiar la luz de encimera/luz nocturna, primero desconecte la - GE JVM1870SK | Use and Care Manual - Page 80
Luz del horno Reemplace la bombilla quemada con una bombilla de halógeno de 120 voltios, 20 vatios (WB36X10213), disponible de su distribuidor GE. 1 Para reemplazar la luz del horno, primer desconecte el suministro eléctrico del fusile principal o del panel de interruptor de circuito o tire del - GE JVM1870SK | Use and Care Manual - Page 81
Seguridad Operación La función de extractor. ge.com Filtro de carbón vegetal (en algunos modelos) grasa liberada por los alimentos ubicados en la parte superior de la cocina. También evita que las llamas provenientes de los mismos dañen la parte interna del microondas. Por esta razón, el - GE JVM1870SK | Use and Care Manual - Page 82
puede limpiarse. Debe cambiarse por otro. Para los modelos Series JVM1800 y JVM3600, ordene la Parte No. WB2X10733 de su distribuidor GE. Para los modelos Serie JVM2000, ordene la Parte No. WB2X10956 de su distribuidor GE. Si el modelo no realiza la extracción al exterior, el aire recirculará a trav - GE JVM1870SK | Use and Care Manual - Page 83
Seguridad Operación Antes de llamar al servicio de reparaciones... ge.com Resolución de Problemas ¡Ahorre tiempo y dinero! Revise la tabla en esta página y tal vez no necesite llamar al servicio de reparación. Problema El horno - GE JVM1870SK | Use and Care Manual - Page 84
de Ventilación Activa (en algunos modelos) se abrirá durante la operación, y permanecerá abierta mientras el microondas está funcionando, para mantener los componentes electrónicos fríos. Es también normal escuchar sonidos de clic mientras la puerta de ventilación se abre y se cierra. 40 Solucionar - GE JVM1870SK | Use and Care Manual - Page 85
Notas. 41 Seguridad Operación Solucionar problemas Soporte al consumidor - GE JVM1870SK | Use and Care Manual - Page 86
Notas. 42 Soporte al consumidor Solucionar problemas Operación Seguridad - GE JVM1870SK | Use and Care Manual - Page 87
producto está situado en un área que no dispone de servicio por parte de un proveedor de servicio autorizado de GE, podría tener que hacerse cargo de los costes de envío o asuntos del consumidor o al procurador general de su estado. Garantizador: General Electric Company. Louisville, KY 40225 43 - GE JVM1870SK | Use and Care Manual - Page 88
durante horas normales de oficina. GE Consumer Home Services estará aún ahí cuando su garantía termine. Piezas y accesorios ge.com Aquellos individuos con la en este manual cubren los procedimientos a seguir por cualquier usuario. Cualquier otra reparación debería, por regla general, referirse a
-
 1
1 -
 2
2 -
 3
3 -
 4
4 -
 5
5 -
 6
6 -
 7
7 -
8
-
9
-
10
-
11
-
12
-
13
-
14
-
15
-
16
-
17
-
18
-
19
-
20
-
21
-
22
-
23
-
24
-
25
-
26
-
27
-
28
-
29
-
30
-
31
-
32
-
33
-
34
-
35
-
36
-
37
-
38
-
39
-
40
-
41
-
42
-
43
-
44
-
45
-
46
-
47
-
48
-
49
-
50
-
51
-
52
-
53
-
54
-
55
-
56
-
57
-
58
-
59
-
60
-
61
-
62
-
63
-
64
-
65
-
66
-
67
-
68
-
69
-
70
-
71
-
72
-
73
-
74
-
75
-
76
-
77
-
78
-
79
-
80
-
81
-
82
-
83
-
84
-
85
-
86
-
87
-
88
 |
 |

DE68-03327A
49-40537
11-06 JR
ge.com
Write the model and serial numbers here:
Model #
__________________________
Serial #
__________________________
Find these numbers on a label inside
the oven.
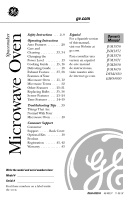
Microwave Oven
Safety Instructions
. . . .
2–9
Operating Instructions
Auto Features . . . . . . . . .20
Care and
Cleaning . . . . . . . . . .33, 34
Changing the
Power Level
. . . . . . . . . .13
Cooking Guide . . . . .15, 16
Defrosting Guide . . . . . .18
Exhaust Feature . . . .37, 38
Features of Your
Microwave Oven . . . .11, 12
Microwave Terms . . . . . .32
Other Features
. . . . 25–31
Replacing Bulbs . . . .35, 36
Sensor Features
. . . .21–24
Time Features . . . . . .14–19
Troubleshooting Tips
. . .
39
Things That Are
Normal With Your
Microwave Oven . . . . . . .40
Consumer Support
Consumer
Support . . . . . .Back Cover
Optional Kits
. . . . . . . . .10
Product
Registration
. . . . . . .41, 42
Warranty . . . . . . . . . . . . .43
Español
For a Spanish version
of this manual,
visit our Website at
ge.com.
Para consultar una
version en español
de este manual
de instrucciones,
visite nuestro sitio
de internet ge.com.
Spacemaker
JVM1850
JNM1851
JVM1870
JVM1871
JVM2050
JVM3670
DVM1850
EMO4000
Owner’s
Manual