Gigabyte MX11-PC0 Manual
Gigabyte MX11-PC0 Manual
 |
View all Gigabyte MX11-PC0 manuals
Add to My Manuals
Save this manual to your list of manuals |
Gigabyte MX11-PC0 manual content summary:
- Gigabyte MX11-PC0 | Manual - Page 1
Gigabyte Server Management Console Installation and Configuration Guide Rev. 1.0 - Gigabyte MX11-PC0 | Manual - Page 2
manual is protected by copyright laws and is the property of GIGABYTE. Changes to the specifications and features in this manual may be made by GIGABYTE without prior notice. No part of this manual read the User's Guide. For more information, visit our website at: http://b2b.gigabyte.com You are a - Gigabyte MX11-PC0 | Manual - Page 3
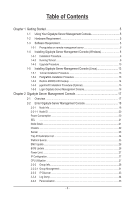
Restore dbRMCv0XX.backup 14 1-5-4 pgadminIII Installation Procedure (Optional 15 1-5-5 Login Gigabyte Server Management Console 16 Chapter 2 Gigabyte Server Management Console 17 2-1 Overview...17 2-2 Enter Gigabyte Server Management Console 18 2-2-1 Node Info...18 2-2-1-1 Node ID...20 Power - Gigabyte MX11-PC0 | Manual - Page 4
2-2-6 SNMP Trap...37 Chapter 3 Appendix...38 3-1 Exception List 38 - 4 - - Gigabyte MX11-PC0 | Manual - Page 5
Software Requirement 1-3-1 Prerequisites on remote management server Supported Browsers: • Internet Explorer 9 or later • Google Chrome 39.0.2171.65 m or later • Mozilla Firefox 33.1.1 Operating System: • Windows 2008 & 2012 R2 • Redhat/CentOS 6.3 or later - 5 - Gigabyte Server Management Console - Gigabyte MX11-PC0 | Manual - Page 6
1-4 Installing Gigabyte Server Management Console (Windows) 1-4-1 Installation Procedure 1. Unzip the file and run the program. 2. Then, a series of installation wizards appear. 3. Click Next. 4. Select the components and click Next. Gigabyte Server Management Console - 6 - - Gigabyte MX11-PC0 | Manual - Page 7
5. Select the file on your local system using the button Browse. 6. Click Install to start the installation. • Please make sure you have enough space on your hard drive for the program. 7. PostgresSQL installed sucessfully, click OK. - 7 - Gigabyte Server Management Console - Gigabyte MX11-PC0 | Manual - Page 8
8. Tomcat is installed, click OK. 9. Insatalltion completed, click Finish. Gigabyte Server Management Console - 8 - - Gigabyte MX11-PC0 | Manual - Page 9
Tomcat icon from the system tool bar. 2. Click Start Service, Tomcat will start running Gigabyte Server Management Console. 3. Open a browser and enter the client server IP address. 4. See Chapter 2 for configuration of Gigabyte Server Management Console. - 9 - Gigabyte Server Management Console - Gigabyte MX11-PC0 | Manual - Page 10
1-4-3 Upgrade Procedure 1. Unzip the file and run the program. 2. Follow the steps below to upgrade the existing program. 3. Click Next. 4. Select the components and click Next. Gigabyte Server Management Console - 10 - - Gigabyte MX11-PC0 | Manual - Page 11
5. Select the file on your local system using the button Browse. 6. Click Install to start the installation. 7. PostgresSQL upgraded sucessfully, click OK. 8. Tomcat is installed, click OK. - 11 - Gigabyte Server Management Console - Gigabyte MX11-PC0 | Manual - Page 12
9. Upgrade completed, click Finish. Gigabyte Server Management Console - 12 - - Gigabyte MX11-PC0 | Manual - Page 13
1-5 Installing Gigabyte Server Management Console (Linux) 1-5-1 Tomcat Installation Procedure 1. Unzip apache-tomcat-7.0.47.tar.gz tar -zxvf apache-tomcat [CentOS] rpm -ivh pgdg-centos93-9.3-1.noarch.rpm [Red Hat] rpm -ivh pgdg-redhat93-9.3-1.noarch.rpm - 13 - Gigabyte Server Management Console - Gigabyte MX11-PC0 | Manual - Page 14
METHOD peer→trust indent→trust indent→trust 3. Start service service postgresql-9.3 start 4. Create database createdb -U postgres dbRMC 5. Restore dbRMCv0XX.backup to database pg_restore -h 127.0.0.1 -p 5432 -U postgres -d dbRMC -v "dbRMCv0XX.backup" Gigabyte Server Management Console - 14 - - Gigabyte MX11-PC0 | Manual - Page 15
Install pgadmin3 yum install pgadmin3_93 2. Execute pgadmin3 pgadmin3 & 3. File -> Add server [Redhat] 1. Get wxBase curl -O http://yum.postgresql.org/9.2/redhat/rhel-6.5-x86_64 .1-2.rhel6.x86_64.rpm 7. Execute pgadmin3 pgadmin3 & 8. File -> Add server - 15 - Gigabyte Server Management Console - Gigabyte MX11-PC0 | Manual - Page 16
1-5-5 Login Gigabyte Server Management Console 1. Open a browser and enter Database IP address localhost 2. Enter Database User Name postgres • This utility supported CentOS 6.3 or later version. • PostgreSQL must be execute in root authority. • In Fedora 19, you have to install package in the - Gigabyte MX11-PC0 | Manual - Page 17
Chapter 2 Gigabyte Server Management Console 2-1 Overview 1. Open a web browser and type in your identified IP. The IP address can be found using your DHCP server. 2. A dialog box prompts you to enter Username and Password. 3. Enter the following values: • Username: admin • Password: password • - Gigabyte MX11-PC0 | Manual - Page 18
Management Console After you successfully log into your Gigabyte Server Management Console, the Remote Management Console GUI in the same group. To create a new group, follow the steps outlined 2-2-2. Create Group Guide in Help page. There are four type of Status: • Out of range (no monitoring - Gigabyte MX11-PC0 | Manual - Page 19
Description Displays the Node power status. There are three type of power status: • ON • OFF • N/A Displays the Node power consumption support status. Displays the Node power limit status. Note for node status. User can add description for selected node. - 19 - Gigabyte Server Management Console - Gigabyte MX11-PC0 | Manual - Page 20
file. Power Consumption Parameter Power Consumption Decription/Resulting Action Displays the power consumption of a remote node system. When you finish the configuration, click OK. - 20 - Gigabyte Server Management Console - Gigabyte MX11-PC0 | Manual - Page 21
system SEL. Parameter Node Detail Decription/Resulting Action Displays the Node system information including Manunfacturer, Product type, Serial number, Asset Tag , and Firmware Version. - 21 - Gigabyte Server Management Console - Gigabyte MX11-PC0 | Manual - Page 22
. Define the timeout from the drop-down list, when you finish the configuration, click ON to power on system. Click OFF to power off system. Gigabyte Server Management Console - 22 - - Gigabyte MX11-PC0 | Manual - Page 23
Sensor Parameter Sensor Decription/Resulting Action Displays the status of node power consumption/fan speed/temperature. Each sensor displays different color to indicate the health status of a specified device. - 23 - Gigabyte Server Management Console - Gigabyte MX11-PC0 | Manual - Page 24
bits. To update the Trap IP Destination List, click Refresh. To configure Trap IPv4/IPv6 Denstination, check Enable box, enter IP address and click Modify. Gigabyte Server Management Console - 24 - - Gigabyte MX11-PC0 | Manual - Page 25
of platform event alerts globally by clicking Global Alerting Enable. When you finish the configuration, click Set. Click Get to update current PFE list. - 25 - Gigabyte Server Management Console - Gigabyte MX11-PC0 | Manual - Page 26
For detail intruction of BMC firmware update, follow the steps outlined 2. BMC Update Guide in Help page. BIOS Update Parameter BIOS Update Decription/Resulting Action BIOS can be update, follow the steps outlined 3. BIOS Update Guide in Help page. Gigabyte Server Management Console - 26 - - Gigabyte MX11-PC0 | Manual - Page 27
processor utilization information of a remote node system. User can select the time slot by the dropdown list. When you finish the configuration, click OK. - 27 - Gigabyte Server Management Console - Gigabyte MX11-PC0 | Manual - Page 28
create to a new group. 2. Select New Group from the drop-down list. 3. Define new group name in the respective column. 4. When finish configuration, click Update. Gigabyte Server Management Console - 28 - - Gigabyte MX11-PC0 | Manual - Page 29
1. Check the box of the node you want to delete. 2. Select the Delete Group from the drop-down list. 3. When finish configuration, click Update. - 29 - Gigabyte Server Management Console - Gigabyte MX11-PC0 | Manual - Page 30
How to Reset Group 1. Select the Reset Group from the drop-down list. 2. When finish configuration, click Update. Gigabyte Server Management Console - 30 - - Gigabyte MX11-PC0 | Manual - Page 31
the timeout from the drop-down list, when you finish the configuration, click ON to power on system. Click OFF to power off system. - 31 - Gigabyte Server Management Console - Gigabyte MX11-PC0 | Manual - Page 32
of firmware. For detail intruction of BMC firmware update, follow the steps outlined 2. BMC Update Guide in Help page. BIOS can be updated remotely. Select the file on your local system using Configuration. When you finish the configuration, click Update. Gigabyte Server Management Console - 32 - - Gigabyte MX11-PC0 | Manual - Page 33
to specify the IP range in the respective columns. 2. Select Scan Type. 3. When you finish the configuration, click Confirm to to save your configuration. - 33 - Gigabyte Server Management Console - Gigabyte MX11-PC0 | Manual - Page 34
event log, just click Clear Log. To refresh the event log, just click Refresh. • To diagnose a error, please refer 3-1 Exception List for detail decription or troubleshooting. Gigabyte Server Management Console - 34 - - Gigabyte MX11-PC0 | Manual - Page 35
System general configuration setting Check system log file size and disk size by configuring Check/ Log/Database functions. When you finish configuration, click Apply. - 35 - Gigabyte Server Management Console - Gigabyte MX11-PC0 | Manual - Page 36
status. Please note that all recorded logs will be cleaned when this function is activated. License Parameter License Decription/Resulting Action Displays all licensed information. Gigabyte Server Management Console - 36 - - Gigabyte MX11-PC0 | Manual - Page 37
2-2-6 SNMP Trap Parameter Formatted timestamp Agent address Description Decription/Resulting Action Displays the time when trap is sent by connected node. Displays the agent address information. Describes the type of errors or logs. - 37 - Gigabyte Server Management Console - Gigabyte MX11-PC0 | Manual - Page 38
system. Network is not connected or BMC is busy. Can not access database, please check status of database. Server log is lost. Please restart tomcat server. Server log is lost. Please restart tomcat server. Network is not connected or BMC is busy. Network is not connected or BMC is busy. Network is
-
 1
1 -
 2
2 -
 3
3 -
 4
4 -
 5
5 -
 6
6 -
 7
7 -
8
-
9
-
10
-
11
-
12
-
13
-
14
-
15
-
16
-
17
-
18
-
19
-
20
-
21
-
22
-
23
-
24
-
25
-
26
-
27
-
28
-
29
-
30
-
31
-
32
-
33
-
34
-
35
-
36
-
37
-
38
 |
 |

Gigabyte Server Management Console
Installation and Configuration Guide
Rev. 1.0